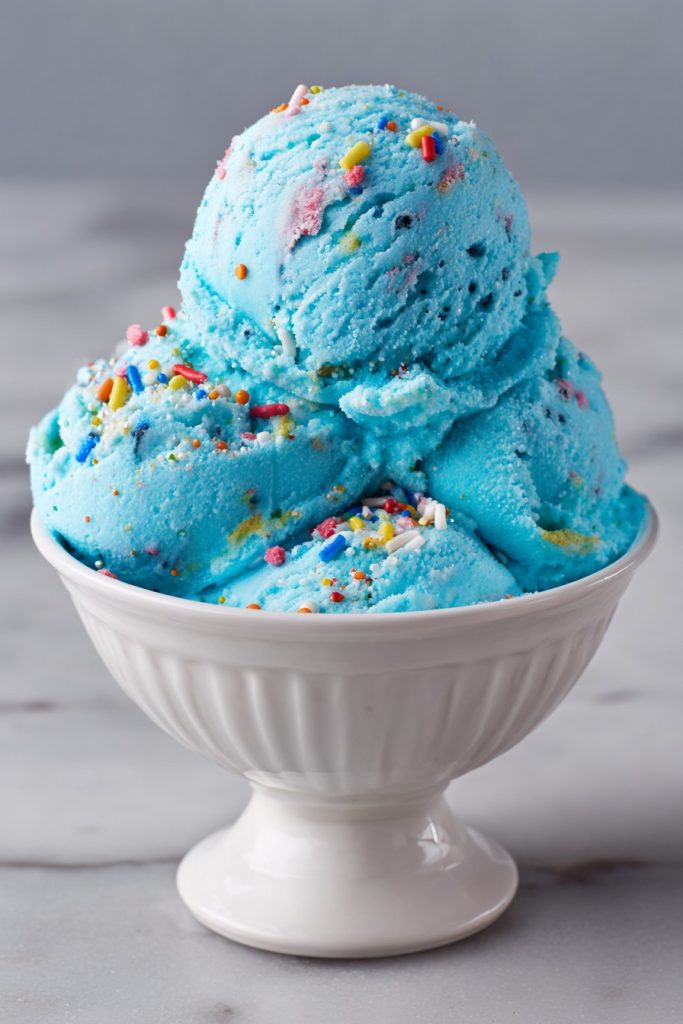
Every parent knows the struggle of finding desserts that actually get eaten without creating a kitchen disaster zone. Especially when you’re dealing with kids who want something fun and colorful but you’re running on empty after a long day. This Blue Moon ice cream solves that exact problem with its magical blue hue and creamy vanilla-berry flavor that comes together with minimal effort and even less cleanup.
Why This Recipe Works
- No-cook base means you skip the egg tempering and custard-making that turns simple ice cream into a multi-hour project, perfect for when you need something impressive but don’t have the energy for complicated techniques
- Uses common pantry ingredients with just one specialty item (the blue food coloring) so you’re not making multiple grocery store runs or hunting down obscure components that will sit in your cupboard forever
- The combination of sweetened condensed milk and heavy cream creates an incredibly smooth texture without ice crystals, giving you professional-quality results without the churn-and-freeze anxiety that often plagues homemade ice cream attempts
- Flexible flavor profile lets you adjust the berry and citrus notes to match your family’s preferences, whether you have picky eaters who want subtle fruitiness or adventurous kids who love bold flavors
- Make-ahead friendly nature means you can prepare this during naptime or after bedtime and have a ready-to-serve dessert waiting for the next day’s dinner or unexpected guests
Ingredients
- 2 cups heavy cream, chilled
- 1 (14-ounce) can sweetened condensed milk
- 1 tablespoon vanilla extract
- 1 teaspoon raspberry extract
- 1/2 teaspoon lemon extract
- 1/4 teaspoon almond extract
- Blue gel food coloring (about 10-12 drops)
- 1/4 cup rainbow sprinkles (optional)
Equipment Needed
- Stand mixer or electric hand mixer
- Large mixing bowl
- Rubber spatula
- Loaf pan or freezer-safe container
- Plastic wrap or airtight lid
Instructions
Whip the Cream to Stiff Peaks
Pour the 2 cups of chilled heavy cream into your stand mixer bowl or large mixing bowl if using a hand mixer. Using the whisk attachment, start mixing on medium speed for about 2 minutes until the cream begins to thicken and show soft trails. Increase to medium-high speed and continue whipping for another 3-4 minutes, watching carefully as the cream transforms from liquid to billowy clouds. Stop mixing when the cream forms distinct peaks that stand straight up when you lift the whisk – this is the stiff peak stage that’s crucial for creating that light, airy ice cream texture. Don’t walk away during this process because over-whipping can turn your cream into butter in seconds, and nobody wants to start over when you’re already short on time. The whole process should take about 6-7 minutes total depending on your mixer’s power and how cold your cream started.
Combine the Flavor Base
In a separate medium bowl, pour the entire can of sweetened condensed milk – no need to measure since you’re using the whole thing. Add the 1 tablespoon vanilla extract, 1 teaspoon raspberry extract, 1/2 teaspoon lemon extract, and 1/4 teaspoon almond extract directly into the condensed milk. Use a whisk or fork to vigorously combine these ingredients for about 1-2 minutes until everything is fully incorporated and you can smell the complex flavor profile developing. This combination creates that signature Blue Moon taste that’s both fruity and creamy without any single flavor dominating. If you’re sensitive to almond flavor, you can reduce it to just an 1/8 teaspoon, but don’t skip it entirely because it provides that mysterious background note that makes this ice cream special.
Incorporate Color and Combine Mixtures
Now add your blue gel food coloring directly to the condensed milk mixture – start with about 8 drops and mix thoroughly to assess the color. Gel food coloring works better than liquid because it provides vibrant color without watering down your mixture. You’re aiming for a bright sky blue color, so add 2-3 more drops if needed until you reach the desired shade. Now take your rubber spatula and add about one-third of the whipped cream to the colored condensed milk mixture, folding gently to lighten the base. Then pour this lightened mixture back into the bowl with the remaining whipped cream and continue folding with broad, sweeping motions until no white streaks remain. This folding technique preserves the air you whipped into the cream, which is what gives you that scoopable, creamy texture straight from the freezer.
Add Sprinkles and Transfer to Pan
If you’re using the optional 1/4 cup rainbow sprinkles, now is the time to fold them in gently with just 4-5 folds of your spatula – overmixing will cause the colors to bleed and create a muddy appearance. Immediately transfer your completed ice cream base to your prepared loaf pan or freezer-safe container, using the spatula to spread it evenly and smooth the top. For easier serving later, you can line your container with parchment paper with overhanging edges, which acts as handles to lift the frozen block out. Another time-saving tip: if you’re using a metal loaf pan, place it in the freezer for 10 minutes before adding the ice cream to help it freeze faster and more evenly.
Freeze Until Firm
Cover your container tightly with plastic wrap pressed directly against the surface of the ice cream to prevent ice crystals from forming, then add your airtight lid if using. Place the container in the coldest part of your freezer, typically the back bottom shelf, and let it freeze completely for at least 6 hours, though overnight is ideal for the best texture. The ice cream will be ready when it’s firm to the touch and doesn’t give when you press the center – this usually takes about 6-8 hours depending on your freezer’s temperature and the container material. Unlike traditional ice cream, this no-churn version doesn’t require stirring or agitating during freezing, so you can literally set it and forget it until you’re ready to serve.
Tips and Tricks
When working with heavy cream, temperature is everything – make sure both your cream and your mixing bowl are thoroughly chilled before you begin whipping. I often pop my bowl and whisk attachment in the freezer for 15-20 minutes before starting, which significantly reduces whipping time and helps achieve those perfect stiff peaks. If you find your cream isn’t whipping properly, check that it hasn’t been frozen and thawed previously, as this can damage the fat structure and prevent proper whipping. For the extracts, quality matters more than quantity – splurge on the good vanilla extract since it’s the backbone flavor, but the berry and citrus extracts can be more budget-friendly options. If you can’t find raspberry extract, you can substitute with 2 tablespoons of raspberry jam that you’ve pressed through a fine mesh strainer to remove seeds, though this will slightly alter the texture. When folding the mixtures together, use a true folding motion – cut through the center with your spatula, scrape along the bottom, and fold over the top, rotating the bowl as you go. This incorporates everything without deflating the precious air bubbles. For serving, take the ice cream out of the freezer about 10-15 minutes before you plan to scoop it – this softens it just enough to make serving effortless without melting into a puddle. If you’re making this for a party or gathering, consider dividing the batch into two smaller containers so you can serve one while keeping the other frozen for later, preventing that awkward partially-melted refreeze situation. Storage is straightforward – kept in an airtight container, this ice cream maintains its texture beautifully for up to 2 weeks, though it rarely lasts that long in most households. If you notice any ice crystals forming on the surface after the first week, simply smooth them out with the back of a spoon before resealing.
Recipe Variations
- For a cookies and cream twist, replace the sprinkles with 1 cup of crushed Oreo cookies folded in during the final mixing stage – the black and white contrast against the blue ice cream creates a stunning visual effect that kids absolutely love. You could also use golden Oreos for a different color combination that’s equally delicious.
- Create a blueberry swirl version by mixing 1/2 cup of blueberry jam with 1 tablespoon of lemon juice until smooth, then drizzling it over the ice cream base before freezing and using a knife to create beautiful marbled patterns throughout.
- Make it into ice cream sandwiches by spreading the mixture between two soft sugar cookies or homemade whoopie pie shells, then freezing until firm – these become grab-and-go treats that are perfect for lunchboxes or after-school snacks.
- Transform it into a birthday cake version by adding 1/2 cup of boxed funfetti cake mix (the dry powder only) to the condensed milk mixture along with the extracts – this creates a cake batter flavor that pairs wonderfully with the blue color for themed parties.
- For a dairy-free alternative, use full-fat coconut milk instead of heavy cream and coconut cream instead of sweetened condensed milk – the flavor profile changes slightly but you still get that creamy texture and the vibrant blue color works beautifully with the tropical notes.
Frequently Asked Questions
What does Blue Moon ice cream actually taste like?
Blue Moon ice cream has a unique flavor profile that’s difficult to pin down but generally described as a creamy vanilla base with fruity berry notes and subtle citrus undertones. The combination of vanilla, raspberry, lemon, and almond extracts creates this mysterious flavor that’s sweet but not cloying, fruity but not tart, and creamy with just enough complexity to keep it interesting. Different regions and ice cream shops have their own variations, but this recipe captures the classic Midwestern version that many people remember from childhood. The beauty of making it at home is that you can adjust the extract ratios to match your personal preference – if you want more berry flavor, increase the raspberry extract to 1.5 teaspoons.
Can I make this without an electric mixer?
While an electric mixer makes the whipping process much faster and easier, you can absolutely make this recipe with a large whisk and some elbow grease. The key is to ensure your cream, bowl, and whisk are all thoroughly chilled before beginning. Use a large balloon whisk and whip with vigorous, broad strokes, incorporating as much air as possible. This manual method will take about 10-15 minutes of continuous whisking until you achieve stiff peaks, so it’s a great arm workout but definitely doable if you don’t have mixer access. Some people find it helpful to switch hands periodically or recruit a family member to take turns whisking to prevent fatigue.
Why is my ice cream too hard to scoop?
If your ice cream becomes rock hard in the freezer, it’s usually due to one of three issues: insufficient air incorporation during whipping, freezer temperature being too low, or not allowing proper resting time before serving. To fix this, make sure you’re whipping the cream to true stiff peaks and folding gently to maintain that air structure. Your freezer should be set to 0°F for ideal ice cream storage – any colder can make it too hard. Always let the ice cream sit at room temperature for 10-15 minutes before attempting to scoop, and use a warmed ice cream scoop dipped in hot water between servings for cleaner, easier scoops.
Can I reduce the sugar in this recipe?
While you can reduce the sugar slightly, the sweetened condensed milk provides both sweetness and crucial texture properties that affect the final product. If you cut the sugar too much, the ice cream will freeze much harder and develop an icy texture rather than remaining creamy. A better approach is to use the full amount of sweetened condensed milk but reduce or eliminate the optional sprinkles, which contain additional sugar. You could also try using low-fat sweetened condensed milk, though this may slightly affect the richness. Another option is to serve smaller portions rather than modifying the recipe, since the intense sweetness means a little goes a long way.
How long does homemade ice cream last in the freezer?
Properly stored in an airtight container with plastic wrap pressed directly against the surface, this no-churn ice cream maintains excellent quality for about 2 weeks. After that time, it may begin to develop ice crystals or suffer from freezer burn, though it remains safe to eat for up to 2 months if continuously frozen. The high fat content and sugar act as natural preservatives, but flavor and texture are best within the first week. For longest shelf life, store in the back of the freezer where temperature fluctuations are minimal, and always reseal the container immediately after scooping to prevent condensation from forming inside.
Summary
This Blue Moon ice cream delivers magical color and flavor with minimal effort, using simple no-churn techniques that busy parents can manage between activities. The creamy texture and mysterious berry-citrus taste will become a family favorite without creating kitchen chaos or requiring special equipment.
Blue Moon Ice Cream
6
servings15
minutesIngredients
Instructions
- 1 Whip chilled heavy cream to stiff peaks using stand mixer or electric hand mixer
- 2 Combine sweetened condensed milk with vanilla, raspberry, lemon, and almond extracts
- 3 Add blue food coloring to condensed milk mixture, then fold into whipped cream
- 4 Gently fold in sprinkles if using, then transfer to loaf pan
- 5 Cover with plastic wrap pressed against surface and freeze for 6+ hours until firm


