Kick your dessert game up a notch with these irresistible Bisquick treats! Whether you’re craving a quick weeknight indulgence or planning a special gathering, this versatile mix is your secret weapon for easy, crowd-pleasing sweets. From cozy cobblers to decadent cakes, we’ve rounded up 23 delicious recipes that promise to satisfy every sweet tooth. Get ready to bake up some magic—your next favorite dessert awaits!
Bisquick Strawberry Shortcake Delight
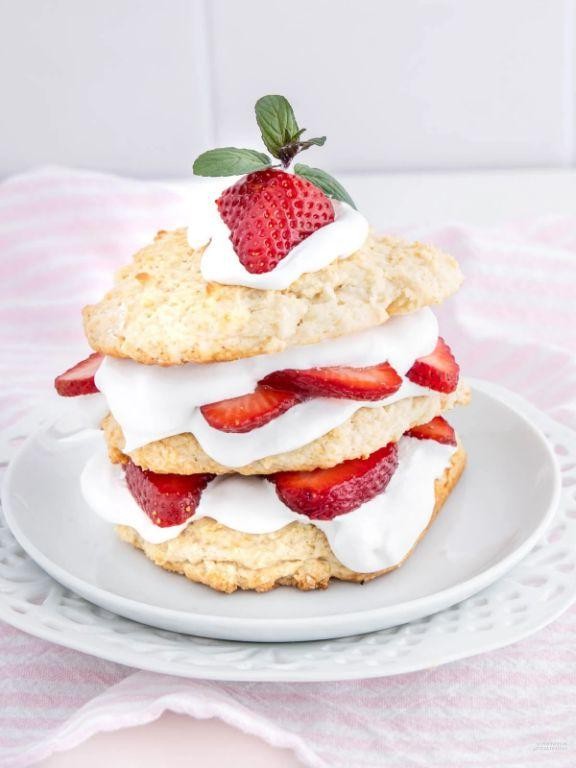
Now, let’s talk about a dessert that’s so easy, it practically winks at you from the mixing bowl—a Bisquick-based strawberry shortcake that’s less fuss, more fun, and ready to steal the spotlight at any gathering. Imagine fluffy, golden biscuits hugging juicy strawberries and a cloud of whipped cream, all coming together in minutes without any fancy chef skills required. It’s the kind of treat that makes you wonder why you ever bothered with complicated pastries in the first place!
Serving: 6 | Pre Time: 15 minutes | Cooking Time: 12 minutes
6
servings15
minutes12
minutesIngredients
– 2 cups Bisquick baking mix (the trusty shortcut that never lets me down)
– ⅓ cup milk (I use whole milk for extra richness, but any works)
– 3 tablespoons granulated sugar (for a hint of sweetness in the biscuits)
– 2 cups fresh strawberries, hulled and sliced (go for ripe, juicy ones—they’re the star here)
– 1 cup heavy whipping cream (chilled is key for perfect peaks)
– 2 tablespoons powdered sugar (to sweeten the whipped cream just right)
– 1 teaspoon vanilla extract (my secret for a fragrant boost)
Instructions
1. Preheat your oven to 450°F and line a baking sheet with parchment paper—this prevents sticking and makes cleanup a breeze.
2. In a medium bowl, combine 2 cups Bisquick baking mix, ⅓ cup milk, and 3 tablespoons granulated sugar, stirring just until a soft dough forms (tip: don’t overmix to keep the biscuits tender).
3. Drop the dough by spoonfuls onto the prepared baking sheet, making 6 equal mounds spaced about 2 inches apart.
4. Bake in the preheated oven for 10–12 minutes, until the biscuits are golden brown and a toothpick inserted comes out clean.
5. While the biscuits bake, hull and slice 2 cups fresh strawberries into thin pieces, setting them aside in a bowl.
6. In a chilled mixing bowl, whip 1 cup heavy whipping cream with 2 tablespoons powdered sugar and 1 teaspoon vanilla extract on medium-high speed for 3–4 minutes, until stiff peaks form (tip: chill your bowl and beaters first for faster whipping).
7. Remove the biscuits from the oven and let them cool on a wire rack for 5 minutes to avoid sogginess.
8. Split each biscuit in half horizontally using a serrated knife for a clean cut.
9. Place the bottom halves on serving plates, top generously with sliced strawberries, then dollop with whipped cream.
10. Cap with the biscuit tops and add an extra spoonful of whipped cream and strawberries on top for a festive finish (tip: serve immediately for the best texture).
Zesty and tender, these shortcakes offer a delightful contrast between the warm, buttery biscuits and the cool, creamy topping. The strawberries burst with sweetness in every bite, making it a dessert that’s both comforting and refreshing—try drizzling with a bit of honey or adding a sprinkle of mint for a creative twist!
Easy Bisquick Peach Cobbler Bliss
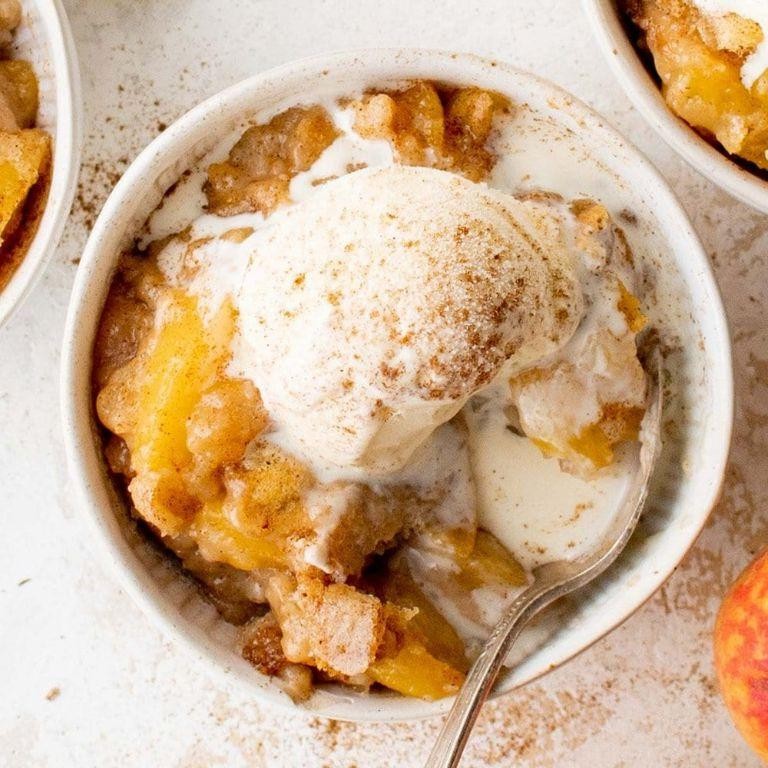
Ready to ditch the fuss and dive into dessert? This Easy Bisquick Peach Cobbler Bliss is your golden ticket to cozy, fruity goodness without the kitchen drama—think of it as a hug in a baking dish that even your oven can’t mess up!
Serving: 8 | Pre Time: 15 minutes | Cooking Time: 45 minutes
8
servings15
minutes45
minutesIngredients
- 2 cups Bisquick mix (the trusty shortcut that never lets me down)
- 1 cup granulated sugar (I split it between batter and topping for balanced sweetness)
- 1 cup whole milk (room temp works best to blend smoothly)
- 1/2 cup unsalted butter (melted and slightly cooled—it’s the secret to a rich base)
- 2 (29 oz) cans sliced peaches in heavy syrup (drained but save that syrup for a drizzle if you’re feeling fancy)
- 1 tsp ground cinnamon (a warm hug for your taste buds)
- 1/2 tsp vanilla extract (pure is my go-to for that extra depth)
Instructions
- Preheat your oven to 375°F (190°C) and grease a 9×13-inch baking dish with butter or non-stick spray.
- In a large bowl, whisk together 1 cup Bisquick mix, 1/2 cup sugar, and the milk until just combined—don’t overmix to keep it tender.
- Pour the melted butter into the prepared baking dish, then gently spread the batter evenly over the butter (it’ll seem thin, but trust the process!).
- Arrange the drained peach slices in a single layer over the batter, scattering them for even coverage.
- In a small bowl, mix the remaining 1 cup Bisquick, 1/2 cup sugar, cinnamon, and vanilla until crumbly, then sprinkle it evenly over the peaches.
- Bake for 45 minutes, or until the top is golden brown and a toothpick inserted into the center comes out clean—if it browns too fast, tent with foil halfway through.
- Remove from the oven and let it cool on a wire rack for at least 15 minutes to set before serving.
Heavenly warm, this cobbler boasts a crisp, buttery top that gives way to juicy peaches and a soft, cakey base. Serve it à la mode with a scoop of vanilla ice cream for a melty contrast, or drizzle with that saved peach syrup for an extra fruity kick—it’s pure bliss in every bite!
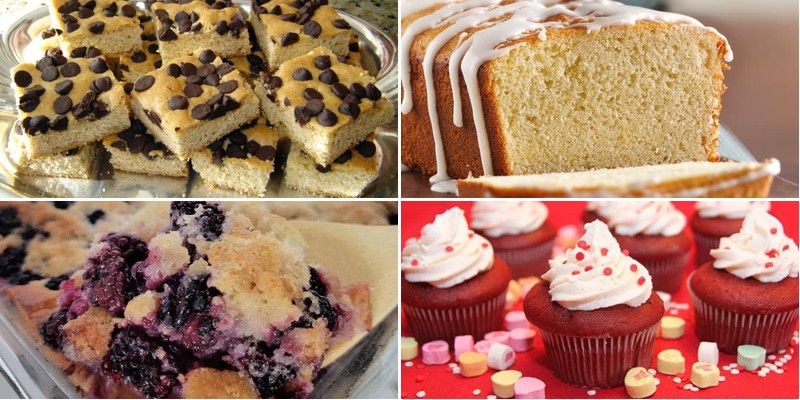
Lemon Drizzle Bisquick Pound Cake
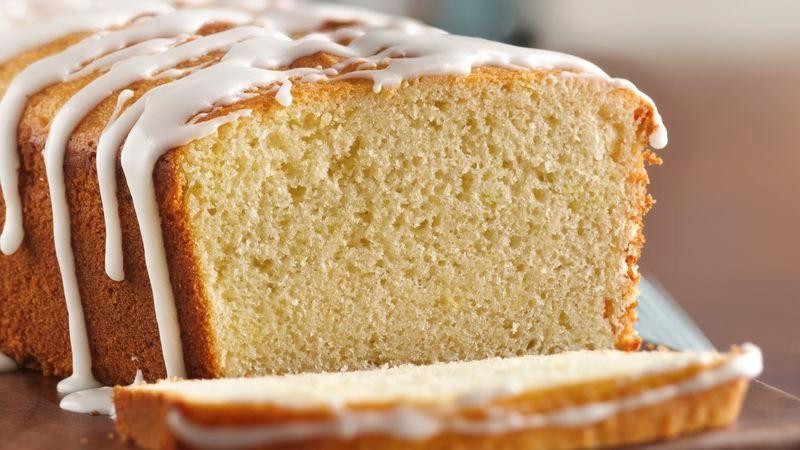
Zesty, zingy, and downright dreamy—this Lemon Drizzle Bisquick Pound Cake is the sunshine-on-a-plate dessert you didn’t know you needed, blending the convenience of a box mix with the homemade charm of a citrusy glaze that’ll make your taste buds do a happy dance. It’s the kind of treat that turns a dreary afternoon into a mini-celebration, no fancy skills required!
Serving: 8 | Pre Time: 15 minutes | Cooking Time: 50 minutes
8
servings15
minutes50
minutesIngredients
– 2 cups Bisquick baking mix (the trusty shortcut that saves the day)
– 1 cup granulated sugar (for that sweet backbone)
– 3 large eggs, at room temperature—I swear by this for a fluffier crumb!
– 1/2 cup unsalted butter, melted and slightly cooled (extra creamy is my go-to)
– 1/2 cup whole milk (full-fat for richness, don’t skimp!)
– Zest of 1 lemon (freshly grated, because bottled zest is a sad substitute)
– 1/4 cup fresh lemon juice (squeezed right from the fruit, no cheating with concentrate)
– 1 cup powdered sugar (for the drizzle that ties it all together)
Instructions
1. Preheat your oven to 350°F and generously grease a 9×5-inch loaf pan with butter or non-stick spray—trust me, a well-greased pan means easy slicing later!
2. In a large mixing bowl, combine the Bisquick baking mix and granulated sugar, whisking them together until no lumps remain.
3. Add the room-temperature eggs, melted butter, whole milk, and lemon zest to the dry ingredients, stirring with a spatula until just combined; overmixing can lead to a dense cake, so stop when you see no streaks of flour.
4. Pour the batter into the prepared loaf pan, smoothing the top with the spatula for an even bake.
5. Bake in the preheated oven for 45–50 minutes, or until a toothpick inserted into the center comes out clean—if it’s gooey, give it another 5 minutes, but watch closely to avoid overbrowning.
6. While the cake bakes, whisk together the fresh lemon juice and powdered sugar in a small bowl until smooth for the drizzle.
7. Once baked, remove the cake from the oven and let it cool in the pan on a wire rack for 10 minutes; this helps it set without crumbling.
8. Carefully invert the cake onto the rack, then use a fork to poke holes all over the top—this lets the drizzle soak in for maximum lemony goodness.
9. Slowly pour the lemon drizzle over the warm cake, letting it seep into the holes and coat the surface evenly.
10. Allow the cake to cool completely for about 1 hour before slicing to ensure the glaze sets properly.
That first bite reveals a tender, moist crumb with a bright lemon kick that’s perfectly balanced by the sweet glaze—it’s like a hug from a citrus grove! Try serving it warm with a dollop of whipped cream or alongside a cup of tea for an afternoon pick-me-up that’s anything but ordinary.
Bisquick Chocolate Chip Cookie Bars
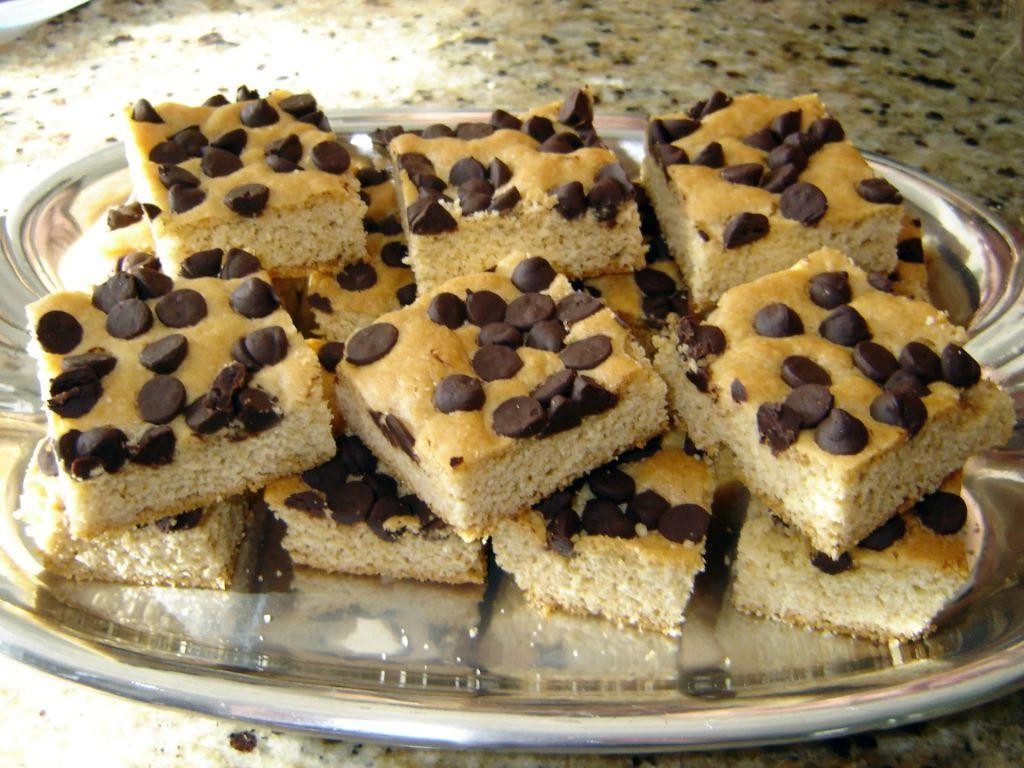
Sick of scooping endless cookie dough? These Bisquick Chocolate Chip Cookie Bars are your one-pan, no-fuss salvation—a chewy, chocolate-studded slab of joy that’s basically a hug in dessert form. Trust me, your spatula (and your patience) will thank you.
Serving: 16 | Pre Time: 10 minutes | Cooking Time: 25 minutes
16
servings10
minutes25
minutesIngredients
– 2 cups Bisquick baking mix (the shortcut hero we all need)
– ⅔ cup packed light brown sugar (for that deep molasses kiss)
– ½ cup unsalted butter, melted and slightly cooled (I pop it in the microwave for 45 seconds—no burnt butter dramas!)
– 1 large egg, at room temperature (it blends smoother, promise)
– 1 teaspoon pure vanilla extract (the good stuff makes a difference)
– 1 cup semi-sweet chocolate chips (go ahead, sneak a handful—I won’t tell)
Instructions
1. Preheat your oven to 350°F and grease an 8×8-inch baking pan with butter or non-stick spray.
2. In a large mixing bowl, combine the Bisquick and brown sugar with a whisk to break up any lumps.
3. Pour in the melted butter, egg, and vanilla extract, then stir vigorously with a spatula until a thick, cohesive dough forms—no dry spots left behind!
4. Fold in the chocolate chips gently, saving a small handful to sprinkle on top for extra visual appeal.
5. Tip: Press the dough evenly into the prepared pan using damp fingers to prevent sticking.
6. Bake on the center rack for 22–25 minutes, until the edges are golden brown and the center looks set but still slightly soft.
7. Tip: Don’t overbake! A toothpick inserted should have a few moist crumbs, not come out clean.
8. Let the pan cool completely on a wire rack for at least 1 hour—this is crucial for clean cuts.
9. Tip: Use a sharp knife dipped in hot water to slice into 16 neat squares, wiping it clean between cuts.
10. Serve immediately or store in an airtight container for up to 3 days.
Gloriously gooey in the middle with crisp edges, these bars deliver that classic chocolate chip cookie flavor without the wrist fatigue. Try warming a square for 10 seconds and topping it with vanilla ice cream—it’s a lazy dessert dream come true!
Classic Bisquick Apple Pie
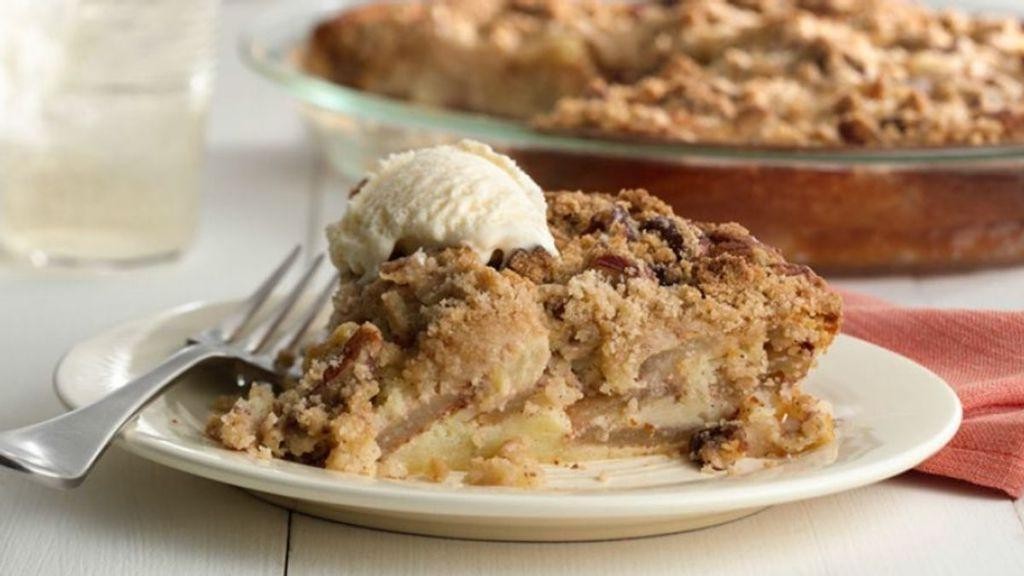
Tired of apple pies that demand a pastry degree? This Classic Bisquick Apple Pie is your kitchen’s new best friend—a flaky, fuss-free marvel that swaps fussy dough for a magical shortcut, delivering all the cozy, cinnamon-spiced joy without the stress. Let’s bake some happiness!
Serving: 8 | Pre Time: 20 minutes | Cooking Time: 45 minutes
8
servings20
minutes45
minutesIngredients
– 2 cups Bisquick mix (the trusty hero that saves the day every time)
– 1/2 cup milk (I use whole for extra richness, but any works)
– 5 cups thinly sliced apples, like Granny Smith (tart ones hold their shape beautifully)
– 3/4 cup granulated sugar (for that sweet, caramelized goodness)
– 1 teaspoon ground cinnamon (the cozy spice that makes it sing)
– 1/4 cup unsalted butter, cold and cubed (keeps the topping crumbly and dreamy)
– 1/2 cup brown sugar (my secret for a deeper, molasses-kissed flavor)
Instructions
1. Preheat your oven to 400°F (200°C) and grease a 9-inch pie dish lightly with butter or cooking spray.
2. In a medium bowl, combine 2 cups Bisquick mix and 1/2 cup milk, stirring just until a soft dough forms—overmixing can make it tough, so stop when it comes together.
3. Press the dough evenly into the bottom and up the sides of the prepared pie dish to form the crust, using your fingers to smooth it out.
4. In a large bowl, toss 5 cups thinly sliced apples with 3/4 cup granulated sugar and 1 teaspoon ground cinnamon until evenly coated.
5. Spread the apple mixture into the crust in an even layer, packing it gently to minimize gaps.
6. In a small bowl, use a fork or pastry cutter to blend 1/4 cup cold, cubed unsalted butter with 1/2 cup brown sugar until crumbly—this topping should look like coarse sand for the perfect texture.
7. Sprinkle the butter-sugar mixture evenly over the apples, covering them completely.
8. Bake in the preheated oven for 40–45 minutes, until the topping is golden brown and the apples are tender when pierced with a fork.
9. Remove from the oven and let the pie cool on a wire rack for at least 30 minutes before slicing to allow the filling to set—patience pays off here!
Yes, that golden, crumbly topping gives way to tender, spiced apples in a buttery crust, creating a dessert that’s rustic yet irresistible. Serve it warm with a scoop of vanilla ice cream for a classic treat, or try it with a drizzle of caramel sauce for an extra indulgent twist—it’s comfort in every bite!
Bisquick Blueberry Muffin Cake
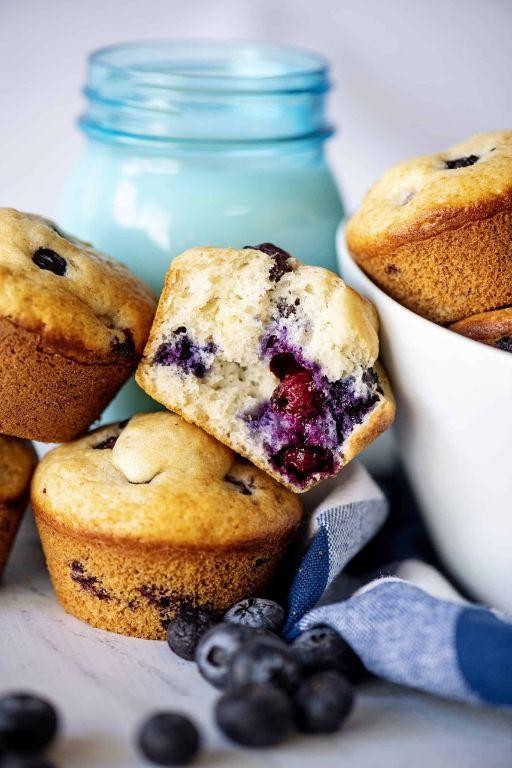
Kickstart your morning with a cake that’s basically a giant, cozy blueberry muffin—no fancy techniques required, just a bowl, a whisk, and a serious craving for something sweet and tender. This Bisquick Blueberry Muffin Cake is the lazy baker’s dream, turning pantry staples into a crowd-pleasing treat that’s perfect for brunch, potlucks, or a sneaky afternoon snack. Trust me, it’s so easy you’ll be tempted to make it twice in one week (no judgment here!).
Serving: 8 | Pre Time: 10 minutes | Cooking Time: 35 minutes
8
servings10
minutes35
minutesIngredients
– 2 cups Bisquick baking mix (the classic yellow box is my go-to—it never lets me down!)
– ¾ cup granulated sugar (I like to use cane sugar for a subtle caramel hint)
– ⅔ cup milk (whole milk makes it extra rich, but any kind works)
– 2 large eggs, at room temperature (pro tip: this helps them blend smoothly without curdling)
– ¼ cup unsalted butter, melted and slightly cooled (because melted butter equals maximum moisture)
– 1 teaspoon vanilla extract (pure vanilla adds that warm, cozy flavor)
– 1 cup fresh blueberries (frozen work too, but don’t thaw them—toss in flour to prevent sinking)
– ½ teaspoon ground cinnamon (a pinch for a hint of spice that pairs perfectly with blueberries)
Instructions
1. Preheat your oven to 350°F (175°C) and grease an 8-inch round cake pan with butter or non-stick spray.
2. In a large mixing bowl, whisk together the Bisquick baking mix, granulated sugar, and ground cinnamon until well combined.
3. In a separate medium bowl, beat the room-temperature eggs lightly with a fork, then stir in the milk, melted butter, and vanilla extract until smooth.
4. Pour the wet ingredients into the dry ingredients and gently fold with a spatula until just combined—overmixing can make the cake tough, so stop when no dry streaks remain.
5. Gently fold in the fresh blueberries, being careful not to crush them, to distribute evenly throughout the batter.
6. Pour the batter into the prepared cake pan and spread it evenly with the spatula.
7. Bake in the preheated oven for 30–35 minutes, or until a toothpick inserted into the center comes out clean (watch for golden edges as a visual cue).
8. Let the cake cool in the pan on a wire rack for 10 minutes, then carefully turn it out to cool completely—this prevents it from getting soggy.
Dive into this cake for a texture that’s wonderfully moist and tender, with juicy blueberries bursting in every bite and a subtle cinnamon warmth. Serve it warm with a dollop of whipped cream for a decadent twist, or slice it up for a grab-and-go breakfast that’ll make your weekday mornings feel like a weekend treat!
Indulgent Bisquick Cinnamon Roll Cake
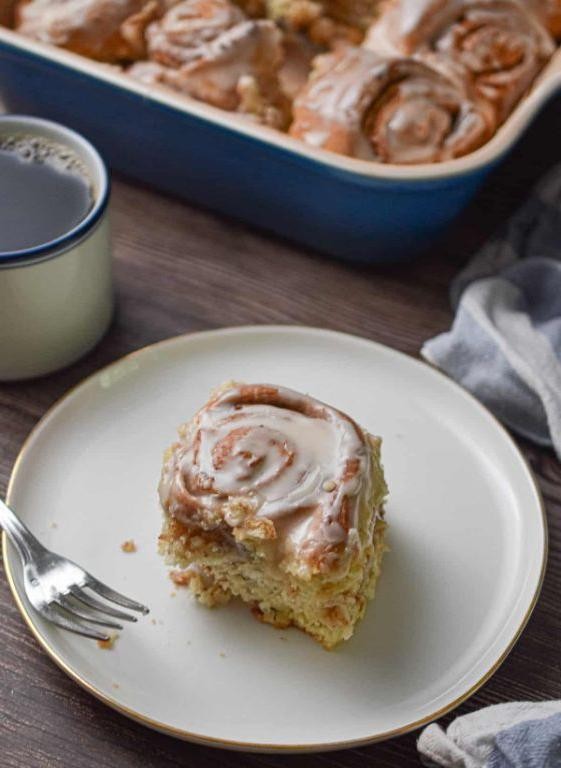
Nothing says cozy morning vibes like the scent of cinnamon sugar wafting through your kitchen, and this Bisquick cinnamon roll cake is here to deliver that in spades—no tedious rolling or cutting required. It’s the lazy baker’s dream come true, combining all the gooey, swirly goodness of a classic cinnamon roll with the ease of a dump-and-bake cake. Trust me, your future self will thank you for this shortcut to bliss.
Serving: 9 | Pre Time: 15 minutes | Cooking Time: 30 minutes
9
servings15
minutes30
minutesIngredients
- 2 cups Bisquick baking mix (the trusty pantry hero that saves the day)
- ¾ cup milk (I use whole milk for extra richness, but any works)
- ¼ cup granulated sugar (for a touch of sweetness in the base)
- 1 large egg, at room temperature (this helps it blend smoothly—no cold shocks!)
- ½ cup packed brown sugar (the deep, molasses-y star of the cinnamon swirl)
- 1 tablespoon ground cinnamon (don’t skimp—this is where the magic happens)
- ¼ cup unsalted butter, melted (for that golden, buttery drizzle)
- 1 cup powdered sugar (for the glaze that ties it all together)
- 2 tablespoons milk (extra for the glaze—just eyeball it to your desired consistency)
Instructions
- Preheat your oven to 350°F and grease an 8×8-inch baking pan—I like to use butter for a non-stick, flavorful base.
- In a large bowl, whisk together the Bisquick baking mix, granulated sugar, milk, and egg until just combined; a few lumps are totally fine to avoid overmixing.
- Pour the batter into the prepared pan and spread it evenly with a spatula.
- In a small bowl, mix the brown sugar and cinnamon until well-blended—this creates the irresistible swirl layer.
- Sprinkle the cinnamon-sugar mixture evenly over the batter in the pan.
- Use a knife to gently swirl the cinnamon-sugar into the batter, making 5-6 figure-eight motions for a marbled effect (tip: don’t over-swirl or you’ll lose those pretty streaks!).
- Drizzle the melted butter evenly over the top of the swirled batter.
- Bake in the preheated oven for 28-32 minutes, until the edges are golden brown and a toothpick inserted into the center comes out clean (tip: check at 28 minutes to prevent overbaking—ovens can vary!).
- While the cake bakes, whisk together the powdered sugar and 2 tablespoons of milk in a bowl until smooth for the glaze.
- Remove the cake from the oven and let it cool in the pan for 10 minutes on a wire rack.
- Drizzle the glaze over the warm cake, using a spoon to spread it evenly.
- Slice into 9 squares and serve warm (tip: for extra indulgence, add a scoop of vanilla ice cream on top—it melts into the glaze beautifully!).
Fresh from the oven, this cake boasts a tender, fluffy crumb with pockets of gooey cinnamon sugar that ooze with every bite. The glaze adds a sweet, creamy finish that balances the warm spice perfectly—it’s like hugging your taste buds on a chilly day. For a fun twist, try serving it with a drizzle of caramel sauce or alongside a hot cup of coffee for the ultimate cozy treat.
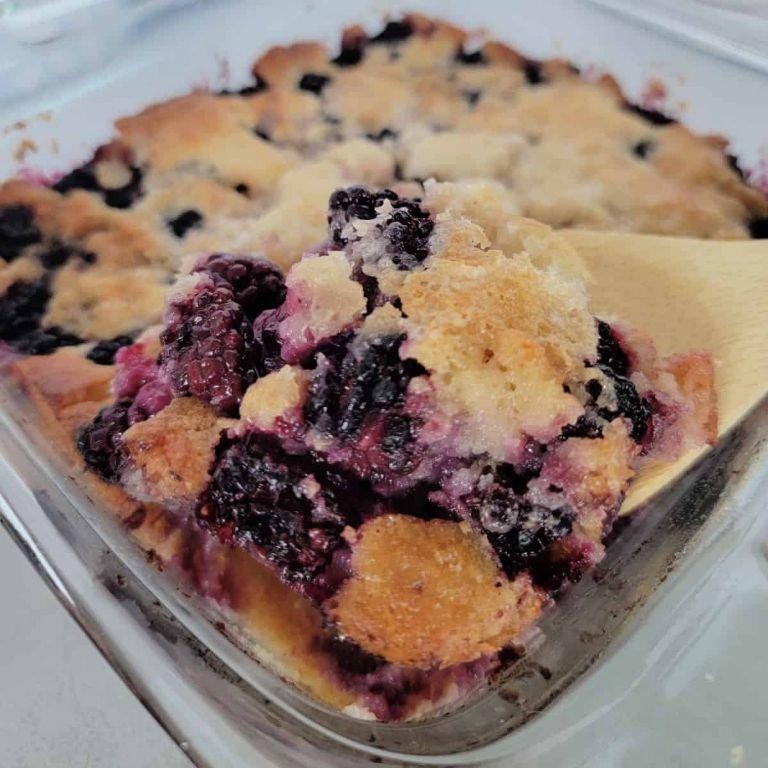
Bisquick Mixed Berry Crisp
Raising your hand if you’ve ever stared at a bag of frozen berries and thought, “I could make something epic with these…or I could just eat them straight from the bag.” No judgment here, but let’s turn that berry bounty into a Bisquick Mixed Berry Crisp—the lazy genius dessert that’s basically a hug in a baking dish.
Serving: 8 | Pre Time: 15 minutes | Cooking Time: 35 minutes
8
servings15
minutes35
minutesIngredients
– 4 cups frozen mixed berries (I keep a Costco-sized bag in my freezer for emergencies like this)
– 1 cup granulated sugar (trust me, the berries need the sweet pep talk)
– 1 tablespoon cornstarch (the silent thickener that prevents a soupy mess)
– 1 cup Bisquick baking mix (the shortcut hero we all deserve)
– 1/2 cup old-fashioned rolled oats (for that essential chewy-crunchy texture)
– 1/2 cup packed light brown sugar (because molasses magic makes everything better)
– 1/2 cup unsalted butter, cold and cubed (I pop it in the freezer for 10 minutes—cold butter equals flaky topping)
– 1 teaspoon ground cinnamon (a non-negotiable cozy spice)
– Pinch of salt (to balance all that sweetness)
Instructions
1. Preheat your oven to 375°F (190°C) and grab a 9×9-inch baking dish—no need to grease it, as the butter in the topping will do the work.
2. In a large bowl, toss the frozen mixed berries with granulated sugar and cornstarch until evenly coated; this step is key to avoiding a berry juice flood later.
3. Pour the berry mixture into the baking dish, spreading it into an even layer.
4. In a separate bowl, combine the Bisquick, oats, brown sugar, cinnamon, and salt, mixing with a fork to break up any sugar lumps.
5. Add the cold, cubed butter to the dry ingredients. Use a pastry cutter or your fingers to work the butter in until the mixture resembles coarse crumbs with some pea-sized bits—this creates that perfect crisp texture.
6. Sprinkle the topping evenly over the berries, covering them completely but not packing it down.
7. Bake in the preheated oven for 30–35 minutes, until the topping is golden brown and you can see the berry juices bubbling vigorously around the edges.
8. Remove from the oven and let it cool on a wire rack for at least 15 minutes; this allows the filling to set so it doesn’t run everywhere when you serve it.
Just imagine digging into that warm crisp: the topping is buttery and crumbly with a hint of oat chew, while the berries burst with sweet-tart juiciness underneath. Serve it à la mode with a scoop of vanilla ice cream for the ultimate contrast, or go rogue and pair it with a dollop of tangy Greek yogurt for breakfast—no one’s judging!
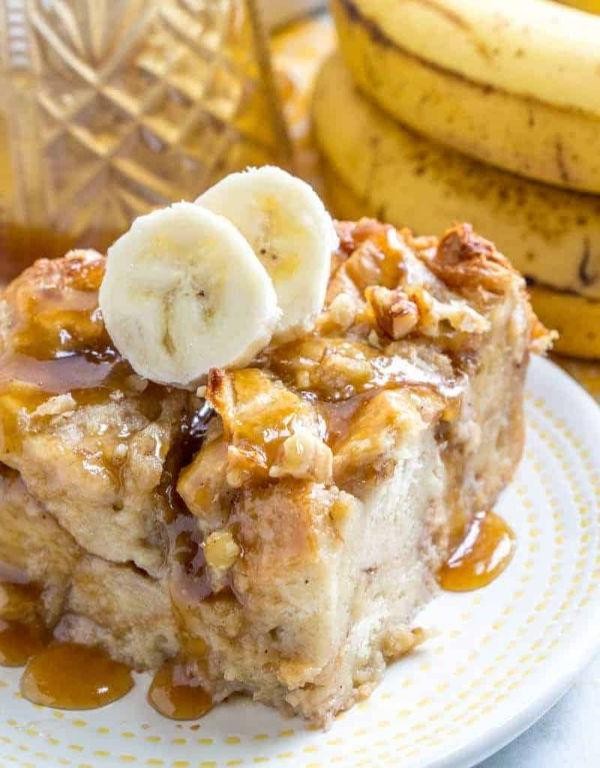
Creamy Bisquick Banana Bread Pudding
Mmm, have you ever stared at a bunch of bananas turning a little too brown and thought, ‘My kingdom for a recipe that’s faster than traditional banana bread’? Well, grab your Bisquick and prepare for glory, because this creamy, dreamy pudding is about to become your new favorite way to rescue those spotty fruits. It’s the cozy hug of banana bread and the luscious comfort of pudding, all baked into one ridiculously easy dessert that’s basically a party in a dish.
Serving: 8 | Pre Time: 15 minutes | Cooking Time: 45 minutes
8
servings15
minutes45
minutesIngredients
– 3 cups of Bisquick baking mix (the trusty shortcut hero in my pantry).
– 3 large, very ripe bananas, mashed (the spottier, the sweeter—I swear by this!).
– 1 cup of granulated sugar (for that perfect sweetness).
– 2 large eggs, at room temperature (they blend smoother, trust me).
– 1 cup of whole milk (full-fat for maximum creaminess, no skimping!).
– 1/2 cup of unsalted butter, melted and slightly cooled (because butter makes everything better).
– 1 teaspoon of pure vanilla extract (my go-to for that warm, aromatic kick).
– 1/2 teaspoon of ground cinnamon (a pinch of cozy spice magic).
Instructions
1. Preheat your oven to 350°F and generously grease a 9×13-inch baking dish with butter or non-stick spray.
2. In a large mixing bowl, combine the 3 cups of Bisquick baking mix, 1 cup of granulated sugar, and 1/2 teaspoon of ground cinnamon, whisking them together until evenly blended.
3. In a separate medium bowl, mash the 3 large, very ripe bananas with a fork until mostly smooth, leaving a few small chunks for texture.
4. Add the 2 large eggs (at room temperature) and 1 teaspoon of pure vanilla extract to the mashed bananas, whisking vigorously until the mixture is fully incorporated and slightly frothy.
5. Pour in the 1 cup of whole milk and 1/2 cup of melted, slightly cooled unsalted butter into the banana mixture, stirring until everything is creamy and well-combined.
6. Gradually pour the wet banana mixture into the dry Bisquick mixture, folding gently with a spatula just until no dry streaks remain—be careful not to overmix to keep it tender.
7. Transfer the batter to the prepared baking dish, spreading it out evenly with the spatula.
8. Bake in the preheated oven at 350°F for 40-45 minutes, or until the top is golden brown and a toothpick inserted into the center comes out clean.
9. Remove the dish from the oven and let it cool on a wire rack for at least 10 minutes before serving to allow it to set properly.
Kind of magical, right? This pudding bakes up with a golden, slightly crisp top that gives way to a soft, custardy interior bursting with sweet banana flavor. Serve it warm with a dollop of whipped cream or a scoop of vanilla ice cream for an extra indulgent treat—it’s so good, you might just forget about regular banana bread forever!
Bisquick Red Velvet Cupcakes

Ready to ditch the boxed mix and whip up something spectacularly simple? These Bisquick Red Velvet Cupcakes are your secret weapon for when you need a show-stopping dessert without the fuss—think of them as your kitchen’s little black dress, but with more sprinkles and way more delicious drama. Let’s get baking!
Serving: 12 | Pre Time: 15 minutes | Cooking Time: 20 minutes
12
servings15
minutes20
minutesIngredients
– 2 cups Bisquick baking mix (the trusty shortcut that never lets me down)
– 1 cup granulated sugar (for that perfect sweetness)
– 1/2 cup unsweetened cocoa powder (I use Dutch-processed for a richer flavor)
– 1 cup buttermilk, at room temperature (it makes the batter extra tender—trust me!)
– 2 large eggs, at room temperature (they blend smoother this way)
– 1/2 cup vegetable oil (my go-to for moist cupcakes)
– 1 tablespoon red food coloring (go for the gel kind to avoid a runny mess)
– 1 teaspoon vanilla extract (pure vanilla adds that cozy warmth)
– 1/2 teaspoon baking soda (the lift master)
– 1/2 teaspoon salt (just a pinch to balance it all out)
Instructions
1. Preheat your oven to 350°F and line a 12-cup muffin tin with paper liners—this prevents sticking and makes cleanup a breeze.
2. In a large mixing bowl, whisk together the Bisquick, sugar, cocoa powder, baking soda, and salt until well combined, ensuring no lumps hide in the corners.
3. In a separate medium bowl, beat the eggs lightly with a fork, then stir in the buttermilk, vegetable oil, red food coloring, and vanilla extract until the mixture is smooth and uniformly red.
4. Pour the wet ingredients into the dry ingredients and gently fold everything together with a spatula until just combined—overmixing can lead to tough cupcakes, so stop as soon as you see no dry streaks.
5. Divide the batter evenly among the prepared muffin cups, filling each about two-thirds full to allow room for rising without overflow.
6. Bake in the preheated oven for 18–20 minutes, or until a toothpick inserted into the center of a cupcake comes out clean with a few moist crumbs (no wet batter).
7. Remove the cupcakes from the oven and let them cool in the tin for 5 minutes before transferring to a wire rack to cool completely—this prevents them from getting soggy on the bottom.
Now, take a bite and savor the magic! These cupcakes boast a tender, velvety crumb with a hint of cocoa that’s not too sweet, and that vibrant red hue is pure party-in-your-mouth energy. Serve them plain for a simple treat, or get creative by topping with cream cheese frosting and a sprinkle of crushed pecans for an extra indulgent twist.
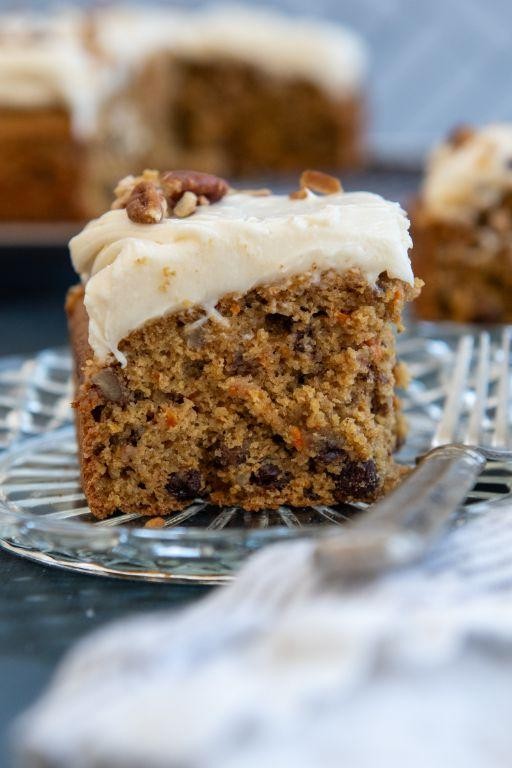
Fluffy Bisquick Carrot Cake
Picture this: a carrot cake so fluffy it practically floats off the plate, and the secret weapon isn’t a fancy technique—it’s a box of trusty Bisquick. This shortcut marvel delivers all the cozy spice and moist crumb you crave, with a fraction of the fuss, perfect for when a baking win feels desperately needed.
Serving: 12 | Pre Time: 15 minutes | Cooking Time: 30 minutes
12
servings15
minutes30
minutesIngredients
- 2 cups Bisquick baking mix (the hero of our story, no sifting required!)
- 1 cup granulated sugar (for that essential sweetness)
- 1 tsp ground cinnamon (the cozy spice MVP)
- 1/2 tsp ground nutmeg (a little warmth goes a long way)
- 3 large eggs, at room temperature please—they blend into the batter much more smoothly this way
- 1/2 cup vegetable oil (my go-to for keeping things super moist)
- 2 cups finely grated carrots (about 3-4 medium ones, and I mean finely—no chunky bits here)
- 1 tsp pure vanilla extract (the flavor enhancer we all deserve)
- 1/2 cup chopped walnuts (optional, but they add a lovely crunch)
Instructions
- Preheat your oven to 350°F (175°C) and generously grease a 9×13-inch baking pan. Tip: Lining the bottom with parchment paper guarantees an easy release later.
- In a large mixing bowl, whisk together the 2 cups of Bisquick, 1 cup of sugar, 1 tsp cinnamon, and 1/2 tsp nutmeg until fully combined.
- Create a well in the center of your dry ingredients and add the 3 room-temperature eggs, 1/2 cup of vegetable oil, and 1 tsp of vanilla extract.
- Using a hand mixer on medium speed, beat the wet ingredients into the dry mixture just until a smooth batter forms, about 1 minute. Tip: Don’t overmix—a few small lumps are perfectly fine and prevent toughness.
- Fold in the 2 cups of finely grated carrots and the 1/2 cup of chopped walnuts (if using) with a rubber spatula until evenly distributed.
- Pour the batter into your prepared pan and use the spatula to spread it into an even layer.
- Bake on the center rack for 28-32 minutes. Tip: Start checking at 28 minutes—the cake is done when a toothpick inserted into the center comes out clean or with just a few moist crumbs.
- Remove the pan from the oven and place it on a wire cooling rack. Let the cake cool completely in the pan, about 1 hour.
Delightfully tender with a perfectly moist crumb, this cake is a hug in dessert form. The warm spices and sweet carrots shine through, while the Bisquick ensures it’s impossibly light. Serve it simply dusted with powdered sugar for a humble treat, or get fancy with a smear of cream cheese frosting for the ultimate indulgence.
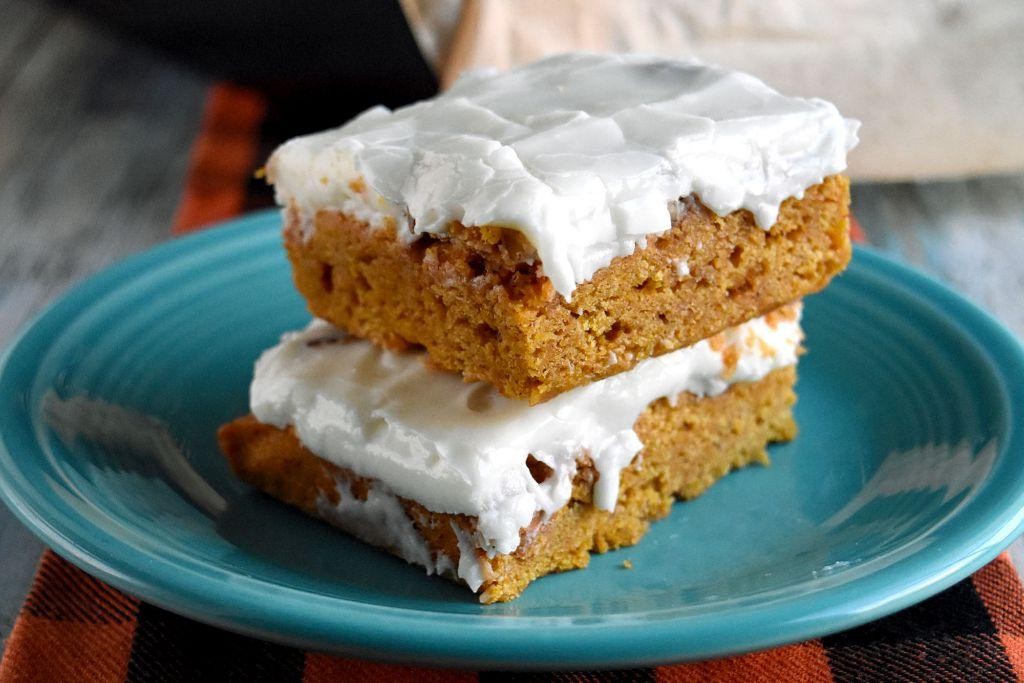
Bisquick Pumpkin Spice Blondies
Brace yourselves, pumpkin spice enthusiasts—your fall baking just got a whole lot easier (and more delicious). These Bisquick Pumpkin Spice Blondies are the cozy, one-bowl wonder you didn’t know you needed, blending warm spices with a buttery, chewy base that’s basically autumn in bar form. Trust me, they’re so good you’ll want to hide them from your roommates (or yourself).
Serving: 16 | Pre Time: 10 minutes | Cooking Time: 25 minutes
16
servings10
minutes25
minutesIngredients
– 2 cups Bisquick mix (the shortcut hero of this recipe)
– 1 cup canned pumpkin puree (not pumpkin pie filling—I learned that the hard way!)
– ¾ cup packed light brown sugar (for that deep, caramel-like sweetness)
– ½ cup unsalted butter, melted and slightly cooled (I prefer it just warm to the touch)
– 2 large eggs, at room temperature (they blend smoother, promise!)
– 1 tsp vanilla extract (pure vanilla is my go-to for the best flavor)
– 2 tsp pumpkin pie spice (feel free to add an extra pinch if you’re spice-obsessed like me)
– ½ tsp salt (to balance all that sweetness)
– ½ cup white chocolate chips (optional, but highly recommended for a melty surprise)
Instructions
1. Preheat your oven to 350°F and grease an 8×8-inch baking pan, lining it with parchment paper for easy removal later.
2. In a large mixing bowl, whisk together the melted butter, brown sugar, pumpkin puree, eggs, and vanilla extract until smooth and well combined.
3. Tip: Scrape the bowl’s sides with a spatula to ensure no pockets of unmixed ingredients remain.
4. Add the Bisquick mix, pumpkin pie spice, and salt to the wet ingredients, stirring gently just until no dry streaks remain—overmixing can make the blondies tough.
5. Fold in the white chocolate chips evenly throughout the batter, if using.
6. Pour the batter into the prepared pan, spreading it into an even layer with a spatula.
7. Bake in the preheated oven for 23–25 minutes, or until the edges are golden brown and a toothpick inserted into the center comes out clean or with a few moist crumbs.
8. Tip: Rotate the pan halfway through baking to ensure even cooking, especially if your oven has hot spots.
9. Remove the pan from the oven and let the blondies cool completely in the pan on a wire rack for at least 1 hour before slicing.
10. Tip: For clean cuts, use a sharp knife wiped clean between slices.
You’ll love the soft, fudgy texture that’s packed with warm pumpkin spice flavor, making these blondies perfect for a quick snack or dressed up with a scoop of vanilla ice cream. Yes, they’re so irresistible you might just find yourself sneaking an extra piece before the guests arrive!
Rich Bisquick Chocolate Lava Cake
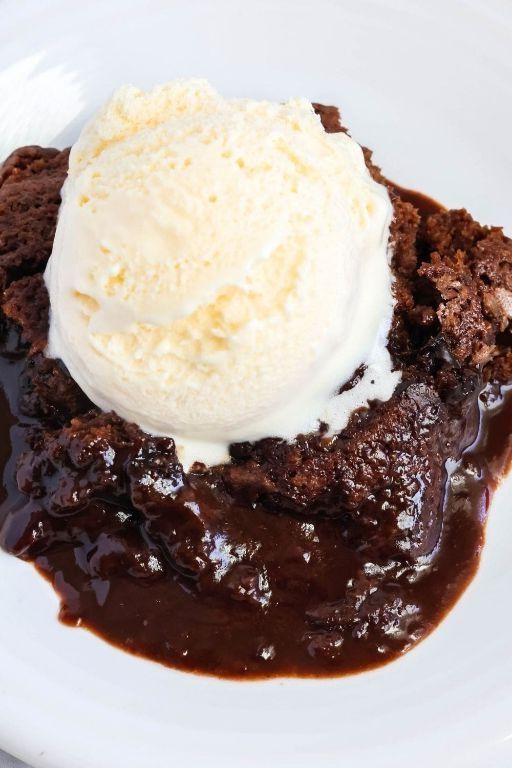
Hold onto your mixing bowls, because we’re about to turn a humble box of Bisquick into a molten chocolate masterpiece that’s easier than explaining your weekend plans. This Rich Bisquick Chocolate Lava Cake is the ultimate ‘looks fancy, secretly simple’ dessert, delivering a gooey, decadent center that’s guaranteed to make you the hero of any dinner party or Tuesday night.
Serving: 4 | Pre Time: 10 minutes | Cooking Time: 12 minutes
4
servings10
minutes12
minutesIngredients
- 1 cup Bisquick baking mix (the trusty pantry MVP)
- 1/2 cup granulated sugar (for that essential sweetness)
- 1/4 cup unsweetened cocoa powder (go for the dark stuff—it’s worth it)
- 1/2 cup milk (whole milk is my go-to for extra richness)
- 1 large egg, at room temperature (it blends in smoother, promise)
- 2 tablespoons vegetable oil (keeps things wonderfully moist)
- 1 teaspoon vanilla extract (the flavor booster we all need)
- 4 squares (1 oz each) semi-sweet baking chocolate (the molten heart of the operation)
Instructions
- Preheat your oven to 425°F and generously grease four 6-ounce ramekins with butter or non-stick spray.
- In a medium bowl, whisk together the 1 cup Bisquick, 1/2 cup sugar, and 1/4 cup cocoa powder until no lumps remain. Tip: Sift the cocoa if it’s clumpy for a perfectly smooth batter.
- Create a well in the center of the dry ingredients and add the 1/2 cup milk, 1 room-temperature egg, 2 tablespoons oil, and 1 teaspoon vanilla.
- Stir vigorously with a spatula until the batter is just combined and smooth, about 1 minute—don’t overmix. Tip: A few tiny lumps are fine; overworking can make the cake tough.
- Divide half of the batter evenly among the prepared ramekins.
- Place 1 square of semi-sweet chocolate in the center of each ramekin, pressing it gently into the batter.
- Top each with the remaining batter, spreading it to completely cover the chocolate square.
- Bake on the middle rack for exactly 12 minutes. Tip: The edges should look set and dry, but the centers will still jiggle slightly—that’s your lava cue!
- Let the cakes cool in the ramekins for exactly 1 minute, then run a knife around the edges.
- Invert each ramekin onto a serving plate, tap gently, and lift to reveal your cake.
Now, get ready for that glorious moment when you cut in. Nothing beats the warm, fudgy lava oozing out against the tender, cakey exterior. Not only is it a flavor explosion, but try serving it with a scoop of vanilla ice cream for a hot-cold contrast that’s downright magical.
Conclusion
A fantastic collection of easy, crowd-pleasing desserts! Whether you’re craving cookies, cobblers, or coffee cake, these Bisquick recipes make baking a breeze. I hope you find a new favorite to whip up. Give one a try, leave a comment with your top pick, and if you enjoyed this roundup, please share it on Pinterest to spread the baking joy!


