Very few meals deliver the perfect combination of hearty satisfaction and minimal kitchen time like this turkey chili. Versatile enough for weeknight dinners and impressive enough for casual gatherings, this recipe transforms simple ingredients into a comforting bowl that everyone from toddlers to adults will devour. You’ll appreciate how it stretches your grocery budget while keeping cleanup to an absolute minimum.
Why This Recipe Works
- Ground turkey provides lean protein without the greasiness of traditional beef chili, making it a healthier option that still delivers rich flavor through careful seasoning and cooking techniques
- The one-pot cooking method means you’re only dirtying a single large Dutch oven or stockpot, significantly reducing cleanup time and making the entire cooking process more manageable during hectic evenings
- Using canned beans and tomatoes eliminates prep work while ensuring consistent results every time, plus these pantry staples are affordable and readily available at any grocery store
- The recipe includes built-in flexibility for spice levels and ingredient substitutions, allowing you to customize based on what your family prefers or what you already have in your kitchen
- Freezes beautifully for up to three months, giving you ready-made meals for those nights when cooking simply isn’t an option and takeout temptations loom large
Ingredients
- 2 tablespoons olive oil
- 1 large yellow onion, finely diced
- 1 medium green bell pepper, finely diced
- 3 cloves garlic, minced
- 2 pounds ground turkey (93% lean works best)
- 3 tablespoons chili powder
- 1 tablespoon ground cumin
- 2 teaspoons dried oregano
- 1 teaspoon smoked paprika
- 1/2 teaspoon cayenne pepper (adjust to taste)
- 1 teaspoon salt
- 1/2 teaspoon black pepper
- 2 (15-ounce) cans kidney beans, drained and rinsed
- 1 (15-ounce) can black beans, drained and rinsed
- 2 (14.5-ounce) cans diced tomatoes with juices
- 1 (8-ounce) can tomato sauce
- 2 cups low-sodium chicken broth
- Optional toppings: shredded cheddar cheese, sour cream, sliced green onions, chopped cilantro, tortilla chips
Equipment Needed
- Large Dutch oven or heavy-bottomed stockpot (6-quart minimum)
- Wooden spoon or sturdy spatula
- Cutting board
- Chef’s knife
- Measuring spoons
- Can opener
- Ladle for serving
Instructions

Prepare Your Base Vegetables
Begin by heating 2 tablespoons of olive oil in your large Dutch oven over medium heat for about 2 minutes until it shimmers slightly. Add your finely diced yellow onion and green bell pepper, stirring to coat them evenly in the oil. Cook these vegetables for 6-8 minutes, stirring occasionally, until the onions become translucent and the peppers soften noticeably. You’ll know they’re ready when the onions have lost their raw, sharp smell and the peppers appear slightly wilted around the edges. Add your 3 minced garlic cloves during the last minute of cooking, stirring constantly to prevent burning since garlic cooks much faster than the other vegetables. The key here is developing that foundational flavor base without rushing the process – those softened vegetables will create the backbone of your chili’s flavor profile. This initial step might seem simple, but it’s crucial for building depth in your final dish.
Brown the Turkey Thoroughly
Now add your 2 pounds of ground turkey to the pot, breaking it up with your wooden spoon into small crumbles as it cooks. You’ll want to cook the turkey for 8-10 minutes over medium heat, continuing to break up any large chunks until no pink remains visible anywhere in the pot. The turkey should appear uniformly cooked with a light brown color throughout, and you should notice some liquid accumulating in the bottom of the pot from the turkey releasing its natural juices. Don’t drain this liquid – it contains valuable flavor that will enhance your chili. As the turkey cooks, you’ll notice the texture changing from raw and cohesive to separated, crumbly pieces. This thorough browning step is essential because it develops the meat’s flavor through Maillard reaction, creating those complex, savory notes that make chili so satisfying.
Bloom Your Spices for Maximum Flavor
Once the turkey is fully cooked, push the meat and vegetables to one side of the pot and sprinkle your 3 tablespoons of chili powder, 1 tablespoon of cumin, 2 teaspoons of oregano, 1 teaspoon of smoked paprika, and 1/2 teaspoon of cayenne pepper directly onto the exposed bottom of the pot. Let the spices toast for 30-45 seconds until they become fragrant – you’ll notice a distinct aroma that’s warmer and more complex than the raw spice smell. Immediately stir the spices into the turkey and vegetable mixture, coating everything evenly and cooking for another minute to ensure the flavors penetrate the ingredients. This blooming process transforms your spices from merely aromatic to deeply flavorful, as the heat releases their essential oils and compounds. The chili should now have a rich, reddish-brown appearance and your kitchen will smell incredible.
Combine and Simmer to Develop Depth
Add your 2 drained and rinsed cans of kidney beans, 1 drained and rinsed can of black beans, 2 cans of diced tomatoes with their juices, 1 can of tomato sauce, and 2 cups of low-sodium chicken broth to the pot. Stir everything together thoroughly, making sure to scrape any browned bits from the bottom of the pot as these contain concentrated flavor. Bring the chili to a gentle boil over medium-high heat, then immediately reduce the heat to low and cover the pot with a lid. Let it simmer for 45 minutes, stirring occasionally every 15 minutes to prevent sticking. During this time, the flavors will meld together beautifully and the liquid will reduce slightly, creating a thicker, more cohesive chili texture. The simmering process is what transforms individual ingredients into a harmonious final dish.
Final Seasoning Adjustments and Serving
After 45 minutes of simmering, remove the lid and taste your chili. Now is the time to adjust the seasoning – add more salt if needed, additional cayenne for extra heat, or a pinch of sugar if the tomatoes taste too acidic. Let the chili cook uncovered for another 10-15 minutes if you prefer a thicker consistency, stirring occasionally. The finished chili should coat the back of a spoon nicely and have a rich, deep red color with visible beans and turkey throughout. Serve immediately in bowls with your choice of toppings, or let it cool completely before transferring to airtight containers for storage. The flavors will continue to develop as it sits, making leftovers even more delicious the next day.
Tips and Tricks
If you’re really pressed for time, consider using pre-chopped frozen onions and peppers from the freezer section – they work perfectly in this recipe and save you valuable prep minutes. For families with varying spice preferences, keep the cayenne pepper minimal during cooking and offer hot sauce or crushed red pepper at the table so everyone can customize their own bowl. When browning the turkey, resist the temptation to stir too frequently – letting it develop a light crust on the bottom before breaking it up creates better flavor through caramelization. If you notice your chili becoming too thick during simmering, simply add additional chicken broth or water in 1/4 cup increments until it reaches your desired consistency. For maximum flavor development with minimal effort, consider making the chili a day ahead – the overnight rest in the refrigerator allows the flavors to meld beautifully, and you’ll only need to reheat it gently on the stove. When freezing portions, use quart-sized freezer bags laid flat to save space, and consider freezing individual servings for quick lunches or smaller meals. If you’re dealing with picky eaters who dislike visible vegetables, you can puree the onion and pepper mixture before adding the turkey – they’ll still get the nutritional benefits without texture complaints. For creamier chili, stir in 1/2 cup of sour cream during the last 5 minutes of cooking rather than serving it on top. Always taste and adjust seasoning at the end rather than relying solely on measurements, as spice potency and salt requirements can vary based on your specific ingredients. If you accidentally oversalt your chili, adding a peeled, raw potato to the pot during the final 15 minutes of cooking can help absorb excess salt – just remove it before serving.
Recipe Variations
- For a smokier flavor profile, replace one can of kidney beans with canned pinto beans and add 1-2 chipotle peppers in adobo sauce, minced finely. The chipotles provide a deep, smoky heat that pairs beautifully with the turkey, and you can adjust the quantity based on your family’s tolerance for spice. This variation works particularly well if you’re serving the chili as part of a game day spread or casual gathering where you want more complex flavors.
- Transform this into a white turkey chili by using ground turkey breast, white beans like cannellini or great northern, and replacing the diced tomatoes with additional chicken broth. Add 4 ounces of diced green chilies and use cumin and oregano as your primary spices instead of chili powder. Finish with a splash of lime juice and fresh cilantro for brightness. This lighter version maintains the convenience of the original while offering a completely different flavor profile that’s perfect for warmer weather or when you want something less tomato-based.
- Make it a slow cooker adaptation by browning the turkey and vegetables on the stove first, then transferring everything to your slow cooker along with the remaining ingredients. Cook on low for 6-8 hours or high for 3-4 hours. This method is ideal for days when you need dinner ready when you walk in the door, and the extended cooking time develops even deeper flavors. Just be sure to adjust the liquid slightly since slow cookers retain moisture better than stovetop cooking.
- For a vegetable-packed version that sneaks in extra nutrients, add 2 cups of finely chopped mushrooms when browning the turkey and include 1 cup of frozen corn during the last 30 minutes of cooking. The mushrooms blend seamlessly with the turkey texture-wise while adding umami depth, and the corn provides sweet pops of flavor and color. This variation helps stretch the recipe further while increasing the vegetable content, making it ideal for families trying to incorporate more produce into their meals.
- Create a Cincinnati-style chili by adding 1 tablespoon of cocoa powder and 1 teaspoon each of cinnamon and allspice to the spice mixture, then serving over spaghetti with shredded cheddar cheese. The warm spices and chocolate notes create a unique flavor profile that’s surprisingly family-friendly, and serving it over pasta makes it more substantial for hungry appetites. This regional variation offers a fun twist on traditional chili that might become a new family favorite.
Frequently Asked Questions
Can I make this chili in advance and how should I store it?
Absolutely, and I actually recommend making it ahead because the flavors improve significantly after resting. Once cooled completely, transfer the chili to airtight containers and refrigerate for up to 4 days. For longer storage, freeze in portion-sized containers or freezer bags for up to 3 months. When reheating, do so gently over medium-low heat on the stove, stirring occasionally and adding a splash of broth or water if it seems too thick. The convenience of having ready-made meals waiting in your refrigerator or freezer is one of this recipe’s biggest advantages for busy families.
What can I substitute if I don’t have ground turkey?
Ground chicken works as a direct substitute with nearly identical cooking times and texture. For a plant-based option, use two 15-ounce cans of lentils (drained) or 1 pound of meatless crumbles, adding them when you would normally add the beans since they don’t require browning. If you prefer beef, ground beef (90% lean) can be used, but you may want to drain excess fat after browning. The recipe’s flexibility with protein sources means you can adapt it based on what’s on sale or already in your pantry, making it budget-friendly.
How can I adjust the spice level for young children?
Start by omitting the cayenne pepper entirely during cooking – you can always add heat later but can’t remove it. The chili powder provides flavor without significant heat, so the dish will still be tasty. Serve the mild version to kids, then offer hot sauce, additional cayenne, or crushed red pepper flakes for adults to customize their bowls. Another strategy is to remove a portion for children before adding any spicy elements, then continue cooking the main batch with your preferred heat level. This approach ensures everyone gets a version they’ll enjoy without requiring separate meals.
Is it possible to make this in an Instant Pot or pressure cooker?
Yes, using the sauté function to brown the turkey and vegetables, then adding remaining ingredients and pressure cooking on high for 15 minutes with natural pressure release for 10 minutes. The pressure cooker method reduces total active cooking time to about 30 minutes while still developing good flavor. Just be sure to deglaze the pot thoroughly after browning to prevent burn notices, and consider reducing the liquid slightly since pressure cookers retain more moisture. This method is perfect for those nights when you need dinner on the table fast but still want a homemade meal.
What are the best toppings and serving suggestions for family meals?
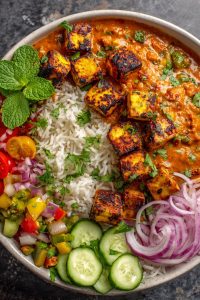
Set up a toppings bar with shredded cheddar cheese, sour cream, sliced green onions, chopped cilantro, tortilla chips, diced avocado, and lime wedges – this allows each family member to customize their bowl. For serving, consider cornbread, crusty bread, or baked potatoes as accompaniments. For particularly busy nights, serve the chili over rice to stretch it further or use it as a filling for baked potatoes. The versatility in serving options means you can create different meals throughout the week using the same base recipe, reducing meal planning stress.
Summary
This turkey chili delivers family-friendly comfort with minimal cleanup, using pantry staples and flexible ingredients that adapt to your schedule and preferences. The one-pot approach saves time while developing deep flavors, and make-ahead options ensure you always have a satisfying meal ready. Perfect for busy weeknights or casual gatherings, it’s the practical dinner solution every parent needs in their rotation.