
Maybe you’ve got a bit of leftover ham sitting in the fridge and you’re wondering what to do with it—well, you’re in luck! From cozy soups to quick skillet dinners, we’ve gathered 22 tasty ideas to turn those leftovers into something special. Keep reading to find your next favorite meal and make the most of every delicious bite!
Cheesy Ham and Potato Casserole

Finally, as the crisp autumn air settles in, I find myself craving those comforting, one-dish meals that remind me of family gatherings. This cheesy ham and potato casserole has been my go-to recipe for busy weeknights ever since my neighbor shared it during a particularly chaotic parenting week—it’s the kind of dish that feels like a warm hug after a long day, with minimal cleanup to boot.
6
servings20
minutes45
minutesIngredients
– 4 cups diced potatoes
– 2 cups diced ham
– 1 cup shredded cheddar cheese
– 1/2 cup sour cream
– 1/4 cup chopped onion
– 2 tbsp butter
– 1 tbsp all-purpose flour
– 1 cup milk
– 1/2 tsp salt
– 1/4 tsp black pepper
Instructions
1. Preheat your oven to 375°F and grease a 9×13-inch baking dish with non-stick spray.
2. Place the diced potatoes in a large pot, cover with water, and boil for 10 minutes until just tender when pierced with a fork.
3. Drain the potatoes thoroughly in a colander to prevent a watery casserole.
4. Melt the butter in a skillet over medium heat and sauté the chopped onion for 3-4 minutes until translucent.
5. Sprinkle the flour over the onions and cook for 1 minute, stirring constantly to form a roux.
6. Gradually whisk in the milk until the mixture is smooth and slightly thickened, about 2-3 minutes.
7. Remove the skillet from heat and stir in the sour cream, salt, and black pepper until fully combined.
8. Combine the cooked potatoes, diced ham, and sauce in a large mixing bowl, folding gently to coat evenly.
9. Transfer the mixture to the prepared baking dish and spread it into an even layer.
10. Sprinkle the shredded cheddar cheese uniformly over the top for a golden, bubbly finish.
11. Bake uncovered for 25-30 minutes until the cheese is melted and the edges are lightly browned.
12. Let the casserole rest for 5 minutes before serving to allow the flavors to meld. Perfectly creamy with a hint of smokiness from the ham, this casserole pairs wonderfully with a simple green salad or steamed veggies for a balanced meal. I love how the cheese forms a delicate crust while the inside stays irresistibly tender—it’s a crowd-pleaser that even my pickiest eaters devour without complaint.
Savory Ham and Cheese Scones

Baking these savory ham and cheese scones has become my go-to weekend ritual—there’s something so comforting about the way they fill my kitchen with that warm, buttery aroma while I sip my morning coffee. I first started making them when I needed to use up leftover holiday ham, and now my family requests them year-round because they’re perfect for brunch, quick snacks, or even packed lunches.
8
scones15
minutes18
minutesIngredients
– 2 cups all-purpose flour
– 1 tbsp baking powder
– 1 tsp salt
– 1/2 cup cold unsalted butter
– 1/2 cup diced ham
– 1/2 cup shredded cheddar cheese
– 2/3 cup whole milk
– 1 large egg
Instructions
1. Preheat your oven to 400°F and line a baking sheet with parchment paper.
2. In a large bowl, whisk together 2 cups all-purpose flour, 1 tbsp baking powder, and 1 tsp salt until well combined.
3. Cut 1/2 cup cold unsalted butter into small cubes and add them to the flour mixture.
4. Use a pastry cutter or your fingers to work the butter into the flour until the mixture resembles coarse crumbs with some pea-sized butter pieces remaining—this creates flaky layers.
5. Stir in 1/2 cup diced ham and 1/2 cup shredded cheddar cheese until evenly distributed.
6. In a separate small bowl, whisk together 2/3 cup whole milk and 1 large egg until smooth.
7. Pour the wet ingredients into the flour mixture and gently stir with a fork until just combined—be careful not to overmix or the scones will become tough.
8. Turn the dough out onto a lightly floured surface and gently pat it into a 1-inch thick circle.
9. Use a sharp knife to cut the circle into 8 equal wedges, wiping the knife clean between cuts for neat edges.
10. Arrange the wedges on the prepared baking sheet, spacing them about 2 inches apart.
11. Bake at 400°F for 15-18 minutes until the scones are golden brown on top and sound hollow when tapped on the bottom.
12. Transfer the scones to a wire rack and let them cool for at least 10 minutes before serving.
What I love most about these scones is their perfect balance—flaky and tender inside with just enough crispness on the outside, while the salty ham and sharp cheddar create a savory flavor that’s satisfying without being heavy. They’re fantastic split and toasted the next day, or try serving them warm with a dollop of honey butter for a sweet-savory twist that always impresses guests.
Hearty Ham and Bean Soup

Brrr, there’s nothing like a chilly autumn day to make me crave a steaming bowl of this comforting ham and bean soup. Just last week, after raking what felt like a mountain of leaves, I came inside frozen and immediately started simmering this family favorite. It’s the kind of meal that warms you from the inside out and makes your whole house smell incredible.
6
servings30
minutes150
minutesIngredients
– 1 pound dried navy beans
– 2 tablespoons olive oil
– 1 large yellow onion, diced
– 2 medium carrots, diced
– 2 celery stalks, diced
– 3 cloves garlic, minced
– 8 cups chicken broth
– 1 meaty ham bone
– 2 bay leaves
– 1 teaspoon dried thyme
– 1/2 teaspoon black pepper
– 2 cups diced cooked ham
– 1/4 cup chopped fresh parsley
Instructions
1. Rinse 1 pound dried navy beans under cold water and pick out any debris or shriveled beans.
2. Place beans in a large bowl and cover with 2 inches of cold water, then soak for 8 hours or overnight.
3. Drain and rinse the soaked beans thoroughly in a colander.
4. Heat 2 tablespoons olive oil in a large stockpot over medium heat until shimmering.
5. Add 1 large diced yellow onion, 2 diced medium carrots, and 2 diced celery stalks to the pot.
6. Cook vegetables for 8-10 minutes, stirring occasionally, until onions are translucent and carrots have softened.
7. Add 3 minced garlic cloves and cook for 1 minute until fragrant.
8. Pour in 8 cups chicken broth and add the drained beans, 1 meaty ham bone, 2 bay leaves, 1 teaspoon dried thyme, and 1/2 teaspoon black pepper.
9. Bring the soup to a boil over high heat, then reduce heat to low and simmer partially covered for 2 hours.
10. Remove the ham bone from the pot and let it cool until safe to handle.
11. Pull all the meat from the ham bone and chop it into bite-sized pieces.
12. Return the chopped ham to the pot along with 2 cups diced cooked ham.
13. Continue simmering for 30 minutes until beans are completely tender and soup has thickened.
14. Remove and discard the bay leaves from the soup.
15. Stir in 1/4 cup chopped fresh parsley just before serving.
Just ladle this soul-warming soup into big bowls and watch how the tender beans melt in your mouth while the ham adds savory depth to every spoonful. I love serving it with crusty bread for dipping, and the leftovers taste even better the next day when the flavors have fully married together.
Classic Ham and Swiss Croissants

Back when I worked at a little bakery in college, the smell of ham and Swiss croissants baking would draw customers in like magic. These flaky, buttery pockets of savory goodness became my go-to breakfast treat, and today I’m sharing my perfected version that’s surprisingly simple to make at home.
4
sandwiches10
minutes15
minutesIngredients
- 4 large croissants
- 8 ounces sliced deli ham
- 6 slices Swiss cheese
- 2 tablespoons Dijon mustard
- 1 egg
- 1 tablespoon water
Instructions
- Preheat your oven to 375°F and line a baking sheet with parchment paper.
- Slice each croissant horizontally, being careful not to cut all the way through, creating a pocket.
- Spread ½ tablespoon of Dijon mustard inside each croissant pocket.
- Layer 2 ounces of sliced ham inside each croissant, folding it to fit neatly.
- Place 1½ slices of Swiss cheese over the ham in each croissant.
- Gently press the croissants closed, being careful not to tear the delicate pastry.
- In a small bowl, whisk together the egg and 1 tablespoon of water until fully combined.
- Brush the egg wash evenly over the top and sides of each croissant using a pastry brush.
- Bake for 12-15 minutes until the croissants are golden brown and the cheese is visibly melted and bubbly.
- Remove from the oven and let rest for 3-5 minutes before serving to allow the filling to set.
Outrageously flaky and buttery, these croissants shatter beautifully with each bite, revealing the savory ham and melted Swiss cheese inside. The Dijon mustard adds just enough tang to cut through the richness, making them perfect for brunch gatherings or sliced into smaller portions for party appetizers.
Creamy Ham and Pea Pasta
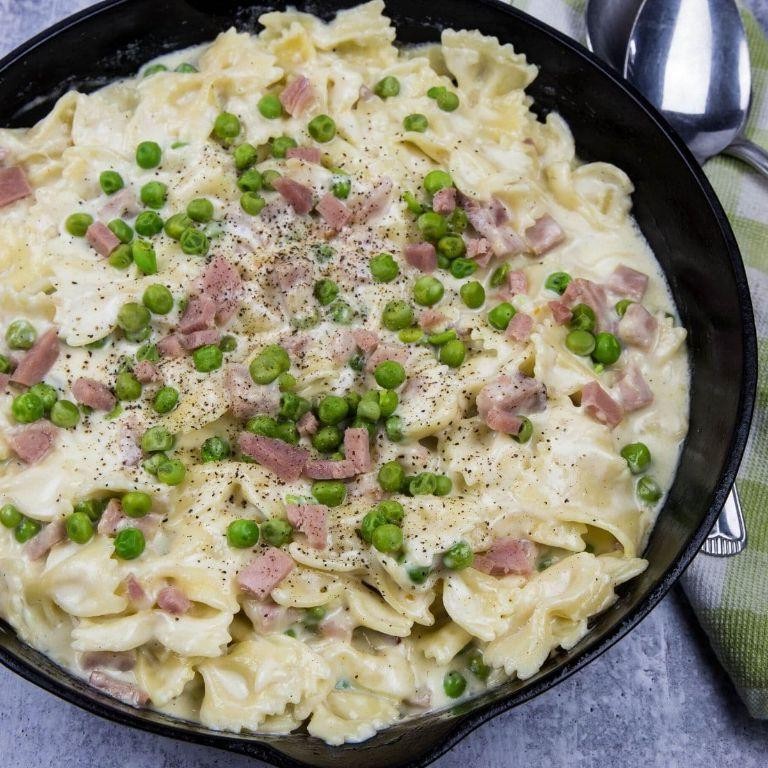
Comforting, creamy, and ready in under 30 minutes—this ham and pea pasta is my go-to weeknight dinner when I’m craving something satisfying but don’t want to spend hours in the kitchen. I first started making this dish back in college when my roommate and I would pool our grocery money to create budget-friendly meals that felt special, and this one always hit the spot. There’s something magical about how the creamy sauce clings to every noodle while the sweet peas and salty ham create the perfect balance in each bite.
2
servings10
minutes20
minutesIngredients
– 12 oz fettuccine pasta
– 2 tbsp olive oil
– 1 cup diced cooked ham
– 3 cloves garlic, minced
– 1 cup frozen peas
– 1 cup heavy cream
– 1/2 cup grated Parmesan cheese
– 1/4 tsp black pepper
– 1/4 tsp salt
Instructions
1. Bring a large pot of salted water to a rolling boil over high heat.
2. Add fettuccine to the boiling water and cook for 10-12 minutes until al dente, stirring occasionally to prevent sticking.
3. While pasta cooks, heat olive oil in a large skillet over medium heat until shimmering.
4. Add diced ham and cook for 3-4 minutes until lightly browned and slightly crispy around the edges.
5. Stir in minced garlic and cook for 30 seconds until fragrant but not browned.
6. Add frozen peas to the skillet and cook for 2 minutes until heated through and bright green.
7. Pour heavy cream into the skillet and bring to a gentle simmer, stirring constantly.
8. Reduce heat to low and stir in grated Parmesan cheese until completely melted and smooth.
9. Season the sauce with black pepper and salt, then simmer for 2 minutes to thicken slightly.
10. Drain the cooked pasta, reserving 1/4 cup of pasta water.
11. Add drained pasta to the skillet with the sauce, tossing to coat evenly.
12. If the sauce is too thick, gradually add reserved pasta water 1 tablespoon at a time until desired consistency is reached.
13. Remove from heat and let rest for 2 minutes to allow flavors to meld.
Luxuriously creamy with pops of sweet peas and savory ham bits, this pasta delivers restaurant-quality comfort in every forkful. The sauce clings beautifully to the fettuccine, creating that perfect creamy-to-pasta ratio we all crave. For an extra touch, I sometimes top it with additional Parmesan and fresh parsley, or serve it alongside garlic bread to soak up every last drop of that delicious sauce.
Flavorful Ham and Broccoli Quiche

Remember that time I had a fridge full of leftover holiday ham and no idea what to make? That’s how this incredible ham and broccoli quiche was born—it’s become my go-to brunch solution that always impresses guests. Really, this versatile dish works beautifully for any meal when you need something satisfying yet elegant.
6
servings15
minutes40
minutesIngredients
– 1 9-inch pie crust
– 1 cup diced cooked ham
– 1 cup chopped broccoli florets
– 1/2 cup shredded cheddar cheese
– 4 large eggs
– 1 cup whole milk
– 1/4 cup heavy cream
– 1/2 teaspoon salt
– 1/4 teaspoon black pepper
– 1/4 teaspoon garlic powder
Instructions
1. Preheat your oven to 375°F and place the pie crust in a 9-inch pie dish.
2. Spread the diced ham evenly across the bottom of the pie crust.
3. Arrange the chopped broccoli florets over the ham layer.
4. Sprinkle the shredded cheddar cheese evenly over the broccoli.
5. In a medium bowl, whisk the eggs until fully combined and slightly frothy.
6. Add the whole milk and heavy cream to the eggs, whisking continuously.
7. Whisk in the salt, black pepper, and garlic powder until fully incorporated.
8. Slowly pour the egg mixture over the ingredients in the pie crust.
9. Tip: Let the quiche sit for 2 minutes to allow the liquid to settle between layers.
10. Place the quiche on the middle oven rack and bake for 35-40 minutes.
11. Tip: Rotate the quiche halfway through baking for even browning.
12. Check for doneness by inserting a knife near the center—it should come out clean.
13. Tip: Let the quiche rest for 10 minutes before slicing to help it set properly.
14. Remove from oven when the top is golden brown and the center is set.
You’ll love how the flaky crust contrasts with the creamy egg filling, while the ham adds savory depth and broccoli brings fresh texture. Yesterday I served slices with a simple arugula salad for lunch, and it made an ordinary Tuesday feel special—this quiche truly elevates any occasion.
Tasty Ham and Cheese Omelette

Sometimes the simplest breakfasts are the ones that hit the spot the most, and this ham and cheese omelette has been my weekend go-to ever since I discovered the perfect technique during a lazy Sunday brunch experiment. I love how the salty ham pairs with the creamy melted cheese, all wrapped up in fluffy eggs that cook up in just minutes.
1
servings5
minutes5
minutesIngredients
– 3 large eggs
– 1/4 cup diced ham
– 1/4 cup shredded cheddar cheese
– 1 tablespoon unsalted butter
– 1 tablespoon milk
– 1/4 teaspoon salt
– 1/8 teaspoon black pepper
Instructions
1. Crack 3 large eggs into a medium bowl.
2. Add 1 tablespoon milk, 1/4 teaspoon salt, and 1/8 teaspoon black pepper to the eggs.
3. Whisk the egg mixture vigorously for 30 seconds until fully combined and slightly frothy.
4. Heat a 10-inch non-stick skillet over medium heat for 2 minutes.
5. Add 1 tablespoon unsalted butter to the hot skillet and swirl to coat the bottom.
6. Pour the egg mixture into the skillet when the butter stops foaming.
7. Let the eggs cook undisturbed for 1 minute until edges begin to set.
8. Use a spatula to gently push cooked edges toward the center, tilting the skillet to let uncooked eggs flow to the edges.
9. Continue this pushing and tilting motion for 2 minutes until the top surface is mostly set but still slightly wet.
10. Sprinkle 1/4 cup diced ham evenly over one half of the omelette.
11. Sprinkle 1/4 cup shredded cheddar cheese over the ham.
12. Cook for 1 more minute until the cheese begins to melt.
13. Carefully fold the empty half of the omelette over the filled half using your spatula.
14. Slide the omelette onto a plate and let it rest for 1 minute before serving.
Fluffy and golden with pockets of melted cheese, this omelette has that perfect balance of savory ham and rich dairy. I love serving it with a side of fresh fruit or avocado slices for a complete meal that feels both comforting and satisfying.
Warm Ham and Spinach Frittata

Sometimes the best meals come together when you’re cleaning out the fridge—I discovered this frittata last Sunday while staring at leftover holiday ham and a wilting bag of spinach. Warm ham and spinach frittata has become my go-to for turning those bits and pieces into something truly special that feels both comforting and elegant.
3
servings10
minutes26
minutesIngredients
– 8 large eggs
– 1 cup diced cooked ham
– 2 cups fresh spinach
– 1/2 cup shredded cheddar cheese
– 1/4 cup whole milk
– 1 tablespoon olive oil
– 1/2 teaspoon salt
– 1/4 teaspoon black pepper
– 1/4 teaspoon garlic powder
Instructions
1. Preheat your oven to 375°F.
2. Crack 8 large eggs into a medium mixing bowl.
3. Add 1/4 cup whole milk to the eggs.
4. Whisk the eggs and milk together until fully combined and slightly frothy.
5. Stir in 1/2 teaspoon salt, 1/4 teaspoon black pepper, and 1/4 teaspoon garlic powder.
6. Heat 1 tablespoon olive oil in a 10-inch oven-safe skillet over medium heat for 2 minutes.
7. Add 1 cup diced cooked ham to the skillet.
8. Cook the ham for 3-4 minutes until lightly browned around the edges.
9. Add 2 cups fresh spinach to the skillet.
10. Cook for 2 minutes until the spinach has wilted, stirring constantly.
11. Tip: Make sure your skillet handle is oven-safe—I wrap mine with foil as a reminder since I’ve burned myself before!
12. Pour the egg mixture evenly over the ham and spinach.
13. Cook without stirring for 4 minutes until the edges begin to set.
14. Sprinkle 1/2 cup shredded cheddar cheese evenly over the top.
15. Tip: Don’t stir after adding the eggs—this creates those beautiful layers rather than scrambled eggs.
16. Transfer the skillet to the preheated oven.
17. Bake for 12-15 minutes until the center is fully set and doesn’t jiggle when shaken.
18. Tip: The frittata will continue cooking after removal, so pull it when the center is just set to avoid dryness.
19. Remove the skillet from the oven using oven mitts.
20. Let the frittata rest for 5 minutes before slicing.
What I love most is how the edges get slightly crispy while the center stays wonderfully moist and tender. The salty ham pairs perfectly with the earthy spinach, and it’s fantastic served warm with a simple arugula salad or at room temperature for brunch the next day.
Zesty Ham and Pineapple Pizza

Whenever I’m craving something that balances savory and sweet, this zesty ham and pineapple pizza is my go-to. I first fell in love with this combination during a beach vacation years ago, and now it’s become my Friday night tradition—the perfect way to unwind after a busy week. There’s just something magical about how the tangy pineapple cuts through the richness of the ham that keeps me coming back for more.
Ingredients
– 1 pound pizza dough
– 1/2 cup pizza sauce
– 2 cups shredded mozzarella cheese
– 1 cup diced ham
– 1 cup pineapple chunks
– 1/4 cup sliced red onion
– 2 tablespoons olive oil
– 1 teaspoon dried oregano
Instructions
1. Preheat your oven to 475°F and place a pizza stone or baking sheet inside to heat for 30 minutes.
2. Lightly flour your work surface and stretch the pizza dough into a 12-inch circle.
3. Brush the entire dough surface with olive oil using a pastry brush.
4. Spread pizza sauce evenly over the dough, leaving a 1-inch border around the edges.
5. Sprinkle shredded mozzarella cheese evenly over the sauce.
6. Distribute diced ham evenly across the pizza surface.
7. Scatter pineapple chunks over the ham layer.
8. Arrange sliced red onion evenly across the pizza.
9. Sprinkle dried oregano over the entire pizza.
10. Carefully transfer the pizza to the preheated pizza stone using a pizza peel.
11. Bake for 12-15 minutes until the crust is golden brown and the cheese is bubbly with light brown spots.
12. Remove the pizza from the oven using oven mitts and let it rest on a cutting board for 3 minutes before slicing.
During that first bite, you’ll experience the perfect contrast between the crispy, chewy crust and the juicy pineapple bursts. The salty ham and sweet pineapple create a flavor harmony that’s absolutely addictive, especially when served with a cold beer or crisp salad on the side.
Comforting Ham and Potato Soup

Cold weather always sends me straight to my kitchen, and this ham and potato soup has become my go-to comfort food during chilly evenings. I first made it when we had leftover holiday ham, and now my family requests it weekly—it’s that perfect blend of creamy, hearty, and satisfying that just warms you from the inside out.
Ingredients
– 2 tablespoons unsalted butter
– 1 medium yellow onion, diced
– 2 cloves garlic, minced
– 4 cups diced Yukon Gold potatoes
– 2 cups diced cooked ham
– 4 cups chicken broth
– 1 cup heavy cream
– 1 teaspoon dried thyme
– 1/2 teaspoon black pepper
– 1/4 cup all-purpose flour
– 1/2 cup whole milk
– 1 cup shredded cheddar cheese
– 2 tablespoons chopped fresh parsley
Instructions
1. Melt 2 tablespoons of unsalted butter in a large Dutch oven over medium heat.
2. Add 1 diced medium yellow onion and cook for 5 minutes, stirring occasionally, until translucent.
3. Stir in 2 minced garlic cloves and cook for 1 minute until fragrant.
4. Add 4 cups of diced Yukon Gold potatoes, 2 cups of diced cooked ham, 4 cups of chicken broth, 1 teaspoon of dried thyme, and 1/2 teaspoon of black pepper to the pot.
5. Bring the mixture to a boil, then reduce heat to low, cover, and simmer for 15 minutes until potatoes are fork-tender.
6. In a separate small bowl, whisk together 1/4 cup of all-purpose flour and 1/2 cup of whole milk until smooth to create a slurry.
7. Slowly pour the flour slurry into the soup while stirring constantly to prevent lumps.
8. Stir in 1 cup of heavy cream and simmer uncovered for 5 minutes, stirring occasionally, until slightly thickened.
9. Remove the pot from heat and stir in 1 cup of shredded cheddar cheese until melted and fully incorporated.
10. Ladle the soup into bowls and garnish with 2 tablespoons of chopped fresh parsley.
My favorite thing about this soup is how the potatoes break down slightly to create a naturally creamy texture while the ham adds salty pockets of flavor throughout. Make it extra special by serving in hollowed-out bread bowls or topping with extra crispy bacon for added crunch.
Vibrant Ham and Veggie Stir Fry

Picture this: It’s Wednesday evening, you’re staring into the fridge wondering what to make with that leftover ham from Sunday’s dinner, and you want something that feels fresh but comes together quickly. That’s exactly how this vibrant ham and veggie stir fry was born in my kitchen last week—a happy accident that’s now on regular rotation.
5
servings15
minutes11
minutesIngredients
- 1 tbsp vegetable oil
- 2 cups diced ham
- 1 cup sliced bell peppers
- 1 cup broccoli florets
- 2 cloves minced garlic
- 1 tbsp grated ginger
- 2 tbsp soy sauce
- 1 tsp sesame oil
Instructions
- Heat 1 tablespoon of vegetable oil in a large wok or skillet over medium-high heat until it shimmers, about 1 minute.
- Add 2 cups of diced ham and cook for 3-4 minutes, stirring occasionally, until lightly browned and edges are slightly crisp.
- Add 1 cup of sliced bell peppers and 1 cup of broccoli florets to the pan. Tip: Cut broccoli into uniform florets to ensure even cooking.
- Stir-fry the vegetables for 5-6 minutes until peppers are tender-crisp and broccoli is bright green.
- Push ingredients to one side of the pan and add 2 cloves of minced garlic and 1 tablespoon of grated ginger to the empty space.
- Cook the garlic and ginger for 30 seconds until fragrant, then mix everything together. Tip: Don’t let garlic sit directly on hot metal or it will burn quickly.
- Pour 2 tablespoons of soy sauce and 1 teaspoon of sesame oil over the stir fry.
- Toss everything together and cook for 1 more minute until well combined and heated through. Tip: Add sauce at the end to prevent vegetables from becoming soggy.
Crunchy broccoli and crisp-tender peppers play beautifully against the salty, savory ham, while that hint of sesame oil ties everything together with its nutty aroma. I love serving this over cauliflower rice for a low-carb option, or you can pile it high on fluffy jasmine rice for the ultimate comfort meal.
Savory Ham and Cheese Stuffed Mushrooms

Just last weekend, I was hosting a small gathering and needed a quick appetizer that would impress without stressing me out—these savory ham and cheese stuffed mushrooms were the perfect solution. They’re my go-to when I want something elegant but easy, and I love how the kitchen fills with that amazing aroma while they bake. Honestly, I’ve made these so many times I could probably do it with my eyes closed, but I’ll walk you through it step by step so you can enjoy them too.
24
portions25
minutes30
minutesIngredients
- 24 large white mushrooms
- 2 tablespoons olive oil
- 1/2 cup finely chopped yellow onion
- 2 cloves garlic, minced
- 1 cup finely diced cooked ham
- 4 ounces cream cheese, softened
- 1/2 cup shredded sharp cheddar cheese
- 1/4 cup grated Parmesan cheese
- 1/4 teaspoon black pepper
- 1/4 teaspoon paprika
- 2 tablespoons chopped fresh parsley
Instructions
- Preheat your oven to 375°F and line a baking sheet with parchment paper.
- Gently twist the stems from 24 large white mushrooms and set the caps aside.
- Finely chop the mushroom stems until they resemble coarse crumbs.
- Heat 2 tablespoons olive oil in a large skillet over medium heat for 1 minute.
- Add 1/2 cup finely chopped yellow onion and sauté for 3 minutes until translucent.
- Stir in the chopped mushroom stems and 2 cloves minced garlic, cooking for 5 minutes until most moisture has evaporated.
- Add 1 cup finely diced cooked ham and cook for 2 more minutes until lightly browned.
- Transfer the mixture to a mixing bowl and let it cool for 5 minutes.
- Mix in 4 ounces softened cream cheese, 1/2 cup shredded sharp cheddar, 1/4 cup grated Parmesan, 1/4 teaspoon black pepper, and 1/4 teaspoon paprika until fully combined.
- Spoon the filling evenly into the mushroom caps, mounding it slightly.
- Arrange the stuffed mushrooms on the prepared baking sheet in a single layer.
- Bake at 375°F for 18-20 minutes until the mushrooms are tender and the tops are golden brown.
- Sprinkle with 2 tablespoons chopped fresh parsley immediately after removing from the oven.
During baking, the mushroom caps soften into juicy little vessels while the cheesy filling gets beautifully bubbly and golden. I love how the salty ham and sharp cheddar play off the earthy mushrooms, creating a perfect bite every time. For a fun twist, try serving them on a wooden board with toothpicks and a side of spicy marinara for dipping—they disappear fast at parties!
Quick Ham and Cheddar Biscuits

Kind of like those mornings when you’re rushing out the door but still want something homemade, these quick ham and cheddar biscuits were born from my constant battle between convenience and craving real food. I’ve been making them for years whenever I have leftover holiday ham or just need a satisfying breakfast in under 30 minutes.
8
biscuits15
minutes15
minutesIngredients
– 2 cups all-purpose flour
– 1 tbsp baking powder
– 1 tsp salt
– 1/2 cup cold unsalted butter
– 3/4 cup whole milk
– 1 cup diced cooked ham
– 1 cup shredded cheddar cheese
Instructions
1. Preheat your oven to 425°F and line a baking sheet with parchment paper.
2. Whisk together 2 cups all-purpose flour, 1 tablespoon baking powder, and 1 teaspoon salt in a large bowl.
3. Cut 1/2 cup cold unsalted butter into small cubes and add to the flour mixture.
4. Use your fingertips or a pastry cutter to work the butter into the flour until the mixture resembles coarse crumbs with some pea-sized butter pieces remaining.
5. Pour in 3/4 cup whole milk and stir with a fork until just combined.
6. Gently fold in 1 cup diced cooked ham and 1 cup shredded cheddar cheese until evenly distributed.
7. Turn the dough out onto a lightly floured surface and pat into a 1-inch thick rectangle.
8. Use a 2.5-inch round biscuit cutter to cut out biscuits, pressing straight down without twisting.
9. Arrange the biscuits on the prepared baking sheet about 2 inches apart.
10. Bake at 425°F for 12-15 minutes until golden brown and puffed.
11. Transfer to a wire rack and let cool for 5 minutes before serving.
These biscuits emerge from the oven with flaky, buttery layers that shatter when you break them open, revealing pockets of salty ham and melted cheddar throughout. I love splitting them warm and slathering with honey butter, or using them as the base for breakfast sandwiches with a fried egg tucked inside.
Gourmet Ham and Brie Sandwich

Tuesdays are my sandwich-testing days, and this gourmet ham and Brie creation came about when I found myself with leftover holiday ham and a serious craving for something melty and decadent—it’s become my go-to for impressing lunch guests ever since.
1
sandwich5
minutes8
minutesIngredients
– 2 slices sourdough bread
– 2 tbsp Dijon mustard
– 4 oz sliced Black Forest ham
– 4 oz Brie cheese, sliced
– 1/2 cup arugula
– 2 tbsp unsalted butter, softened
Instructions
1. Spread 1 tablespoon of Dijon mustard evenly on the inner side of each slice of sourdough bread.
2. Layer 4 ounces of sliced Black Forest ham on one mustard-coated bread slice.
3. Arrange 4 ounces of sliced Brie cheese evenly over the ham layer.
4. Place 1/2 cup of arugula on top of the Brie cheese.
5. Close the sandwich with the second mustard-coated bread slice, mustard-side facing inward.
6. Spread 1 tablespoon of softened unsalted butter evenly on the outer side of the top bread slice.
7. Heat a skillet or griddle over medium heat (350°F) for 2 minutes until evenly heated.
8. Place the sandwich buttered-side down in the heated skillet.
9. Spread the remaining 1 tablespoon of softened unsalted butter on the now-upper outer bread slice.
10. Cook for 3-4 minutes until the bottom bread is golden brown and crisp.
11. Flip the sandwich carefully using a spatula.
12. Cook for another 3-4 minutes until the second side is golden brown and the Brie cheese is completely melted.
13. Remove the sandwich from the skillet and let it rest for 1 minute before slicing.
Creamy Brie melting into savory ham creates an irresistible texture, while the peppery arugula cuts through the richness perfectly. I love serving this sliced diagonally with a side of sweet potato fries for the ultimate sweet-and-salty combination that always disappears within minutes.
Satisfying Ham and Cabbage Roll

Just last week, I found myself craving that perfect comfort food that fills the kitchen with incredible aromas while being surprisingly simple to prepare. My grandmother used to make these ham and cabbage rolls every fall, and I’ve adapted her recipe to work beautifully in my modern kitchen. There’s something magical about how the savory ham and tender cabbage come together in this satisfying dish.
8
rolls25
minutes60
minutesIngredients
– 8 large cabbage leaves
– 1 pound cooked ham, diced
– 1 cup cooked white rice
– 1 small onion, finely chopped
– 2 cloves garlic, minced
– 1 tablespoon olive oil
– 1 (15 ounce) can tomato sauce
– 1 cup chicken broth
– 1 teaspoon dried thyme
– 1/2 teaspoon black pepper
Instructions
1. Bring a large pot of water to a rolling boil over high heat.
2. Carefully submerge 8 large cabbage leaves in the boiling water and blanch for 2 minutes until pliable.
3. Remove cabbage leaves with tongs and immediately transfer to a bowl of ice water to stop the cooking process.
4. Pat cabbage leaves completely dry with paper towels, being gentle to avoid tearing.
5. Heat 1 tablespoon olive oil in a large skillet over medium heat until shimmering.
6. Add 1 small finely chopped onion and cook for 4 minutes until translucent.
7. Stir in 2 cloves minced garlic and cook for 1 minute until fragrant.
8. Add 1 pound diced cooked ham to the skillet and cook for 3 minutes until lightly browned.
9. Remove skillet from heat and stir in 1 cup cooked white rice, 1 teaspoon dried thyme, and 1/2 teaspoon black pepper.
10. Place approximately 1/2 cup of the ham mixture in the center of each blanched cabbage leaf.
11. Fold the sides of each cabbage leaf inward, then roll tightly from the bottom to form secure packages.
12. Arrange cabbage rolls seam-side down in a single layer in a 9×13 inch baking dish.
13. Pour 1 (15 ounce) can tomato sauce and 1 cup chicken broth evenly over the cabbage rolls.
14. Cover baking dish tightly with aluminum foil and bake at 375°F for 45 minutes.
15. Remove foil and continue baking for 15 minutes until sauce is bubbly and cabbage is tender.
16. Let cabbage rolls rest for 5 minutes before serving to allow flavors to meld.
During my first bite, I’m always struck by how the tender cabbage gives way to the savory ham filling, with the tomato sauce adding just the right amount of tangy sweetness. Don’t be surprised if these become your new go-to comfort food – they reheat beautifully for lunches and taste even better the next day when the flavors have fully developed.
Nutritious Ham and Lentil Salad
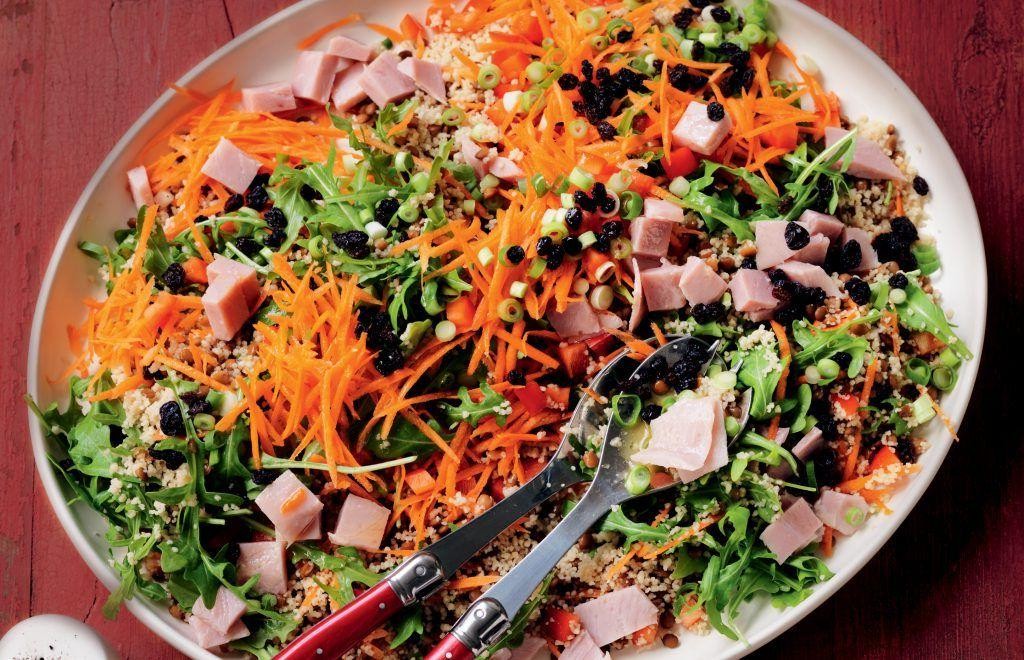
Zesty yet comforting, this ham and lentil salad has become my go-to lunch prep recipe ever since I discovered how perfectly the smoky ham complements the earthy lentils. I first threw this together during a busy week when I needed something nutritious that could last several days in the fridge without getting soggy. Now it’s my secret weapon for healthy eating that actually satisfies those savory cravings.
4
servings20
minutes25
minutesIngredients
– 1 cup dried green lentils
– 4 cups water
– 1 tsp salt
– 8 oz cooked ham, diced
– 1/2 cup red onion, finely chopped
– 1/2 cup celery, diced
– 1/4 cup fresh parsley, chopped
– 3 tbsp olive oil
– 2 tbsp red wine vinegar
– 1 tbsp Dijon mustard
– 1/2 tsp black pepper
Instructions
1. Rinse 1 cup dried green lentils under cold running water in a fine-mesh strainer to remove any debris.
2. Combine rinsed lentils, 4 cups water, and 1 tsp salt in a medium saucepan over high heat.
3. Bring the lentil mixture to a rolling boil, then reduce heat to maintain a gentle simmer.
4. Simmer lentils uncovered for 20-25 minutes, stirring occasionally, until tender but still firm to the bite.
5. Drain cooked lentils thoroughly in a colander and spread them in a thin layer on a baking sheet to cool completely for 15 minutes.
6. Dice 8 oz cooked ham into 1/4-inch cubes while lentils cool.
7. Finely chop 1/2 cup red onion and dice 1/2 cup celery into 1/4-inch pieces.
8. Whisk together 3 tbsp olive oil, 2 tbsp red wine vinegar, 1 tbsp Dijon mustard, and 1/2 tsp black pepper in a large mixing bowl until emulsified.
9. Add cooled lentils, diced ham, chopped red onion, diced celery, and 1/4 cup chopped fresh parsley to the dressing bowl.
10. Toss all ingredients gently but thoroughly until evenly coated with dressing.
11. Cover the bowl with plastic wrap and refrigerate for at least 30 minutes to allow flavors to meld. During this chilling time, the lentils will absorb the dressing beautifully while maintaining their texture.
12. Give the salad one final gentle toss before serving to redistribute the dressing.Delightfully textured with firm lentils against the tender ham chunks, this salad offers a satisfying chew that holds up beautifully for days. The mustard-vinegar dressing cuts through the richness while the celery provides that essential fresh crunch. I love serving it over crisp romaine leaves or stuffing it into pita pockets for an easy handheld lunch that never fails to impress.
Delightful Ham and Egg Breakfast Burritos

Finally, after years of rushed breakfasts, I’ve perfected the ultimate grab-and-go morning solution that even my sleepy-eyed kids will happily devour. These ham and egg breakfast burritos have become our family’s weekday hero, wrapping everything we love about a hearty breakfast in one portable package that I can make ahead on Sunday evenings.
5
burritos15
minutes15
minutesIngredients
– 4 large flour tortillas (10-inch)
– 6 large eggs
– 1 cup diced cooked ham
– 1 cup shredded cheddar cheese
– 1/2 cup diced bell peppers
– 1/4 cup diced onion
– 1 tablespoon olive oil
– 1/2 teaspoon salt
– 1/4 teaspoon black pepper
Instructions
1. Heat 1 tablespoon olive oil in a large non-stick skillet over medium heat until shimmering.
2. Add 1/2 cup diced bell peppers and 1/4 cup diced onion to the skillet, cooking for 4-5 minutes until softened.
3. Crack 6 large eggs into a medium bowl and whisk vigorously until fully combined and slightly frothy.
4. Pour the whisked eggs into the skillet with the vegetables, stirring constantly with a spatula.
5. Add 1 cup diced cooked ham to the egg mixture, continuing to stir as the eggs cook.
6. Sprinkle 1/2 teaspoon salt and 1/4 teaspoon black pepper evenly over the cooking eggs.
7. Cook the egg mixture for 3-4 minutes, scraping the bottom of the skillet frequently to prevent sticking, until eggs are fully set but still moist.
8. Remove the skillet from heat and immediately stir in 1 cup shredded cheddar cheese until melted and evenly distributed.
9. Warm 4 large flour tortillas in a dry skillet over medium heat for 30 seconds per side until pliable.
10. Divide the egg and ham mixture evenly among the center of each warmed tortilla.
11. Fold the bottom edge of each tortilla up over the filling, then fold in the sides and roll tightly away from you to form secure burritos.
12. Serve immediately or wrap each burrito tightly in foil for later reheating. The creamy melted cheese binds everything together beautifully, while the diced ham adds savory depth that pairs perfectly with the fluffy scrambled eggs. I love serving these with a side of fresh salsa for dipping, or you can slice them in half diagonally to show off the colorful filling inside.
Conclusion
Creative possibilities abound with these 22 delicious leftover ham recipes! From comforting soups to elegant dinners, there’s something for every taste. We hope these ideas inspire your next kitchen adventure. Don’t forget to share your favorite recipe in the comments below and pin this article to your Pinterest boards for easy reference. Happy cooking!


