Venture beyond basic hot dogs and discover camp cooking that will transform your outdoor meals! Whether you’re craving quick one-pot dinners, hearty comfort food after a long hike, or impressive dishes to share around the fire, these recipes turn simple ingredients into unforgettable feasts. Get ready to elevate your camp kitchen game—your next adventure in flavor starts right here.
Smoky Campfire Chili

Ready to turn your kitchen into a flavor bonfire? This smoky campfire chili is basically a hug in a bowl with a mischievous wink—the kind of dish that makes you want to build a fort and tell ghost stories while it simmers. It’s hearty, a little bit spicy, and guaranteed to make your taste buds do a happy dance around the imaginary campfire.
6
servings15
minutes75
minutesIngredients
– 2 tablespoons extra-virgin olive oil
– 1 large yellow onion, finely diced
– 4 cloves garlic, minced
– 1 pound grass-fed ground beef
– 2 tablespoons chili powder
– 1 teaspoon smoked paprika
– 1 teaspoon ground cumin
– 1/2 teaspoon cayenne pepper
– 1 (28-ounce) can fire-roasted diced tomatoes, undrained
– 1 (15-ounce) can dark red kidney beans, rinsed and drained
– 1 (15-ounce) can black beans, rinsed and drained
– 2 cups beef broth
– 1/2 cup dark beer (such as stout)
– 1 tablespoon Worcestershire sauce
– 1 teaspoon fine sea salt
– 1/2 teaspoon freshly cracked black pepper
Instructions
1. Heat 2 tablespoons extra-virgin olive oil in a large Dutch oven over medium-high heat until shimmering.
2. Add 1 large yellow onion, finely diced, and sauté for 5–7 minutes until translucent and lightly golden.
3. Stir in 4 cloves garlic, minced, and cook for 1 minute until fragrant.
4. Add 1 pound grass-fed ground beef, breaking it up with a wooden spoon, and cook for 6–8 minutes until browned and crumbled.
5. Sprinkle in 2 tablespoons chili powder, 1 teaspoon smoked paprika, 1 teaspoon ground cumin, and 1/2 teaspoon cayenne pepper, stirring for 1 minute to toast the spices.
6. Pour in 1 (28-ounce) can fire-roasted diced tomatoes, undrained, scraping the bottom to release any browned bits.
7. Add 1 (15-ounce) can dark red kidney beans, rinsed and drained, and 1 (15-ounce) can black beans, rinsed and drained.
8. Stir in 2 cups beef broth, 1/2 cup dark beer, 1 tablespoon Worcestershire sauce, 1 teaspoon fine sea salt, and 1/2 teaspoon freshly cracked black pepper.
9. Bring the chili to a boil, then reduce heat to low, cover, and simmer for 45 minutes, stirring occasionally.
10. Uncover and simmer for an additional 15 minutes until the chili thickens slightly. Seriously, this chili is so cozy it practically comes with its own flannel shirt—thick, smoky, and packed with layers of spice that mellow into a deep, soul-warming finish. Serve it over cornbread, topped with sharp cheddar, or alongside a crisp salad for a meal that’s unapologetically delicious.
Savory Dutch Oven Bread
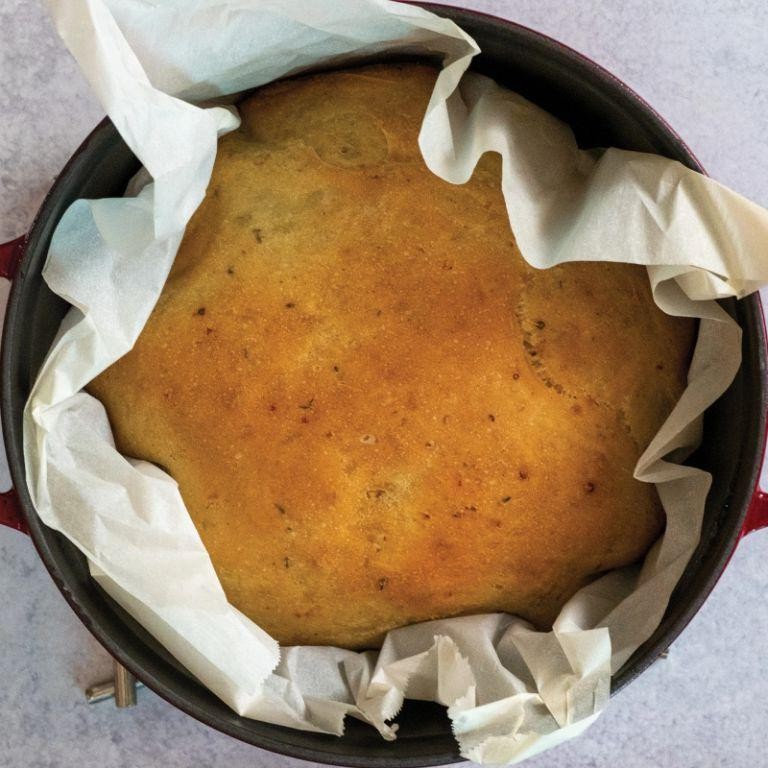
Tired of bread that requires more commitment than your last relationship? This no-knead Dutch oven masterpiece delivers that artisanal bakery crust with the effort level of a lazy Sunday morning. Seriously, your future self will thank you for this life-changing loaf.
1
loaf30
minutes50
minutesIngredients
– 3 ¼ cups (390g) unbleached bread flour
– 1 ½ tsp (9g) fine sea salt
– ¼ tsp (1g) instant yeast
– 1 ⅔ cups (390ml) filtered water at 90°F
– 1 tbsp (15ml) extra virgin olive oil
– 2 tbsp (16g) cornmeal for dusting
Instructions
1. In a large mixing bowl, whisk together 3 ¼ cups unbleached bread flour, 1 ½ tsp fine sea salt, and ¼ tsp instant yeast until thoroughly combined.
2. Pour 1 ⅔ cups filtered water at 90°F into the dry ingredients and mix with a wooden spoon until no dry flour remains, about 1 minute.
3. Cover the bowl tightly with plastic wrap and let rest at room temperature (68-72°F) for 12-18 hours until the dough has doubled in size and surface appears bubbly.
4. Lightly flour a work surface and turn the dough out, folding it over itself 4-6 times to form a loose ball.
5. Place a clean kitchen towel on a baking sheet and sprinkle with 2 tbsp cornmeal.
6. Transfer the shaped dough to the prepared towel, seam side down, and cover with another floured towel for 2 hours.
7. During the final 30 minutes of rising, place your Dutch oven with lid into the cold oven and preheat to 450°F.
8. Carefully remove the hot Dutch oven using oven mitts and lift the lid.
9. Gently invert the risen dough into the preheated Dutch oven, seam side up.
10. Drizzle 1 tbsp extra virgin olive oil over the dough surface and immediately replace the lid.
11. Bake covered at 450°F for 30 minutes until the crust is pale but firm.
12. Remove the lid and continue baking for 15-20 minutes until the crust develops a deep golden-brown color and internal temperature reaches 210°F.
13. Transfer the bread to a wire rack and let cool completely for 2 hours before slicing.
Ethereal crust gives way to an open, airy crumb that’s perfect for sopping up soups or creating the ultimate avocado toast. The chewy interior and crackling exterior make this bread equally suited for fancy cheese boards or simple butter slathering—just try not to eat the entire loaf in one sitting (we won’t judge if you do).
Grilled Cast Iron Skillet Breakfast Hash

Kickstart your morning with a sizzling skillet sensation that’ll make your taste buds do a happy dance—this grilled cast iron breakfast hash transforms humble ingredients into a crispy, savory masterpiece that even the grumpiest morning person can’t resist. Forget boring breakfast routines; we’re turning up the heat with a dish that’s part comfort food, part culinary adventure, all served up with a side of irresistible crunch. It’s the weekend warrior of breakfasts, ready to conquer your cravings with every golden-brown bite.
2
servings15
minutes27
minutesIngredients
- 2 tablespoons clarified butter
- 1 large yellow onion, finely diced
- 2 medium Yukon Gold potatoes, peeled and cut into ½-inch cubes
- 1 red bell pepper, seeded and diced into ¼-inch pieces
- 4 ounces smoked pork sausage, casing removed and crumbled
- 2 cloves garlic, minced
- ½ teaspoon smoked paprika
- ¼ teaspoon freshly cracked black pepper
- 2 tablespoons extra virgin olive oil
- 4 pasture-raised eggs, lightly beaten
- 2 tablespoons chopped fresh chives
- ¼ cup shredded sharp cheddar cheese
Instructions
- Preheat your grill to medium-high heat, maintaining a consistent 400°F temperature.
- Place a 10-inch cast iron skillet on the grill grates and heat for 5 minutes until thoroughly warmed.
- Add clarified butter to the hot skillet and swirl to coat the surface evenly.
- Sauté diced yellow onion for 3-4 minutes until translucent and fragrant.
- Add potato cubes and cook for 8 minutes, stirring occasionally until edges begin to brown.
- Incorporate diced red bell pepper and crumbled smoked pork sausage, cooking for 5 minutes until sausage is lightly browned.
- Stir in minced garlic and cook for 1 minute until aromatic but not burned.
- Sprinkle smoked paprika and freshly cracked black pepper over the hash mixture, tossing to distribute evenly.
- Drizzle extra virgin olive oil around the perimeter of the skillet to crisp the edges.
- Create four small wells in the hash mixture using the back of a spoon.
- Pour lightly beaten pasture-raised eggs into the wells, dividing equally.
- Cover the skillet with a lid or aluminum foil and cook for 4-5 minutes until egg whites are set but yolks remain slightly runny.
- Sprinkle shredded sharp cheddar cheese over the entire surface and cook uncovered for 1 minute until melted.
- Remove skillet from heat and garnish with chopped fresh chives.
A symphony of textures awaits—crispy potato cubes mingle with juicy sausage bits while the velvety eggs create pockets of richness that’ll have you scraping the skillet clean. The smoky paprika adds depth to each forkful, making this hash equally glorious served straight from the pan or piled high on toasted sourdough. For maximum enjoyment, top with a drizzle of hot sauce and watch as your ordinary breakfast transforms into an extraordinary start to any day.
Zesty Lemon Herb Grilled Chicken Skewers

Dazzling your taste buds doesn’t require a culinary degree—just these outrageously good Zesty Lemon Herb Grilled Chicken Skewers that’ll make your backyard the hottest ticket in town. Seriously, these skewers are so flavor-packed they might just upstage your main course ambitions and become the star of every summer soirée.
8
skewers140
minutes14
minutesIngredients
- 1.5 lbs boneless, skinless chicken thighs, cut into 1-inch cubes
- 1/4 cup extra virgin olive oil
- 3 tbsp freshly squeezed lemon juice
- 2 tbsp fresh oregano leaves, finely chopped
- 1 tbsp fresh thyme leaves
- 2 tsp lemon zest, finely grated
- 3 garlic cloves, minced
- 1 tsp kosher salt
- 1/2 tsp freshly cracked black pepper
- 8 wooden skewers, soaked in water for 30 minutes
Instructions
- Combine 1/4 cup extra virgin olive oil, 3 tbsp freshly squeezed lemon juice, 2 tbsp fresh oregano leaves, 1 tbsp fresh thyme leaves, 2 tsp lemon zest, 3 minced garlic cloves, 1 tsp kosher salt, and 1/2 tsp freshly cracked black pepper in a large mixing bowl.
- Add 1.5 lbs of cubed chicken thighs to the marinade, ensuring each piece is thoroughly coated.
- Cover the bowl with plastic wrap and refrigerate for exactly 2 hours—this marinating time allows the acid to tenderize while the herbs infuse maximum flavor.
- Thread the marinated chicken pieces onto 8 pre-soaked wooden skewers, leaving 1/4-inch space between each piece for even cooking.
- Preheat your grill to medium-high heat (425°F), brushing the grates with oil to prevent sticking.
- Place the skewers on the hot grill at a 45-degree angle to create perfect grill marks.
- Grill for 6-7 minutes per side, flipping only once when the chicken releases easily from the grates.
- Check for doneness using an instant-read thermometer inserted into the thickest piece—it should register 165°F.
- Transfer the skewers to a clean platter and let rest for 5 minutes before serving to allow juices to redistribute.
Lusciously tender with a vibrant citrus punch, these skewers deliver that perfect char-kissed exterior giving way to incredibly juicy interiors. The herbal notes dance beautifully with the bright lemon zing, creating a symphony of flavors that pairs spectacularly with a crisp summer salad or tucked into warm pita bread with tzatziki for a Mediterranean twist.
Fluffy Sleeping Bag Pancakes

Darlings, have you ever wished your breakfast could give you a warm, comforting hug? Meet Fluffy Sleeping Bag Pancakes—the cozy, cloud-like creation that wraps your morning in deliciousness. These aren’t just pancakes; they’re edible comfort with a personality as bubbly as their perfect golden-brown bubbles.
8
portions10
minutes20
minutesIngredients
– 1½ cups all-purpose flour, sifted
– 2 tablespoons granulated sugar
– 2 teaspoons baking powder
– ½ teaspoon fine sea salt
– 1 large pasture-raised egg, lightly beaten
– 1¼ cups whole milk, at room temperature
– 3 tablespoons clarified butter, melted and cooled
– 1 teaspoon pure vanilla extract
– Additional clarified butter for griddling
Instructions
1. In a large mixing bowl, whisk together the sifted all-purpose flour, granulated sugar, baking powder, and fine sea salt until fully incorporated.
2. In a separate bowl, combine the lightly beaten pasture-raised egg, whole milk, melted clarified butter, and pure vanilla extract, whisking until emulsified.
3. Pour the wet ingredients into the dry ingredients, folding gently with a spatula until just combined—do not overmix; a few lumps are ideal for fluffiness.
4. Preheat a non-stick griddle or skillet over medium heat (350°F), brushing the surface lightly with additional clarified butter.
5. Ladle ¼-cup portions of batter onto the griddle, spacing them 2 inches apart to allow for spreading.
6. Cook for 2–3 minutes, or until bubbles form uniformly across the surface and the edges appear set and matte.
7. Flip each pancake using a thin spatula, cooking for an additional 1–2 minutes until the underside is golden-brown and springs back lightly to touch.
8. Transfer cooked pancakes to a wire rack in a single layer to prevent steaming and maintain crisp edges.
9. Repeat steps 5–8 with remaining batter, brushing the griddle with clarified butter between batches. Lightly stack pancakes like folded blankets to keep them warm. Let these pillowy wonders cradle your favorite toppings—their delicate crumb and buttery richness make them perfect for drizzling with maple syrup or sandwiching with fresh berries for a handheld breakfast burrito-style treat.
Herbed Foil Pack Veggies

Wondering how to transform those languishing vegetables in your crisper into a flavor-packed side dish that practically cooks itself? These herbed foil pack veggies are your kitchen’s new superhero—no fancy skills required, just some foil-wrapped magic that delivers restaurant-quality results with minimal cleanup. Seriously, your baking sheet might start feeling neglected.
5
portions15
minutes25
minutesIngredients
– 2 cups rainbow carrots, peeled and cut into ½-inch coins
– 1 large red onion, sliced into ¼-inch half-moons
– 1 pound baby potatoes, halved
– 1 large zucchini, cut into ½-inch half-moons
– 3 tablespoons extra virgin olive oil
– 2 tablespoons clarified butter, melted
– 3 garlic cloves, minced
– 1 tablespoon fresh rosemary, finely chopped
– 1 tablespoon fresh thyme leaves
– 1 teaspoon kosher salt
– ½ teaspoon freshly cracked black pepper
– ¼ teaspoon red pepper flakes
Instructions
1. Preheat your oven to 425°F and position one rack in the center.
2. Combine rainbow carrots, red onion, baby potatoes, and zucchini in a large mixing bowl.
3. Drizzle extra virgin olive oil and clarified butter over the vegetables, tossing thoroughly to coat every surface.
4. Add minced garlic, chopped rosemary, thyme leaves, kosher salt, black pepper, and red pepper flakes to the bowl.
5. Toss the vegetable mixture for 2 full minutes until herbs and seasonings are evenly distributed.
6. Tear four 12-inch squares of heavy-duty aluminum foil and arrange them on a clean work surface.
7. Divide the vegetable mixture equally among the four foil squares, placing each portion in the center.
8. Bring opposite edges of each foil square together and fold down three times to create a tight seal.
9. Fold the remaining open ends inward twice to form completely sealed packets. (Tip: Leave a small air pocket inside each packet to allow steam circulation.)
10. Arrange the foil packets in a single layer on a baking sheet.
11. Bake at 425°F for 25 minutes on the center rack. (Tip: Rotate the baking sheet halfway through cooking for even heat distribution.)
12. Carefully open one packet after 25 minutes to check doneness—vegetables should be tender when pierced with a fork but still retain slight crispness.
13. If additional cooking is needed, reseal the packet and return to oven for 3-5 minute increments until desired tenderness is achieved.
14. Let the packets rest unopened for 3 minutes before serving to allow flavors to meld. (Tip: Use oven mitts when opening packets as escaping steam will be extremely hot.)
Each bite delivers that perfect textural contrast—tender potatoes against crisp-tender zucchini with caramelized onion sweetness cutting through the herbaceous garlic notes. Try serving these straight from the foil packets at your next backyard gathering, or elevate weeknight dinners by topping with crumbled feta and toasted pine nuts for Mediterranean flair.
Cheesy Fire-Roasted Quesadillas

Zesty doesn’t even begin to cover these cheesy fire-roasted quesadillas—they’re basically a flavor fiesta wrapped in a crispy tortilla hug, guaranteed to make your Tuesday night feel like a Cinco de Mayo celebration.
5
quesadillas15
minutes28
minutesIngredients
– 4 large flour tortillas (10-inch diameter)
– 2 cups shredded Monterey Jack cheese
– 1 cup fire-roasted corn kernels
– ½ cup diced fire-roasted poblano peppers
– ¼ cup finely chopped red onion
– 2 tablespoons clarified butter
– ½ teaspoon smoked paprika
– ¼ teaspoon ground cumin
– ¼ cup fresh cilantro leaves
– ½ cup crema Mexicana
– 1 lime, cut into wedges
Instructions
1. Heat a large cast-iron skillet over medium heat until a drop of water sizzles immediately.
2. Brush one side of each flour tortilla with clarified butter using a pastry brush.
3. Place one tortilla buttered-side down in the heated skillet.
4. Sprinkle ½ cup shredded Monterey Jack cheese evenly over the tortilla.
5. Distribute ¼ cup fire-roasted corn kernels in a single layer over the cheese.
6. Scatter 2 tablespoons diced fire-roasted poblano peppers across the surface.
7. Sprinkle 1 tablespoon finely chopped red onion over the peppers.
8. Dust with ⅛ teaspoon smoked paprika and a pinch of ground cumin.
9. Top with another tortilla, buttered-side facing up.
10. Cook for 3-4 minutes until the bottom tortilla develops golden-brown spots and the cheese begins melting at the edges.
11. Carefully flip the quesadilla using a wide spatula, supporting the entire structure.
12. Cook for another 3 minutes until the second side achieves equal browning and the cheese is fully melted.
13. Transfer to a cutting board and let rest for 1 minute to set the cheese layer.
14. Repeat the assembly and cooking process with remaining ingredients.
15. Cut each quesadilla into 6 wedges using a sharp chef’s knife with a rocking motion.
16. Garnish with fresh cilantro leaves and drizzle with crema Mexicana.
17. Serve immediately with lime wedges for squeezing. Unbelievably crispy tortillas give way to molten cheese pockets studded with smoky corn and peppers, creating a textural symphony that’ll have you reaching for “just one more wedge.” For maximum drama, stack the wedges vertically on a platter and let guests pull them apart like edible Jenga blocks.
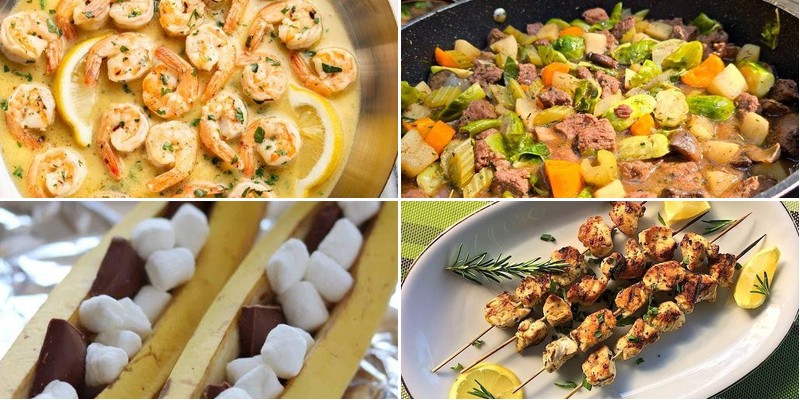
S’mores-Stuffed Banana Boats

Let’s be honest—campfire desserts just got a major glow-up with these s’mores-stuffed banana boats, where gooey marshmallows, melted chocolate, and buttery graham crackers cozy up inside a warm, caramelized banana. It’s like a campfire classic decided to take a tropical vacation, and honestly, we’re all here for it. Just try not to eat the whole batch before your friends catch a whiff of that toasty, chocolatey goodness.
2
bananas10
minutes15
minutesIngredients
- 4 ripe bananas, unpeeled
- 1 cup mini marshmallows
- 1/2 cup semisweet chocolate chips
- 4 graham cracker sheets, finely crushed
- 2 tablespoons unsalted butter, melted
Instructions
- Preheat your oven to 375°F and line a baking sheet with parchment paper.
- Place each unpeeled banana on its side and use a sharp paring knife to slice lengthwise through the peel and flesh, stopping just before cutting through the opposite side.
- Gently pry the slit open to create a pocket in each banana, being careful not to detach the halves.
- Sprinkle 1/4 cup of mini marshmallows evenly into the pocket of each banana.
- Divide 1/2 cup of semisweet chocolate chips equally among the four bananas, scattering them over the marshmallows.
- Drizzle 1/2 tablespoon of melted unsalted butter over the filling in each banana.
- Sprinkle 1 finely crushed graham cracker sheet over the top of each banana’s filling.
- Wrap each banana tightly in aluminum foil, sealing the edges to prevent leakage.
- Place the foil packets on the prepared baking sheet and bake at 375°F for 12–15 minutes, until the banana flesh is soft and the marshmallows are visibly melted.
- Carefully unwrap the foil packets, as steam will release—allow them to cool for 2–3 minutes before handling.
- Serve the bananas directly in their peels, using a spoon to scoop out the warm, blended filling and fruit. Tip: For extra crunch, sprinkle additional crushed graham crackers on top after baking. Tip: If the bananas are very ripe, reduce baking time by 1–2 minutes to avoid mushiness. Tip: For a caramelized edge, briefly broil the unwrapped bananas for 1 minute post-baking.
The result is a delightful mess of creamy banana, stretchy marshmallow, and rich chocolate, all hugged by a buttery, crisp crust. Serve these straight from the foil for a rustic vibe, or fancy them up with a drizzle of salted caramel and a scoop of vanilla bean ice cream—because why should campfires have all the fun?
Campside Garlic Butter Shrimp

Kick off your camping culinary adventures with this garlicky, buttery shrimp that transforms your campsite into a five-star bistro under the stars—no white tablecloth required, but maybe bring extra napkins for the inevitable finger-licking.
3
servings10
minutes5
minutesIngredients
- 1 pound large wild-caught shrimp, peeled and deveined
- 4 tablespoons clarified butter
- 6 garlic cloves, finely minced
- 2 tablespoons freshly squeezed lemon juice
- 1 teaspoon smoked paprika
- 1/4 teaspoon crushed red pepper flakes
- 2 tablespoons chopped fresh parsley
- 1/2 teaspoon kosher salt
- 1/4 teaspoon freshly cracked black pepper
Instructions
- Pat the shrimp completely dry with paper towels to ensure a proper sear.
- Season the shrimp evenly with kosher salt and freshly cracked black pepper.
- Heat a cast-iron skillet over medium-high heat until a drop of water sizzles and evaporates immediately.
- Add clarified butter to the hot skillet and swirl to coat the surface.
- Sear the shrimp in a single layer for 2 minutes until the bottoms turn pink and develop a light crust.
- Flip each shrimp precisely and cook for another 1 minute.
- Add finely minced garlic to the skillet and sauté for 30 seconds until fragrant but not browned.
- Sprinkle smoked paprika and crushed red pepper flakes over the shrimp.
- Deglaze the pan with freshly squeezed lemon juice, scraping up any browned bits from the bottom.
- Remove the skillet from heat and stir in chopped fresh parsley.
- Let the shrimp rest in the pan for 1 minute to allow flavors to meld.
Serve this immediately while it’s gloriously sizzling—the shrimp will be tender with a subtle smokiness from the paprika, while the garlic butter clings to each bite like a flavorful hug. Spoon it over campfire-toasted bread or toss with pre-cooked pasta for an instant gourmet meal that’ll make your fellow campers request seconds before the fire dies down.
Hearty Campfire Stew
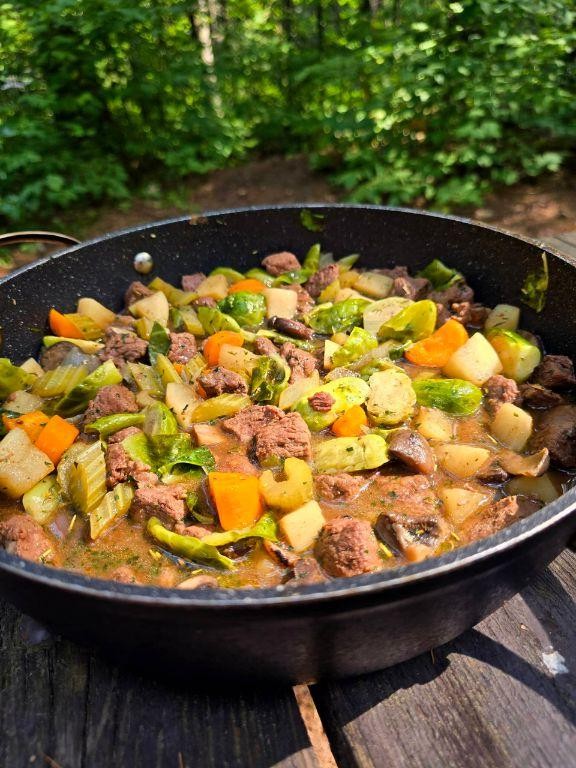
Zesty, smoky, and packed with personality, this campfire stew is basically a hug in a bowl that decided to go on an outdoor adventure. Forget boring dinners—this hearty concoction turns basic ingredients into a flavor fiesta that’ll have your taste buds doing a happy dance around the fire. It’s the ultimate comfort food with a rugged twist, perfect for chilly evenings under the stars.
5
servings20
minutes91
minutesIngredients
– 2 tablespoons extra-virgin olive oil
– 1 large yellow onion, finely diced
– 3 cloves garlic, minced
– 1 pound beef chuck roast, cut into 1-inch cubes
– 4 cups beef stock
– 2 large carrots, peeled and sliced into 1/2-inch rounds
– 2 medium Yukon Gold potatoes, peeled and diced into 3/4-inch pieces
– 1 tablespoon tomato paste
– 1 teaspoon smoked paprika
– 1/2 teaspoon freshly cracked black pepper
– 1 bay leaf
– 2 tablespoons all-purpose flour
– 1/4 cup cold water
– 1 teaspoon kosher salt
Instructions
1. Heat the extra-virgin olive oil in a large Dutch oven over medium-high heat until it shimmers, about 2 minutes.
2. Add the finely diced yellow onion and sauté until translucent and lightly golden, approximately 5–7 minutes.
3. Stir in the minced garlic and cook for 1 minute until fragrant, being careful not to let it burn.
4. Add the beef chuck roast cubes in a single layer and sear until browned on all sides, about 8–10 minutes total.
5. Sprinkle the all-purpose flour over the beef and onions, stirring constantly to coat and cook for 1 minute to eliminate the raw flour taste.
6. Pour in the beef stock gradually while scraping the bottom of the pot to deglaze and incorporate any browned bits.
7. Add the tomato paste, smoked paprika, freshly cracked black pepper, and bay leaf, stirring to combine fully.
8. Bring the mixture to a boil, then reduce the heat to low, cover, and simmer for 45 minutes to tenderize the beef.
9. Stir in the sliced carrots and diced Yukon Gold potatoes, ensuring they are submerged in the liquid.
10. Cover and continue simmering for another 30 minutes until the vegetables are fork-tender.
11. In a small bowl, whisk the cold water with the kosher salt until dissolved, then stir this slurry into the stew to thicken it slightly.
12. Simmer uncovered for 5 more minutes until the stew reaches your desired consistency, then remove the bay leaf before serving.
Gloriously rich and chunky, this stew boasts tender beef that melts in your mouth alongside sweet carrots and creamy potatoes. Serve it piping hot in rustic bowls with crusty bread for dipping, or ladle it over a bed of buttery mashed potatoes for extra indulgence—either way, it’s a cozy masterpiece that’ll make you wish every meal came with a campfire view.
Pine Nut and Pesto Campfire Pasta
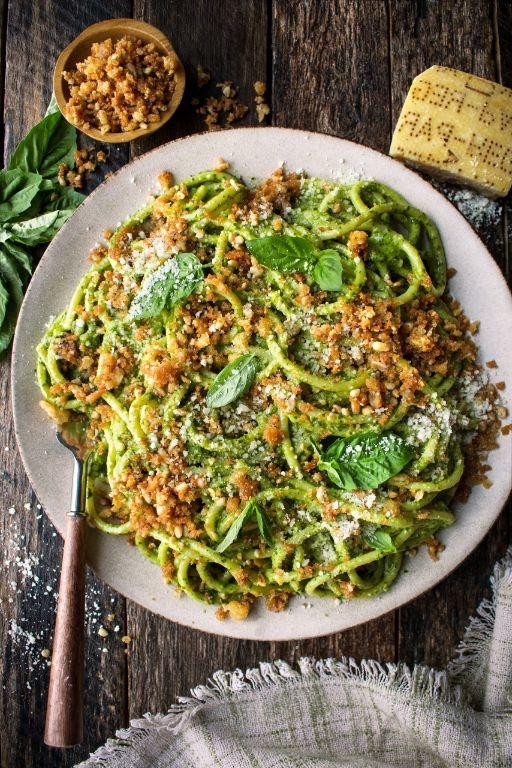
Oh, the great outdoors—where everything tastes better, especially when it involves minimal cleanup and maximum flavor. This pine nut and pesto campfire pasta is your ticket to gourmet wilderness dining, proving you don’t need a fancy kitchen to eat like a foodie (just a sturdy pot and a sense of adventure).
4
servings10
minutes22
minutesIngredients
– 12 ounces dried linguine pasta
– 1/4 cup extra-virgin olive oil
– 3 cloves garlic, thinly sliced
– 1/2 cup toasted pine nuts
– 1/2 cup basil pesto
– 1/4 cup grated Parmigiano-Reggiano cheese
– 1/4 teaspoon freshly cracked black pepper
– 4 cups water
– 1 teaspoon fine sea salt
Instructions
1. Place a large cast-iron Dutch oven over a stable campfire grate, allowing it to preheat for 5 minutes over medium-high heat.
2. Pour 4 cups of water into the Dutch oven and bring to a rolling boil, which should take approximately 8–10 minutes.
3. Add 1 teaspoon of fine sea salt and 12 ounces of dried linguine pasta to the boiling water, stirring immediately to prevent sticking.
4. Cook the pasta for 9–11 minutes, stirring occasionally, until it reaches an al dente texture with a slight firmness to the bite.
5. Carefully drain the pasta into a heatproof container, reserving 1/4 cup of the starchy pasta water for later use.
6. Wipe the Dutch oven clean with a camp towel and return it to the fire, reducing the heat to medium.
7. Pour 1/4 cup of extra-virgin olive oil into the pot and heat until it shimmers, about 1–2 minutes.
8. Add 3 cloves of thinly sliced garlic and sauté for 45–60 seconds until fragrant and lightly golden, stirring constantly to avoid burning.
9. Tip: Toasting the garlic just until golden unlocks its sweetness without bitterness—perfect for balancing the pesto’s herbal notes.
10. Stir in 1/2 cup of toasted pine nuts and cook for an additional 1 minute to warm through.
11. Add the drained pasta back to the pot, followed by 1/2 cup of basil pesto and the reserved 1/4 cup of pasta water.
12. Toss everything together vigorously using campfire-safe tongs until the pasta is evenly coated and glossy.
13. Tip: Reserved pasta water acts as a natural emulsifier, helping the pesto cling to every strand for a restaurant-worthy finish.
14. Remove the pot from the heat and sprinkle in 1/4 cup of grated Parmigiano-Reggiano cheese and 1/4 teaspoon of freshly cracked black pepper.
15. Toss once more to incorporate the cheese and pepper evenly throughout the dish.
16. Tip: For an extra layer of flavor, toast the pine nuts in a dry skillet over the fire beforehand until golden—this enhances their nutty depth.
Just imagine twirling those glossy linguine strands, each bite bursting with the bright, herbal punch of pesto and the buttery crunch of pine nuts. The al dente pasta holds its own against the rich sauce, while a sprinkle of Parmigiano-Reggiano adds a salty sharpness that sings under the stars. Serve it straight from the Dutch oven with crusty bread for mopping up every last drop—because in the wild, there’s no such thing as leftovers.
Sweet and Spicy Sausage Kebabs

Craving something that’ll make your taste buds do a happy dance while simultaneously questioning your life choices? These sweet and spicy sausage kebabs are here to deliver that perfect balance of fiery kick and caramelized sweetness that’ll have you reaching for “just one more” until suddenly the platter is empty.
8
kebabs20
minutes12
minutesIngredients
– 1 pound smoked andouille sausage, sliced into 1-inch coins
– 2 large bell peppers (1 red, 1 yellow), cut into 1.5-inch squares
– 1 large sweet onion, cut into 1-inch wedges
– 1/4 cup pure maple syrup
– 2 tablespoons Sriracha sauce
– 1 tablespoon apple cider vinegar
– 2 teaspoons smoked paprika
– 1/2 teaspoon garlic powder
– 1/4 teaspoon cayenne pepper
– 2 tablespoons extra virgin olive oil
– 8 (10-inch) bamboo skewers, soaked in water for 30 minutes
Instructions
1. Preheat your grill to medium-high heat, approximately 400°F, ensuring even cooking surface temperature.
2. Thread sausage coins, bell pepper squares, and onion wedges alternately onto soaked bamboo skewers, leaving 1-inch handles at both ends for easy turning.
3. Whisk together maple syrup, Sriracha sauce, apple cider vinegar, smoked paprika, garlic powder, and cayenne pepper in a small bowl until fully emulsified.
4. Brush kebabs generously with extra virgin olive oil to prevent sticking and promote caramelization.
5. Place kebabs on preheated grill and cook for 4-6 minutes per side, rotating once grill marks appear.
6. Baste kebabs with the maple-Sriracha glaze during the final 2 minutes of cooking, allowing the sugars to caramelize without burning.
7. Transfer cooked kebabs to a clean platter and let rest for 3 minutes before serving to allow juices to redistribute.
Zesty doesn’t even begin to cover the flavor explosion here—the smoky sausage gets beautifully glazed while the vegetables maintain a satisfying crunch. Serve these beauties over cilantro-lime rice or stuff them into warm flour tortillas for an unexpected twist that’ll make your weeknight dinner feel like a backyard fiesta.
Rustic Tomato Basil Camp Soup

Just when you thought canned soup couldn’t get any more exciting, we’re about to transform that humble pantry staple into a culinary masterpiece that’ll make your taste buds do a happy dance. Forget boring lunch breaks—this rustic tomato basil camp soup is about to become your new go-to comfort food with personality plus!
2
servings15
minutes33
minutesIngredients
- 2 tablespoons extra virgin olive oil
- 1 large yellow onion, finely diced
- 3 cloves garlic, minced
- 2 (14.5-ounce) cans fire-roasted diced tomatoes
- 4 cups vegetable broth
- 1/2 cup heavy cream
- 1/4 cup fresh basil leaves, chiffonade-cut
- 1 teaspoon kosher salt
- 1/2 teaspoon freshly cracked black pepper
- 1/4 teaspoon red pepper flakes
Instructions
- Heat 2 tablespoons extra virgin olive oil in a large Dutch oven over medium heat until shimmering, about 2 minutes.
- Add 1 large finely diced yellow onion and sauté until translucent and fragrant, approximately 5-7 minutes, stirring frequently with a wooden spoon.
- Stir in 3 cloves minced garlic and cook for exactly 1 minute until aromatic but not browned.
- Pour in 2 cans fire-roasted diced tomatoes with their juices, scraping any browned bits from the bottom of the pot.
- Add 4 cups vegetable broth, 1 teaspoon kosher salt, 1/2 teaspoon freshly cracked black pepper, and 1/4 teaspoon red pepper flakes.
- Bring the mixture to a rolling boil over high heat, then immediately reduce to a gentle simmer.
- Cover and simmer for 20 minutes to allow flavors to meld completely.
- Remove from heat and carefully blend the soup until smooth using an immersion blender, holding the blender at a 45-degree angle to prevent splashing.
- Stir in 1/2 cup heavy cream until fully incorporated and the soup turns a rich coral color.
- Fold in 1/4 cup chiffonade-cut fresh basil leaves just before serving to maintain their vibrant green color and fresh aroma.
Unbelievably velvety with a subtle smoky undertone from the fire-roasted tomatoes, this soup delivers bright acidity balanced by the creamy richness. The fresh basil provides aromatic bursts that cut through the richness perfectly. Try serving it in hollowed-out bread bowls for the ultimate cozy meal, or pair it with sharp grilled cheese sandwiches for that classic comfort food duo that never disappoints.
Citrus-Marinated Campfire Fish
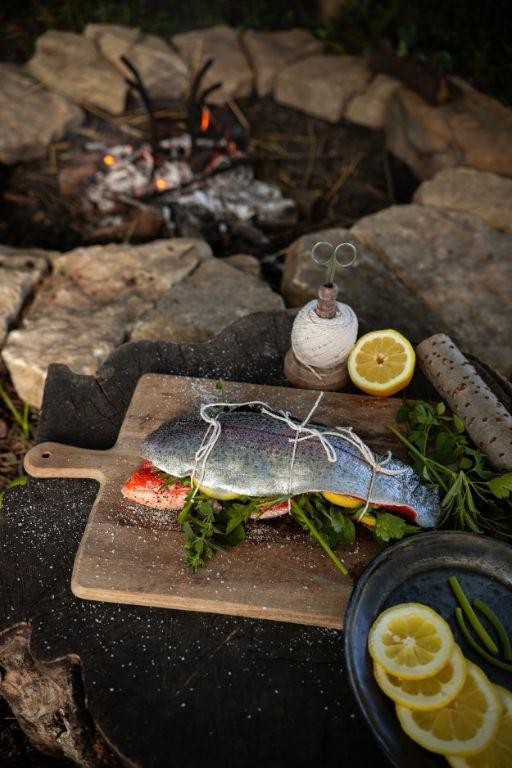
Crisp autumn evenings were practically invented for this citrus-marinated campfire fish—it’s the kind of recipe that turns a simple campfire into a five-star dining experience, minus the stuffy dress code and overpriced wine list.
2
portions35
minutes12
minutesIngredients
- 1 lb firm white fish fillets (such as cod or halibut)
- 1/4 cup freshly squeezed orange juice
- 2 tbsp freshly squeezed lime juice
- 1 tbsp extra-virgin olive oil
- 1 tsp finely minced garlic
- 1/2 tsp smoked paprika
- 1/4 tsp sea salt
- 1/8 tsp freshly cracked black pepper
- 1 tbsp chopped fresh cilantro
- Heavy-duty aluminum foil
Instructions
- Combine 1/4 cup freshly squeezed orange juice, 2 tbsp freshly squeezed lime juice, 1 tbsp extra-virgin olive oil, 1 tsp finely minced garlic, 1/2 tsp smoked paprika, 1/4 tsp sea salt, and 1/8 tsp freshly cracked black pepper in a shallow dish.
- Place 1 lb firm white fish fillets in the marinade, ensuring they are fully coated.
- Cover the dish and refrigerate for exactly 30 minutes to allow the acids to gently tenderize the fish without overcooking it.
- Preheat a campfire grill grate to medium-high heat (approximately 400°F) while the fish marinates.
- Tear two 12-inch sheets of heavy-duty aluminum foil and lightly brush the center of each with extra-virgin olive oil.
- Remove the fish from the marinade, letting excess liquid drip off, and place the fillets in the center of the oiled foil.
- Fold the foil over the fish, crimping the edges tightly to create a sealed packet that will trap steam and infuse flavor.
- Place the foil packets directly on the preheated campfire grill grate.
- Cook for 10–12 minutes, flipping the packets once halfway through, until the fish flakes easily with a fork and reaches an internal temperature of 145°F.
- Carefully open the foil packets (watch for escaping steam) and sprinkle the fish with 1 tbsp chopped fresh cilantro.
The fish emerges flaky and moist, with a bright citrus tang that cuts through the smoky campfire essence. Serve it straight from the foil with charred corn or tucked into warm tortillas for a handheld feast under the stars.
Chocolatey Skillet Brownie Delight
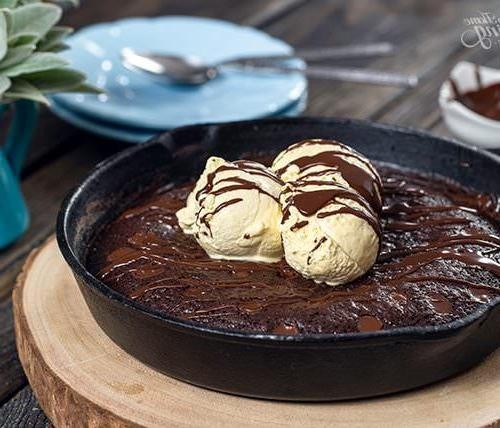
Let’s be real—when chocolate cravings hit with the force of a toddler demanding snacks, you need a dessert that’s ridiculously easy, gloriously gooey, and ready to devour straight from the skillet. This Chocolatey Skillet Brownie Delight is your emergency chocolate fix, baked to fudgy perfection in one pan, because who has time for extra dishes when molten chocolate is calling?
8
servings15
minutes25
minutesIngredients
- 1 cup high-quality Dutch-process cocoa powder
- 1 ½ cups unbleached all-purpose flour
- 1 cup unsalted European-style butter, melted and cooled slightly
- 2 cups granulated cane sugar
- 4 large pasture-raised eggs, lightly beaten
- 2 teaspoons pure vanilla extract
- ½ teaspoon fine sea salt
- 1 cup bittersweet chocolate chunks (70% cacao)
- ½ cup toasted pecans, roughly chopped
Instructions
- Preheat your oven to 350°F and lightly grease a 10-inch cast-iron skillet with butter.
- Whisk together the Dutch-process cocoa powder, unbleached all-purpose flour, and fine sea salt in a medium bowl until no lumps remain.
- In a separate large bowl, combine the melted European-style butter and granulated cane sugar, stirring vigorously for 2 minutes until the mixture is pale and slightly thickened.
- Add the lightly beaten pasture-raised eggs one at a time, mixing thoroughly after each addition until fully incorporated.
- Stir in the pure vanilla extract until the mixture is smooth and glossy.
- Gently fold the dry ingredients into the wet mixture using a spatula, mixing just until combined to avoid overworking the batter.
- Fold in the bittersweet chocolate chunks and toasted pecans until evenly distributed throughout the batter.
- Transfer the batter to the prepared skillet, spreading it evenly with the spatula.
- Bake for 22–25 minutes, until the edges are set and the center appears slightly underdone but not liquid.
- Remove the skillet from the oven and let it cool on a wire rack for 10 minutes before serving.
Zesty and decadent, this brownie boasts a crackly top that gives way to an intensely fudgy center, with molten chocolate pockets and crunchy pecans in every bite. Serve it warm with a scoop of vanilla bean ice cream melting into the cracks, or go full rebel and eat it straight from the skillet with a spoon—because sometimes, elegance is overrated.
Conclusion
From campfire classics to gourmet trail meals, these 34 unforgettable recipes will transform your outdoor cooking adventures. We hope this collection inspires you to create delicious memories under the stars! Try your favorites, leave a comment sharing which recipes you loved most, and don’t forget to pin this article on Pinterest to save these camping culinary gems for your next wilderness getaway.


