Bring on the barbecue season! Nothing beats the smoky aroma of grilled chicken, but let’s be honest—the sides make the meal truly memorable. Whether you’re hosting a backyard gathering or just craving some comfort food, these 22 irresistible BBQ chicken side dishes will elevate your spread from simple to spectacular. Get ready to find your new favorites!
Grilled Corn with Chili Lime Butter

Oh my goodness, is there anything better than the smell of corn grilling on a summer evening? You’re about to make the most incredible grilled corn that’s bursting with flavor. This chili lime butter takes it to a whole new level that’ll have everyone asking for your secret.
5
servings20
minutes15
minutesIngredients
Corn – 4 ears
Butter – 4 tbsp
Lime juice – 2 tbsp
Chili powder – 1 tsp
Salt – ½ tsp
Instructions
1. Preheat your grill to medium-high heat (400°F).
2. Peel back the corn husks without removing them completely.
3. Remove all the silk threads from each ear of corn.
4. Pull the husks back up to cover the corn kernels.
5. Soak the corn in cold water for 15 minutes – this prevents burning and creates steam for perfect cooking.
6. Place the soaked corn directly on the grill grates.
7. Close the grill lid and cook for 15 minutes, turning every 5 minutes.
8. While corn cooks, melt the butter in a small microwave-safe bowl for 30 seconds.
9. Stir the lime juice into the melted butter until fully combined.
10. Add the chili powder to the butter mixture and whisk thoroughly.
11. Mix in the salt until evenly distributed throughout the butter.
12. Remove corn from grill using tongs – it should have some charred spots and be tender when pierced with a fork.
13. Carefully peel back the hot husks using oven mitts.
14. Brush each ear generously with the chili lime butter mixture.
15. Serve immediately while hot.
Damn, that first bite is everything – the sweet corn pops against the zesty lime and spicy chili butter. The kernels stay juicy while getting that perfect smoky char from the grill. Try crumbling some cotija cheese over the top or serving it alongside grilled shrimp for an amazing summer meal.
Creamy Coleslaw with Tangy Dressing
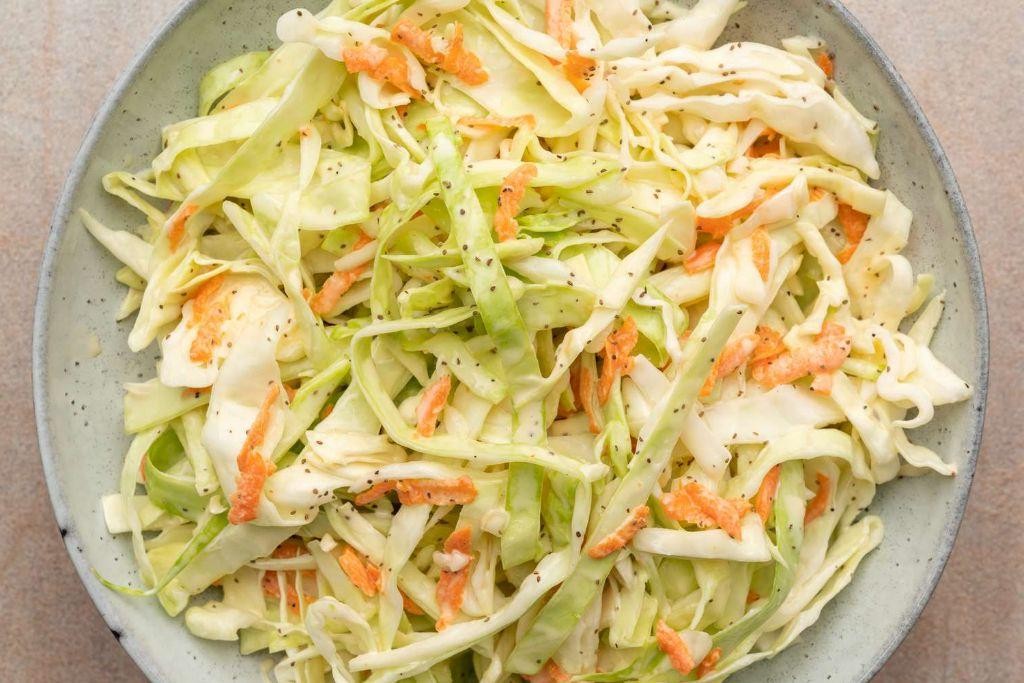
Ever find yourself staring at that bag of coleslaw mix in your fridge, wondering how to make it actually exciting? You’re not alone. This creamy coleslaw with a tangy dressing will change your coleslaw game forever.
2
servings15
minutesIngredients
Coleslaw mix – 1 (14 oz) bag
Mayonnaise – ½ cup
Apple cider vinegar – 2 tbsp
Sugar – 1 tbsp
Salt – ½ tsp
Black pepper – ¼ tsp
Instructions
1. Place the coleslaw mix in a large mixing bowl.
2. In a separate medium bowl, combine the mayonnaise, apple cider vinegar, sugar, salt, and black pepper.
3. Whisk the dressing ingredients together until completely smooth and well combined.
4. Pour the dressing over the coleslaw mix in the large bowl.
5. Use tongs or two large spoons to toss the coleslaw until every piece is evenly coated with dressing.
6. Cover the bowl tightly with plastic wrap.
7. Refrigerate the coleslaw for at least 1 hour to allow the flavors to meld and the cabbage to soften slightly.
8. Remove from refrigerator and give the coleslaw one final toss before serving.
You’ll love how the crisp cabbage gets just tender enough while keeping that satisfying crunch. The tangy dressing balances perfectly with the creaminess, making this coleslaw fantastic on pulled pork sandwiches or as a bright side to grilled meats.
Baked Sweet Potato Wedges with Rosemary
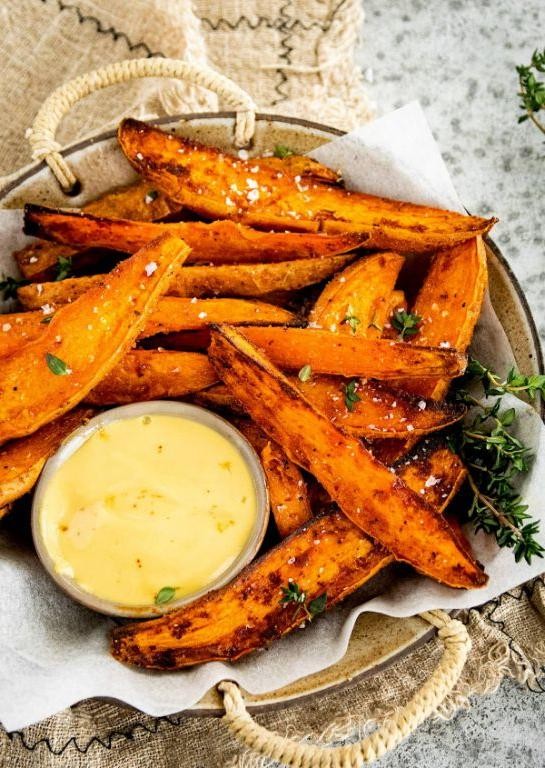
Wondering what to make with those sweet potatoes sitting on your counter? These baked wedges are the perfect easy side dish. You’ll love how simple they are to throw together.
4
servings15
minutes40
minutesIngredients
Sweet potatoes – 2 large
Olive oil – 2 tbsp
Fresh rosemary – 1 tbsp, chopped
Salt – 1 tsp
Black pepper – ½ tsp
Instructions
1. Preheat your oven to 425°F.
2. Scrub the sweet potatoes thoroughly under running water.
3. Pat the sweet potatoes completely dry with paper towels.
4. Cut each sweet potato in half lengthwise.
5. Cut each half into 6-8 even wedges.
6. Place the wedges in a large mixing bowl.
7. Drizzle the olive oil over the sweet potato wedges.
8. Toss the wedges until they’re evenly coated with oil.
9. Chop the fresh rosemary leaves finely.
10. Sprinkle the chopped rosemary over the wedges.
11. Add the salt and black pepper to the bowl.
12. Toss everything together until the seasonings are evenly distributed.
13. Line a baking sheet with parchment paper.
14. Arrange the wedges in a single layer on the baking sheet.
15. Make sure none of the wedges are touching each other.
16. Place the baking sheet in the preheated oven.
17. Bake for 20 minutes at 425°F.
18. Remove the baking sheet from the oven using oven mitts.
19. Flip each wedge over with tongs.
20. Return the baking sheet to the oven.
21. Bake for another 15-20 minutes until the edges are crispy and browned.
22. Test for doneness by piercing a wedge with a fork – it should slide in easily.
23. Transfer the wedges to a serving plate using a spatula.
But these wedges aren’t just pretty – they’re wonderfully crispy outside while staying creamy inside. The rosemary adds an earthy fragrance that pairs beautifully with the natural sweetness. Try serving them alongside grilled chicken or crumbling some feta cheese over the top for extra flavor.
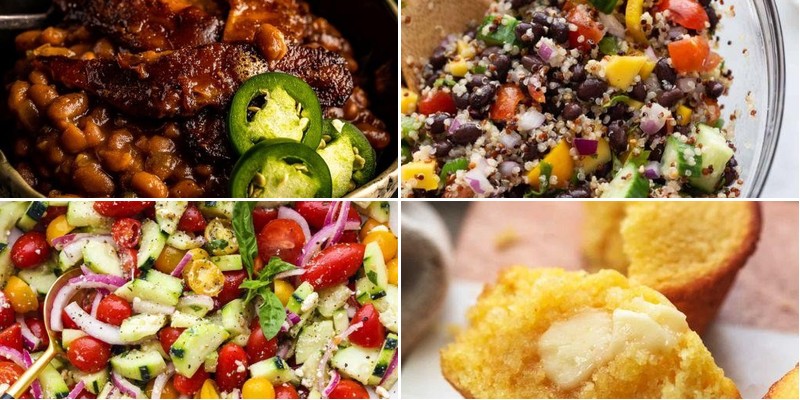
Smoky Baked Beans with Bacon
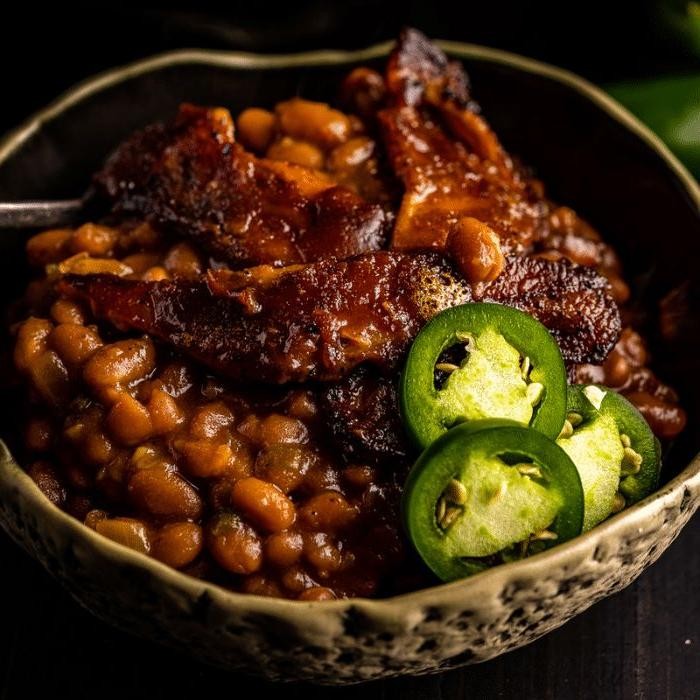
Sometimes you just need that classic comfort food that hits all the right notes. Smoky baked beans with bacon deliver that perfect balance of sweet, savory, and smoky flavors that make any meal feel special. They’re surprisingly simple to make from scratch and taste so much better than the canned version.
6
servings20
minutes65
minutesIngredients
Bacon – 6 slices
Yellow onion – 1 medium
Canned navy beans – 2 (15 oz) cans
Ketchup – ½ cup
Brown sugar – ¼ cup
Molasses – 2 tbsp
Apple cider vinegar – 1 tbsp
Worcestershire sauce – 1 tbsp
Dijon mustard – 1 tsp
Smoked paprika – 1 tsp
Black pepper – ½ tsp
Instructions
1. Preheat your oven to 350°F.
2. Chop 6 slices of bacon into ½-inch pieces.
3. Cook bacon in a large oven-safe skillet over medium heat for 8-10 minutes until crispy.
4. Remove bacon with a slotted spoon, leaving 2 tablespoons of bacon fat in the skillet.
5. Dice 1 medium yellow onion.
6. Cook onion in the bacon fat over medium heat for 5-7 minutes until translucent.
7. Drain and rinse 2 cans of navy beans.
8. Add beans to the skillet with the cooked onions.
9. Stir in ½ cup ketchup, ¼ cup brown sugar, 2 tablespoons molasses, 1 tablespoon apple cider vinegar, 1 tablespoon Worcestershire sauce, 1 teaspoon Dijon mustard, 1 teaspoon smoked paprika, and ½ teaspoon black pepper.
10. Mix everything together until well combined.
11. Stir the cooked bacon back into the bean mixture.
12. Bake uncovered at 350°F for 45 minutes until bubbly and slightly thickened around the edges.
13. Let rest for 10 minutes before serving to allow the flavors to meld.
Great texture comes from that perfect balance between creamy beans and crispy bacon bits. The smoky paprika and molasses create this deep, complex flavor that just gets better as it sits. Try serving these over baked potatoes or alongside grilled sausages for a complete meal that everyone will love.
Garlic Butter Grilled Asparagus
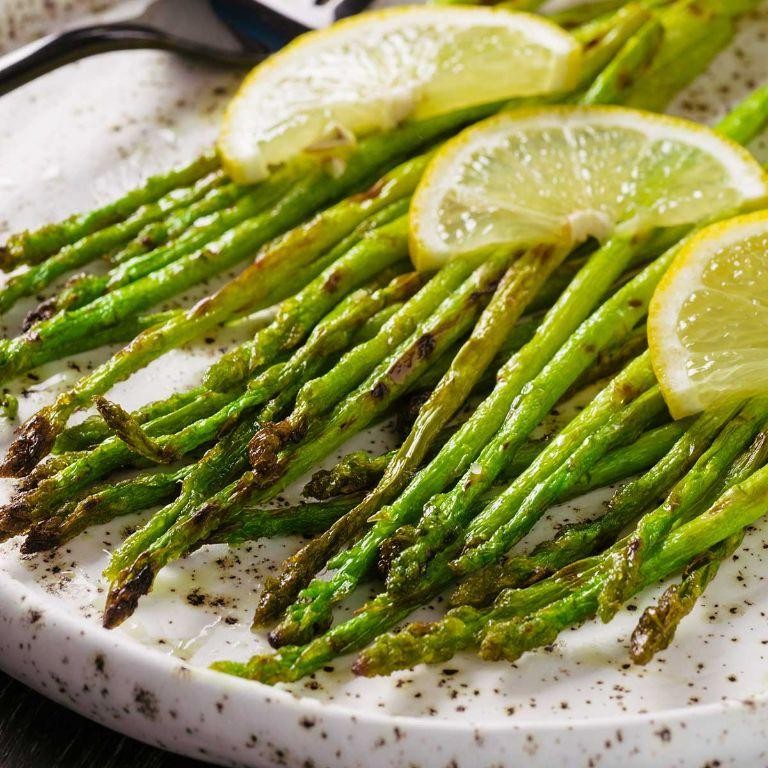
Zesty grilled asparagus is one of those side dishes that feels fancy but comes together in minutes. You’ll love how the garlic butter soaks into those tender spears, creating the perfect balance of savory and slightly charred goodness. It’s the kind of simple recipe that makes any meal feel special.
3
servings10
minutes8
minutesIngredients
– Asparagus – 1 lb
– Butter – 3 tbsp
– Garlic – 3 cloves, minced
– Salt – ½ tsp
– Black pepper – ¼ tsp
Instructions
1. Preheat your grill to medium-high heat (400°F).
2. Rinse the asparagus under cold water and pat completely dry with paper towels.
3. Trim the tough, woody ends off the asparagus by snapping each spear where it naturally breaks.
4. In a small microwave-safe bowl, melt the butter in 15-second intervals until fully liquid.
5. Stir the minced garlic, salt, and black pepper into the melted butter until well combined.
6. Place the asparagus spears in a single layer on a baking sheet.
7. Brush the garlic butter mixture evenly over all sides of the asparagus using a pastry brush.
8. Transfer the asparagus directly onto the preheated grill grates, arranging them perpendicular to the grates so they don’t fall through.
9. Grill for 6-8 minutes, turning halfway through with tongs, until bright green with visible grill marks.
10. Remove the asparagus from the grill and transfer to a serving platter immediately.
11. Drizzle any remaining garlic butter from the baking sheet over the grilled asparagus.
12. Serve while hot. Heavenly tender-crisp asparagus with that irresistible garlic butter flavor makes this side dish unforgettable. Try serving it alongside grilled steak or folding it into pasta for an easy upgrade—the slight smokiness from the grill pairs perfectly with almost any main course.
Classic Potato Salad with Diced Eggs
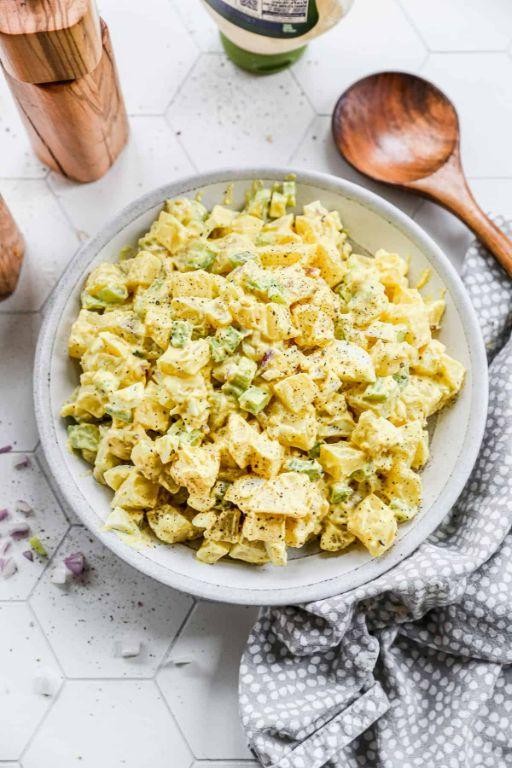
Remember those perfect summer picnics where everyone raves about the potato salad? You can totally make that happen with this classic version featuring diced eggs. It’s creamy, comforting, and always a crowd-pleaser.
2
servings30
minutes37
minutesIngredients
- Potatoes – 2 lbs
- Eggs – 4
- Mayonnaise – ¾ cup
- Yellow mustard – 2 tbsp
- White vinegar – 1 tbsp
- Celery salt – 1 tsp
- Black pepper – ½ tsp
Instructions
- Place potatoes in a large pot and cover with cold water by 1 inch.
- Bring water to a boil over high heat, then reduce heat to maintain a gentle boil.
- Boil potatoes for 20-25 minutes until easily pierced with a fork but not falling apart.
- While potatoes cook, place eggs in a separate saucepan and cover with cold water.
- Bring eggs to a boil over high heat, then immediately remove from heat and cover.
- Let eggs stand covered for 12 minutes for perfectly cooked yolks without gray rings.
- Drain potatoes and let them cool until comfortable to handle, about 15 minutes.
- Peel potatoes and cut into ¾-inch cubes, transferring to a large mixing bowl.
- Peel boiled eggs and dice them into ½-inch pieces, adding to the potatoes.
- In a small bowl, whisk together mayonnaise, mustard, vinegar, celery salt, and pepper until smooth.
- Pour dressing over potato-egg mixture and gently fold until everything is evenly coated.
- Cover bowl with plastic wrap and refrigerate for at least 2 hours to let flavors meld.
Mixing while potatoes are slightly warm helps them absorb the dressing better. The finished salad has a creamy texture with tender potato chunks and pops of egg throughout. Try serving it on toasted bread for a delicious potato salad sandwich, or garnish with paprika for extra color.
Zesty Mexican Street Corn Salad
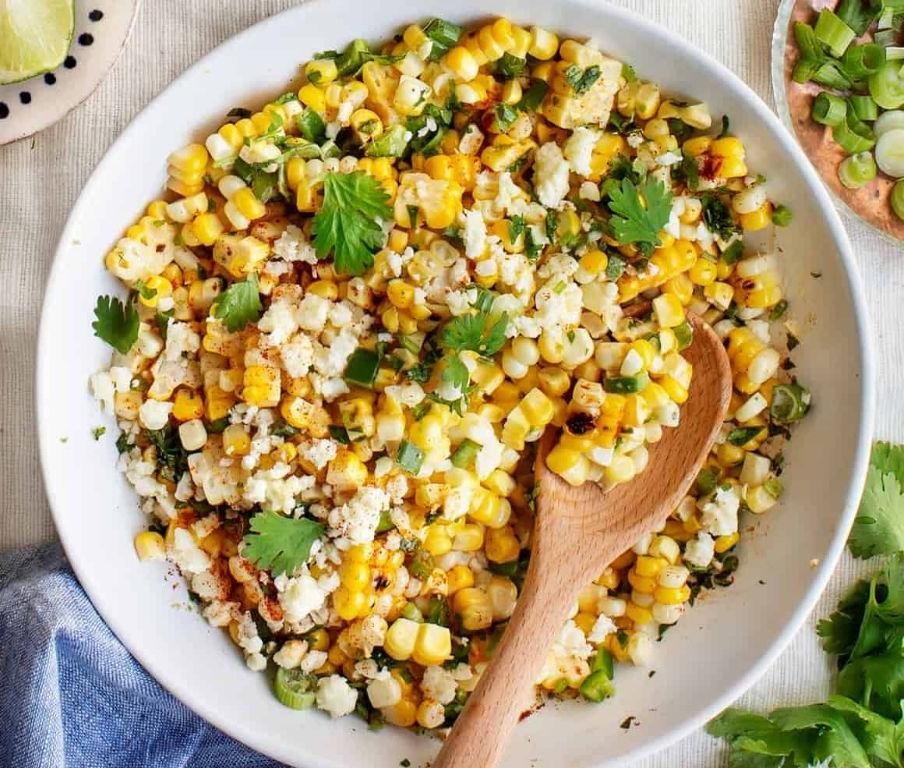
Gosh, you know that amazing charred corn flavor from Mexican street vendors? This salad brings all that zesty magic right to your backyard. It’s perfect for summer cookouts or whenever you’re craving something fresh with a kick.
2
servings15
minutes18
minutesIngredients
Corn – 4 ears
Mayonnaise – ½ cup
Lime juice – 2 tbsp
Cotija cheese – ½ cup, crumbled
Chili powder – 1 tsp
Cilantro – ¼ cup, chopped
Instructions
1. Preheat your grill to 400°F.
2. Place the corn directly on the grill grates.
3. Grill the corn for 15–18 minutes, turning every 4–5 minutes, until kernels are charred in spots.
4. Let the corn cool until you can handle it comfortably, about 10 minutes.
5. Stand each ear upright in a bowl and slice downward to remove all kernels.
6. In a large bowl, combine the grilled corn kernels and mayonnaise.
7. Stir in the lime juice until fully incorporated.
8. Fold in the crumbled cotija cheese.
9. Sprinkle the chili powder evenly over the mixture.
10. Add the chopped cilantro and toss everything gently to combine.
Just serve this salad immediately for the best texture—the corn stays slightly crisp, the cheese adds salty bites, and the chili powder gives it that signature warmth. It’s fantastic as a taco topping or alongside grilled meats for a complete meal.
Chilled Cucumber and Tomato Salad
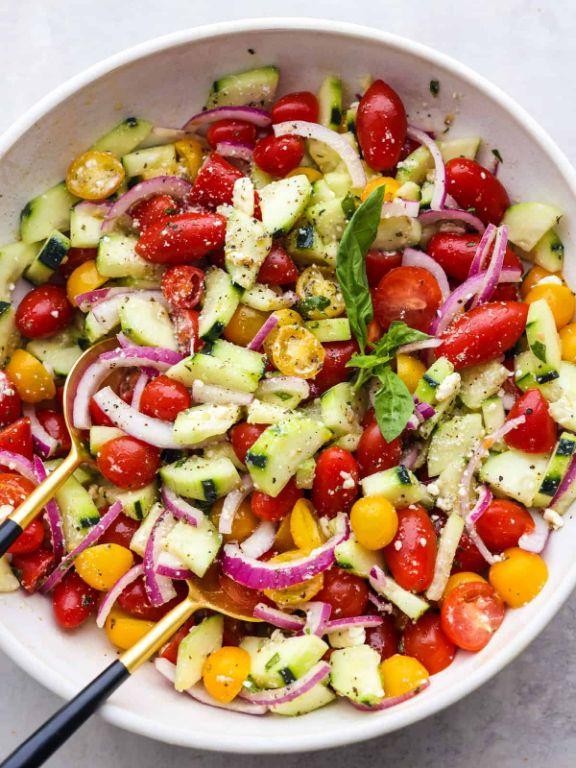
There’s nothing quite like a chilled cucumber and tomato salad on a warm day. You’ll love how refreshing and simple this recipe is to throw together. It’s the perfect side dish for any summer meal.
4
servings15
minutesIngredients
Cucumber – 1 large
Tomatoes – 2 medium
Red onion – ¼ cup, thinly sliced
Olive oil – 2 tbsp
Red wine vinegar – 1 tbsp
Salt – ½ tsp
Black pepper – ¼ tsp
Instructions
1. Wash the cucumber and tomatoes under cool running water. 2. Pat the vegetables dry with a clean kitchen towel. 3. Slice the cucumber into ¼-inch thick rounds. 4. Chop the tomatoes into 1-inch chunks. 5. Thinly slice the red onion until you have ¼ cup. 6. Combine the cucumber, tomatoes, and red onion in a large mixing bowl. 7. Drizzle the olive oil over the vegetable mixture. 8. Add the red wine vinegar to the bowl. 9. Sprinkle the salt and black pepper evenly over the salad. 10. Toss everything together gently until well combined. 11. Cover the bowl tightly with plastic wrap. 12. Refrigerate the salad for at least 30 minutes to chill thoroughly. Getting that chill time really makes the flavors pop and the vegetables crisp up perfectly. The cool crunch of cucumber pairs beautifully with the juicy tomatoes, while the tangy dressing brings it all together. Try serving it alongside grilled chicken or spooned over crusty bread for a light lunch.
Buttery Cornbread Muffins

Warm, golden cornbread muffins are the ultimate comfort food that comes together in minutes. You’ll love how these bake up with crispy edges and a tender, buttery crumb. They’re perfect alongside chili, soup, or just slathered with honey butter.
12
muffins10
minutes18
minutesIngredients
Flour – 1 cup
Cornmeal – 1 cup
Sugar – ¼ cup
Baking powder – 1 tbsp
Salt – 1 tsp
Milk – 1 cup
Egg – 1
Butter – ½ cup, melted
Instructions
1. Preheat your oven to 400°F and line a 12-cup muffin tin with paper liners.
2. Whisk together 1 cup flour, 1 cup cornmeal, ¼ cup sugar, 1 tbsp baking powder, and 1 tsp salt in a large bowl until fully combined.
3. In a separate bowl, whisk 1 cup milk, 1 egg, and ½ cup melted butter until smooth.
4. Pour the wet ingredients into the dry ingredients and stir gently until just combined – don’t overmix or your muffins will be tough.
5. Divide the batter evenly among the 12 muffin cups, filling each about ⅔ full.
6. Bake at 400°F for 15-18 minutes until the tops are golden brown and a toothpick inserted in the center comes out clean.
7. Let the muffins cool in the pan for 5 minutes before transferring to a wire rack.
8. Serve warm for the best texture and flavor.
Just out of the oven, these muffins have the perfect contrast of crispy crust and soft, moist interior. Their sweet corn flavor pairs wonderfully with savory dishes, or try crumbling them over chili for a delicious twist. They’re also fantastic toasted the next day with a pat of butter melting into every nook.
Roasted Garlic Parmesan Broccoli
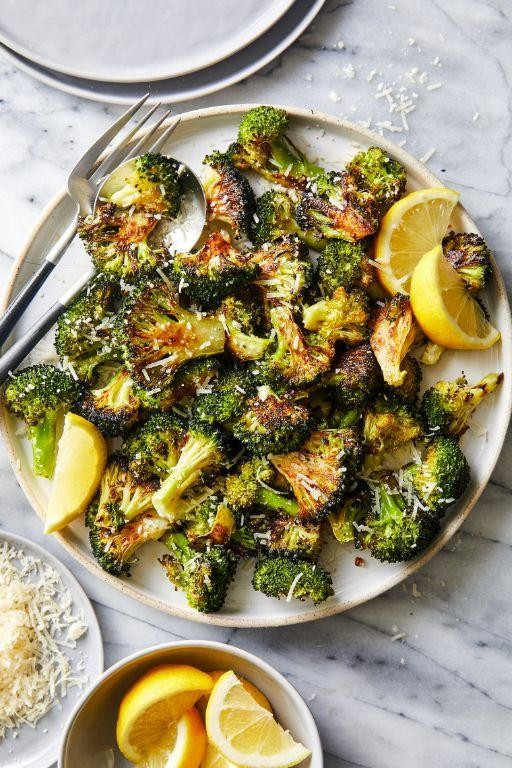
Craving something that transforms basic broccoli into a crave-worthy side? This roasted garlic parmesan broccoli is your new go-to—it’s crispy, cheesy, and ridiculously easy to make. You’ll wonder why you ever steamed it.
3
servings10
minutes22
minutesIngredients
Broccoli – 1 large head
Olive oil – 2 tbsp
Garlic – 3 cloves, minced
Parmesan cheese – ½ cup, grated
Salt – ½ tsp
Black pepper – ¼ tsp
Instructions
1. Preheat your oven to 425°F.
2. Cut the broccoli into bite-sized florets.
3. Toss the broccoli florets with olive oil in a large bowl until evenly coated.
4. Spread the broccoli in a single layer on a baking sheet. (Tip: Don’t overcrowd the pan—this ensures crispiness instead of steaming.)
5. Roast for 15 minutes at 425°F.
6. Remove the baking sheet from the oven.
7. Sprinkle the minced garlic, grated parmesan, salt, and black pepper evenly over the broccoli.
8. Toss gently to combine. (Tip: Work quickly so the broccoli stays hot and the cheese melts slightly.)
9. Return the baking sheet to the oven.
10. Roast for another 5–7 minutes at 425°F, or until the edges are crispy and the cheese is golden. (Tip: Watch closely at the end to avoid burning the garlic.)
11. Remove from the oven and let cool for 2 minutes before serving. Finally, this broccoli comes out with crispy, almost charred edges and tender stems, all coated in savory, nutty parmesan and garlic. For a fun twist, squeeze fresh lemon juice over the top or toss with cooked pasta for a quick vegetarian meal.
Hearty Quinoa and Black Bean Salad
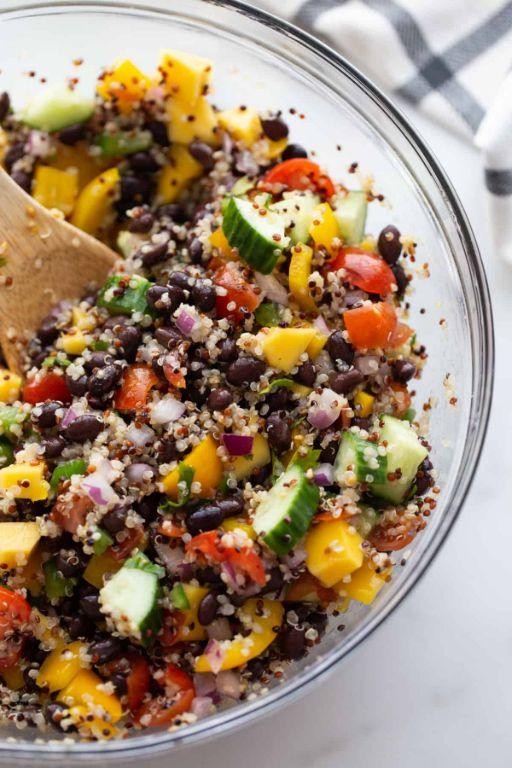
A hearty quinoa and black bean salad is exactly what you need for those busy weeknights when you want something nutritious but don’t have hours to spend in the kitchen. You’ll love how quickly this comes together, and it’s packed with protein to keep you satisfied. It’s perfect for meal prep too—just make a big batch and enjoy it all week long.
2
servings25
minutes15
minutesIngredients
Quinoa – 1 cup
Black beans – 15 oz can
Red bell pepper – 1
Lime – 1
Olive oil – 2 tbsp
Cumin – 1 tsp
Salt – ½ tsp
Cilantro – ¼ cup
Instructions
1. Rinse 1 cup of quinoa under cold water in a fine-mesh strainer for 1 minute to remove the natural coating that can make it bitter.
2. Combine the rinsed quinoa with 2 cups of water in a medium saucepan and bring to a boil over high heat.
3. Reduce heat to low, cover the saucepan, and simmer for 15 minutes until all water is absorbed and quinoa grains have little white tails.
4. Spread cooked quinoa on a baking sheet and let it cool completely for 20 minutes to prevent a mushy salad.
5. Drain and rinse 15 oz can of black beans thoroughly under cold water to remove excess sodium.
6. Dice 1 red bell pepper into ¼-inch pieces for even distribution throughout the salad.
7. Chop ¼ cup of fresh cilantro leaves, avoiding the thicker stems which can be bitter.
8. Juice 1 lime into a small bowl, being careful to remove any seeds that might fall in.
9. Whisk together lime juice, 2 tbsp olive oil, 1 tsp cumin, and ½ tsp salt in a large mixing bowl until well combined.
10. Add cooled quinoa, black beans, diced red bell pepper, and chopped cilantro to the dressing bowl.
11. Toss everything together gently but thoroughly until all ingredients are evenly coated with dressing.
12. Let the salad sit for 10 minutes before serving to allow flavors to meld together.
You’ll notice the quinoa has a delightful fluffy texture that pairs perfectly with the creamy black beans. The bright lime and earthy cumin create a flavor profile that’s both refreshing and satisfying. Try serving it in lettuce cups for a low-carb option or alongside grilled chicken for a complete meal.
Fresh Herb and Lemon Couscous
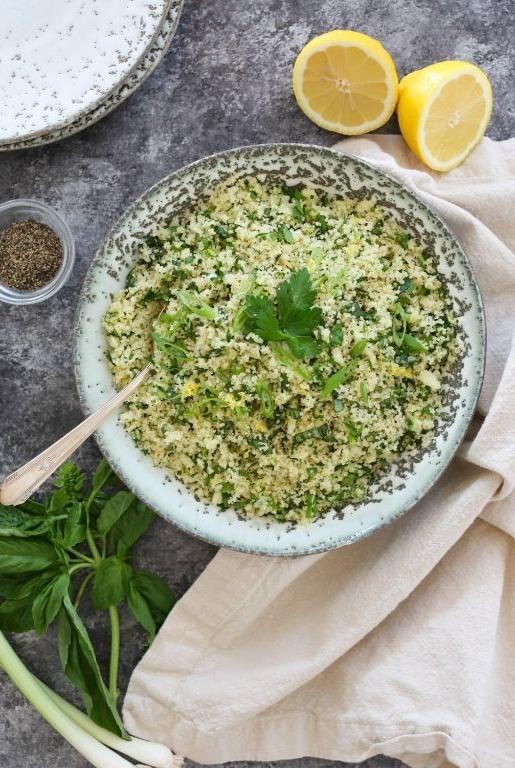
Perfect for those busy weeknights when you need something quick yet satisfying, this fresh herb and lemon couscous comes together in minutes. You’ll love how the bright citrus and fragrant herbs wake up the simple couscous base, making it feel anything but ordinary. It’s the kind of side dish that steals the show without much effort at all.
2
servings10
minutes5
minutesIngredients
Couscous – 1 cup
Water – 1 cup
Lemon – 1
Fresh parsley – ¼ cup
Fresh mint – 2 tbsp
Olive oil – 2 tbsp
Salt – ½ tsp
Instructions
1. Bring 1 cup of water to a rolling boil in a small saucepan over high heat.
2. Remove the saucepan from heat immediately once boiling.
3. Stir in 1 cup of couscous and ½ teaspoon salt until fully combined.
4. Cover the saucepan tightly with a lid and let it sit for 5 minutes—this allows the couscous to steam perfectly without becoming mushy.
5. While the couscous rests, zest the entire lemon using a microplane, being careful to avoid the bitter white pith.
6. Juice the zested lemon until you have 2 tablespoons of fresh lemon juice.
7. Finely chop ¼ cup fresh parsley leaves and 2 tablespoons fresh mint leaves, using a sharp knife to prevent bruising the delicate herbs.
8. Uncover the couscous and fluff it with a fork to separate the grains and create a light texture.
9. Drizzle 2 tablespoons olive oil over the fluffed couscous.
10. Add the lemon zest, lemon juice, chopped parsley, and chopped mint to the couscous.
11. Gently toss everything together until the ingredients are evenly distributed. Marvelous how this simple dish transforms with its fluffy texture and vibrant, citrusy flavor. Try serving it alongside grilled chicken or folding it into a salad with chickpeas and cucumbers for a complete meal—the fresh herbs really pop against the tender couscous grains.
Savory Cheddar and Chive Biscuits

Warm, cheesy biscuits straight from the oven are one of life’s simple pleasures. You’ll love how quickly these come together with just a few basic ingredients. They’re perfect for breakfast, alongside soup, or just because.
8
biscuits15
minutes15
minutesIngredients
- Flour – 2 cups
- Baking powder – 1 tbsp
- Salt – 1 tsp
- Cold butter – ½ cup
- Shredded cheddar cheese – 1 cup
- Fresh chives – ¼ cup
- Milk – ¾ cup
Instructions
- Preheat your oven to 425°F and line a baking sheet with parchment paper.
- Whisk together 2 cups flour, 1 tbsp baking powder, and 1 tsp salt in a large bowl.
- Cut ½ cup cold butter into small cubes and add to the flour mixture.
- Use your fingers or a pastry cutter to work the butter into the flour until pea-sized crumbs form. Tip: Keep the butter cold for flaky layers.
- Stir in 1 cup shredded cheddar cheese and ¼ cup fresh chives until evenly distributed.
- Pour in ¾ cup milk and mix gently until just combined. Tip: Don’t overmix or the biscuits will be tough.
- Turn the dough out onto a lightly floured surface and pat into a 1-inch thick rectangle.
- Fold the dough in half, then pat back down to 1-inch thickness. Repeat this folding process 2 more times.
- Cut the dough into 8 squares using a sharp knife or bench scraper.
- Arrange the biscuits on the prepared baking sheet, spacing them about 2 inches apart.
- Brush the tops with a little extra milk for golden browning.
- Bake for 12-15 minutes until golden brown and puffed. Tip: Check at 12 minutes—they’re done when a toothpick comes out clean.
Just out of the oven, these biscuits have the most wonderful flaky texture with melty cheddar pockets. The fresh chives add a subtle onion flavor that pairs perfectly with the rich cheese. Try splitting one warm and topping it with a fried egg for the ultimate breakfast sandwich.
Conclusion
Kick your BBQ chicken dinners to the next level with these 22 irresistible sides! From creamy potato salads to fresh grilled veggies, there’s something for every taste. We hope you find a new favorite—give these recipes a try, then leave a comment telling us which one you loved most. Don’t forget to share this roundup with your fellow foodies on Pinterest!


