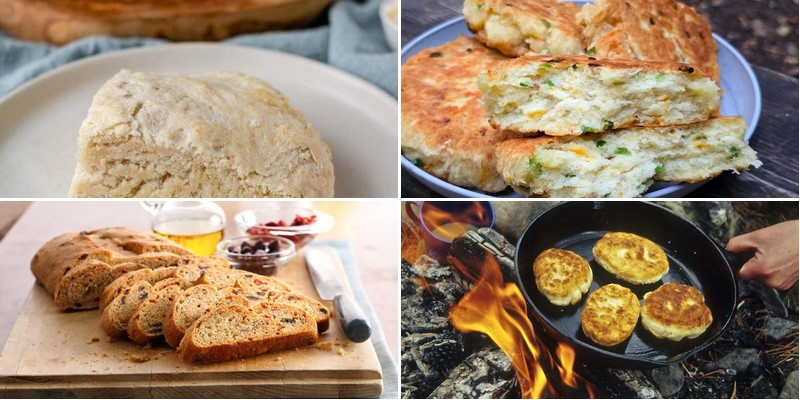
Unleash the comforting aroma of freshly baked bannock bread in your kitchen! This versatile staple, beloved across North America, transforms simple ingredients into golden, pillowy perfection for any meal or celebration. Whether you’re craving a quick snack, a cozy breakfast, or a festive side, our roundup has a recipe to delight every palate. Dive in and discover your new favorite twist on this timeless treat!
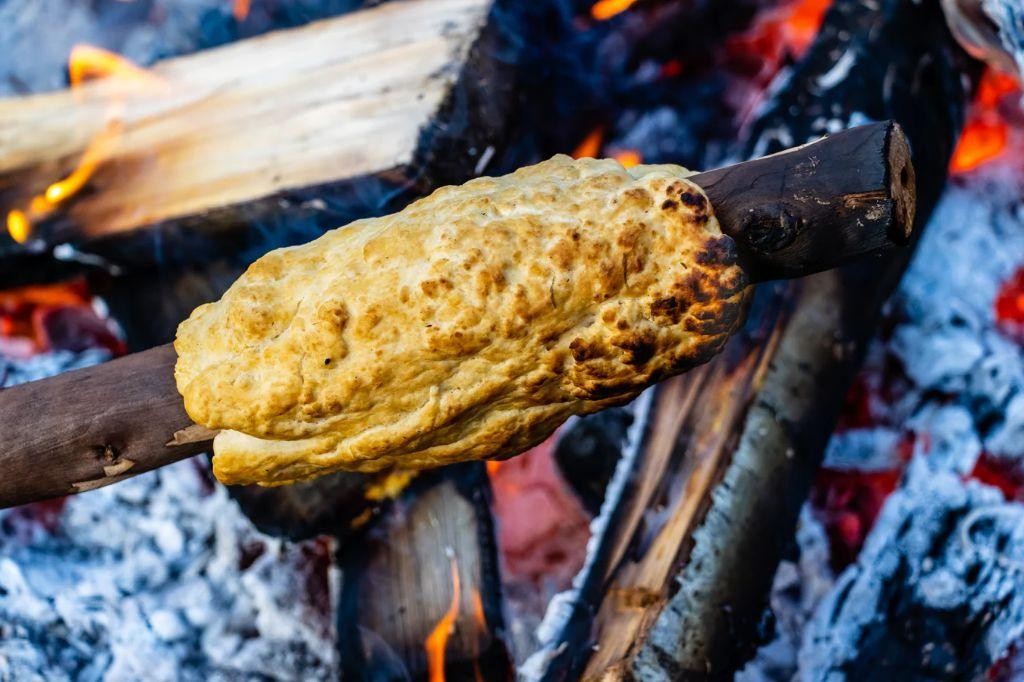
Classic Campfire Bannock

Many of my favorite childhood memories involve sitting around a crackling fire with my family, and nothing brings back those cozy moments quite like the smell of bannock cooking over the flames. I still make this simple bread whenever we go camping—it’s become our tradition to mix the dough while the fire settles into perfect cooking coals. There’s something magical about how just a few basic ingredients transform into this wonderfully satisfying bread that everyone fights over.
3
portions10
minutes40
minutesIngredients
Flour – 2 cups
Baking powder – 1 tbsp
Salt – 1 tsp
Water – ¾ cup
Instructions
1. Combine 2 cups of flour, 1 tablespoon of baking powder, and 1 teaspoon of salt in a medium bowl.
2. Gradually add ¾ cup of water while stirring with a fork until a shaggy dough forms.
3. Knead the dough on a floured surface for exactly 2 minutes until it becomes smooth and elastic.
4. Divide the dough into 4 equal portions and shape each into a ½-inch thick round disc.
5. Place a cast iron skillet over hot campfire coals that have turned ash-gray and preheat for 5 minutes.
6. Carefully place one dough disc into the hot skillet using tongs.
7. Cook the first side for 4-5 minutes until golden brown spots appear across the surface.
8. Flip the bannock using a spatula and cook the second side for another 4-5 minutes.
9. Press the center gently with your finger—if it springs back immediately, it’s fully cooked.
10. Repeat the cooking process with the remaining dough portions.
11. Transfer cooked bannock to a wire rack and let cool for 3 minutes before serving.
Lightly crisp on the outside with a wonderfully soft, pillowy interior, this bannock has that perfect balance of textures that makes it irresistible straight from the pan. The simple, slightly salty flavor pairs beautifully with morning coffee or makes an excellent base for campfire sandwiches filled with grilled sausages and peppers. I love tearing off warm pieces and dipping them in honey or wrapping them around roasted marshmallows for the ultimate campfire dessert.
Sweet Cinnamon Raisin Bannock

Perfect for crisp autumn mornings, this sweet cinnamon raisin bannock has become my go-to comfort food when I want something warm and homemade without spending hours in the kitchen. I first discovered this simple fried bread while camping with friends in Colorado, and now I make it almost weekly—my dog always knows when I’m pulling out the skillet because he starts wagging his tail hoping for a crumb!
8
wedges10
minutes10
minutesIngredients
- Flour – 2 cups
- Baking powder – 1 tbsp
- Salt – ½ tsp
- Sugar – ¼ cup
- Cinnamon – 1 tsp
- Raisins – ½ cup
- Milk – ¾ cup
- Butter – 2 tbsp
Instructions
- Whisk together 2 cups flour, 1 tbsp baking powder, ½ tsp salt, ¼ cup sugar, and 1 tsp cinnamon in a large bowl until fully combined.
- Stir in ½ cup raisins until evenly distributed throughout the dry mixture.
- Pour in ¾ cup milk and mix with a fork until a shaggy dough forms, being careful not to overmix—this keeps the bannock tender rather than tough.
- Turn the dough onto a lightly floured surface and gently knead just 4-5 times to bring it together.
- Pat the dough into a ½-inch thick circle, then cut into 8 equal wedges using a sharp knife or pizza cutter.
- Melt 2 tbsp butter in a cast iron skillet over medium heat (350°F), swirling to coat the bottom evenly.
- Place the dough wedges in the hot skillet, leaving about 1 inch between them for even cooking.
- Cook for 4-5 minutes until the bottoms are golden brown with small bubbles forming on the surface.
- Flip each wedge carefully using a spatula and cook for another 4-5 minutes until both sides are deeply golden and the edges look crisp.
- Transfer to a wire rack to cool for 2-3 minutes before serving—this prevents steaming and keeps the texture perfect.
Fresh from the skillet, this bannock has a wonderfully crisp exterior that gives way to a soft, pillowy interior studded with plump raisins. The cinnamon sugar creates a caramelized crust that pairs beautifully with the subtle saltiness, making it irresistible whether you eat it plain or dunked in coffee. For a special treat, I sometimes split them warm and spread with honey butter or serve alongside apple slices for a complete autumn breakfast.
Herb and Garlic Bannock Twist
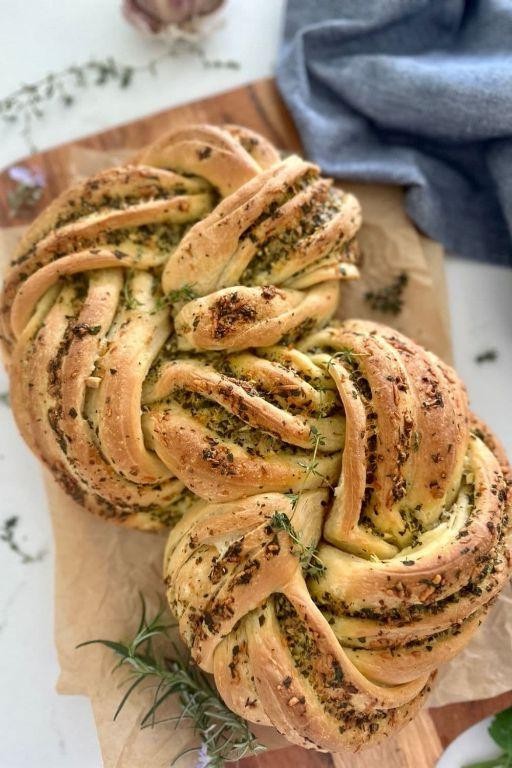
Zesty aromas of fresh herbs and roasted garlic have been filling my kitchen lately, thanks to this incredible bannock twist I discovered during a camping trip last fall. I’ve been making it weekly ever since – it’s become my go-to comfort bread that always impresses guests without requiring fancy baking skills.
3
portions15
minutes22
minutesIngredients
Flour – 2 cups
Baking powder – 1 tbsp
Salt – 1 tsp
Garlic powder – 2 tsp
Dried rosemary – 1 tbsp
Milk – ¾ cup
Butter – ¼ cup
Egg – 1
Instructions
1. Preheat your oven to 400°F and line a baking sheet with parchment paper.
2. Whisk together flour, baking powder, salt, garlic powder, and dried rosemary in a large bowl until fully combined.
3. Cut cold butter into small cubes and work it into the dry ingredients using your fingertips until the mixture resembles coarse crumbs.
4. Pour in milk and crack in the egg, then mix with a fork until a shaggy dough forms.
5. Turn the dough onto a lightly floured surface and knead gently for about 30 seconds until it comes together smoothly.
6. Divide the dough into three equal portions and roll each into a 12-inch rope about 1-inch thick.
7. Pinch the three ropes together at one end and braid them tightly, then pinch the opposite ends to seal.
8. Transfer the braided dough to your prepared baking sheet and brush the entire surface with additional milk using a pastry brush.
9. Bake for 18-22 minutes until golden brown and the internal temperature reaches 190°F when tested with an instant-read thermometer.
10. Remove from oven and let cool on the baking sheet for 5 minutes before transferring to a wire rack.
Versatile and satisfying, this bannock twist develops a wonderfully crisp exterior while staying remarkably soft inside. The garlic and rosemary create such a comforting aroma that my family can’t resist tearing off warm pieces straight from the loaf. I love serving it alongside soups or turning leftovers into the most incredible garlic bread by toasting slices with a bit of extra butter.
Maple Syrup-infused Bannock
Nothing says comfort like the smell of warm bread filling the kitchen, and this Maple Syrup-infused Bannock is my new go-to for a quick, satisfying treat. I first tried making bannock on a camping trip years ago, and now I love whipping up this cozy version at home when I need a little homemade happiness.
1
bannock10
minutes16
minutesIngredients
- Flour – 2 cups
- Baking powder – 1 tbsp
- Salt – ½ tsp
- Maple syrup – ¼ cup
- Water – ¾ cup
- Butter – 2 tbsp
Instructions
- Whisk together 2 cups of flour, 1 tablespoon of baking powder, and ½ teaspoon of salt in a large bowl until fully combined.
- Pour ¼ cup of maple syrup and ¾ cup of water into the dry ingredients, then stir with a wooden spoon just until a shaggy dough forms—don’t overmix, or the bannock can become tough.
- Lightly flour your hands and a clean surface, then turn the dough out and gently knead it 4–5 times to bring it together into a smooth ball.
- Press the dough into a ½-inch thick circle on a floured surface, using your palms to keep it even for consistent cooking.
- Melt 2 tablespoons of butter in a cast-iron skillet over medium heat, swirling to coat the bottom completely.
- Carefully place the dough circle into the skillet and cook for 6–8 minutes, or until the bottom is golden brown with a few darker spots.
- Flip the bannock using a spatula and cook for another 6–8 minutes, pressing down lightly to ensure even browning on both sides.
- Transfer the cooked bannock to a wire rack and let it cool for 5 minutes before slicing—this helps the interior set and makes cleaner cuts.
So warm and tender with a subtle maple sweetness that isn’t overpowering, this bannock is perfect torn apart and served with a drizzle of extra syrup or a smear of jam. I love it alongside a hot coffee for a lazy weekend breakfast that feels both rustic and special.
Cheesy Jalapeño Bannock Bites

Every time I have friends over for game day, I find myself scrambling for a snack that’s both impressive and easy to whip up. That’s how these Cheesy Jalapeño Bannock Bites were born in my kitchen—a happy accident during one particularly hungry football Sunday.
24
bites15
minutes15
minutesIngredients
- Flour – 2 cups
- Baking powder – 1 tbsp
- Salt – 1 tsp
- Shredded cheddar cheese – 1 cup
- Diced jalapeños – ½ cup
- Milk – ¾ cup
- Butter – ¼ cup, melted
Instructions
- Preheat your oven to 400°F and line a baking sheet with parchment paper.
- Whisk together the flour, baking powder, and salt in a large bowl until fully combined.
- Stir in the shredded cheddar cheese and diced jalapeños until evenly distributed throughout the dry mixture.
- Pour in the milk and melted butter, then mix gently with a fork until a soft dough forms—don’t overmix, or the bites will become tough.
- Scoop tablespoon-sized portions of dough and drop them onto the prepared baking sheet, spacing them about 1 inch apart.
- Bake for 12–15 minutes, or until the bites are golden brown on top and sound hollow when tapped on the bottom.
- Let the bites cool on the baking sheet for 5 minutes before transferring them to a wire rack—this helps them firm up without getting soggy.
- Serve warm, and if you want an extra kick, brush the tops with a little melted butter mixed with a pinch of salt right after baking.
Keep these bites on hand for any last-minute cravings; they’re wonderfully soft inside with a slight crisp on the outside, and the gooey cheese balances the jalapeño’s heat perfectly. I love dunking them in cool ranch dip or even splitting them to make mini sliders—they’re that versatile!
Gluten-Free Bannock Delight

A few weeks ago, my gluten-free friend came over for brunch, and I realized how limited our options were—until I discovered this simple bannock recipe that’s become my go-to. As someone who loves rustic, hands-on baking, I’ve tweaked it to be foolproof and delicious, perfect for cozy mornings or last-minute gatherings. Honestly, it’s so easy that I often whip it up while my coffee brews, and the smell alone makes everyone gather in the kitchen.
1
bannock10
minutes14
minutesIngredients
Gluten-Free Flour – 1 cup
Baking Powder – 1 tsp
Salt – ½ tsp
Water – ½ cup
Oil – 2 tbsp
Instructions
1. Preheat a skillet over medium heat (about 350°F) and lightly grease it with 1 tablespoon of oil. Tip: I always test the heat by sprinkling a pinch of flour—if it sizzles gently, you’re good to go.
2. In a medium bowl, whisk together 1 cup gluten-free flour, 1 teaspoon baking powder, and ½ teaspoon salt until fully combined. Tip: For extra fluffiness, I sift the dry ingredients, which helps avoid lumps in the dough.
3. Gradually pour in ½ cup water, stirring with a fork until a soft dough forms and no dry spots remain.
4. Turn the dough onto a lightly floured surface and gently knead it 4–5 times until smooth, being careful not to overwork it.
5. Pat the dough into a ½-inch thick round, about 6 inches in diameter.
6. Place the dough round into the preheated skillet and cook for 5–7 minutes, until the bottom is golden brown and firm.
7. Flip the bannock using a spatula and cook for another 5–7 minutes, until both sides are evenly browned and it sounds hollow when tapped. Tip: If it browns too quickly, reduce the heat to low to ensure the inside cooks through.
8. Transfer the bannock to a wire rack and let it cool for 2–3 minutes before slicing. This bannock has a tender, slightly crumbly texture that pairs wonderfully with sweet jam or savory soups. Try serving it warm with a drizzle of honey or alongside a hearty stew—it’s versatile enough to shine at any meal.
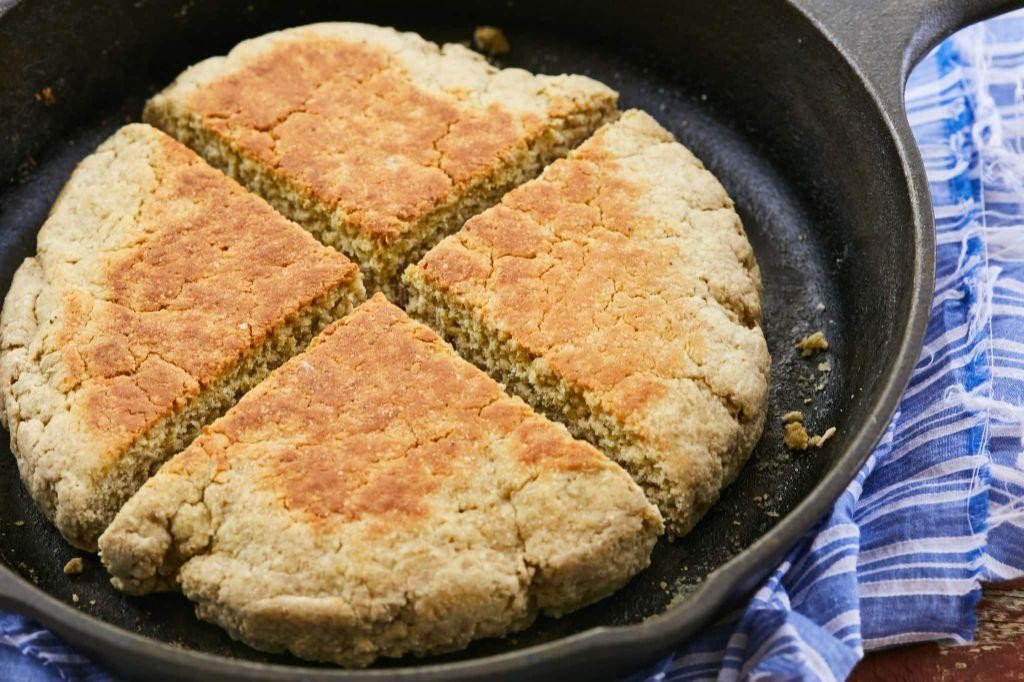
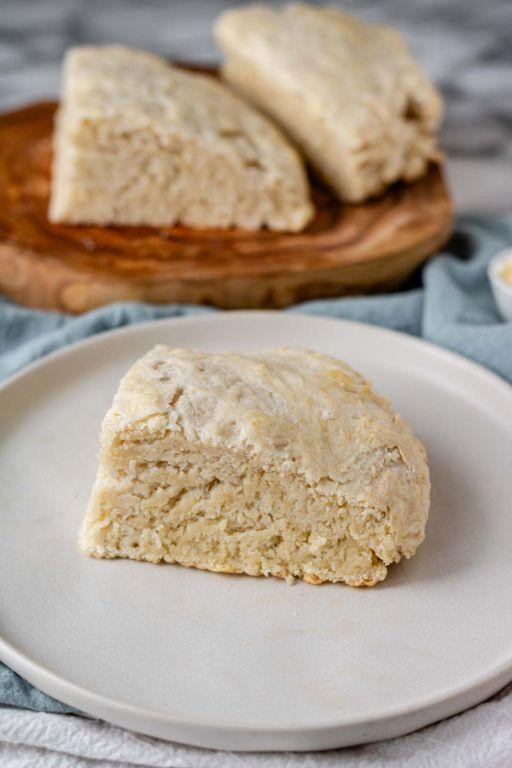
Traditional Scottish Bannock Bread
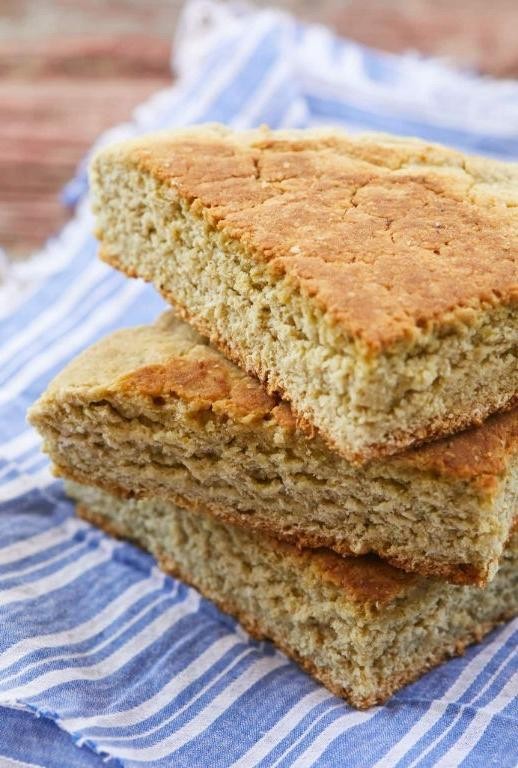
Never have I been more grateful for simple bread recipes than during my first attempt at Scottish bannock. My grandmother used to make this on camping trips with just a bowl and a skillet, and I’ve carried on that tradition in my own kitchen, usually while wearing my favorite flour-dusted apron. This rustic bread comes together with minimal fuss but delivers maximum comfort, perfect for those days when you want homemade bread without the wait.
4
wedges15
minutes18
minutesIngredients
Flour – 2 cups
Baking powder – 2 tsp
Salt – ½ tsp
Butter – 2 tbsp
Milk – ¾ cup
Instructions
1. Preheat your oven to 425°F and lightly grease a baking sheet.
2. Whisk together 2 cups flour, 2 tsp baking powder, and ½ tsp salt in a large bowl.
3. Cut 2 tbsp cold butter into small pieces and work it into the flour mixture using your fingertips until it resembles coarse crumbs.
4. Make a well in the center of the dry ingredients and pour in ¾ cup milk.
5. Stir gently with a fork until a shaggy dough forms, being careful not to overmix.
6. Turn the dough out onto a lightly floured surface and knead it just 4-5 times to bring it together.
7. Pat the dough into a 1-inch thick circle about 7 inches in diameter.
8. Cut the circle into 4 wedges using a sharp knife or bench scraper.
9. Transfer the wedges to the prepared baking sheet, spacing them about 1 inch apart.
10. Bake at 425°F for 15-18 minutes until golden brown and the bottom sounds hollow when tapped.
11. Transfer the bannock to a wire rack and let cool for 5 minutes before serving.
Hearty and satisfying, this bannock has a dense yet tender crumb that holds up beautifully to butter and jam. The subtle saltiness pairs wonderfully with sharp cheddar for a savory snack, or try toasting day-old pieces and topping them with honey for a simple dessert that feels anything but ordinary.
Rustic Oatmeal Bannock
Remember those chilly autumn mornings when you want something warm and comforting but don’t have time for complicated baking? Rustic oatmeal bannock has become my go-to solution—it’s the simple, hearty bread I whip up while my coffee brews, filling the kitchen with that incredible toasty oat aroma that makes everyone wander in asking what’s cooking.
6
portions10
minutes25
minutesIngredients
Rolled oats – 1 cup
All-purpose flour – 1 cup
Baking powder – 1 tbsp
Salt – ½ tsp
Water – ¾ cup
Butter – 2 tbsp
Instructions
- Preheat your oven to 425°F and place a 10-inch cast iron skillet inside to heat up.
- Combine 1 cup rolled oats, 1 cup all-purpose flour, 1 tablespoon baking powder, and ½ teaspoon salt in a medium bowl.
- Mix the dry ingredients thoroughly with a fork until everything is evenly distributed.
- Pour in ¾ cup water and stir just until the dough comes together—don’t overmix or your bannock will be tough.
- Carefully remove the hot skillet from the oven using oven mitts and add 2 tablespoons butter.
- Swirl the melted butter around the skillet to coat the bottom and sides completely.
- Transfer the dough to the hot skillet, pressing it gently into an even circle about 1-inch thick.
- Score the top of the dough with a sharp knife in a crisscross pattern to help it bake evenly.
- Bake at 425°F for 20-25 minutes until the top is golden brown and the edges pull away from the skillet.
- Check for doneness by tapping the top—it should sound hollow when fully baked.
- Let the bannock cool in the skillet for 5 minutes before transferring to a wire rack.
Sometimes I’ll split a warm slice and slather it with honey butter, letting that slightly nutty oat flavor shine through. The texture walks that perfect line between tender and substantial—crusty on the outside while remaining wonderfully moist inside, making it ideal for sopping up soup or standing alone with just a pat of good butter.
Blueberry and Honey Bannock

Remember that time I stumbled upon wild blueberries during a camping trip in Maine? That magical moment inspired this cozy bannock recipe that’s become my go-to comfort food. Rustling up this simple, skillet-baked bread feels like wrapping yourself in a warm blanket on a crisp autumn evening.
8
wedges10
minutes35
minutesIngredients
- Flour – 2 cups
- Baking powder – 1 tbsp
- Salt – ½ tsp
- Honey – ¼ cup
- Milk – ¾ cup
- Blueberries – 1 cup
- Butter – 2 tbsp
Instructions
- Preheat your cast iron skillet in a 375°F oven for 10 minutes—this creates that perfect crispy crust.
- Whisk together flour, baking powder, and salt in a large bowl until no lumps remain.
- Drizzle honey into the dry ingredients while stirring continuously to prevent clumping.
- Pour milk into the mixture and stir just until the dough comes together; overmixing makes tough bannock.
- Gently fold in blueberries using a spatula, being careful not to crush them.
- Remove the hot skillet from the oven and melt butter in it, swirling to coat the bottom.
- Transfer dough to the skillet, patting it into a 1-inch thick circle.
- Bake at 375°F for 25 minutes until the top is golden brown and a toothpick inserted comes out clean.
- Cool in the skillet for 5 minutes before slicing—this helps the structure set properly.
What emerges is a tender crumb studded with jammy blueberries, the honey lending a floral sweetness that balances the slight tang. I love serving thick wedges warm with extra honey drizzled over top, though it’s equally fantastic toasted next morning with a smear of cream cheese.
Sun-Dried Tomato and Olive Bannock

My kitchen counter is currently littered with sun-dried tomatoes and kalamata olives because I’ve been obsessed with this bannock recipe ever since my camping trip last fall. Usually I’m all about complicated breads, but this simple skillet bread has become my go-to for busy weeknights when I want something warm and satisfying without the fuss.
5
portions10
minutes15
minutesIngredients
– All-purpose flour – 2 cups
– Baking powder – 1 tbsp
– Salt – 1 tsp
– Sun-dried tomatoes – ½ cup
– Kalamata olives – ⅓ cup
– Water – ¾ cup
– Olive oil – 2 tbsp
Instructions
1. Preheat your cast iron skillet over medium heat for exactly 5 minutes.
2. Chop ½ cup sun-dried tomatoes into small pieces.
3. Pit and roughly chop ⅓ cup kalamata olives.
4. Combine 2 cups all-purpose flour, 1 tbsp baking powder, and 1 tsp salt in a medium bowl.
5. Add the chopped sun-dried tomatoes and kalamata olives to the dry ingredients.
6. Pour in ¾ cup water and 2 tbsp olive oil.
7. Mix with a fork until the dough just comes together—don’t overmix or your bannock will be tough.
8. Lightly oil your preheated skillet with additional olive oil.
9. Press the dough into the skillet to form a 1-inch thick circle.
10. Cook for 8 minutes on the first side until the bottom develops golden-brown spots.
11. Flip the bannock using a spatula.
12. Cook for another 7 minutes on the second side.
13. Press the center gently with your finger—it should spring back when fully cooked.
14. Transfer to a wire rack and let cool for 5 minutes before slicing.
15. Cut into wedges and serve warm.
Using a well-seasoned cast iron skillet gives you that perfect crispy crust I love, and letting the dough rest for just a minute after mixing helps the flour hydrate properly. Undeniably rustic with its craggy texture, this bannock delivers pockets of salty olives and sweet tomatoes in every bite—I often tear off warm chunks to dip in herbed olive oil or serve alongside a hearty soup for the ultimate comfort meal.
Nutty Whole Wheat Bannock

Just when I thought I’d tried every bread variation, my grandmother’s handwritten recipe box revealed this nutty whole wheat bannock—a humble quick bread that’s become my go-to for chilly autumn evenings. Last Tuesday, while rain tapped against my kitchen window, I discovered this recipe transports me right back to her flour-dusted countertop, where she’d always say “good bread needs no ceremony.”
8
wedges15
minutes18
minutesIngredients
Whole wheat flour – 2 cups
Baking powder – 1 tbsp
Salt – 1 tsp
Walnuts – ½ cup
Milk – ¾ cup
Honey – 2 tbsp
Butter – 3 tbsp
Instructions
1. Preheat your oven to 425°F and line a baking sheet with parchment paper.
2. Whisk together 2 cups whole wheat flour, 1 tablespoon baking powder, and 1 teaspoon salt in a large bowl.
3. Chop ½ cup walnuts into coarse pieces using a sharp knife—I keep them chunky for better texture.
4. Stir the chopped walnuts into the dry ingredients until evenly distributed.
5. Melt 3 tablespoons butter in a small saucepan over medium heat, watching carefully until it bubbles and turns golden brown, about 3 minutes.
6. Combine ¾ cup milk and 2 tablespoons honey in a separate bowl, then whisk in the browned butter.
7. Pour the wet ingredients into the dry ingredients and mix with a fork just until no dry flour remains—overmixing makes bannock tough.
8. Turn the shaggy dough onto a lightly floured surface and gently pat into a 1-inch thick circle.
9. Cut the circle into 8 wedges using a sharp knife dipped in flour to prevent sticking.
10. Arrange the wedges on the prepared baking sheet, leaving 1 inch between each piece.
11. Bake for 15-18 minutes until the tops are golden brown and the bottoms sound hollow when tapped.
12. Transfer to a wire rack and let cool for 10 minutes before serving.
Lightly crisp edges give way to a tender, dense crumb that holds up beautifully to spreads, while the toasted walnuts provide earthy depth in every bite. Last weekend, I split one warm wedge and layered it with sharp cheddar and apple slices—the sweet-salty combination made my rainy afternoon feel downright celebratory.
Apple and Cinnamon Bannock Roll

During my recent camping trip in the Adirondacks, I stumbled upon the most delightful campfire creation that’s become my go-to autumn treat. There’s something magical about the combination of warm apples and cinnamon that just screams fall comfort, and this simple bannock roll captures that perfectly in a portable package that’s equally at home in my kitchen or over an open fire.
1
roll15
minutes25
minutesIngredients
- All-purpose flour – 1 cup
- Baking powder – 1 tsp
- Salt – ¼ tsp
- Water – ⅓ cup
- Apple – 1 medium, peeled and diced
- Ground cinnamon – 1 tsp
- Brown sugar – 2 tbsp
- Butter – 2 tbsp, melted
Instructions
- Combine 1 cup flour, 1 tsp baking powder, and ¼ tsp salt in a medium bowl.
- Gradually add ⅓ cup water while stirring with a fork until a soft dough forms. Tip: Don’t overmix—the dough should be slightly shaggy for the best texture.
- Turn the dough onto a lightly floured surface and knead gently 4-5 times until it holds together.
- Roll the dough into a ¼-inch thick rectangle approximately 8×6 inches.
- Sprinkle the diced apple evenly over the dough surface, leaving a ½-inch border around the edges.
- Combine 1 tsp cinnamon and 2 tbsp brown sugar in a small bowl, then sprinkle this mixture over the apples.
- Starting from one long edge, tightly roll the dough into a log, pinching the seam to seal.
- Brush the entire surface with 2 tbsp melted butter using a pastry brush. Tip: The butter helps create a beautifully golden, crisp exterior.
- Place the roll seam-side down on a parchment-lined baking sheet.
- Bake at 375°F for 22-25 minutes until golden brown and firm to the touch. Tip: Check for doneness by inserting a toothpick—it should come out clean with no wet dough clinging to it.
- Remove from oven and let cool on the baking sheet for 5 minutes before slicing.
Golden and fragrant straight from the oven, this bannock roll delivers a wonderful contrast between the crisp, buttery exterior and the soft, apple-filled interior. The cinnamon-sugar caramelizes slightly around the apples, creating little pockets of sweet warmth throughout each slice. I love serving thick slices warm with a drizzle of caramel sauce or alongside a scoop of vanilla ice cream for an extra-indulgent autumn dessert that never fails to impress.
Vegan Spelt Flour Bannock
Just when I thought my vegan baking experiments had peaked, I stumbled upon this spelt flour bannock recipe during a rainy afternoon when my pantry was nearly empty—sometimes the simplest ingredients create the most comforting results, and this bread quickly became my go-to for quick, wholesome snacks.
2
wedges15
minutes25
minutesIngredients
- Spelt Flour – 2 cups
- Baking Powder – 1 tbsp
- Salt – ½ tsp
- Water – ¾ cup
- Olive Oil – 2 tbsp
Instructions
- Preheat your oven to 375°F and line a baking sheet with parchment paper.
- Whisk together 2 cups spelt flour, 1 tbsp baking powder, and ½ tsp salt in a large bowl until no lumps remain.
- Pour in ¾ cup water and 2 tbsp olive oil, then stir with a wooden spoon until a shaggy dough forms—tip: avoid overmixing to keep the bannock tender.
- Turn the dough onto a lightly floured surface and gently knead it 4–5 times until it holds together.
- Pat the dough into a 1-inch thick circle, about 6 inches in diameter.
- Score the top into 4 wedges with a sharp knife, which helps it bake evenly and gives that classic bannock look.
- Bake for 22–25 minutes until the top is golden brown and the bottom sounds hollow when tapped—tip: use an oven thermometer to ensure accurate temperature for the best rise.
- Transfer the bannock to a wire rack and let it cool for 10 minutes before slicing.
- Serve warm or store in an airtight container for up to 2 days—tip: for a crispier crust, reheat slices in a toaster oven for 3–4 minutes.
Kneading this dough feels meditative, and the result is a slightly nutty, dense-yet-soft bread that’s perfect torn apart and dipped into soups or slathered with avocado. I love splitting a wedge and toasting it for breakfast, its rustic cracks catching pools of maple syrup or jam.
Savory Bacon and Cheddar Bannock
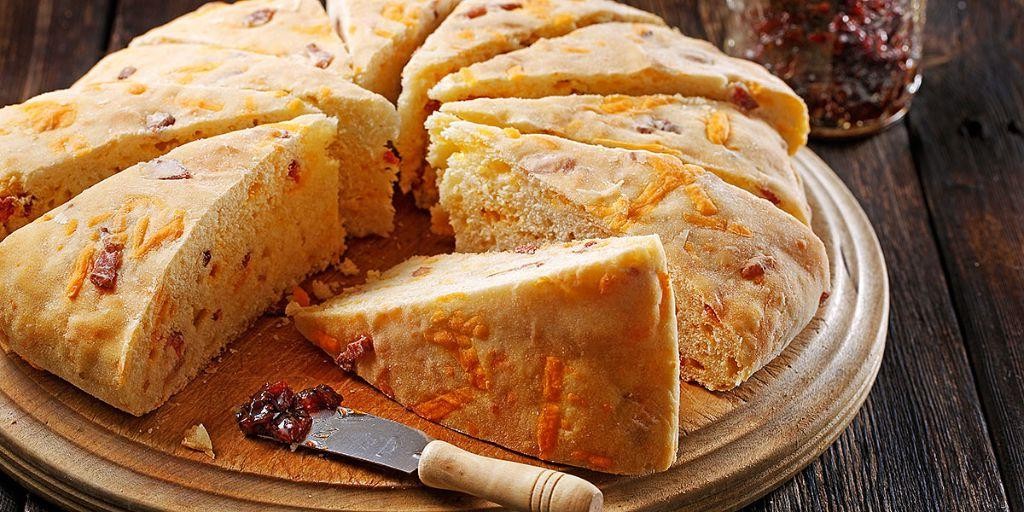
Keeping things simple in the kitchen has always been my motto, especially on busy weeknights when I want something comforting without the fuss. That’s why this savory bacon and cheddar bannock has become my go-to—it’s hearty, cheesy, and comes together in one bowl with minimal cleanup. I first stumbled upon bannock while camping years ago and have been tweaking it ever since for cozy home meals.
8
wedges15
minutes20
minutesIngredients
Flour – 2 cups
Baking powder – 1 tbsp
Salt – 1 tsp
Cooked bacon – ½ cup, crumbled
Shredded cheddar cheese – 1 cup
Milk – ¾ cup
Butter – 2 tbsp, melted
Instructions
1. Preheat your oven to 400°F and line a baking sheet with parchment paper.
2. In a large bowl, whisk together 2 cups of flour, 1 tbsp of baking powder, and 1 tsp of salt until no lumps remain.
3. Stir in ½ cup of crumbled cooked bacon and 1 cup of shredded cheddar cheese until evenly distributed.
4. Pour in ¾ cup of milk and 2 tbsp of melted butter, then mix gently with a fork until a shaggy dough forms—don’t overmix, or the bannock will be tough.
5. Turn the dough out onto a lightly floured surface and pat it into a 1-inch thick circle.
6. Cut the circle into 8 wedges using a sharp knife or bench scraper for clean edges.
7. Arrange the wedges on the prepared baking sheet, spacing them about 1 inch apart.
8. Bake for 18–20 minutes, or until the tops are golden brown and a toothpick inserted into the center comes out clean.
9. Let the bannock cool on the baking sheet for 5 minutes before serving warm.
Perfectly golden and slightly crumbly, this bannock has a rich, smoky flavor from the bacon and a gooey cheese pull in every bite. I love splitting it open and slathering it with herb butter, or serving it alongside a bowl of tomato soup for a comforting meal that feels like a hug.
Pan-Fried Bannock with Mixed Berries

Venturing into my grandmother’s recipe box always brings back such warm memories, especially when I rediscovered her simple bannock recipe that she’d make for us after school. Today I’m sharing my updated version with sweet berries that burst with flavor in every bite – it’s become my go-to comfort food on crisp autumn evenings.
2
portions10
minutes20
minutesIngredients
- Flour – 2 cups
- Baking powder – 1 tbsp
- Salt – ½ tsp
- Water – ¾ cup
- Mixed berries – 1 cup
- Butter – 2 tbsp
Instructions
- Combine 2 cups flour, 1 tablespoon baking powder, and ½ teaspoon salt in a large mixing bowl.
- Gradually add ¾ cup water while stirring with a fork until a shaggy dough forms.
- Gently fold in 1 cup mixed berries being careful not to overmix the dough.
- Divide the dough into 4 equal portions and shape each into ½-inch thick rounds.
- Heat a large skillet over medium heat and melt 1 tablespoon butter until it bubbles.
- Place two dough rounds in the skillet leaving space between them.
- Cook for 4-5 minutes until the bottoms develop golden brown spots.
- Flip the bannock and cook for another 4-5 minutes until both sides are evenly browned.
- Transfer the cooked bannock to a plate and repeat with remaining dough using the second tablespoon of butter.
- Let the bannock rest for 2 minutes before serving to allow the interior to set properly.
Keeping this bannock simple lets the berry juices caramelize beautifully against the crispy exterior while maintaining a wonderfully tender, almost biscuit-like interior. I love serving these warm with a drizzle of honey or splitting them open to make mini berry shortcakes with whipped cream for dessert.
Conclusion
You’ve now discovered 25 incredible bannock bread recipes perfect for any gathering or cozy night in. Whether you’re a seasoned baker or just starting out, there’s something here to delight every palate. We’d love to hear which recipes become your favorites—drop us a comment below and share this delicious roundup on Pinterest so fellow food lovers can enjoy these tasty treats too!


