Brace yourselves for the most incredible, mind-blowing banana pudding experience of your life! This isn’t just any dessert – it’s a creamy, dreamy, banana-packed masterpiece that will have everyone begging for seconds and thirds. Get ready to create pure magic in your kitchen that’ll make you the superstar of every potluck, family gathering, or just-because Tuesday night!
Why This Recipe Works
- Our secret weapon? We use both instant vanilla pudding AND homemade whipped cream for the absolute creamiest, fluffiest texture that melts in your mouth like sweet heaven!
- We layer those beautiful bananas between the pudding and vanilla wafers, creating perfect moisture barriers that keep everything fresh and prevents sogginess for days!
- The overnight chilling time isn’t just a suggestion – it’s the magic wand that transforms good pudding into incredible pudding as all the flavors marry and intensify!
- We use just the right amount of vanilla extract to enhance but not overpower the beautiful banana flavor that makes this dessert so special and memorable!
- The combination of textures from crunchy wafers to creamy pudding to soft bananas creates a party in your mouth with every single spoonful you take!
Ingredients
- 6 large ripe bananas, sliced into 1/4-inch rounds
- 1 box (3.4 oz) instant vanilla pudding mix
- 2 cups whole milk, cold
- 1 cup heavy whipping cream, chilled
- 1/4 cup granulated sugar
- 1 teaspoon pure vanilla extract
- 1 box (11 oz) vanilla wafers
- 1/4 teaspoon salt
Equipment Needed
- Large mixing bowl
- Electric mixer or whisk
- Medium mixing bowl
- 9×13 inch baking dish
- Measuring cups and spoons
- Rubber spatula
- Sharp knife
- Cutting board
Instructions
Whip Up That Heavenly Cream Base
Get ready to create the fluffiest cloud of deliciousness you’ve ever tasted! Pour that ice-cold heavy whipping cream into your large mixing bowl and grab your electric mixer – we’re going for maximum volume here! Start on low speed for about 30 seconds until the cream begins to thicken slightly, then crank it up to medium-high and watch the magic happen! As you’re mixing, gradually add the 1/4 cup of granulated sugar and that glorious teaspoon of vanilla extract. Keep beating until you see beautiful, stiff peaks forming – that means when you lift the beaters out, the cream should stand up straight and proud without collapsing! This should take about 3-4 minutes of continuous mixing. Pro tip: Make sure your bowl and beaters are completely chilled for the best results – pop them in the freezer for 15 minutes before starting if you have time!
Create the Pudding Perfection
Now let’s build the foundation of our incredible dessert! Grab your medium mixing bowl and pour in those 2 cups of cold whole milk – I mean seriously cold, straight from the refrigerator! Sprinkle the entire box of instant vanilla pudding mix over the milk and immediately start whisking like your dessert dreams depend on it! You want to whisk continuously for a full 2 minutes without stopping – set a timer if you need to! The mixture will transform from liquid to thick, creamy pudding right before your eyes! Here’s a game-changing tip: Let the pudding sit for 5 minutes after whisking to thicken up even more – this creates the perfect consistency for layering! You’ll know it’s ready when you can drag a spoon through it and the line holds its shape!
Combine Your Creamy Dream Team
This is where the real magic happens, folks! Take about one-third of your freshly whipped cream and gently fold it into the pudding mixture using a rubber spatula. I’m talking gentle, sweeping motions from the bottom of the bowl up and over – no aggressive stirring that would deflate all that beautiful air we just whipped in! Once that first third is incorporated, add the remaining whipped cream and continue folding until you have a uniform, creamy, dreamy mixture that’s light as air but rich as royalty! The color should be a beautiful pale cream and the texture should be smooth and luxurious! Pro tip: Always fold rather than stir to maintain that incredible light texture we worked so hard to achieve!
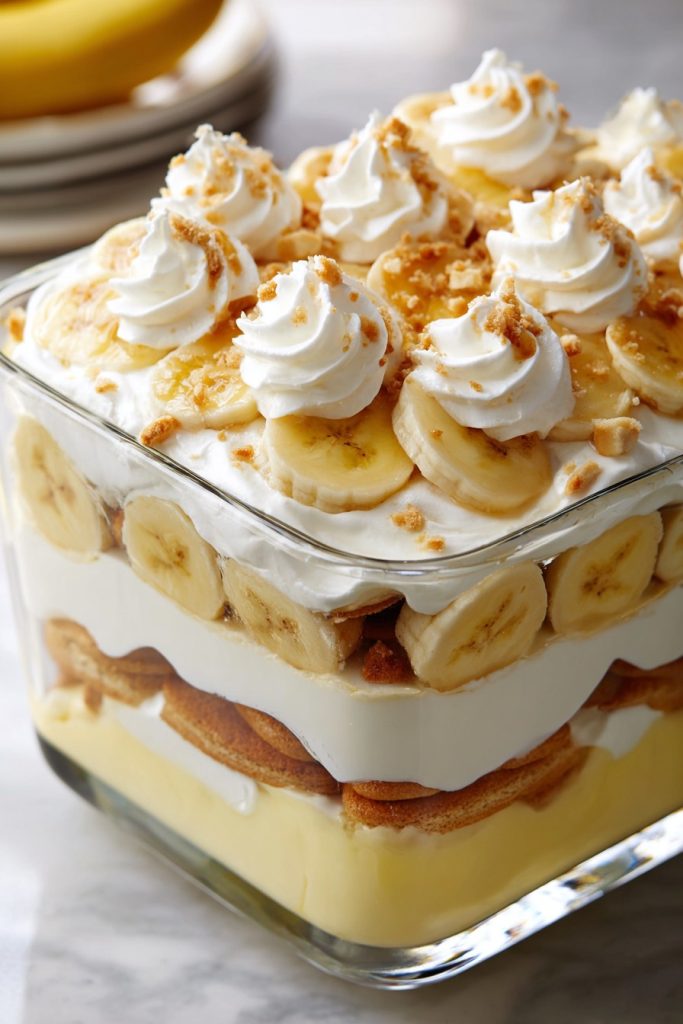
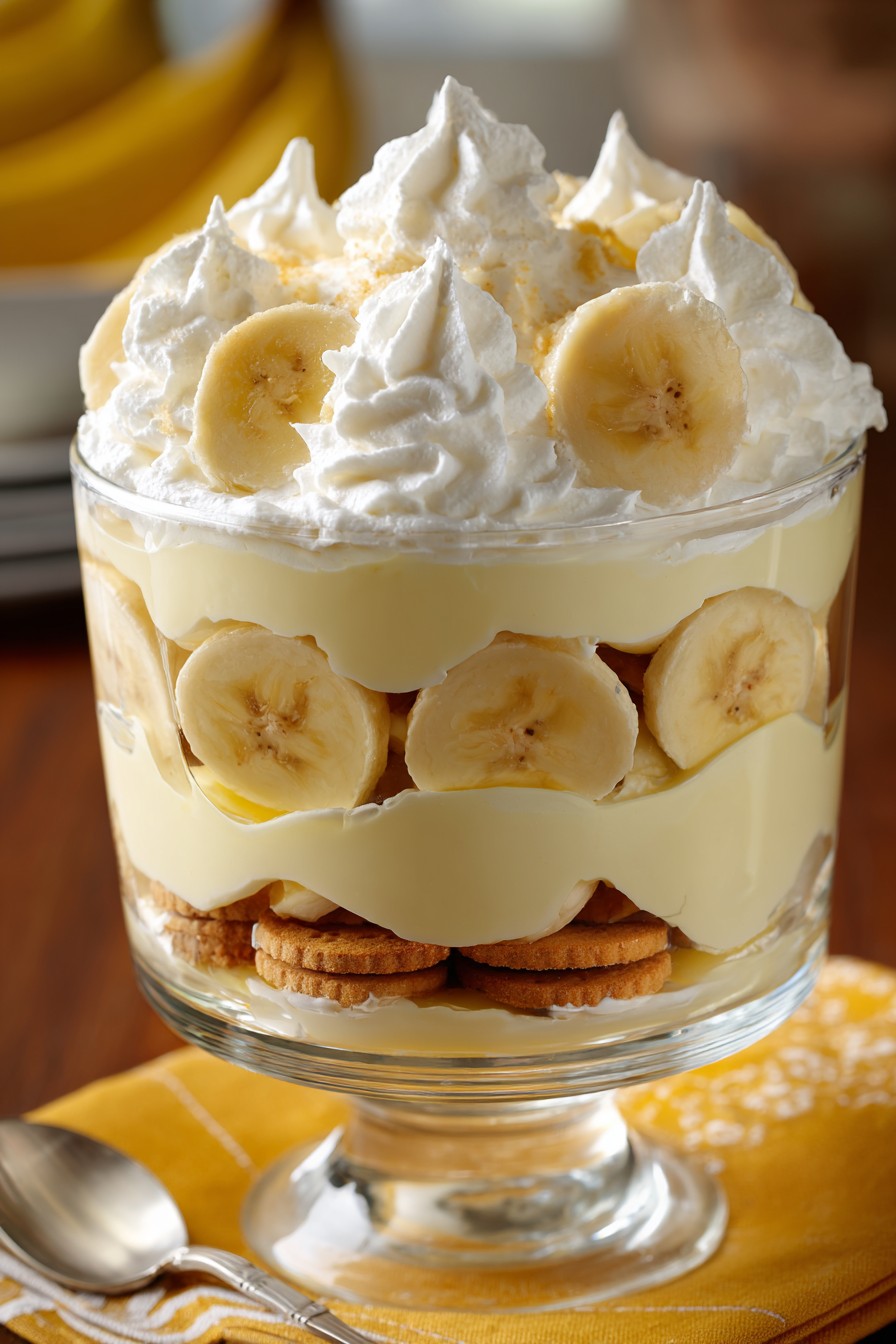
Layer Like a Dessert Pro
Time to build our banana pudding masterpiece! Grab your 9×13 inch baking dish and let’s create layers of pure happiness! Start by covering the bottom with a single layer of vanilla wafers – you’ll use about one-third of the box. Now arrange a beautiful layer of banana slices over the wafers, making sure to cover every inch! Spoon one-third of your creamy pudding mixture over the bananas and spread it evenly with your spatula. Repeat these layers two more times, ending with a final layer of pudding on top! Make it pretty – this is going to be the star of your table!
The Grand Finale and Chill Time
We’re in the home stretch, dessert champions! Take any remaining vanilla wafers and crush them lightly in your hands, then sprinkle them artistically over the top layer of pudding for that beautiful finishing touch! Now comes the hardest part – covering your creation tightly with plastic wrap and refrigerating for at least 4 hours, but ideally overnight! I know it’s tempting to dive right in, but trust me – this waiting period is what transforms good banana pudding into LEGENDARY banana pudding as the flavors meld together and the wafers soften to perfect cake-like texture!
Tips and Tricks
Ready to take your banana pudding game to professional level? Let me share some insider secrets that will make your dessert absolutely unforgettable! First up – banana selection is CRUCIAL! You want bananas that are ripe with plenty of brown spots but not mushy – they should still have some firmness when you slice them. If your bananas are too green, they won’t have developed their full sweetness, and if they’re too ripe, they’ll turn to mush in your pudding! Another game-changer: temperature control! Everything needs to be COLD – your milk, your cream, your bowls. Warm ingredients will prevent proper whipping and setting, leading to a runny pudding that nobody wants! When it comes to layering, don’t be shy with those vanilla wafers – they need to form a solid base to support all that creamy goodness! And here’s a pro move: if you’re making this for a crowd and want to prevent the bananas from browning, you can toss the sliced bananas with a tablespoon of lemon juice – but honestly, I think the natural browning adds character and doesn’t affect the flavor at all! Storage is simple – keep it covered in the refrigerator and it’ll stay perfect for up to 3 days, though I doubt it will last that long! If you want to get fancy, you can pipe the final layer of pudding using a pastry bag for a beautiful presentation that will wow your guests! And remember – the quality of your vanilla extract matters! Spend a few extra dollars on the good stuff – you’ll taste the difference in every creamy bite!
Recipe Variations
- Chocolate Lover’s Dream: Replace the vanilla pudding with chocolate pudding and add 1/2 cup of chocolate chips between layers for an incredible chocolate-banana combination that will satisfy any sweet tooth!
- Tropical Paradise: Mix in 1 cup of toasted coconut flakes with the pudding and add 1 cup of crushed pineapple (well-drained) between layers for a vacation-inspired treat that transports you to the islands!
- Peanut Butter Bliss: Swirl 1/2 cup of creamy peanut butter into the pudding mixture and sprinkle chopped peanuts on top for that classic peanut butter-banana combo everyone adores!
- Berry Burst: Layer fresh strawberries or raspberries with the bananas and add a tablespoon of lemon zest to the whipped cream for a fruity, zesty twist on the classic!
- Southern Comfort: Replace 1/2 cup of the milk with bourbon and add a teaspoon of cinnamon to the pudding mix for a grown-up version that’s perfect for holiday gatherings!
Frequently Asked Questions
Can I make this banana pudding ahead of time?
Absolutely, and honestly, I highly recommend it! Banana pudding actually gets BETTER when made ahead because all those incredible flavors have time to meld together beautifully. You can prepare this up to 24 hours in advance – just make sure to keep it tightly covered in the refrigerator until you’re ready to serve. The vanilla wafers will soften to that perfect cake-like texture, the bananas will infuse their sweetness throughout, and the pudding will set up perfectly. If you need to make it even further ahead, you can prepare the pudding base and whipped cream separately, then assemble about 4 hours before serving to prevent the bananas from getting too soft.
What’s the best way to prevent the bananas from turning brown?
This is one of the most common questions I get, and here’s the real deal about banana browning! The natural oxidation process that causes bananas to brown doesn’t affect the flavor at all – it’s purely cosmetic. However, if you’re serving this for a special occasion and want those bananas to stay pretty, you can toss the sliced bananas with about a tablespoon of lemon juice or pineapple juice before layering. The acid in the juice slows down the browning process significantly. Another trick is to make sure the banana slices are completely covered by pudding on all sides, creating a barrier from the air. But personally, I think the slight browning adds character and shows you’re using fresh ingredients!
Can I use homemade pudding instead of instant?
You absolutely can, but there are some important considerations! Homemade cooked pudding will give you a richer, more custard-like texture that many people adore. However, it requires cooking and cooling time, so plan accordingly. If you go this route, make sure the homemade pudding is completely chilled before folding in the whipped cream, or you’ll end up with a melted mess! The advantage of instant pudding is the convenience and consistent results – it sets up quickly and reliably every time. If you’re new to banana pudding making, I’d stick with instant for your first attempt, then experiment with homemade versions once you’ve mastered the basic technique!
How long does banana pudding last in the refrigerator?
Your beautiful banana pudding creation will stay fresh and delicious in the refrigerator for about 3 days when properly stored with tight plastic wrap covering. After day 3, the bananas will start to get quite soft and the texture might become a bit watery. The vanilla wafers will continue to soften over time, becoming more cake-like by day 2, which many people actually prefer! I don’t recommend freezing banana pudding because the texture of the dairy components and bananas doesn’t hold up well to freezing and thawing. For the absolute best eating experience, I suggest enjoying it within 48 hours of making it – not that it usually lasts that long anyway!
Summary
This incredible banana pudding combines creamy vanilla pudding, fluffy whipped cream, fresh bananas, and crispy vanilla wafers into the ultimate crowd-pleasing dessert that’s perfect for any occasion and guaranteed to disappear quickly!
Ultimate Banana Pudding
4
servings25
minutesIngredients
Instructions
- 1 In large bowl, whip heavy cream with sugar and vanilla until stiff peaks form, about 3-4 minutes
- 2 In separate bowl, whisk pudding mix with cold milk for 2 minutes until thick, let stand 5 minutes
- 3 Gently fold whipped cream into pudding mixture until fully combined
- 4 Layer vanilla wafers, banana slices, and pudding mixture in 9x13 dish, repeating layers
- 5 Sprinkle with crushed wafers, cover and refrigerate at least 4 hours or overnight