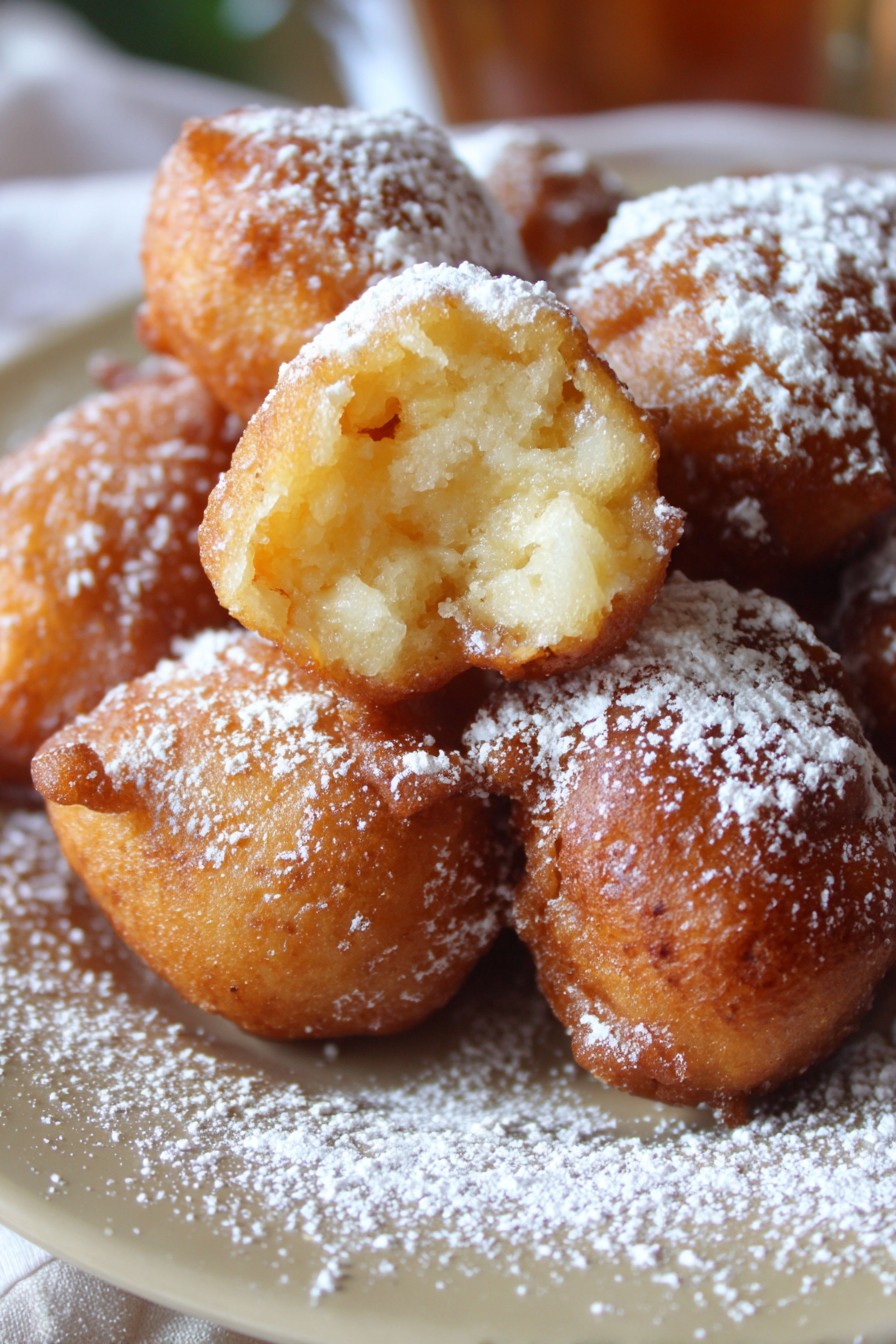
Tired of your bananas staging a dramatic death scene on your countertop? Transform those sad, spotty fruits into golden, crispy miracles that will make you forget pancakes ever existed. These banana fritters are basically edible sunshine – warm, comforting, and guaranteed to turn your morning frown upside down.
Why This Recipe Works
- Spotty bananas bring the perfect natural sweetness and moisture, eliminating the need for excessive sugar while creating the most tender interior texture you’ve ever experienced in a fritter.
- The magical combination of baking powder and buttermilk creates tiny air pockets that make these fritters light as clouds while maintaining that satisfying crispy exterior we all crave.
- Using a thermometer for frying ensures each fritter emerges golden and perfect, not greasy and sad like last week’s failed attempts at being a responsible adult.
- The simple batter comes together faster than you can say “I should probably clean my kitchen,” making these perfect for lazy weekend mornings or desperate Tuesday breakfast emergencies.
- These fritters are basically the culinary equivalent of a warm hug – comforting, reliable, and guaranteed to make everything feel better, even if you burned the first batch.
Ingredients
- 3 medium very ripe bananas (mashed until they resemble baby food)
- 1 cup all-purpose flour (the reliable workhorse of baking)
- 2 tablespoons granulated sugar (just enough to make you smile)
- 1 teaspoon baking powder (the magical rising fairy)
- 1/2 teaspoon ground cinnamon (for that cozy sweater weather vibe)
- 1/4 teaspoon salt (to make all the flavors play nice together)
- 1 large egg (the binding agent that holds our dreams together)
- 1/4 cup buttermilk (the secret to fluffy perfection)
- 1 teaspoon vanilla extract (because vanilla makes everything better)
- Vegetable oil for frying (enough to make your fritters swim happily)
- Powdered sugar for dusting (the snowy mountain tops of deliciousness)
Equipment Needed
- Large mixing bowl
- Medium mixing bowl
- Whisk or fork
- Deep skillet or Dutch oven
- Candy/deep-fry thermometer
- Slotted spoon or spider strainer
- Paper towel-lined plate
- Measuring cups and spoons
Instructions
Prepare Your Banana Army
First, gather those bananas that have been giving you the sad eyes from the fruit bowl. Peel all three bananas and place them in your large mixing bowl. Now comes the therapeutic part – mash those bananas until they reach a consistency somewhere between chunky baby food and smooth pudding. You want some texture, but not full banana chunks that might stage a rebellion during frying. Pro tip: if your bananas are being stubborn, microwave them for 15-20 seconds to soften them up – it’s like giving them a warm hug before their delicious transformation. Once mashed, add the egg, buttermilk, and vanilla extract to the banana mixture. Whisk everything together until it looks like a pale yellow smoothie that you definitely shouldn’t drink (trust me on this one).
Create Your Dry Ingredient Dream Team
The Great Batter Union
This is where the magic happens – the moment when wet meets dry and creates something beautiful. Pour your dry ingredients into the wet banana mixture, but here’s the crucial part: mix gently with a spatula until just combined. We’re looking for a thick, lumpy batter that says “I have character” rather than a smooth, overmixed batter that screams “I’m going to be tough as rubber.” Those little lumps are actually pockets of potential deliciousness. If the batter seems too thick, add another tablespoon of buttermilk. If it’s too runny, add another tablespoon of flour. You’re aiming for a consistency that slowly drops from the spatula rather than pouring like pancake batter.
Frying Temperature Tango
Now for the hot oil party! Pour about 1 1/2 inches of vegetable oil into your deep skillet or Dutch oven and attach your candy thermometer to the side. Heat the oil over medium-high heat until it reaches 350°F – this is the sweet spot where magic happens. If the oil is too cool, your fritters will absorb oil like sponges and become greasy disappointments. Too hot, and they’ll burn on the outside while remaining raw inside – the culinary equivalent of a bad haircut. Maintain this temperature throughout frying, adjusting your heat as needed. Test your oil by dropping a tiny bit of batter in – it should sizzle immediately and float to the top while turning golden brown.
Fritter Formation and First Fry
Using two spoons or a small cookie scoop, carefully drop heaping tablespoons of batter into the hot oil. Don’t overcrowd the pan – these fritters need their personal space to cook properly. I recommend frying 3-4 at a time, depending on your pan size. They should immediately begin sizzling and floating to the surface. Fry for 2-3 minutes on the first side until golden brown and beautiful. You’ll know they’re ready to flip when the edges look set and the bottom has developed that perfect crispy crust. Use your slotted spoon to gently flip each fritter – they should feel light and airy, not heavy and oil-logged.
The Final Fry and Drain
After flipping, fry for another 1-2 minutes until both sides are evenly golden brown and gorgeous. The fritters should feel firm to the touch but still have a slight give when pressed. Remove them with your slotted spoon and let them drain on the paper towel-lined plate. This step is crucial for avoiding greasy fritters – the paper towels will absorb any excess oil while the fritters are still hot. Let them rest for a minute before serving – I know it’s tempting to eat them immediately, but patience prevents burned tongues and maximizes enjoyment.
The Grand Finale Presentation
Once all your fritters are fried to perfection and drained, it’s time for the finishing touches. Dust them generously with powdered sugar using a fine-mesh sieve – this creates that beautiful snowy effect that makes everything look fancier. Serve them warm while they’re still crispy on the outside and fluffy on the inside. They’re perfect as is, but if you’re feeling extra, serve with maple syrup for dipping or a dollop of whipped cream. These are best eaten immediately, but let’s be real – they won’t last long enough to get cold anyway.
Tips and Tricks
Let’s talk about banana selection because not all bananas are created equal when it comes to fritter greatness. You want those bananas that have more brown spots than a Dalmatian – the ones that make you question whether they’re still safe to eat. These super-ripe bananas are sweeter and mash more easily, plus their stronger banana flavor really shines through in the final product. If your bananas aren’t quite there yet, you can speed up the ripening process by placing them in a paper bag with an apple overnight – it’s like a fruit sleepover that yields delicious results.
When it comes to frying temperature, be religious about that thermometer. Oil temperature can fluctuate wildly, and maintaining that perfect 350°F is what separates good fritters from great ones. If you notice your fritters browning too quickly, don’t be afraid to lower the heat slightly. Conversely, if they’re taking forever to brown, nudge the temperature up a bit. The first batch is always your test batch – use it to dial in your perfect temperature before committing to the rest of your batter.
Batter consistency is everything in the fritter world. If your batter seems too thin, add flour one tablespoon at a time until it reaches the proper thickness. If it’s too thick, add buttermilk in tablespoon increments. Remember that the batter will thicken slightly as it sits, so don’t panic if it seems a bit loose initially. The perfect batter should hold its shape when scooped but still be soft enough to spread slightly when it hits the hot oil.
Don’t skip the draining step! Those paper towels are doing important work absorbing excess oil, which means crispier fritters and happier arteries. If you want to take it to the next level, place your drained fritters on a wire rack set over a baking sheet – this allows air to circulate around them, keeping all sides crispy. And whatever you do, resist the urge to press down on the fritters while they’re draining – you’ll squeeze out all the lovely air pockets you worked so hard to create.
Storage is simple but important – these fritters are best eaten immediately, but if you must save some for later, let them cool completely then store in an airtight container at room temperature for up to two days. To reheat, place them in a 350°F oven for 5-7 minutes until crispy again. Do not microwave unless you enjoy soggy, sad fritters – and nobody wants that.
Recipe Variations
- Chocolate Chip Paradise: Fold in 1/2 cup of semi-sweet chocolate chips to the batter before frying. The chocolate melts into gooey pockets of happiness that make these fritters taste like banana bread and chocolate chip cookies had a beautiful baby. Perfect for when you need extra comfort or want to impress breakfast guests who think you’re a culinary genius.
- Nutty Professor: Add 1/2 cup of chopped walnuts or pecans to the batter for extra crunch and sophistication. The nuts toast slightly during frying, releasing their oils and creating deeper, more complex flavors. This variation makes your fritters feel fancier, like they’re wearing a tuxedo to your breakfast table.
- Tropical Vacation: Mix in 1/4 cup of shredded coconut and 2 tablespoons of crushed pineapple (well-drained) for a taste of the islands. The coconut adds texture while the pineapple brings subtle acidity that cuts through the richness. Close your eyes while eating these and you can almost hear ocean waves instead of your morning alarm.
- Spice Explorer: Boost the cinnamon to 1 teaspoon and add 1/4 teaspoon each of nutmeg and allspice for a warm spice blend that will make your kitchen smell like a holiday bakery. These spices complement the banana beautifully and create a more complex flavor profile that will have people asking for your secret recipe.
- Lemon Zest Revival: Add the zest of one lemon to the batter for a bright, citrusy note that cuts through the sweetness. The lemon enhances the banana flavor without making the fritters taste lemony, creating a more balanced and sophisticated treat that’s perfect for spring and summer mornings.
Frequently Asked Questions
Can I bake these instead of frying?
While baking might seem healthier, it creates a completely different texture that’s more like banana muffins than traditional fritters. The magic of fritters comes from the quick, hot oil creating that crispy exterior while keeping the interior light and fluffy. If you must bake, drop tablespoon-sized portions onto a parchment-lined baking sheet and bake at 375°F for 12-15 minutes, flipping halfway through. They’ll be tasty, but they won’t have that signature fritter crunch that makes them so special. The baked version is like watching a movie on your phone instead of in a theater – similar content, completely different experience.
What if I don’t have buttermilk?
No buttermilk? No problem! You can make a quick substitute by adding 1 tablespoon of white vinegar or lemon juice to 1 cup of regular milk and letting it sit for 5 minutes until it curdles slightly. The acidity in buttermilk (or your substitute) reacts with the baking powder to create those lovely air pockets that make your fritters light and airy. Without this reaction, you’d end up with dense, sad banana hockey pucks instead of glorious, fluffy fritters. Regular milk just doesn’t have the same magical properties for this particular recipe.
How do I know when the oil is ready without a thermometer?
If you’re flying thermometer-free, you can test your oil by dropping a small piece of bread or a tiny bit of batter into the oil. If it sizzles immediately, floats to the top, and turns golden brown within 60 seconds, your oil is probably around 350°F. Another method is the wooden spoon trick – dip the handle of a wooden spoon into the oil, and if bubbles form around it immediately, you’re good to go. However, I strongly recommend investing in a cheap candy thermometer – it takes the guesswork out of frying and ensures consistent results every time.
Can I make the batter ahead of time?
You can prepare the batter up to 2 hours in advance, but any longer and the baking powder will lose its effectiveness, resulting in denser fritters. The bananas may also release more liquid as they sit, making your batter thinner over time. If you do make it ahead, store it covered in the refrigerator and give it a quick stir before frying. The best approach is to have all your ingredients measured and ready to go, then mix the batter right before frying for the lightest, fluffiest results possible.
What’s the best way to serve these fritters?
These fritters are incredibly versatile! Serve them dusted with powdered sugar for a simple treat, with maple syrup for classic breakfast vibes, or with a dollop of whipped cream for extra indulgence. They’re also fantastic with a scoop of vanilla ice cream for dessert, or with Greek yogurt and honey for a slightly healthier twist. Honestly, they’re so good you could probably serve them with ketchup and people would still rave about them (though I don’t recommend testing that theory).
Summary
Transform overripe bananas into golden, crispy fritters that combine fluffy interiors with satisfying crunch. This simple recipe delivers restaurant-quality results using basic pantry ingredients and techniques that even kitchen newbies can master. Perfect for breakfast, brunch, or whenever you need a little edible happiness in your life.
Banana Fritters
4
servings10
minutes15
minutesIngredients
Instructions
- 1 Mash bananas in large bowl, then whisk in egg, buttermilk, and vanilla
- 2 In separate bowl, whisk flour, sugar, baking powder, cinnamon, and salt
- 3 Combine wet and dry ingredients, mixing until just combined
- 4 Heat 1 1/2 inches oil to 350°F in deep skillet
- 5 Drop heaping tablespoons of batter into hot oil, frying 3-4 at a time
- 6 Fry 2-3 minutes per side until golden brown
- 7 Drain on paper towels, dust with powdered sugar, and serve warm