Picture this: the warm, comforting aroma of banana bread wafting through my grandmother’s kitchen on lazy Sunday mornings. That distinct scent, mingling with the sound of her humming old hymns while she mixed the batter, created memories that have stayed with me for decades. Today, I’m sharing her cherished eggless version, passed down through generations and perfected with time.
Why This Recipe Works
- The combination of mashed bananas and Greek yogurt creates incredible moisture without needing eggs, resulting in a tender crumb that melts in your mouth
- Using both baking soda and baking powder ensures perfect rise and texture, giving you that classic bakery-style dome every single time
- The blend of brown and white sugars creates depth of flavor with caramel notes that complement the banana perfectly
- Resting the batter for 15 minutes allows the flour to fully hydrate, creating a more uniform texture throughout the loaf
- The simple ingredient list means you likely have everything on hand for those spontaneous baking moments when the craving strikes
Ingredients
- 3 large very ripe bananas, mashed (about 1 1/2 cups)
- 1/2 cup plain Greek yogurt
- 1/2 cup unsalted butter, melted and cooled
- 1/2 cup granulated sugar
- 1/2 cup light brown sugar, packed
- 2 teaspoons pure vanilla extract
- 2 cups all-purpose flour
- 1 teaspoon baking soda
- 1/2 teaspoon baking powder
- 1/2 teaspoon salt
- 1 teaspoon ground cinnamon
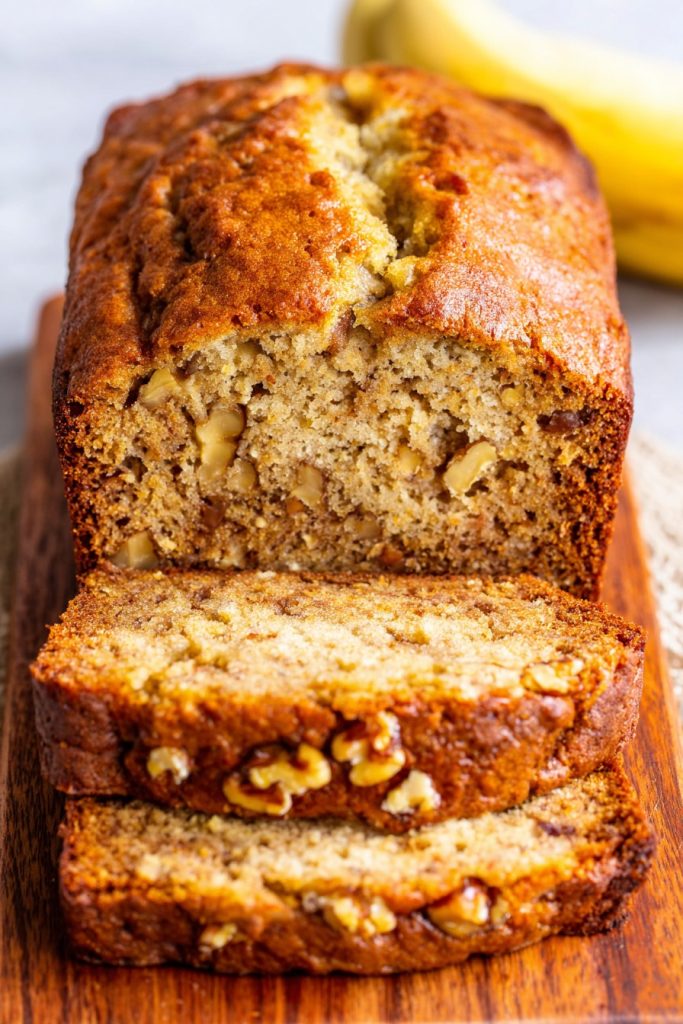
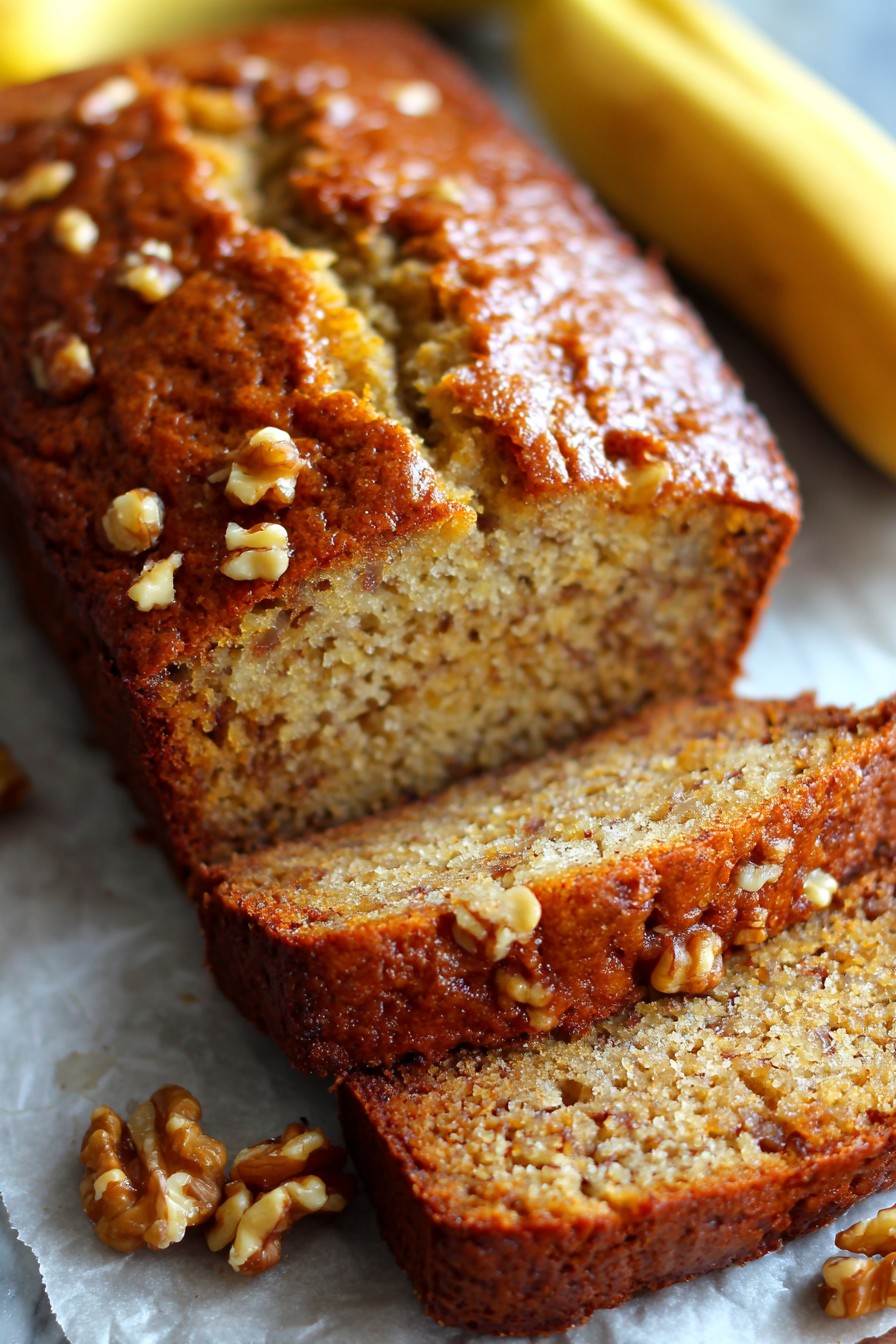
- 1/2 cup chopped walnuts (optional)
Equipment Needed
- 9×5 inch loaf pan
- Mixing bowls (large and medium)
- Whisk and spatula
- Measuring cups and spoons
- Cooling rack
- Toothpick or cake tester
Instructions
Preparing Your Ingredients and Pan
Before we begin mixing, let’s set the stage for baking success. Preheat your oven to 350°F and generously grease your 9×5 inch loaf pan with butter or cooking spray, making sure to get into all the corners. In a large mixing bowl, mash your very ripe bananas until they reach a smooth, pudding-like consistency with just a few small lumps for texture. The bananas should be so spotted they’re almost black – that’s when they’re sweetest and most flavorful. In a separate medium bowl, whisk together your dry ingredients: the all-purpose flour, baking soda, baking powder, salt, and ground cinnamon. This careful preparation reminds me of watching my grandmother meticulously measure each ingredient, her hands moving with practiced grace that only comes from years of creating comfort for those she loved.
Creating the Wet Mixture
Now comes the magical part where we build our foundation of flavor. To your mashed bananas, add the plain Greek yogurt, melted and cooled butter, granulated sugar, light brown sugar, and pure vanilla extract. Using a sturdy whisk, blend these ingredients together until they form a smooth, homogeneous mixture where no streaks of yogurt or butter remain visible. The brown sugar will create little caramel swirls through the batter that promise depth and complexity in every bite. Tip: Make sure your melted butter has cooled to room temperature before adding it to prevent cooking the bananas or curdling the yogurt. This careful attention to temperature control was something my grandmother always emphasized, saying it separated good bakers from great ones.
Combining Wet and Dry Ingredients
This step requires a gentle touch and patience – qualities my grandmother said made baking a form of meditation. Gradually add your whisked dry ingredients to the wet mixture, folding gently with a spatula until just combined. You’ll want to stop mixing when you no longer see dry flour pockets, but small lumps in the batter are perfectly fine and actually desirable. Overmixing develops gluten and can lead to a tough, dense bread rather than the tender crumb we’re aiming for. If you’re using walnuts, now is the time to fold them in gently, distributing them evenly throughout the batter. The sound of the walnuts clicking against the bowl takes me right back to childhood kitchen counters, waiting impatiently for that first warm slice.
Resting and Baking the Batter
Here’s a secret step that makes all the difference – let the batter rest for 15 minutes before baking. This allows the flour to fully hydrate and the baking agents to begin their work, resulting in a more even rise and finer texture. While waiting, I always think about how my grandmother used this time to clean her workspace, humming as she wiped counters, teaching me that baking is as much about the process as the result. After resting, pour the batter into your prepared loaf pan, smoothing the top with your spatula. Tip: For that beautiful bakery-style crack down the center, run a thin line of melted butter down the middle before baking. Bake at 350°F for 55-65 minutes, until the top is golden brown and a toothpick inserted into the center comes out clean or with just a few moist crumbs attached.
Cooling and Serving Your Masterpiece
The hardest part of baking banana bread has always been waiting for it to cool properly. Remove your beautiful loaf from the oven and let it rest in the pan for 15 minutes – this allows the structure to set and makes removal much easier. Then, carefully run a knife around the edges and transfer the bread to a cooling rack. Tip: For the perfect slicing texture, wait until the bread is completely cool before cutting, about 2 hours. I know it’s tempting to cut into it warm, but patience rewards you with clean slices that showcase the beautiful crumb. My grandmother always said good things come to those who wait, and she’d distract us during this waiting period with stories of her own childhood and the banana bread her mother used to make.
Tips and Tricks
Over the years of making this family recipe, I’ve gathered some invaluable insights that transform good banana bread into extraordinary banana bread. First, let’s talk about banana ripening – if your bananas aren’t quite ripe enough, you can speed up the process by baking them (unpeeled) at 300°F for 15-20 minutes until the skins turn black. This caramelizes the natural sugars and creates that deep banana flavor we crave. When measuring flour, always use the spoon-and-level method rather than scooping directly from the bag with your measuring cup. Scooping packs the flour down and can lead to dry, dense bread. Instead, spoon flour into your measuring cup until heaping, then level off with a straight edge.
Storage is another area where small changes make big differences. While this bread keeps well at room temperature for 2-3 days wrapped in plastic wrap, for longer storage I recommend slicing the entire loaf and freezing individual slices between parchment paper. This way, you can pull out just what you need and toast it straight from frozen – the toasting brings back that fresh-from-the-oven warmth and revives the texture beautifully. If you find your bread browning too quickly on top while the center remains undercooked, create a simple foil tent by loosely covering the loaf pan with aluminum foil during the last 15-20 minutes of baking.
For those who love precise baking, consider weighing your ingredients rather than using volume measurements. 2 cups of all-purpose flour equals approximately 240 grams, while 1 cup of mashed bananas is about 225 grams. This accuracy eliminates variables and ensures consistent results every time. When testing for doneness, don’t just rely on the toothpick test – also look for the bread pulling away slightly from the sides of the pan and listen for a hollow sound when you tap the top. These multiple indicators give you confidence that your bread is perfectly baked through. Finally, remember that ovens vary, so invest in an inexpensive oven thermometer to ensure your temperature readings are accurate – this small tool has saved many batches in my kitchen over the years.
Recipe Variations
- Chocolate Chip Delight: Fold in 3/4 cup of semi-sweet chocolate chips along with the walnuts (or instead of them) for a decadent treat that turns ordinary banana bread into dessert-worthy indulgence. The melted chocolate pockets create little bursts of richness throughout each slice, making this version particularly popular with children and anyone with a sweet tooth. You could also use white chocolate chips or a combination for visual appeal and flavor complexity.
- Streusel-Topped Elegance: Create a simple streusel topping by combining 1/4 cup flour, 1/4 cup brown sugar, 2 tablespoons cold cubed butter, and 1/2 teaspoon cinnamon until crumbly. Sprinkle this over the batter before baking for a bakery-style finish with delightful texture contrast. The crunchy, buttery topping elevates the bread from simple snack to special occasion treat, perfect for brunches or when you want to impress guests with minimal extra effort.
- Whole Wheat Healthier Option: Substitute 1 cup of the all-purpose flour with whole wheat flour for added fiber and nutty flavor. You might need to add an extra tablespoon or two of yogurt to maintain moisture since whole wheat flour absorbs more liquid. This variation creates a heartier bread that feels substantial and nourishing, perfect for breakfasts or afternoon snacks when you want something satisfying without guilt.
- Spiced Autumn Version: Add 1/2 teaspoon each of ground nutmeg and ground ginger along with the cinnamon for a warm, spiced flavor profile that evokes fall comfort. This variation pairs beautifully with a cup of tea or coffee and makes your kitchen smell like the coziest season all year round. The additional spices complement the banana’s natural sweetness while adding complexity that keeps each bite interesting.
- Gluten-Free Adaptation: Replace the all-purpose flour with a 1:1 gluten-free baking blend and add 1/2 teaspoon xanthan gum if your blend doesn’t include it. The structure might be slightly more delicate, but the flavor remains wonderfully familiar, allowing those with dietary restrictions to enjoy this family favorite without compromise.
Frequently Asked Questions
Can I make this recipe dairy-free?
Absolutely! For a completely dairy-free version, substitute the Greek yogurt with an equal amount of dairy-free yogurt (coconut or almond-based work well) and replace the butter with coconut oil or vegan butter. The texture might be slightly different but still delicious. I’ve made this for family members with dairy sensitivities, and it maintains that comforting banana bread quality we all love. Just ensure your dairy-free substitutes are at room temperature before incorporating them into the batter for best results.
How ripe should my bananas be?
The ideal bananas for this recipe should be very ripe with black spots covering at least 50% of the peel, and they should feel soft to the touch. These overripe bananas are sweeter and more flavorful because the starches have converted to sugars, and they mash more easily into a smooth puree. If your bananas aren’t quite there yet, you can speed up ripening by placing them in a paper bag overnight or using the baking method mentioned in our tips section.
Can I make this recipe into muffins instead?
Yes, this batter adapts beautifully to muffin form! Simply divide the batter among 12 standard muffin cups lined with paper liners and bake at 375°F for 18-22 minutes, until a toothpick inserted comes out clean. The higher temperature helps create that lovely domed top we associate with bakery muffins. This variation is perfect for portion control, lunchboxes, or when you want individual servings ready to grab and go.
Why did my banana bread sink in the middle?
A sunken center usually indicates underbaking or overmixing. Ensure you’re baking until a toothpick comes out completely clean, and remember that visual cues like golden brown color and pulling away from the pan edges are important indicators. Also, be gentle when combining wet and dry ingredients – overmixing develops too much gluten, which can collapse during cooling. Oven temperature accuracy is another common culprit, so verifying your oven’s calibration with a thermometer can prevent this issue.
How long does banana bread stay fresh?
Properly stored in an airtight container at room temperature, this banana bread maintains its freshness for 2-3 days. For longer storage, I recommend freezing sliced portions as mentioned earlier. The bread actually tastes best the day after baking once the flavors have had time to meld and develop fully. If your bread seems to be drying out, you can refresh slices by lightly toasting them or warming them in the microwave for 10-15 seconds.
Summary
This cherished family recipe creates moist, flavorful banana bread without eggs, carrying forward generations of kitchen wisdom and comfort. With simple ingredients and heartfelt techniques, it delivers that nostalgic taste of home we all crave, perfect for creating new memories while honoring old traditions.
Grandma's Eggless Banana Bread
4
servings20
minutes60
minutesIngredients
Instructions
- 1 Preheat oven to 350°F and grease a 9x5 inch loaf pan
- 2 Mash bananas until smooth in a large bowl
- 3 Whisk together flour, baking soda, baking powder, salt, and cinnamon in a separate bowl
- 4 Add yogurt, melted butter, both sugars, and vanilla to bananas, mixing until smooth
- 5 Gradually fold dry ingredients into wet mixture until just combined
- 6 Fold in walnuts if using, then let batter rest 15 minutes
- 7 Pour into prepared pan and bake 55-65 minutes until golden and toothpick comes out clean
- 8 Cool in pan 15 minutes, then transfer to rack to cool completely


