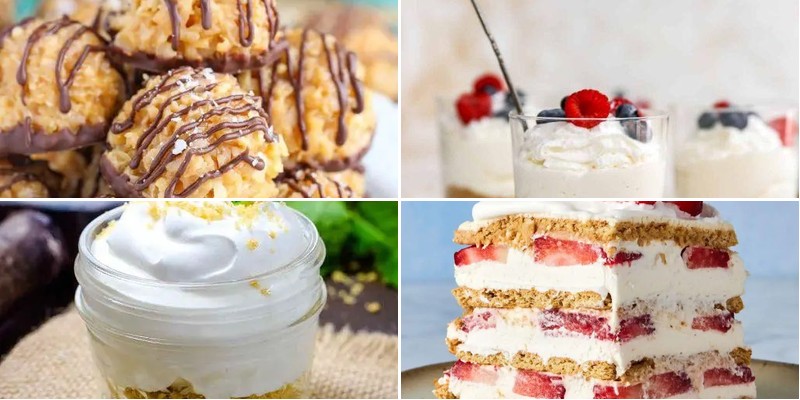
Many of us crave something sweet but don’t want to turn on the oven—especially during busy weeks or hot summer days. That’s where these brilliant bakeless desserts come in! From creamy no-bake cheesecakes to refreshing frozen treats, this collection proves you can create impressive, delicious sweets without ever preheating. Get ready to discover 23 easy recipes perfect for any occasion.
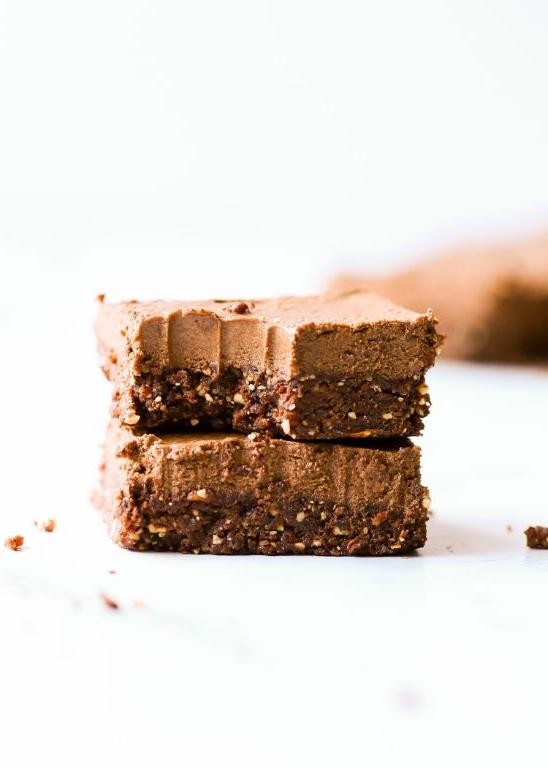
No-Bake Chocolate Peanut Butter Bars
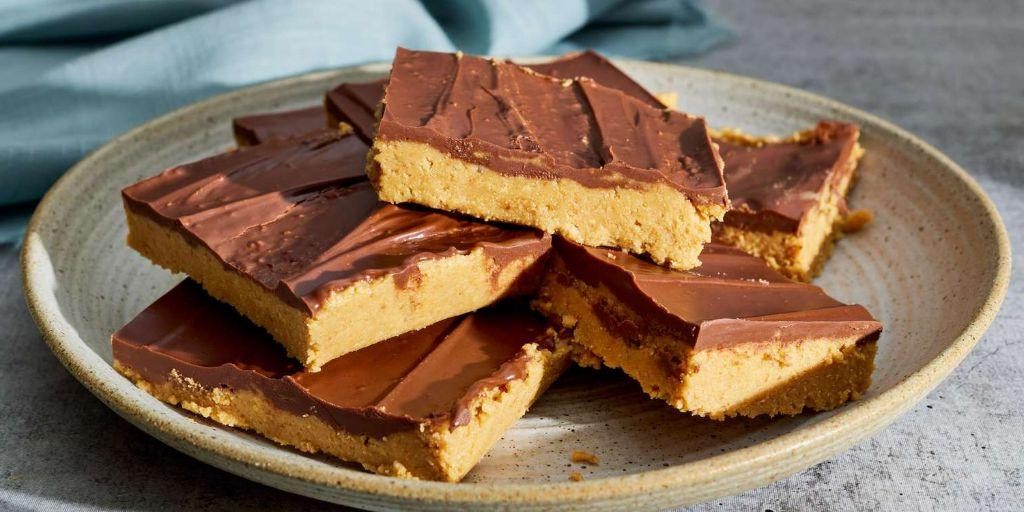
Only have 15 minutes? These no-bake bars deliver rich chocolate and salty peanut butter in every bite. Perfect for last-minute cravings or unexpected guests.
16
squares15
minutes2
minutesIngredients
Graham cracker crumbs – 2 cups
Powdered sugar – 1 cup
Peanut butter – 1 cup
Unsalted butter – ½ cup
Semi-sweet chocolate chips – 1½ cups
Instructions
- Line an 8×8-inch baking pan with parchment paper, leaving overhang on two sides.
- Combine graham cracker crumbs, powdered sugar, peanut butter, and melted butter in a large bowl.
- Press mixture firmly into the prepared pan using the bottom of a measuring cup for even compression.
- Melt chocolate chips in a microwave-safe bowl in 30-second intervals, stirring between each.
- Spread melted chocolate evenly over the peanut butter layer with an offset spatula.
- Refrigerate for at least 2 hours until the chocolate is completely set and firm to the touch.
- Lift bars from pan using parchment overhang and place on a cutting board.
- Cut into 16 squares with a sharp knife wiped clean between cuts for neat edges.
Buttery and crumbly with a smooth chocolate finish, these bars offer satisfying texture contrast. For a festive twist, sprinkle flaky sea salt over the chocolate before chilling. They stay firm at room temperature for easy potluck transport.
Easy No-Bake Cheesecake Cups

Sometimes you need dessert fast without heating up the kitchen. These individual cheesecake cups come together in minutes. Skip the oven entirely for creamy, cool satisfaction.
8
cups15
minutesIngredients
Graham cracker crumbs – 1 cup
Cream cheese – 8 oz
Heavy cream – 1 cup
Powdered sugar – ½ cup
Vanilla extract – 1 tsp
Instructions
1. Place 8 small cups or jars on your work surface.
2. Divide 1 cup graham cracker crumbs evenly among all cups.
3. Press crumbs firmly into the bottom of each cup using the back of a spoon.
4. Beat 8 oz softened cream cheese with an electric mixer on medium speed for 2 minutes until completely smooth.
5. Add ½ cup powdered sugar to the cream cheese and beat for 1 more minute until fully incorporated.
6. Pour in 1 tsp vanilla extract and mix for 30 seconds until combined.
7. In a separate bowl, whip 1 cup heavy cream on high speed for 3-4 minutes until stiff peaks form.
8. Gently fold the whipped cream into the cream cheese mixture using a spatula until no white streaks remain.
9. Divide the cheesecake filling evenly among the prepared cups.
10. Smooth the tops with the back of a spoon or an offset spatula.
11. Refrigerate the cheesecake cups for at least 4 hours until completely set.
12. Serve chilled directly from the refrigerator.
What you get is a light, airy texture that melts on the tongue with classic creamy tang. The crisp graham cracker base provides perfect textural contrast against the smooth filling. For a fun twist, top with fresh berries or a drizzle of chocolate sauce right before serving.
No-Bake Strawberry Icebox Cake
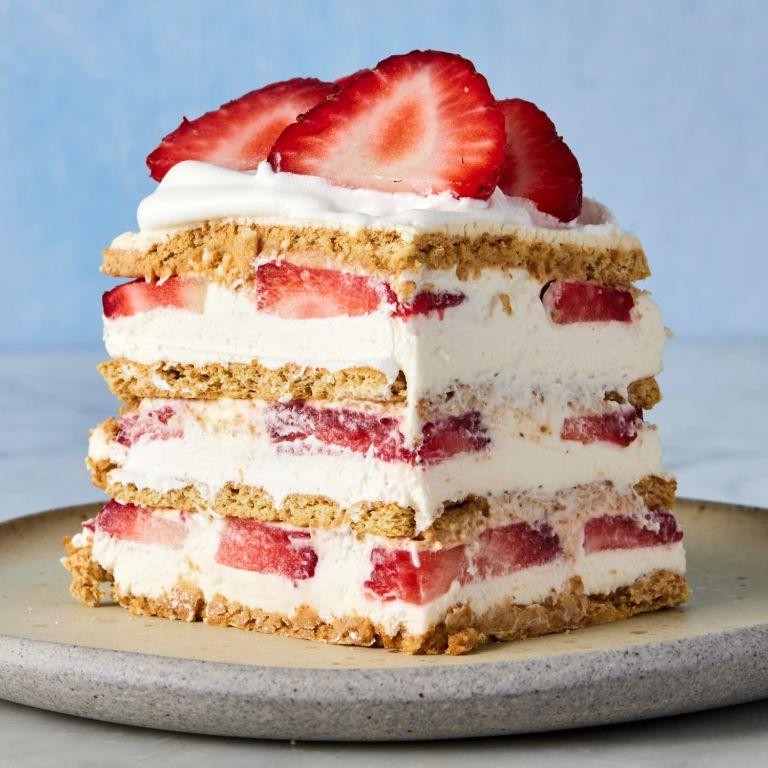
Perfect for hot summer days, this no-bake strawberry icebox cake requires zero oven time. Prepare it in minutes, then let the fridge do all the work. You’ll love the creamy, refreshing layers.
12
servings20
minutesIngredients
- Graham crackers – 1 box (about 24 sheets)
- Heavy cream – 2 cups
- Powdered sugar – ½ cup
- Vanilla extract – 1 tsp
- Fresh strawberries – 2 lbs
Instructions
- Wash 2 lbs of fresh strawberries under cold running water.
- Pat the strawberries completely dry with paper towels.
- Slice the strawberries into ¼-inch thick pieces using a sharp knife.
- Place 2 cups of heavy cream in a large, chilled metal bowl.
- Add ½ cup of powdered sugar and 1 tsp of vanilla extract to the bowl.
- Whip the mixture on medium-high speed until stiff peaks form, about 3-4 minutes.
- Spread a thin layer of whipped cream on the bottom of a 9×13 inch baking dish.
- Arrange a single layer of graham crackers over the whipped cream, breaking crackers to fit edges.
- Spread ⅓ of the remaining whipped cream evenly over the graham cracker layer.
- Arrange ⅓ of the sliced strawberries in a single layer over the whipped cream.
- Repeat steps 8-10 two more times to create three complete layers.
- Cover the baking dish tightly with plastic wrap, pressing it directly onto the surface.
- Refrigerate the cake for at least 8 hours or overnight until graham crackers soften completely.
The chilled cake develops a soft, cake-like texture as the graham crackers absorb moisture from the cream. Sweet strawberry slices provide bursts of fresh flavor against the rich vanilla cream. Serve chilled slices with extra strawberry garnish or drizzle with chocolate sauce for variation.
Creamy No-Bake Lemon Tart
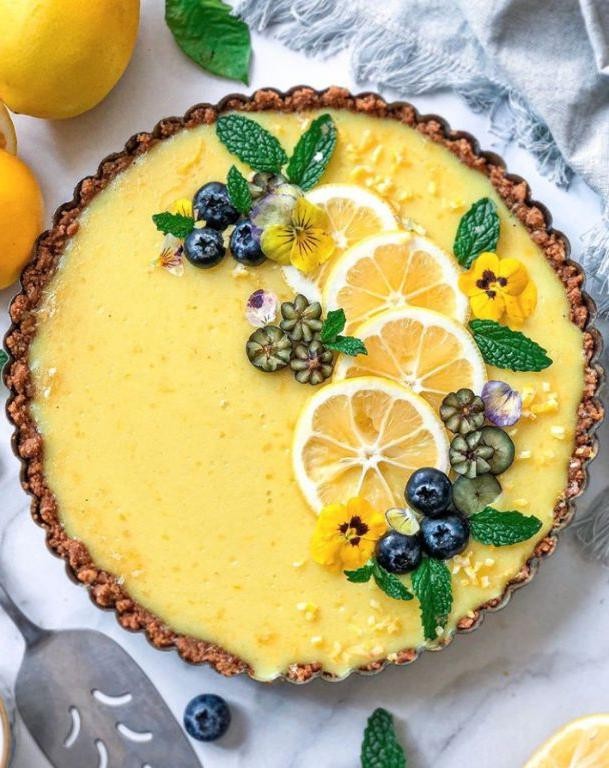
Unbelievably simple yet sophisticated, this no-bake lemon tart comes together in minutes. Using just five ingredients, it delivers bright citrus flavor with creamy texture. Perfect for warm days when you want dessert without heating the kitchen.
8
portions25
minutesIngredients
Graham cracker crumbs – 1½ cups
Unsalted butter – ½ cup
Cream cheese – 8 oz
Sweetened condensed milk – 14 oz
Lemon juice – ½ cup
Instructions
1. Melt butter in microwave for 45 seconds until completely liquid.
2. Combine graham cracker crumbs with melted butter in medium bowl.
3. Press crumb mixture firmly into 9-inch tart pan using flat-bottomed cup for even distribution.
4. Chill crust in freezer for 15 minutes until firm to the touch.
5. Beat cream cheese with electric mixer on medium speed for 2 minutes until smooth and lump-free.
6. Pour sweetened condensed milk into cream cheese while mixer runs on low.
7. Add lemon juice gradually to prevent curdling, scraping bowl sides with spatula.
8. Mix on medium-high for 1 minute until filling thickens visibly.
9. Pour filling over chilled crust, smoothing top with offset spatula.
10. Refrigerate tart for minimum 4 hours or until filling sets completely when pan is jiggled.
Buttery crust contrasts with tangy lemon filling that’s both rich and refreshing. The creamy texture melts smoothly while maintaining structure when sliced. Serve chilled with fresh berries or toasted coconut for contrasting textures.
No-Bake Coconut Macaroons

A perfect treat when you’re short on time, these no-bake coconut macaroons come together in minutes. All you need is a few pantry staples and a sweet tooth. They’re ideal for last-minute guests or a quick dessert craving.
12
macaroons15
minutesIngredients
– Sweetened shredded coconut – 2 cups
– Sweetened condensed milk – 1/2 cup
– Vanilla extract – 1 tsp
– Salt – 1/4 tsp
Instructions
1. Line a baking sheet with parchment paper.
2. Combine sweetened shredded coconut, sweetened condensed milk, vanilla extract, and salt in a medium bowl.
3. Mix thoroughly with a spatula until all ingredients are fully incorporated and the coconut is evenly coated.
4. Use a 1-tablespoon cookie scoop to portion the mixture onto the prepared baking sheet, spacing macaroons 1 inch apart.
5. Gently press each scoop with your fingers to compact it into a mound shape, which helps the macaroons hold together better.
6. Refrigerate the macaroons for at least 2 hours, or until firm to the touch.
7. For best texture, let the macaroons sit at room temperature for 10 minutes before serving to soften slightly. Get ready for chewy, coconut-packed bites with a subtle vanilla sweetness. Drizzle them with melted chocolate for an elegant touch, or enjoy their simple, tropical flavor straight from the fridge.
Chocolate Mint Oreo Refrigerator Fudge
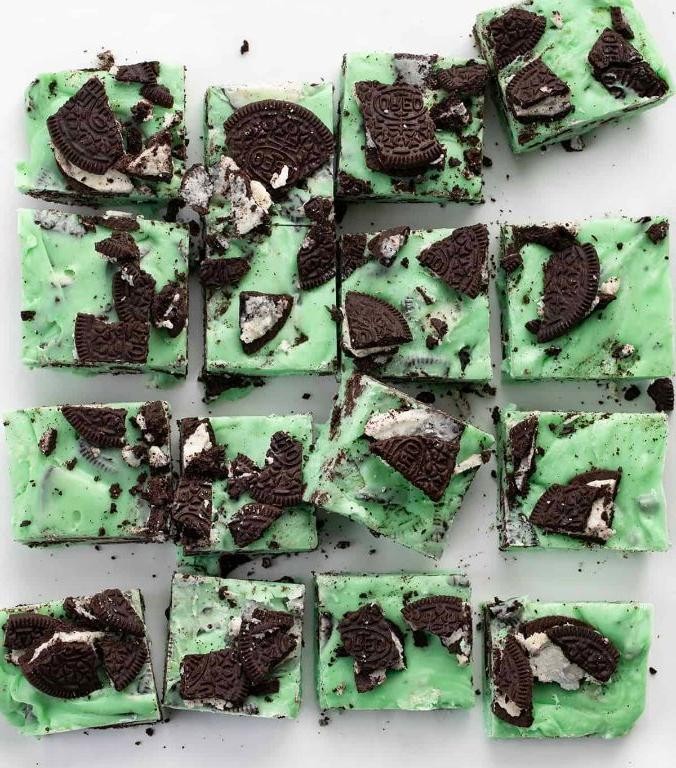
A ridiculously easy no-bake fudge that comes together in minutes. This chocolate mint dessert requires zero cooking skills and sets up perfectly in your refrigerator. You’ll have creamy, minty fudge ready to slice in just a few hours.
64
squares15
minutes2
minutesIngredients
White chocolate chips – 3 cups
Sweetened condensed milk – 14 oz
Peppermint extract – 1 tsp
Green food coloring – 5 drops
Crushed Oreo cookies – 1 cup
Instructions
1. Line an 8×8 inch baking pan with parchment paper, leaving overhang on two opposite sides for easy removal.
2. Combine white chocolate chips and sweetened condensed milk in a medium microwave-safe bowl.
3. Microwave the mixture on high for 1 minute, then stir thoroughly with a spatula.
4. Continue microwaving in 15-second intervals, stirring after each, until the chocolate is completely melted and smooth.
5. Stir in peppermint extract and green food coloring until evenly distributed throughout the mixture.
6. Fold in crushed Oreo cookies gently until just combined, being careful not to overmix.
7. Spread the fudge mixture evenly into the prepared pan using a spatula.
8. Press the surface firmly with the back of a spoon to eliminate air pockets and create a smooth top.
9. Refrigerate the fudge for at least 4 hours, or until completely firm to the touch.
10. Lift the fudge from the pan using the parchment paper overhang and place on a cutting board.
11. Cut into 1-inch squares using a sharp knife wiped clean between cuts for neat edges.
12. Store the fudge in an airtight container in the refrigerator for up to 2 weeks.
The fudge has a creamy, melt-in-your-mouth texture with cool mint flavor that perfectly complements the chocolate cookie crunch. For an elegant presentation, dust the squares with crushed candy canes before serving, or layer them between sheets of wax paper in a decorative tin.
Simple No-Bake Raspberry Pie

Grab your favorite pie dish for this effortless dessert. Get ready to impress with minimal effort and maximum flavor. This no-bake treat comes together in minutes.
8
servings15
minutesIngredients
Graham cracker crust – 1 (9-inch)
Fresh raspberries – 3 cups
Cream cheese – 8 oz
Sweetened condensed milk – 1 (14 oz) can
Lemon juice – 2 tbsp
Whipped cream – 1 cup
Instructions
1. Place the graham cracker crust on a flat surface.
2. Beat cream cheese with an electric mixer on medium speed for 2 minutes until smooth.
3. Pour sweetened condensed milk into the cream cheese mixture.
4. Add lemon juice to the bowl.
5. Mix on low speed for 1 minute until fully combined.
6. Fold in 2 cups of raspberries gently with a spatula.
7. Spread the filling evenly into the graham cracker crust.
8. Refrigerate the pie for at least 4 hours until firm.
9. Top with whipped cream just before serving.
10. Arrange remaining 1 cup of raspberries over the whipped cream. Make sure your cream cheese is at room temperature for easiest mixing. Chill the pie thoroughly for clean slices. Reserve some perfect raspberries for garnish. My family loves the contrast between the creamy filling and tart berries. The graham cracker crust provides satisfying crunch against the smooth texture. Try serving with extra fresh mint or a drizzle of white chocolate.
No-Bake Key Lime Pie in Jars
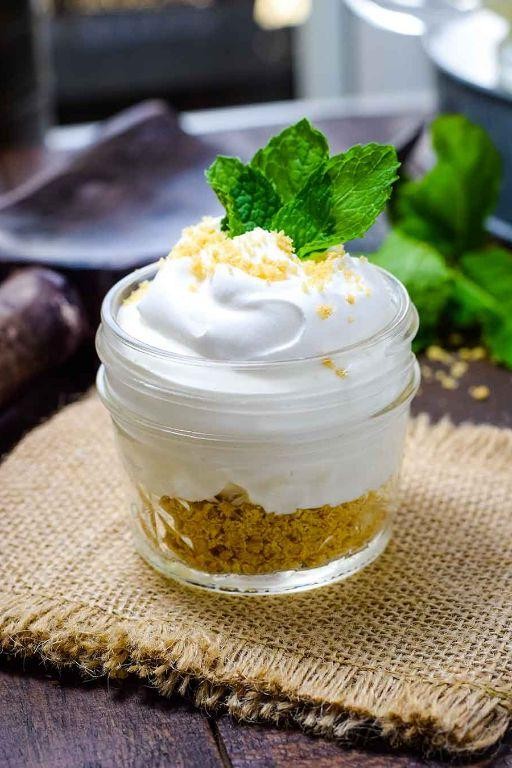
Dazzlingly simple and refreshing, this no-bake key lime pie in jars requires zero oven time. Perfect for hot summer days when you crave something cool and tangy. Just layer, chill, and enjoy.
8
portions20
minutesIngredients
Graham crackers – 1 cup crushed
Unsalted butter – 4 tbsp melted
Sweetened condensed milk – 1 can (14 oz)
Key lime juice – ½ cup
Heavy cream – 1 cup
Powdered sugar – 2 tbsp
Instructions
1. Crush graham crackers into fine crumbs using a food processor or rolling pin.
2. Mix graham cracker crumbs with melted butter until fully combined.
3. Press 2 tablespoons of the crumb mixture firmly into the bottom of each 8-ounce jar.
4. Chill jars in the refrigerator for 15 minutes to set the crust.
5. Whisk sweetened condensed milk and key lime juice together in a medium bowl until smooth.
6. Pour the lime filling over the chilled crusts, dividing evenly among jars.
7. Whip heavy cream and powdered sugar on high speed for 3-4 minutes until stiff peaks form.
8. Spoon or pipe whipped cream over the lime filling in each jar.
9. Refrigerate jars for at least 4 hours, or until filling is completely set.
10. Garnish with extra lime zest or graham cracker crumbs before serving.
Not overly sweet with a perfect balance of tart lime and creamy richness. The crunchy graham cracker crust provides nice textural contrast to the smooth filling. Serve chilled straight from the jar for the ultimate portable dessert experience.
No-Bake White Chocolate Raspberry Cheesecake
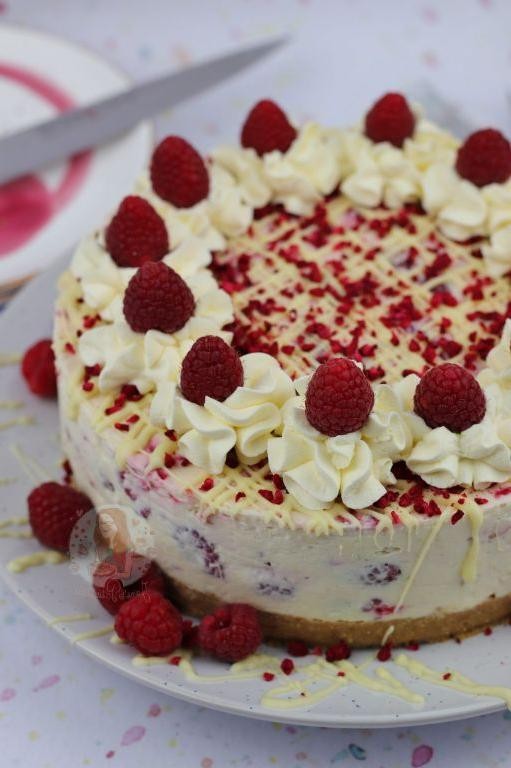
Just when you thought cheesecake couldn’t get easier, this no-bake version delivers creamy perfection without turning on your oven. Juicy raspberries and sweet white chocolate create a dessert that’s both elegant and effortless. Prepare to impress with minimal kitchen time.
8
servings45
minutesIngredients
Graham cracker crumbs – 1 ½ cups
Unsalted butter – ½ cup, melted
Cream cheese – 16 oz, softened
White chocolate – 8 oz, melted
Heavy cream – 1 cup
Powdered sugar – ½ cup
Fresh raspberries – 1 ½ cups
Lemon juice – 1 tbsp
Instructions
1. Combine graham cracker crumbs and melted butter in a medium bowl until mixture resembles wet sand.
2. Press crumb mixture firmly into bottom of 9-inch springform pan using flat-bottomed cup.
3. Refrigerate crust for 30 minutes until firm.
4. Beat softened cream cheese with electric mixer on medium speed for 2 minutes until smooth and lump-free.
5. Add melted white chocolate to cream cheese and beat for 1 minute until fully incorporated.
6. In separate bowl, whip heavy cream and powdered sugar on high speed for 3-4 minutes until stiff peaks form.
7. Gently fold whipped cream into cream cheese mixture using spatula until no white streaks remain.
8. Mash 1 cup raspberries with fork and stir in lemon juice.
9. Swirl raspberry mixture through cheesecake filling with knife for marbled effect.
10. Pour filling over chilled crust and smooth top with offset spatula.
11. Refrigerate cheesecake for at least 6 hours, preferably overnight, until completely set.
12. Garnish with remaining ½ cup fresh raspberries before serving.
Perfectly chilled slices reveal a creamy, cloud-like texture that melts on your tongue. The bright raspberry swirl cuts through the rich white chocolate for balanced sweetness. Present each wedge with extra fresh berries or drizzle with raspberry sauce for an elegant dessert presentation.
Peanut Butter Cornflake Clusters

Unexpectedly simple yet satisfying, these peanut butter cornflake clusters require just three ingredients. They come together in minutes with no baking required. Perfect for last-minute treats or lunchbox surprises.
24
clusters10
minutes4
minutesIngredients
Peanut butter – 1 cup
Corn syrup – ½ cup
Cornflakes – 4 cups
Instructions
1. Line a baking sheet with parchment paper.
2. Combine 1 cup peanut butter and ½ cup corn syrup in a medium saucepan.
3. Heat the mixture over medium-low heat, stirring constantly with a rubber spatula.
4. Continue heating until the mixture becomes smooth and fully combined, about 3-4 minutes. Tip: Don’t let the mixture boil to prevent scorching.
5. Remove the saucepan from heat immediately.
6. Add 4 cups cornflakes to the warm peanut butter mixture.
7. Gently fold the cornflakes into the mixture until evenly coated. Tip: Work quickly before the mixture cools and stiffens.
8. Drop tablespoon-sized portions onto the prepared baking sheet.
9. Use your fingers to gently press each cluster into compact mounds.
10. Let the clusters cool completely at room temperature for 1 hour. Tip: For faster setting, refrigerate for 20 minutes until firm.
Buttery peanut flavor melds with the satisfying crunch of cornflakes in these no-bake clusters. The contrast between creamy binding and crisp cereal creates addictive texture. Try crumbling them over ice cream or packing them for hiking snacks.
No-Bake Tiramisu with Mascarpone
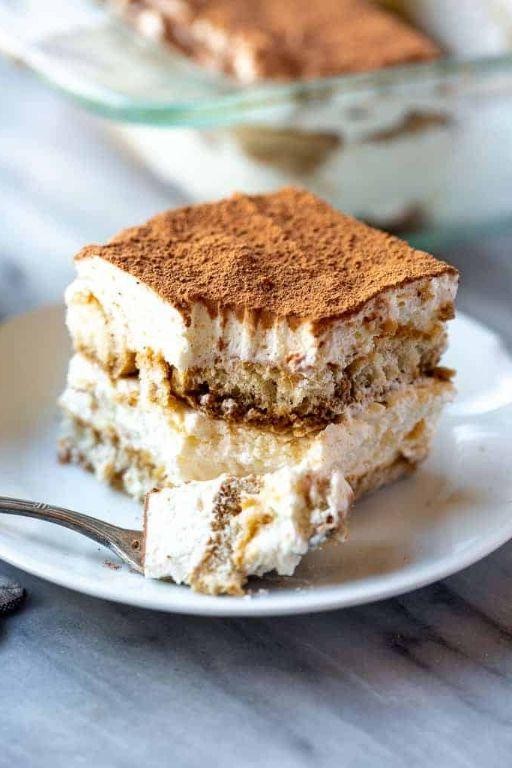
A perfect no-bake dessert for busy weeknights, this tiramisu comes together in minutes without turning on your oven. An elegant layered treat that tastes like it took hours to prepare. All you need is a bowl, whisk, and your favorite baking dish.
9
portions25
minutesIngredients
Ladyfinger cookies – 24
Strong brewed coffee – 1 cup, cooled
Mascarpone cheese – 16 oz
Heavy cream – 1 cup
Granulated sugar – ½ cup
Cocoa powder – 2 tbsp
Instructions
1. Brew 1 cup of strong coffee and let it cool completely to room temperature.
2. Place mascarpone cheese in a large mixing bowl and let it sit at room temperature for 15 minutes to soften.
3. Add ½ cup granulated sugar to the mascarpone and beat with an electric mixer on medium speed until smooth, about 2 minutes.
4. Pour 1 cup heavy cream into the mascarpone mixture and continue beating until stiff peaks form, approximately 3-4 minutes.
5. Quickly dip 12 ladyfinger cookies one at a time into the cooled coffee, ensuring they’re moist but not soggy.
6. Arrange the coffee-dipped ladyfingers in a single layer in an 8×8 inch baking dish.
7. Spread half of the mascarpone cream mixture evenly over the ladyfinger layer.
8. Repeat the dipping process with the remaining 12 ladyfinger cookies and create a second layer.
9. Spread the remaining mascarpone cream over the second ladyfinger layer.
10. Sift 2 tablespoons cocoa powder evenly over the top surface using a fine-mesh sieve.
11. Cover the dish with plastic wrap and refrigerate for at least 4 hours, or preferably overnight. What makes this tiramisu exceptional is the contrast between the coffee-soaked cookies and the rich mascarpone cream. The overnight chilling allows the flavors to meld perfectly while maintaining distinct layers. Serve chilled in individual glasses for an elegant presentation or straight from the baking dish for casual gatherings.
No-Bake Mocha Mousse
No-bake mocha mousse delivers rich coffee-chocolate flavor without turning on your oven. Need a quick dessert that impresses? This creamy treat comes together in under 20 minutes.
3
servings20
minutesIngredients
- Heavy cream – 1 cup
- Cream cheese – 8 oz
- Powdered sugar – ½ cup
- Cocoa powder – ¼ cup
- Instant coffee – 1 tbsp
- Vanilla extract – 1 tsp
Instructions
- Beat heavy cream in a chilled metal bowl until stiff peaks form, about 3-4 minutes.
- In a separate bowl, beat cream cheese with powdered sugar until completely smooth and no lumps remain.
- Add cocoa powder, instant coffee, and vanilla extract to the cream cheese mixture.
- Beat the mixture on medium speed until all ingredients are fully incorporated, scraping down the sides once.
- Gently fold the whipped cream into the chocolate-coffee mixture using a spatula.
- Continue folding until no white streaks remain, being careful not to deflate the mixture.
- Divide the mousse evenly among 4 serving glasses or ramekins.
- Refrigerate the mousse for at least 2 hours, or until set and chilled through.
Bittersweet chocolate and bold coffee create a sophisticated flavor profile in this airy dessert. Best served cold, try topping with chocolate shavings or a sprinkle of sea salt for extra dimension. The texture remains light yet satisfyingly creamy for days when stored properly.
Simple No-Bake Blueberry Swirl Cheesecake
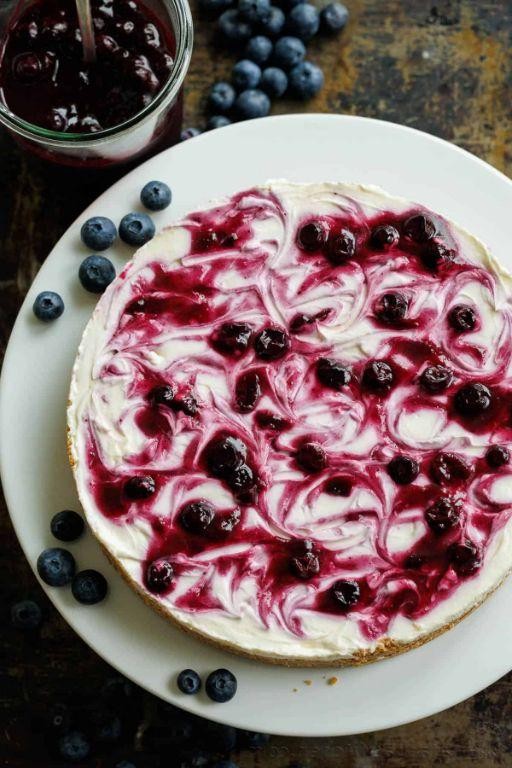
Frozen blueberries make this no-bake cheesecake possible any time of year. This simple dessert comes together in under 30 minutes of active work. You’ll love the vibrant purple swirls against the creamy white filling.
8
servings30
minutesIngredients
Graham crackers – 1½ cups
Unsalted butter – ½ cup
Cream cheese – 16 oz
Heavy cream – 1 cup
Powdered sugar – ¾ cup
Vanilla extract – 1 tsp
Frozen blueberries – 1 cup
Instructions
1. Crush graham crackers into fine crumbs using a food processor or rolling pin.
2. Melt butter in microwave for 45 seconds at 50% power.
3. Combine graham cracker crumbs and melted butter in medium bowl.
4. Press crumb mixture firmly into 9-inch springform pan using measuring cup.
5. Refrigerate crust for 15 minutes while preparing filling.
6. Beat cream cheese with electric mixer on medium speed for 2 minutes until smooth.
7. Add powdered sugar and vanilla extract to cream cheese.
8. Beat mixture for 1 minute until fully combined.
9. Pour heavy cream into separate chilled bowl.
10. Whip heavy cream on high speed for 3 minutes until stiff peaks form.
11. Fold whipped cream into cream cheese mixture using spatula.
12. Spread half of filling over chilled crust.
13. Microwave frozen blueberries for 60 seconds until warm and juicy.
14. Mash blueberries with fork until saucy consistency forms.
15. Drop spoonfuls of blueberry sauce over cream cheese layer.
16. Top with remaining cream cheese filling.
17. Swirl blueberry sauce through top layer using knife tip.
18. Refrigerate cheesecake for at least 4 hours until firm.
19. Run knife around pan edge before releasing springform.
20. Slice with warm knife for clean cuts. The creamy texture contrasts beautifully with the tart blueberry swirls. Try serving individual slices with extra blueberry sauce drizzled over the top. This cheesecake holds its shape perfectly when chilled but melts luxuriously in your mouth.
No-Bake Salted Caramel Pretzel Bars
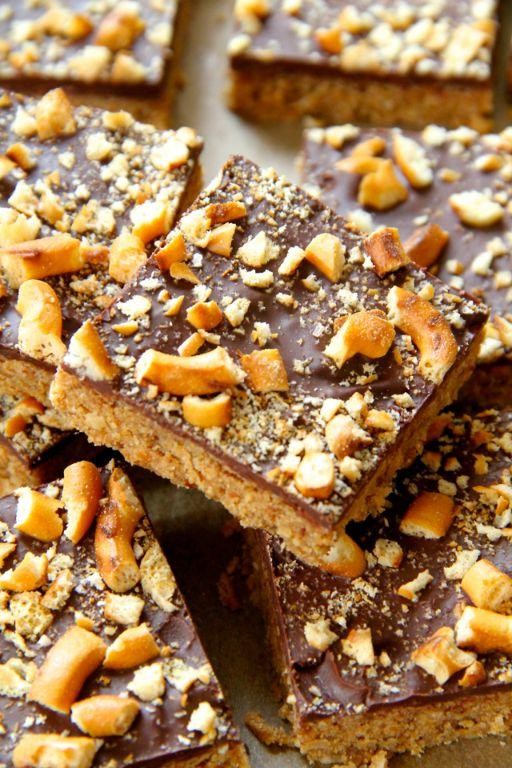
You need a dessert that delivers maximum satisfaction with minimal effort. These no-bake bars combine sweet, salty, and crunchy textures in every bite. They’re perfect for last-minute cravings or easy entertaining.
16
squares20
minutes7
minutesIngredients
– Pretzels – 2 cups
– Butter – ½ cup
– Brown sugar – 1 cup
– Sweetened condensed milk – 1 can (14 oz)
– Sea salt – 1 tsp
– Vanilla extract – 1 tsp
– Semi-sweet chocolate chips – 1 cup
Instructions
1. Crush 2 cups of pretzels into small pieces using a food processor or rolling pin.
2. Line an 8×8 inch baking pan with parchment paper, leaving overhang on two sides for easy removal.
3. Melt ½ cup butter in a medium saucepan over medium heat.
4. Add 1 cup brown sugar and stir constantly for 2 minutes until sugar dissolves.
5. Pour in 1 can sweetened condensed milk and bring to a gentle boil.
6. Cook caramel for 5 minutes, stirring continuously, until it thickens slightly and darkens one shade.
7. Remove saucepan from heat and immediately stir in 1 tsp vanilla extract.
8. Fold in crushed pretzels until fully coated in caramel.
9. Press mixture firmly into prepared pan using the bottom of a measuring cup to create an even layer.
10. Sprinkle 1 tsp sea salt evenly over the surface.
11. Melt 1 cup semi-sweet chocolate chips in a microwave-safe bowl in 30-second intervals, stirring between each, until smooth.
12. Spread melted chocolate evenly over the salted caramel pretzel layer.
13. Refrigerate bars for at least 4 hours, or until completely firm and chocolate is set.
14. Use parchment paper overhang to lift bars from pan and place on cutting board.
15. Cut into 16 squares with a sharp knife wiped clean between cuts for neat edges.
Oozing with salted caramel and studded with crunchy pretzels, these bars offer the perfect sweet-salty balance. The firm chocolate topping cracks satisfyingly when you bite into the chewy base. Serve them chilled alongside coffee or crumbled over vanilla ice cream for an elevated dessert.
Conclusion
Keeping things simple yet spectacular, these 23 bakeless desserts prove you don’t need an oven to create memorable treats. From quick fixes to elegant finales, there’s something here for every craving and occasion. We’d love to hear which recipes become your favorites—drop us a comment below and don’t forget to pin your top picks to share the sweet inspiration!