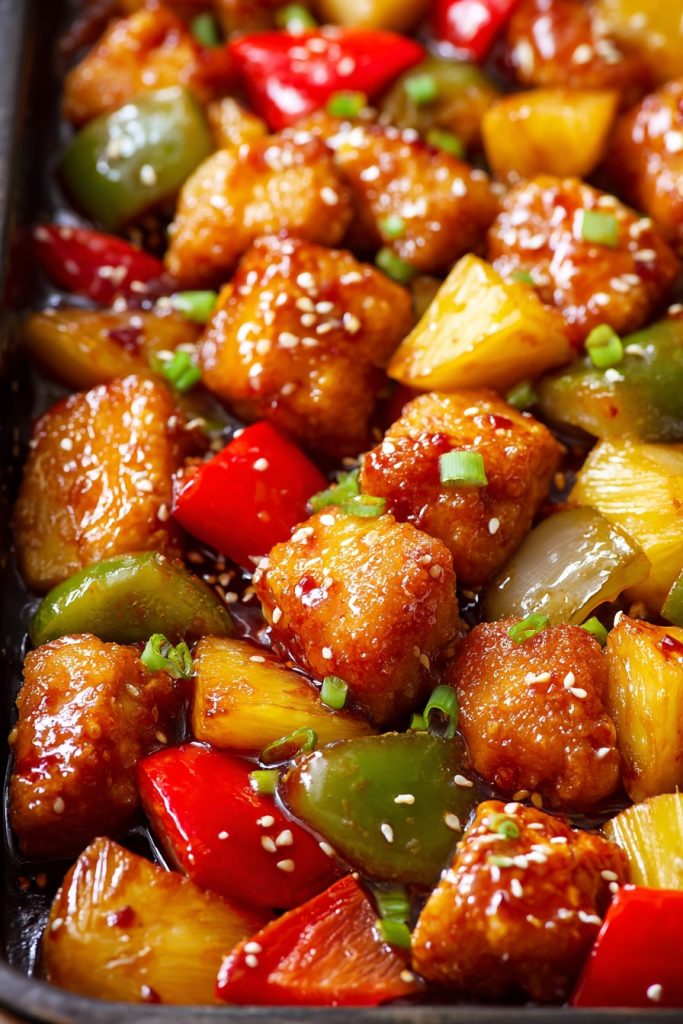
Hey there, fellow food enthusiasts! Have you ever craved that perfect sweet and sour chicken but dreaded the greasy mess of deep frying? How about we tackle that craving with a baked version that’s just as irresistible but way kinder to your kitchen (and your waistline)? Here’s my foolproof recipe that’ll have you wondering why you ever ordered takeout in the first place.
Why This Recipe Works
- The baking method creates a crispy exterior without all the oil of traditional frying, making it a healthier alternative that doesn’t sacrifice texture.
- Our homemade sweet and sour sauce strikes the perfect balance between tangy and sweet, using pineapple juice and rice vinegar for authentic flavor without artificial ingredients.
- The cornstarch coating technique ensures every piece gets beautifully crispy while helping the sauce cling perfectly to each bite.
- Baking at high heat (400°F) gives you that golden-brown crunch while keeping the chicken incredibly juicy and tender inside.
- This recipe is incredibly versatile – easily adaptable for different protein options or dietary preferences without losing its signature flavor profile.
Ingredients
- 2 pounds boneless, skinless chicken breasts, cut into 1-inch cubes
- 1 cup cornstarch, for coating
- 3 large eggs, beaten until frothy
- 1/2 teaspoon salt
- 1/4 teaspoon black pepper, freshly ground
- 1 tablespoon vegetable oil, for greasing the baking sheet
- 1 cup pineapple juice, preferably unsweetened
- 1/2 cup rice vinegar
- 1/4 cup ketchup
- 1/3 cup brown sugar, packed
- 2 tablespoons soy sauce, reduced sodium
- 2 tablespoons cornstarch, for sauce thickening
- 2 tablespoons water, cold
- 1 red bell pepper, cut into 1-inch pieces
- 1 green bell pepper, cut into 1-inch pieces
- 1 cup pineapple chunks, fresh or canned (drained)
- 2 green onions, thinly sliced for garnish
- 1 tablespoon sesame seeds, toasted for garnish
Equipment Needed
- Large mixing bowls (2)
- Rimmed baking sheet
- Parchment paper or silicone baking mat
- Whisk
- Medium saucepan
- Tongs
- Measuring cups and spoons
- Cutting board and sharp knife
- Small bowl for cornstarch slurry
Instructions
Preparing the Chicken Coating Station
Let’s set up our assembly line, folks! In one large bowl, place your 1 cup of cornstarch and season it with the 1/2 teaspoon salt and 1/4 teaspoon black pepper – give it a good whisk to combine. In another bowl, crack those 3 eggs and beat them until they’re nice and frothy, about 1-2 minutes of vigorous whisking. Now, take your 2 pounds of cubed chicken and pat it completely dry with paper towels – this is crucial for the coating to stick properly. Line up your bowls in this order: chicken, cornstarch mixture, egg wash, and then your prepared baking sheet. This systematic approach will keep your fingers relatively clean and ensure every piece gets evenly coated. Pro tip: use one hand for the dry ingredients and the other for the wet to avoid clumpy fingers!
Coating and Arranging the Chicken Pieces
Time to get our hands slightly messy! Working with about 5-6 pieces at a time, toss the chicken cubes in the cornstarch mixture until they’re completely coated on all sides – shake off any excess powder. Then dip them into the beaten eggs, making sure every surface gets covered. Use tongs to transfer them to your prepared baking sheet that you’ve lined with parchment paper and lightly greased with that 1 tablespoon of vegetable oil. Arrange the pieces in a single layer with about 1/2 inch of space between each piece – they need room to crisp up properly. Don’t crowd the pan, or you’ll end up with steamed chicken instead of crispy baked goodness. If your baking sheet seems too small, use two sheets or work in batches. The coating process should take about 8-10 minutes total if you work efficiently.
Creating the Signature Sweet and Sour Sauce
While the chicken is waiting its turn, let’s whip up that magical sauce! In your medium saucepan, combine 1 cup pineapple juice, 1/2 cup rice vinegar, 1/4 cup ketchup, 1/3 cup packed brown sugar, and 2 tablespoons soy sauce. Whisk everything together over medium heat until the sugar completely dissolves, which should take about 3-4 minutes. In a small separate bowl, make your slurry by mixing 2 tablespoons cornstarch with 2 tablespoons cold water until it’s smooth with no lumps. Slowly whisk this slurry into your saucepan and continue cooking, stirring constantly, until the sauce thickens noticeably – you’ll know it’s ready when it coats the back of a spoon and leaves a clear path when you run your finger through it. This should take about 5-7 minutes of constant stirring. Remove from heat and set aside.
Baking to Golden Perfection
Preheat your oven to 400°F – yes, that’s hot, but we need that high heat for proper crisping! Bake the coated chicken for 15 minutes, then carefully flip each piece using tongs. You should see beautiful golden spots developing on the bottom. Continue baking for another 10-15 minutes until the chicken is cooked through and has an even golden-brown color on all sides. The internal temperature should reach 165°F when checked with an instant-read thermometer. About 5 minutes before the chicken is done, scatter your 1-inch bell pepper pieces and pineapple chunks around the baking sheet to let them roast slightly and develop some caramelized edges. The total baking time will be 25-30 minutes depending on your oven and the size of your chicken pieces.
Combining and Final Presentation
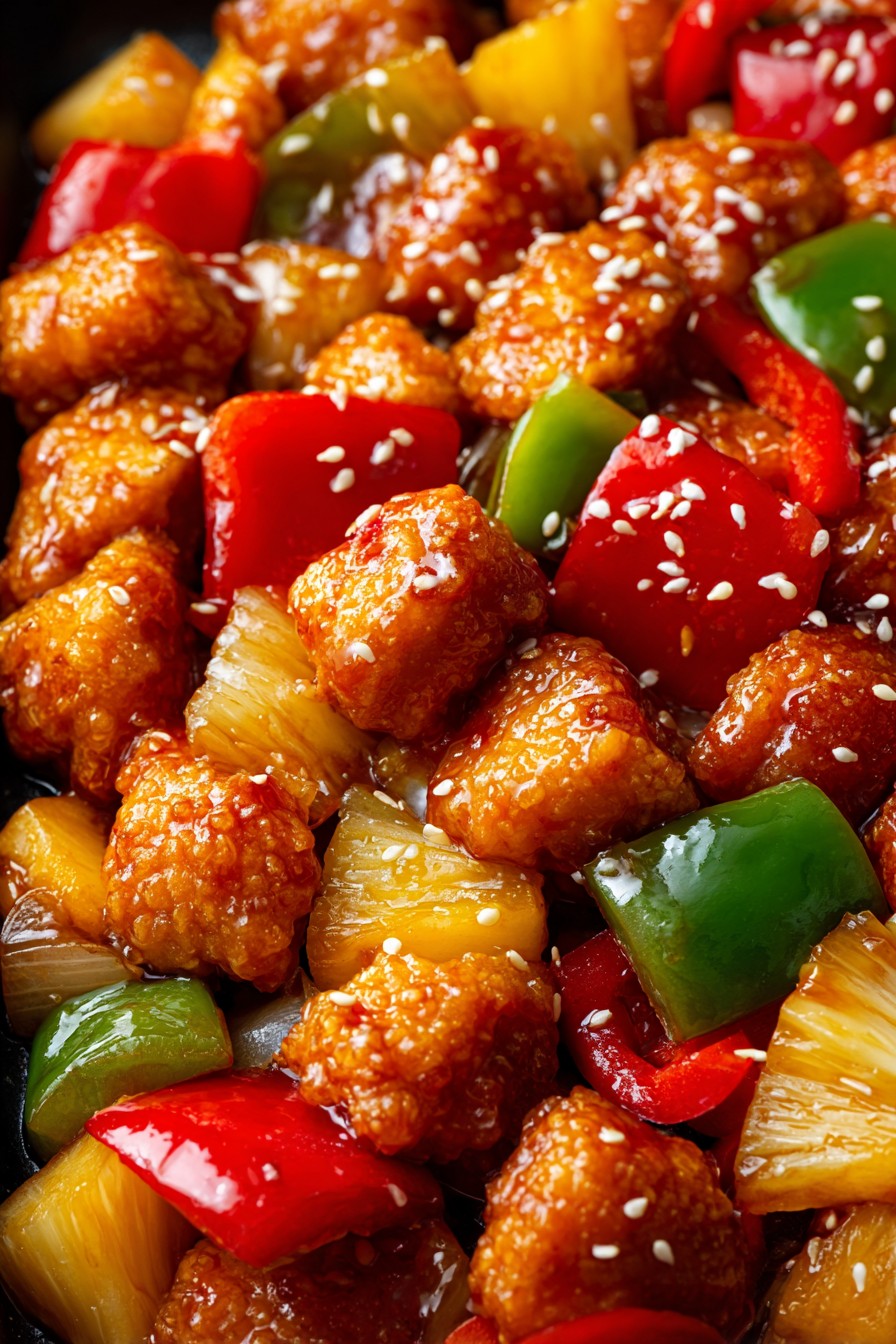
Once your chicken is beautifully golden and cooked through, remove the baking sheet from the oven. Immediately pour about 3/4 of your prepared sweet and sour sauce over the chicken and vegetables, gently tossing everything to coat evenly. Return to the oven for just 2-3 minutes to let the sauce caramelize slightly and adhere to the chicken. Transfer everything to a serving platter and drizzle with the remaining sauce. Garnish with those thinly sliced green onions and toasted sesame seeds for that professional finish. Serve immediately while it’s hot and crispy – this dish waits for no one! The contrast between the crispy chicken, sweet-tangy sauce, and fresh garnishes is what makes this recipe truly spectacular.
Tips and Tricks
Let’s talk about taking this recipe from great to absolutely legendary! First, if you want an extra crispy coating, try a double-dip method: after the first coat of cornstarch and egg, let the chicken rest on a wire rack for 10 minutes, then give it a second quick dip in the egg and another light dusting of cornstarch. This creates an even thicker, crispier crust that holds up beautifully to the sauce. For the sauce enthusiasts, consider making a double batch of the sweet and sour sauce and storing half in the refrigerator for up to two weeks – it’s fantastic on rice bowls, as a dipping sauce, or even as a glaze for grilled meats.
When cutting your chicken, aim for uniform 1-inch pieces – this ensures even cooking and prevents some pieces from drying out while others remain undercooked. If you’re dealing with particularly thick chicken breasts, consider pounding them slightly before cubing. For an extra flavor boost, marinate the chicken cubes in 1 tablespoon of soy sauce and 1 teaspoon of grated ginger for 30 minutes before coating – just pat them completely dry afterward. The baking temperature is crucial here – don’t be tempted to lower it even if things seem to be browning quickly. The high heat is what creates that crispy texture without frying.
If you’re serving a crowd, you can prepare the coated chicken pieces up to 4 hours in advance and keep them refrigerated on the baking sheet until ready to bake. The sauce can also be made up to 3 days ahead and reheated gently before using. For those who like their sweet and sour with more tang, increase the rice vinegar to 2/3 cup and reduce the brown sugar to 1/4 cup. Conversely, for a sweeter version, use 1/2 cup brown sugar and reduce the vinegar to 1/3 cup. Always taste and adjust the sauce before adding the cornstarch slurry.
Don’t skip the toasting step for the sesame seeds – simply place them in a dry skillet over medium heat for 2-3 minutes until fragrant and lightly golden. This enhances their flavor dramatically. If you want to add more vegetables, broccoli florets, sliced carrots, or snap peas work beautifully – just add them during the last 10 minutes of baking. For an extra glossy sauce, stir in 1 teaspoon of sesame oil at the very end. And remember, the sauce will continue to thicken as it cools, so it’s better to err on the slightly thinner side when cooking.
Recipe Variations
- For a spicy kick, add 1-2 teaspoons of sriracha or red pepper flakes to the sauce mixture, or include some diced jalapeños with the bell peppers. You can also create a spicy version by adding 1 tablespoon of chili garlic sauce to the sauce ingredients – this gives it that perfect balance of heat and sweetness that will have your taste buds dancing.
- Try different proteins like shrimp (reduce baking time to 12-15 minutes total), pork tenderloin cubes, or even firm tofu pressed and cubed for a vegetarian option. For shrimp, use large ones and reduce the baking time significantly to avoid overcooking. For tofu, press it for 30 minutes first to remove excess moisture, then proceed with the coating process as written.
- Create an orange variation by substituting orange juice for pineapple juice and adding 1 tablespoon of orange zest to the sauce. This citrus twist gives it a brighter, fresher flavor profile that’s perfect for summer gatherings. You could also add some mandarin orange segments at the end for an extra burst of citrus flavor.
- Make it gluten-free by using tamari instead of soy sauce and ensuring your cornstarch is certified gluten-free. Most cornstarch is naturally gluten-free, but it’s always good to check the packaging if you’re serving someone with celiac disease or gluten sensitivity. Serve with rice noodles or gluten-free grains for a complete meal.
- For a tropical twist, add 1/2 cup of shredded coconut to the cornstarch coating mixture and use coconut milk instead of water in the sauce slurry. This creates a delightful coconut sweet and sour chicken that tastes like a vacation in every bite. Top with toasted coconut flakes instead of sesame seeds for the full effect.
Frequently Asked Questions
Can I make this recipe ahead of time?
Absolutely! You can prepare the components separately up to 24 hours in advance. The sauce can be made and refrigerated for up to 3 days – just reheat gently before using. The chicken can be coated and arranged on the baking sheet, then covered and refrigerated for up to 4 hours before baking. I don’t recommend baking it completely ahead as the coating will lose its crispness when refrigerated and reheated. If you must reheat leftovers, use an air fryer or oven at 375°F for 5-7 minutes to restore the crisp texture rather than microwaving.
Why is my coating not getting crispy?
Several factors could be at play here! First, ensure your oven is fully preheated to 400°F – an oven thermometer can verify the actual temperature. Second, make sure you’re not overcrowding the baking sheet – the pieces need space for air circulation. Third, pat your chicken completely dry before coating – any moisture will steam the coating instead of letting it crisp. Fourth, use the middle oven rack position for even heating. Finally, make sure you’re using cornstarch rather than flour, as cornstarch creates a much crispier texture when baked. If all else fails, try spraying the coated chicken lightly with cooking spray before baking for extra browning.
Can I use frozen chicken for this recipe?
I strongly recommend against using frozen chicken directly. Frozen chicken releases too much moisture during baking, which will prevent the coating from crisping properly. Instead, thaw your chicken completely in the refrigerator overnight, then pat it very dry with paper towels before cubing and coating. If you’re in a pinch, you can use the cold water thawing method: place sealed frozen chicken in a bowl of cold water, changing the water every 30 minutes until thawed. This usually takes about 1-2 hours depending on the quantity. Never thaw chicken at room temperature for food safety reasons.
How do I know when the chicken is fully cooked?
The safest way is to use an instant-read meat thermometer inserted into the thickest piece of chicken – it should register 165°F. Visually, the chicken should be opaque throughout with no pinkness, and the juices should run clear when pierced with a knife. The coating should be golden brown and crisp to the touch. If you notice the coating browning too quickly before the chicken is cooked through, you can tent the baking sheet with foil for the last 5-10 minutes of baking. Remember that chicken continues to cook slightly after removal from the oven, so you can remove it at 160°F and let it carry over to 165°F.
What’s the best way to serve this dish?
This baked sweet and sour chicken is incredibly versatile! Traditionally, it’s served over steamed white rice, but it also works beautifully with brown rice, quinoa, or cauliflower rice for a lower-carb option. For a complete meal, serve it with steamed broccoli or a fresh cucumber salad on the side. If you’re feeling fancy, wrap it in lettuce cups for a low-carb lettuce wrap situation. It also makes fantastic leftovers – cold straight from the refrigerator or reheated for lunch the next day. For parties, serve it as an appetizer with toothpicks for easy grabbing, or as part of a larger Asian-inspired buffet spread.
Summary
This baked sweet and sour chicken delivers all the crave-worthy flavors of takeout without the grease or guilt. With a crispy cornstarch coating, perfectly balanced homemade sauce, and customizable vegetables, it’s sure to become a weeknight favorite that beats any restaurant version.
Baked Sweet and Sour Chicken
5
servings25
minutes30
minutesIngredients
Instructions
- 1 Preheat oven to 400°F and line a baking sheet with parchment paper, lightly greased.
- 2 Season 1 cup cornstarch with salt and pepper in one bowl, beat eggs in another.
- 3 Coat chicken pieces in cornstarch mixture, then egg wash, and arrange on baking sheet.
- 4 Bake for 15 minutes, flip pieces, then bake 10-15 minutes more until golden and cooked through.
- 5 Meanwhile, make sauce by combining pineapple juice, vinegar, ketchup, brown sugar, and soy sauce in saucepan.
- 6 Whisk cornstarch and water into slurry, add to sauce, and cook until thickened.
- 7 Add peppers and pineapple last 5 minutes of baking, then toss everything with sauce and garnish.


