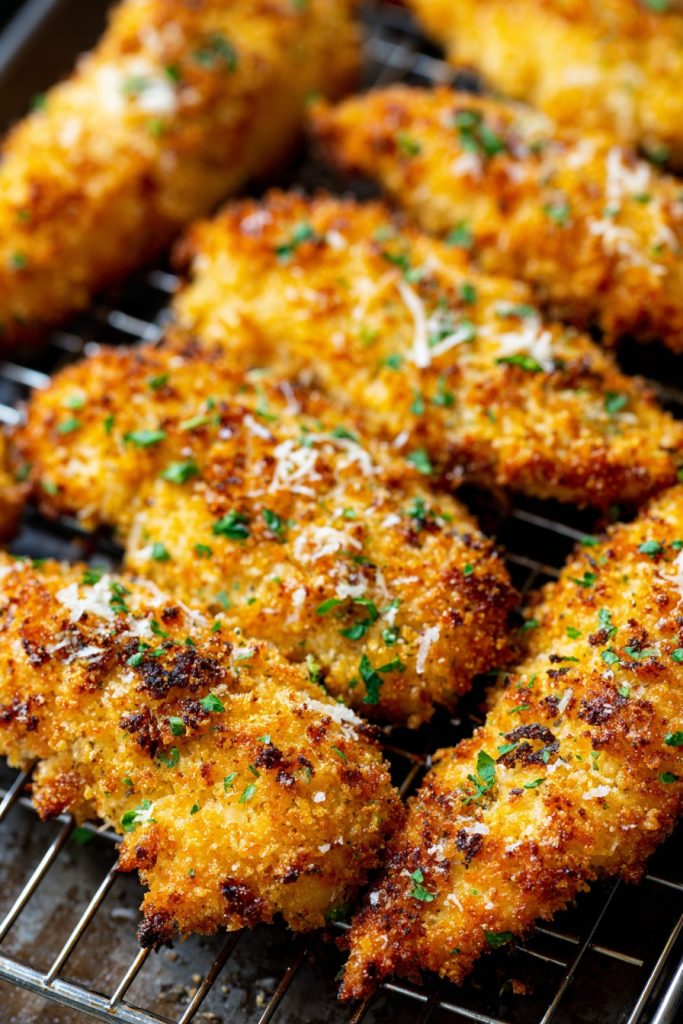
Every time I think about chicken tenders, I get that nostalgic craving for something crispy, juicy, and downright delicious—but without the guilt of deep frying! Especially perfect for busy weeknights or game day snacking, this baked version delivers all the flavor with way less mess.
Why This Recipe Works
- Our secret triple-coating method (flour, egg wash, panko-parmesan mix) creates an incredibly crispy exterior that stays crunchy even after baking, thanks to the panko breadcrumbs absorbing less oil than traditional breadcrumbs.
- Baking at a high temperature of 425°F ensures the chicken cooks quickly while developing a beautiful golden-brown crust without drying out the interior, locking in those natural juices for maximum tenderness.
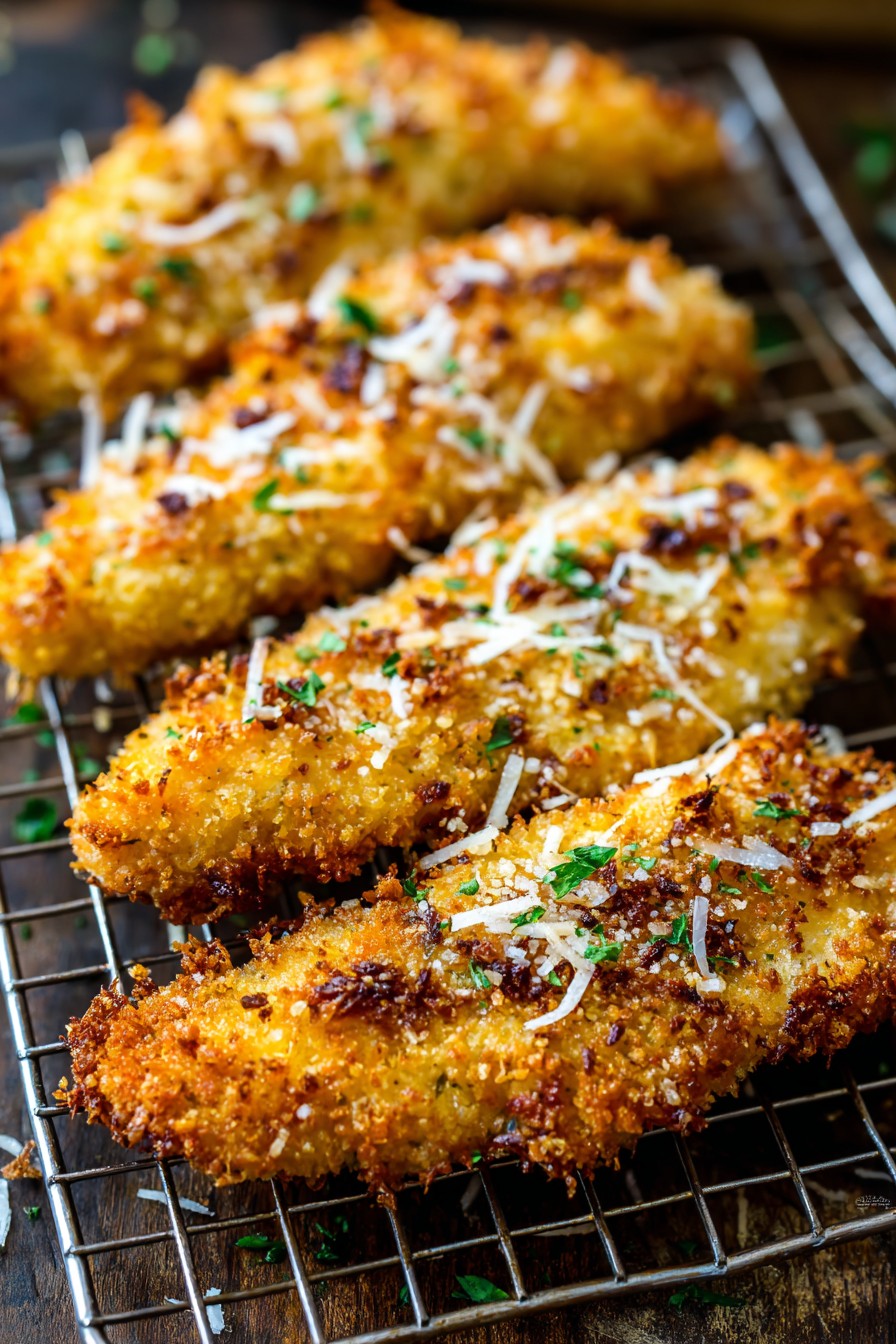
- The addition of grated parmesan cheese and smoked paprika in the breading not only adds a savory, umami depth but also helps with browning and provides a flavor boost that makes these tenders stand out from basic recipes.
- Using a wire rack set over a baking sheet allows hot air to circulate evenly around each tender, preventing sogginess on the bottom and ensuring every inch gets perfectly crisp—no flipping required!
- This recipe is incredibly versatile and family-friendly; it’s easily customizable with different seasonings, dips, or even gluten-free alternatives, making it a go-to for picky eaters and dietary restrictions alike.
Ingredients
- 1.5 pounds chicken tenders (or boneless, skinless chicken breasts cut into 1-inch strips)
- 1 cup all-purpose flour
- 2 large eggs, beaten
- 1 cup panko breadcrumbs
- 1/2 cup grated parmesan cheese
- 1 teaspoon garlic powder
- 1 teaspoon smoked paprika
- 1/2 teaspoon onion powder
- 1/2 teaspoon black pepper, freshly ground
- 1 teaspoon salt
- 2 tablespoons olive oil or melted butter
- Cooking spray (optional, for rack)
Equipment Needed
- Rimmed baking sheet
- Wire rack (that fits inside the baking sheet)
- Three shallow bowls or plates
- Whisk
- Tongs or fork for handling chicken
- Measuring cups and spoons
- Paper towels
- Meat thermometer (highly recommended)
Instructions
Step 1: Prep Your Station and Chicken
First things first, let’s get organized! Preheat your oven to 425°F and position a rack in the center. Line a rimmed baking sheet with aluminum foil for easy cleanup, then place a wire rack on top—lightly spray the rack with cooking spray to prevent sticking. Pat the chicken tenders completely dry with paper towels; this is crucial for helping the coating adhere properly. In three separate shallow bowls, set up your breading station: one with the all-purpose flour, another with the beaten eggs (whisk them until uniform), and the third with a mixture of panko breadcrumbs, grated parmesan, garlic powder, smoked paprika, onion powder, black pepper, and salt. Stir the breadcrumb mixture well to evenly distribute all those flavorful seasonings. Having everything ready before you start dipping will make the process smooth and mess-free!
Step 2: Coat the Chicken Thoroughly
Now for the fun part—coating those tenders! Working with one piece at a time, dredge each chicken tender in the flour, shaking off any excess. Next, dip it into the beaten egg, making sure it’s fully coated and letting any extra drip back into the bowl. Finally, press the tender firmly into the panko-parmesan mixture, ensuring an even and generous coating on all sides; I like to use one hand for dry ingredients and the other for wet to avoid clumpy fingers. Place each coated tender on the prepared wire rack, spacing them about an inch apart to allow for proper air circulation. Repeat until all tenders are breaded—this should take about 5-7 minutes depending on how many you have. Lightly drizzle or brush the tops with olive oil or melted butter; this will help them achieve that gorgeous golden-brown color and extra crispiness in the oven.
Step 3: Bake to Golden Perfection
Pop that baking sheet into the preheated 425°F oven and set your timer for 10 minutes. After 10 minutes, rotate the pan 180 degrees to ensure even cooking—ovens can have hot spots, and this simple step prevents some tenders from browning more than others. Continue baking for another 8-12 minutes, but start checking around the 18-minute mark total. You’re looking for an internal temperature of 165°F when measured with a meat thermometer inserted into the thickest part of a tender, and the coating should be deeply golden brown and crispy to the touch. If they need more time, bake in 2-minute increments until done. Avoid opening the oven door too frequently, as this can cause temperature fluctuations that affect crispiness. The total bake time typically ranges from 18-22 minutes depending on the size of your tenders.
Step 4: Rest and Serve Immediately
Once the chicken tenders reach 165°F internally and have that perfect crispy exterior, carefully remove the baking sheet from the oven. Let the tenders rest on the wire rack for about 3-5 minutes; this allows the juices to redistribute throughout the meat, ensuring every bite is moist and tender. Resist the urge to dig in right away—this short rest also helps the coating set further, making it less likely to fall off when you bite into it. Serve immediately while hot and crispy with your favorite dipping sauces like honey mustard, barbecue, or ranch. If you’re meal prepping, they can be stored after cooling completely, but they’re truly best enjoyed fresh out of the oven for maximum crunch and flavor!
Tips and Tricks
For the crispiest results ever, try placing the breaded tenders in the refrigerator for 15-20 minutes before baking. This chill time helps the coating set and adhere better, reducing the risk of it sliding off during cooking. If you’re short on time, you can skip this, but it’s a game-changer for extra crunch. Another pro tip: if your panko breadcrumbs aren’t as fine as you’d like, pulse them in a food processor for a few seconds to break them down slightly; this creates a more even coating that crisps up beautifully without being too bulky. For an even browner finish, you can switch the oven to broil for the last 1-2 minutes of cooking—but watch them like a hawk to prevent burning! If you don’t have a wire rack, you can bake the tenders directly on a parchment-lined sheet, but flip them halfway through to ensure both sides get crispy. To make cleanup a breeze, use disposable aluminum foil on your baking sheet and consider lining the wire rack with foil too (poke a few holes for air flow). For juicier chicken, avoid overcrowding the pan; if necessary, use two baking sheets and rotate them between oven racks midway. If you’re doubling the recipe, work in batches for coating to keep the station organized. Lastly, for a flavor boost, add a tablespoon of everything bagel seasoning or Italian herbs to the breadcrumb mix—it’s an easy way to customize without extra steps!
Recipe Variations
- For a spicy kick, add 1/2 teaspoon of cayenne pepper or chili powder to the breadcrumb mixture, or toss the baked tenders in a buffalo sauce mix (1/4 cup hot sauce + 2 tbsp melted butter) right after they come out of the oven. Serve with blue cheese dressing and celery sticks for a classic wing-inspired twist that’s perfect for game day or parties.
- Make it gluten-free by substituting the all-purpose flour with a gluten-free blend (like Bob’s Red Mill 1:1) and using gluten-free panko breadcrumbs. Ensure all other ingredients are certified gluten-free, and consider adding an extra tablespoon of parmesan to help with binding. This variation lets everyone enjoy crispy tenders without dietary worries, and you won’t taste the difference!
- Create a kid-friendly version by using crushed cornflakes or crispy rice cereal instead of panko for a sweeter, lighter crunch. Mix in a teaspoon of brown sugar with the seasonings for a hint of sweetness that pairs wonderfully with ketchup or honey mustard. It’s a fun way to get little ones excited about dinner while keeping things baked and healthy.
- For an herb-infused option, add 2 tablespoons of finely chopped fresh parsley, dill, or basil to the breadcrumb mixture, along with the zest of one lemon for brightness. This fresh take is ideal for spring or summer meals and pairs beautifully with a yogurt-based dip or a squeeze of lemon juice after baking.
- Turn it into a Parmesan-crusted style by doubling the parmesan cheese to 1 cup and reducing the panko to 1/2 cup for an extra cheesy, savory coating. Add a teaspoon of Italian seasoning for depth, and serve with marinara sauce for a chicken tenders-meets-chicken-parm hybrid that’s sure to become a family favorite.
Frequently Asked Questions
Can I use chicken breasts instead of tenders?
Absolutely! If you can’t find pre-cut chicken tenders, boneless, skinless chicken breasts work perfectly. Just slice them into 1-inch thick strips lengthwise, aiming for uniform sizes to ensure even cooking. Pound thicker pieces gently with a meat mallet or rolling pin to an even thickness—this prevents some pieces from drying out while others cook through. The baking time might vary slightly, so always use a meat thermometer to check for 165°F internally. This swap is budget-friendly and lets you control the size, making it great for meal prepping or feeding a crowd.
How do I store and reheat leftovers?
Store leftover baked chicken tenders in an airtight container in the refrigerator for up to 3 days. To reheat, avoid the microwave—it will make them soggy! Instead, place them on a wire rack over a baking sheet and bake at 375°F for 8-10 minutes until heated through and crispy again. For a quicker option, use an air fryer at 370°F for 4-5 minutes, shaking halfway. This method restores that fresh-out-of-the-oven crunch much better than other approaches, though they’re best enjoyed immediately after baking for optimal texture.
Can I make these ahead of time?
Why did my coating fall off?
If your coating fell off, it’s likely due to moisture or insufficient pressing. Always pat the chicken completely dry with paper towels before breading—any surface moisture can prevent adhesion. Also, press firmly when coating in the breadcrumb mixture to help it stick, and let the breaded tenders rest for a few minutes before baking (or chill as suggested in tips). Using a wire rack instead of placing them directly on the sheet also reduces sogginess that can cause coating loss. If issues persist, try adding an extra egg or a tablespoon of mayonnaise to the egg wash for better binding.
Are these healthier than fried chicken tenders?
Yes, these baked chicken tenders are significantly healthier than traditional fried versions! By baking instead of deep-frying, you cut down on oil absorption—this recipe uses only 2 tablespoons of oil brushed on top, compared to cups of oil for frying. You’ll save calories and fat while still achieving crispiness. Using panko breadcrumbs (which are lighter and absorb less oil) and incorporating parmesan for flavor without excess salt also boosts the nutrition profile. They’re high in protein and can be paired with veggie sides for a balanced meal, making them a guilt-free favorite for health-conscious eaters.
Summary
These baked chicken tenders deliver crispy, juicy perfection with a fraction of the oil of frying. Perfect for families, parties, or meal prep, they’re customizable, easy to make, and always a hit!
Baked Chicken Tenders Recipe
5
servings15
minutes20
minutesIngredients
Instructions
- 1 Preheat oven to 425°F. Line a baking sheet with foil and place a wire rack on top; spray rack lightly.
- 2 Pat chicken dry. Set up three bowls: one with flour, one with beaten eggs, one with panko, parmesan, garlic powder, paprika, onion powder, pepper, and salt mixed.
- 3 Dredge each tender in flour, then egg, then press into breadcrumb mixture. Place on rack.
- 4 Drizzle with oil or butter. Bake for 18-22 minutes until internal temperature reaches 165°F and coating is golden brown.
- 5 Rest for 5 minutes before serving hot with dipping sauces.


