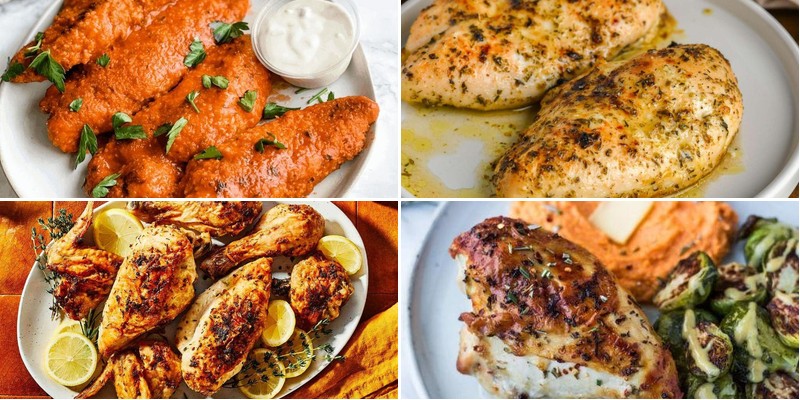
Unlock the secret to stress-free dinners with these 34 mouthwatering baked chicken recipes! Whether you’re craving quick weeknight meals, cozy comfort food, or fresh seasonal favorites, we’ve got you covered. From crispy classics to saucy surprises, these oven-baked delights are sure to become family favorites. Ready to transform your dinner routine? Let’s dive into these delicious options!
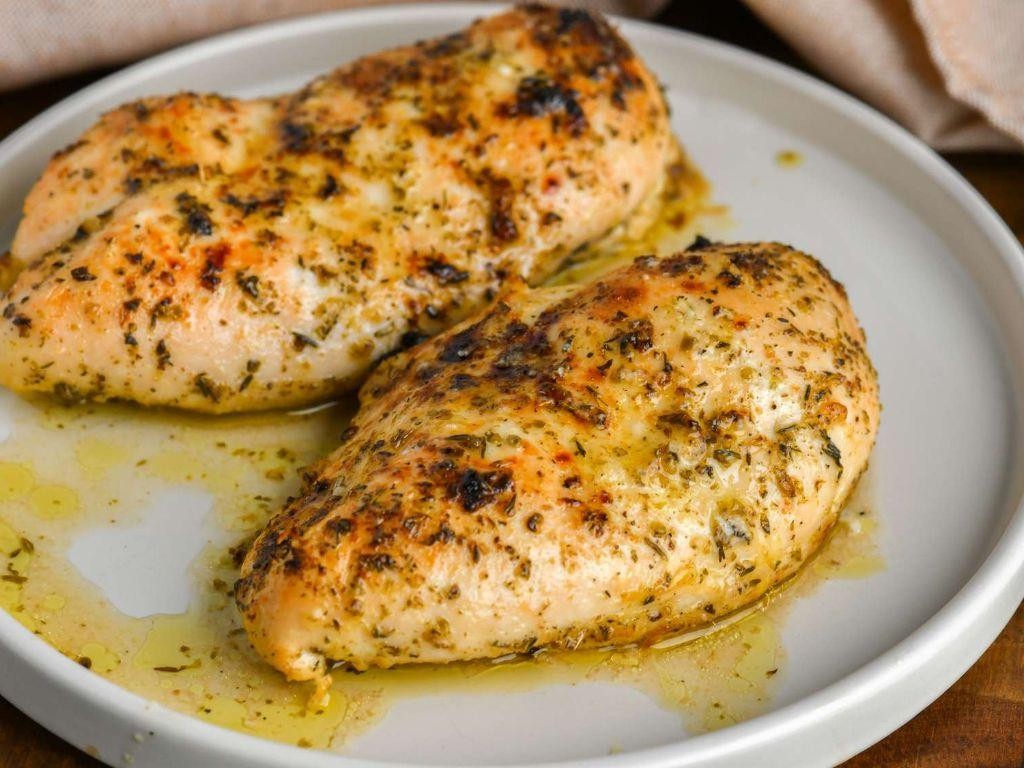
Lemon Herb Baked Chicken Breasts
Now, I have to confess—I used to be intimidated by baking chicken breasts, always worried they’d turn out dry. But this lemon herb version changed everything for me, becoming my go-to weeknight dinner that never fails to impress. Just last Tuesday, my neighbor texted asking for the recipe after catching a whiff of it through our open windows!
2
servings15
minutes25
minutesIngredients
– 4 boneless, skinless chicken breasts (I like to buy them on sale and freeze individually)
– ¼ cup extra virgin olive oil (this is my absolute go-to for baking)
– 3 tablespoons fresh lemon juice (freshly squeezed makes all the difference)
– 2 cloves garlic, minced (I always keep a jar of pre-minced in the fridge for busy days)
– 1 teaspoon dried oregano
– 1 teaspoon dried thyme
– ½ teaspoon salt (I use kosher salt for better distribution)
– ¼ teaspoon black pepper
– 1 lemon, sliced into thin rounds (the thin slices crisp up beautifully)
– 2 tablespoons fresh parsley, chopped (I grow mine in a little kitchen herb garden)
Instructions
1. Preheat your oven to 400°F and lightly grease a 9×13 inch baking dish with 1 tablespoon of the olive oil.
2. Pat the chicken breasts completely dry with paper towels—this helps the seasoning stick better and promotes browning.
3. In a small bowl, whisk together the remaining olive oil, fresh lemon juice, minced garlic, dried oregano, dried thyme, salt, and black pepper until fully combined.
4. Place the dried chicken breasts in the prepared baking dish in a single layer, not touching each other.
5. Pour the lemon herb mixture evenly over all four chicken breasts, using a brush to coat both sides thoroughly.
6. Arrange the thin lemon slices over the top of the chicken breasts, overlapping slightly if needed.
7. Bake at 400°F for 22-25 minutes, until the internal temperature reaches 165°F when checked with an instant-read thermometer inserted into the thickest part.
8. Remove from oven and let rest for 5 minutes—this allows the juices to redistribute throughout the meat.
9. Sprinkle the freshly chopped parsley over the baked chicken breasts just before serving.
Juicy doesn’t even begin to describe these chicken breasts—they’re so tender they practically melt in your mouth with bright citrus notes balanced by earthy herbs. I love serving them over a bed of fluffy quinoa with the pan juices drizzled over everything, or slicing them thin for the most incredible chicken sandwiches the next day.
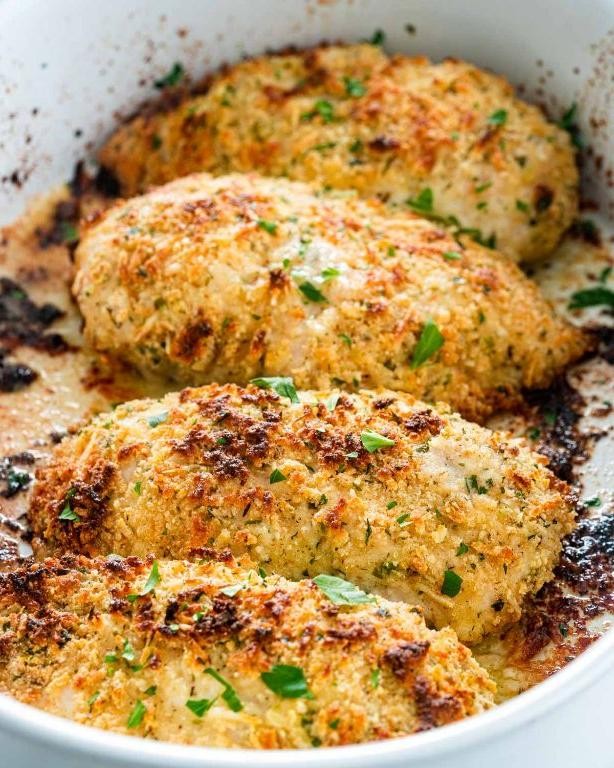
Garlic Parmesan Oven-Baked Chicken Thighs

Last week, I found myself staring at yet another package of chicken thighs, wondering how to transform them into something extraordinary without spending hours in the kitchen. Let’s just say these Garlic Parmesan Oven-Baked Chicken Thighs became an instant family favorite after one bite of their crispy, cheesy crust.
6
portions15
minutes40
minutesIngredients
- 6 bone-in, skin-on chicken thighs – I always pat them dry thoroughly for maximum crispiness
- 1/2 cup grated Parmesan cheese – the fresh kind from the refrigerated section makes all the difference
- 1/4 cup panko breadcrumbs – my secret weapon for that perfect crunch
- 3 tablespoons melted unsalted butter – I prefer unsalted to control the seasoning myself
- 4 cloves garlic, minced – because more garlic is always better in my book
- 1 teaspoon dried Italian seasoning – my go-to blend for that classic herb flavor
- 1/2 teaspoon paprika – just enough for a subtle smoky note
- 1/4 teaspoon black pepper – freshly ground if you have it
- 1/2 teaspoon salt – I use fine sea salt for even distribution
Instructions
- Preheat your oven to 400°F and line a baking sheet with parchment paper.
- Pat the chicken thighs completely dry with paper towels – this is crucial for getting that crispy skin.
- In a medium bowl, combine the Parmesan cheese, panko breadcrumbs, Italian seasoning, paprika, salt, and black pepper.
- In a separate small bowl, whisk together the melted butter and minced garlic until well combined.
- Brush the garlic butter mixture evenly over both sides of each chicken thigh, making sure to get under the skin where possible.
- Press the Parmesan breadcrumb mixture firmly onto both sides of each chicken thigh, creating an even coating.
- Arrange the coated chicken thighs skin-side up on the prepared baking sheet, leaving space between each piece.
- Bake for 35-40 minutes at 400°F until the internal temperature reaches 165°F and the coating is golden brown.
- Let the chicken rest for 5 minutes before serving to allow the juices to redistribute.
As you cut into these beauties, you’ll discover the magic contrast between the shatteringly crisp Parmesan crust and the incredibly juicy meat beneath. That garlic-infused butter seeps into every bite, creating a flavor that’s both comforting and sophisticated. I love serving these over creamy polenta or alongside roasted asparagus for a complete meal that feels restaurant-worthy but is surprisingly simple to pull off.
Honey Mustard Glazed Chicken Drumsticks

Zesty and sweet with just the right kick, these honey mustard glazed chicken drumsticks have become my go-to weeknight dinner that somehow feels fancy enough for company. I first discovered this combination when trying to use up some leftover ingredients, and now my family requests it at least twice a month—the sticky glaze gets perfectly caramelized while keeping the chicken incredibly juicy inside.
8
drumsticks15
minutes45
minutesIngredients
– 8 chicken drumsticks (I always look for ones with nice plump meat)
– 1/4 cup honey (local if you can find it—the flavor is worth it)
– 3 tablespoons Dijon mustard (this is my secret—don’t substitute yellow mustard)
– 2 tablespoons olive oil (extra virgin is my kitchen staple)
– 2 cloves garlic, minced (fresh only—jarred just doesn’t compare)
– 1 teaspoon smoked paprika (this adds that wonderful smoky depth)
– 1/2 teaspoon salt (I use kosher salt for better distribution)
– 1/4 teaspoon black pepper (freshly ground makes all the difference)
Instructions
1. Preheat your oven to 400°F and line a baking sheet with parchment paper or foil for easy cleanup.
2. Pat the chicken drumsticks completely dry with paper towels—this helps the skin get crispy instead of steaming.
3. In a medium bowl, whisk together the honey, Dijon mustard, olive oil, minced garlic, smoked paprika, salt, and black pepper until smooth.
4. Place the dried drumsticks in a large bowl and pour 3/4 of the glaze over them, reserving the remaining 1/4 for later.
5. Using your hands or tongs, toss the drumsticks thoroughly until every piece is evenly coated with the glaze mixture.
6. Arrange the coated drumsticks in a single layer on your prepared baking sheet, making sure they aren’t touching.
7. Bake at 400°F for 25 minutes, then remove from the oven and brush with the reserved glaze.
8. Return to the oven and continue baking for another 15-20 minutes until the internal temperature reaches 165°F and the glaze is caramelized.
9. Let the drumsticks rest on the baking sheet for 5 minutes before serving—this allows the juices to redistribute throughout the meat. Tender and falling-off-the-bone, these drumsticks develop the most beautiful sticky crust that contrasts wonderfully with the juicy interior. The sweet honey balances perfectly with the tangy mustard, creating a flavor profile that appeals to both kids and adults—I love serving them over creamy polenta or with roasted vegetables to soak up every last bit of that delicious glaze.
Crispy Baked Chicken Wings

Every time game day rolls around, I find myself craving that perfect combination of crispy skin and juicy meat that only well-made chicken wings can deliver. After years of experimenting with various methods, I’ve perfected this baked version that gives you all the crunch without the mess of deep frying. Trust me, once you try these, you’ll never go back to soggy oven-baked wings again.
4
servings10
minutes55
minutesIngredients
- 2 lbs chicken wings – I always look for wings that are similar in size so they cook evenly
- 2 tbsp baking powder – This is my secret weapon for ultra-crispy skin, not baking soda!
- 1 tbsp olive oil – Extra virgin is my preference for its fruity notes
- 1 tsp garlic powder – I prefer the powder over fresh here since it coats better
- 1 tsp smoked paprika – This adds that beautiful color and subtle smokiness
- ½ tsp salt – I use fine sea salt for even distribution
- ¼ tsp black pepper – Freshly ground gives the best flavor
Instructions
- Preheat your oven to 425°F and place a wire rack on a baking sheet.
- Pat the chicken wings completely dry with paper towels – this step is crucial for crispy skin.
- In a large bowl, combine baking powder, garlic powder, smoked paprika, salt, and black pepper.
- Add the dried chicken wings to the bowl and drizzle with olive oil.
- Toss the wings thoroughly until every surface is coated with the seasoning mixture.
- Arrange the wings in a single layer on the wire rack, making sure they don’t touch each other.
- Bake for 30 minutes at 425°F until the skin starts to crisp and turn golden.
- Flip each wing carefully using tongs to ensure even cooking on both sides.
- Continue baking for another 20-25 minutes until the skin is deeply golden and crispy.
- Check for doneness – the internal temperature should reach 165°F when measured with a meat thermometer.
That incredible crackle when you bite into these wings tells you everything about their texture. The smoked paprika gives them this beautiful russet color while the baking powder creates that shatteringly crisp exterior we all love. Try serving them with a cool blue cheese dip to cut through the richness, or toss them in your favorite buffalo sauce for classic game day vibes.
Mediterranean Spiced Baked Chicken
Nothing beats coming home to the incredible aroma of Mediterranean spices filling my kitchen—it instantly transports me back to that little seaside taverna in Greece where I first fell in love with this flavor profile. I’ve been making this Mediterranean Spiced Baked Chicken for years, and it’s become my go-to weeknight dinner that feels fancy enough for company but simple enough for tired Tuesday nights. My secret? Letting the chicken marinate while I sip wine and catch up on my favorite cooking shows—multi-tasking at its finest!
4
servings25
minutes30
minutesIngredients
– 4 boneless, skinless chicken breasts (I always buy the organic ones from my local butcher—they’re thicker and juicier)
– 3 tablespoons extra virgin olive oil (this is my absolute go-to for Mediterranean dishes)
– 2 tablespoons lemon juice (freshly squeezed, never bottled—trust me on this)
– 3 garlic cloves, minced (I use my garlic press because I’m impatient with mincing)
– 1 tablespoon dried oregano (the Greek variety if you can find it)
– 1 teaspoon smoked paprika (this adds that beautiful color and subtle smokiness)
– 1 teaspoon ground cumin (my favorite spice—I always add an extra pinch)
– ½ teaspoon salt (I use coarse sea salt for better texture)
– ¼ teaspoon black pepper (freshly ground from my pepper mill)
Instructions
1. Preheat your oven to 375°F and lightly grease a 9×13 inch baking dish with olive oil.
2. Pat the chicken breasts completely dry with paper towels—this helps the marinade stick better and creates a nicer crust.
3. In a medium bowl, whisk together the olive oil, lemon juice, minced garlic, oregano, paprika, cumin, salt, and pepper until fully combined.
4. Place the chicken breasts in the baking dish and pour the spice mixture over them, making sure to coat every surface thoroughly.
5. Use your hands to rub the marinade into the chicken, covering both sides—this is my favorite part, getting hands-on with the spices!
6. Let the chicken marinate at room temperature for 20 minutes while the oven finishes preheating.
7. Bake the chicken in the preheated oven for 25-30 minutes, until the internal temperature reaches 165°F when tested with a meat thermometer.
8. Remove the baking dish from the oven and let the chicken rest for 5 minutes before slicing—this keeps all those delicious juices inside.
Resting this chicken makes all the difference—the spices meld together beautifully while the meat stays incredibly moist and tender. I love serving this over a bed of fluffy couscous with roasted vegetables, or slicing it thin for the most amazing Mediterranean chicken sandwiches the next day. The smoky paprika and bright lemon create this perfect balance that makes everyone at my table ask for seconds!
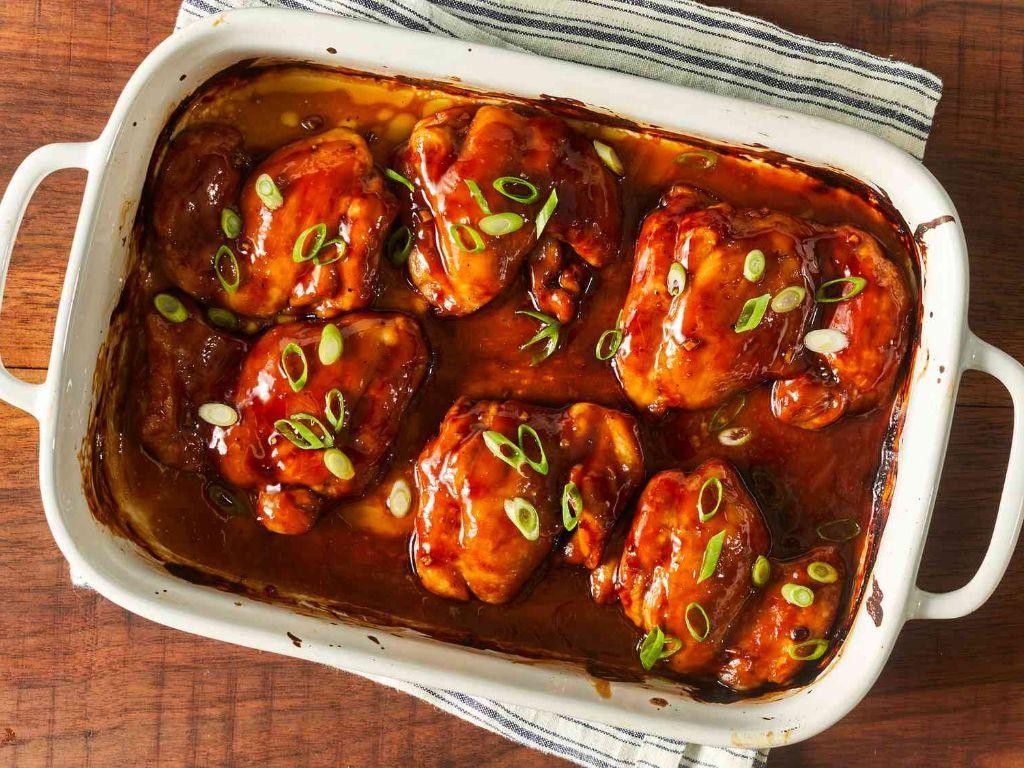
Oven-Baked BBQ Chicken
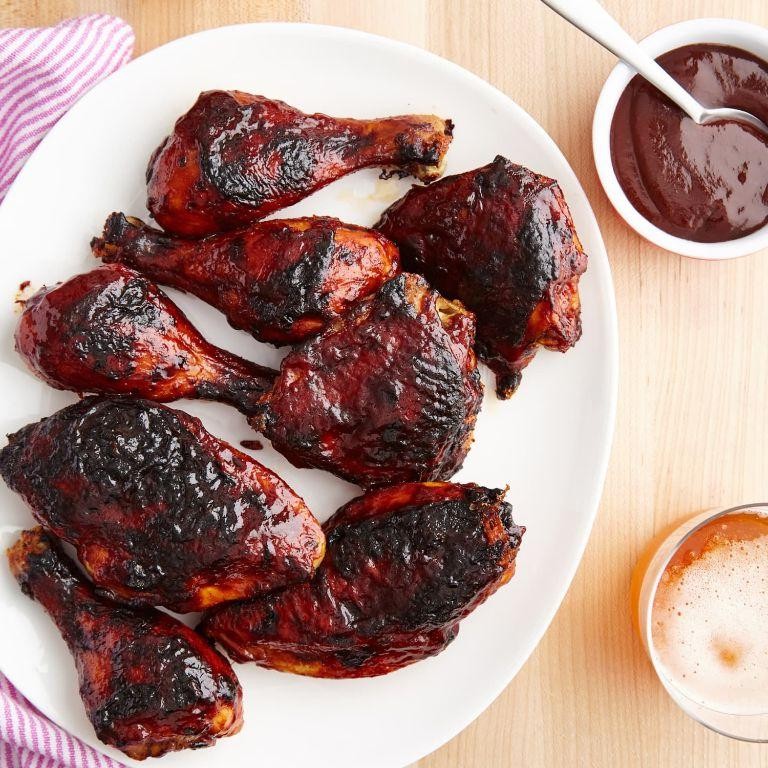
Over the years, I’ve tried countless BBQ chicken recipes, but this oven-baked version has become my absolute go-to for busy weeknights and casual gatherings alike. There’s something incredibly comforting about the aroma of sweet and tangy barbecue sauce filling the kitchen while the chicken turns beautifully caramelized in the oven. I first perfected this method when my grill ran out of propane mid-cookout, and now I actually prefer the consistent results the oven provides.
3
portions10
minutes50
minutesIngredients
– 2 lbs chicken thighs (bone-in, skin-on for maximum juiciness)
– 1 cup of your favorite BBQ sauce (I’m partial to Sweet Baby Ray’s for that classic American flavor)
– 2 tbsp olive oil (extra virgin is my pantry staple)
– 1 tbsp smoked paprika (this adds that smoky depth we all love)
– 1 tsp garlic powder (I always keep this handy for quick seasoning)
– 1 tsp onion powder (the unsung hero of spice cabinets)
– 1/2 tsp black pepper (freshly ground makes all the difference)
– 1/2 tsp salt (I use kosher salt for better distribution)
Instructions
1. Preheat your oven to 375°F and line a baking sheet with aluminum foil for easy cleanup.
2. Pat the chicken thighs completely dry with paper towels—this helps the skin get extra crispy.
3. In a small bowl, whisk together the olive oil, smoked paprika, garlic powder, onion powder, black pepper, and salt until well combined.
4. Rub the spice mixture evenly over all surfaces of the chicken thighs, making sure to get under the skin where possible.
5. Arrange the seasoned chicken thighs skin-side up on the prepared baking sheet, leaving space between each piece.
6. Bake at 375°F for 25 minutes to allow the skin to begin crisping and the fat to render.
7. Remove the baking sheet from the oven and brush each chicken thigh generously with BBQ sauce using a pastry brush.
8. Return the chicken to the oven and bake for another 20-25 minutes at 375°F.
9. Check for doneness by inserting a meat thermometer into the thickest part of a thigh—it should read 165°F.
10. For extra caramelization, switch your oven to broil and broil the chicken for 2-3 minutes, watching carefully to prevent burning.
11. Remove from oven and let the chicken rest for 5 minutes before serving to allow juices to redistribute.
Finally, that beautiful sticky glaze and tender, falling-off-the-bone texture make this chicken worth the wait. I love serving it with creamy coleslaw and cornbread to soak up all the delicious sauce, though it’s equally fantastic shredded over baked potatoes or tucked into soft buns for the ultimate BBQ chicken sandwich.
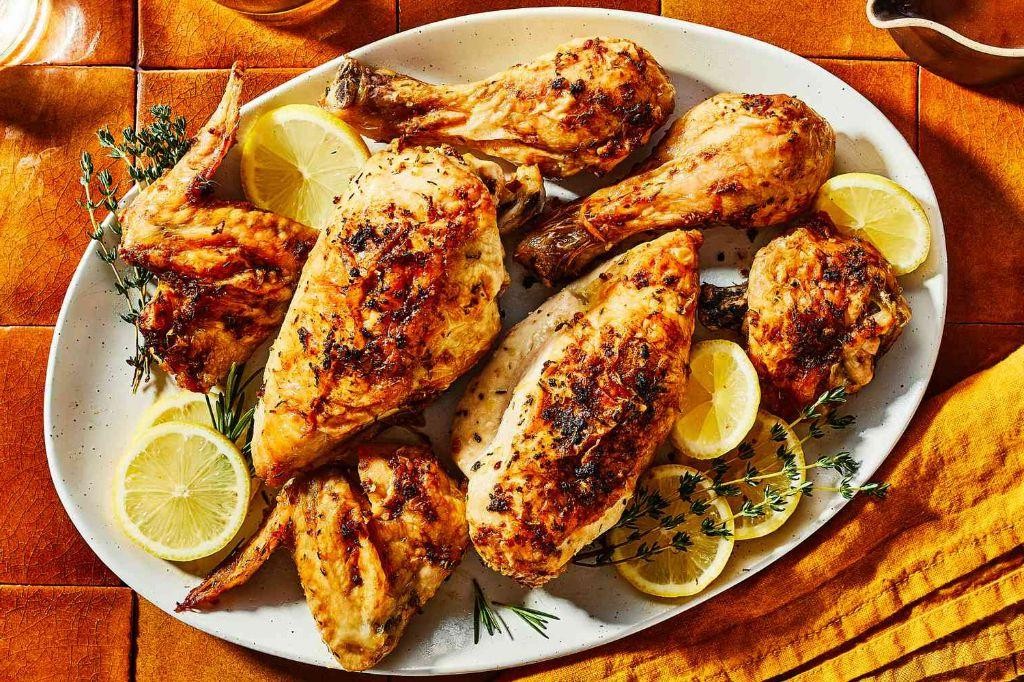
Roasted Garlic and Rosemary Chicken
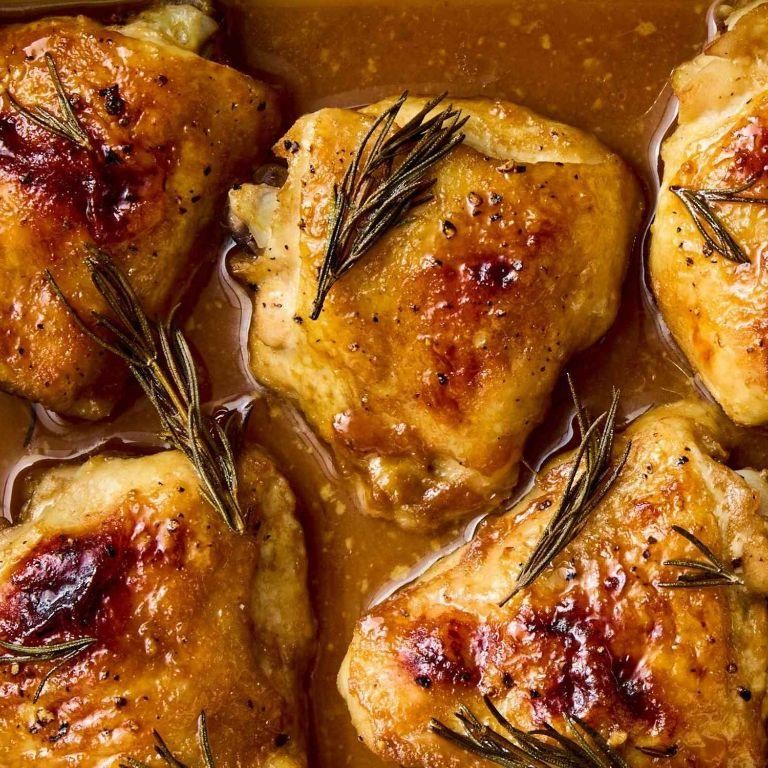
Here’s a recipe I’ve been perfecting for years—this roasted garlic and rosemary chicken has saved me from countless “what’s for dinner?” panics. My family actually cheers when they smell it baking, and I love how the rosemary from my little patio garden makes it feel extra special.
3
servings15
minutes80
minutesIngredients
- 1 whole chicken (about 4 lbs) – I always pat mine dry with paper towels for crispier skin
- 8 garlic cloves – fresh ones from the farmer’s market make all the difference
- 3 tbsp extra virgin olive oil – my go-to for roasting
- 2 tbsp fresh rosemary – I grow mine in pots, but dried works in a pinch
- 1 tsp kosher salt – I prefer the larger flakes for better seasoning
- ½ tsp black pepper – freshly ground, always
- 1 lemon – room temp slices release more juice
Instructions
- Preheat your oven to 425°F and position the rack in the middle.
- Pat the chicken completely dry inside and out with paper towels—this is my secret for extra crispy skin.
- Rub the entire chicken with 2 tablespoons of olive oil, making sure to coat every surface.
- Sprinkle the salt and pepper evenly over the chicken, including inside the cavity.
- Stuff the cavity with 4 garlic cloves, half the rosemary, and the sliced lemon.
- Place the remaining garlic cloves and rosemary around the chicken in the roasting pan.
- Drizzle the remaining 1 tablespoon of olive oil over the garlic in the pan.
- Roast for 20 minutes at 425°F to start the browning process.
- Reduce oven temperature to 375°F and continue roasting for 60 minutes.
- Check for doneness—the internal temperature should reach 165°F in the thickest part of the thigh, and juices should run clear when pierced.
- Let the chicken rest for 15 minutes before carving—this keeps all those delicious juices inside.
My favorite part is how the garlic becomes sweet and spreadable after roasting. Makes the most incredible chicken sandwiches the next day—just pile the shredded meat on crusty bread with some arugula and those roasted garlic cloves smashed into mayo.
Buffalo Style Baked Chicken Tenders

Vivid memories of game day parties always come flooding back whenever I make these Buffalo Style Baked Chicken Tenders. There’s something magical about that spicy, tangy sauce paired with perfectly crispy chicken that just brings people together around the table. I love how baking them makes cleanup so much easier than traditional frying, plus I can feel a little better about indulging in my favorite flavors.
4
servings15
minutes25
minutesIngredients
– 1.5 lbs chicken tenders (I always look for the plumpest ones at the butcher counter)
– 1 cup all-purpose flour (I keep mine in a glass jar right on the counter for easy access)
– 2 large eggs, beaten (room temperature helps them coat more evenly)
– 1.5 cups panko breadcrumbs (the Japanese-style ones give the best crunch in my opinion)
– 1/2 cup Buffalo sauce (Frank’s RedHot is my absolute favorite for that authentic flavor)
– 3 tbsp melted butter (I use unsalted so I can control the seasoning)
– 1 tsp garlic powder (fresh would burn, so powdered works perfectly here)
– 1/2 tsp smoked paprika (adds that beautiful color and subtle smokiness)
– Cooking spray (I prefer avocado oil spray for its high smoke point)
Instructions
1. Preheat your oven to 425°F and line a baking sheet with parchment paper.
2. Pat the chicken tenders completely dry with paper towels—this is crucial for getting that crispy coating to stick properly.
3. Set up three shallow bowls: one with flour, one with beaten eggs, and one with panko breadcrumbs mixed with garlic powder and smoked paprika.
4. Dredge each chicken tender first in flour, shaking off any excess.
5. Dip the floured tender into the beaten eggs, letting the excess drip back into the bowl.
6. Press the tender firmly into the panko mixture, making sure every surface gets coated evenly.
7. Arrange the breaded tenders in a single layer on your prepared baking sheet, making sure they don’t touch each other.
8. Lightly spray the tops of the tenders with cooking spray—this helps them achieve that golden brown color we all love.
9. Bake for 15-18 minutes, then flip each tender carefully with tongs.
10. Continue baking for another 5-7 minutes until the internal temperature reaches 165°F and the coating is golden and crispy.
11. While the chicken bakes, whisk together Buffalo sauce and melted butter in a small bowl.
12. Remove the baked tenders from the oven and immediately brush them generously with the Buffalo sauce mixture.
13. Return to the oven for exactly 2 minutes to let the sauce set into that beautiful glaze.
The combination of that crispy panko crust giving way to juicy chicken underneath is pure perfection. I love serving these with extra Buffalo sauce for dipping and a big bowl of cool, creamy ranch dressing to balance the heat. They’re fantastic piled high on a platter for game day or served over a crisp green salad for a lighter meal.
Maple Dijon Baked Chicken
Every time I make this maple Dijon baked chicken, I’m reminded of that cozy fall evening when I first experimented with this combination—the sweet maple syrup and tangy Dijon mustard just clicked, creating a dish that’s become a family favorite for busy weeknights.
3
servings15
minutes30
minutesIngredients
- 4 boneless, skinless chicken breasts (I always pat them dry with paper towels first—it helps the marinade stick better)
- 1/4 cup pure maple syrup (the real stuff makes all the difference, trust me)
- 2 tbsp Dijon mustard (I prefer the grainy kind for extra texture)
- 2 tbsp olive oil (extra virgin is my kitchen staple)
- 2 cloves garlic, minced (freshly minced garlic releases the best flavor)
- 1 tsp smoked paprika (this adds that warm, smoky depth I love)
- 1/2 tsp black pepper (freshly ground pepper gives it that extra kick)
- 1/2 tsp salt (I use kosher salt for even seasoning)
- Fresh thyme sprigs (a few sprigs from my windowsill herb garden)
Instructions
- Preheat your oven to 375°F and lightly grease a 9×13 inch baking dish with olive oil.
- In a medium bowl, whisk together maple syrup, Dijon mustard, olive oil, minced garlic, smoked paprika, black pepper, and salt until fully combined. Tip: Let the marinade sit for 5 minutes to allow the flavors to meld—it makes a noticeable difference.
- Place chicken breasts in the prepared baking dish in a single layer, ensuring they aren’t crowded.
- Pour the maple Dijon mixture evenly over the chicken, using a brush or spoon to coat each piece thoroughly.
- Arrange fresh thyme sprigs on top of the chicken for aromatic infusion during baking.
- Bake in the preheated oven for 25-30 minutes, or until the internal temperature reaches 165°F when checked with a meat thermometer. Tip: For extra caramelization, broil for the last 2-3 minutes, watching closely to prevent burning.
- Remove from oven and let the chicken rest for 5 minutes before slicing. Tip: Resting allows the juices to redistribute, keeping the chicken moist and tender.
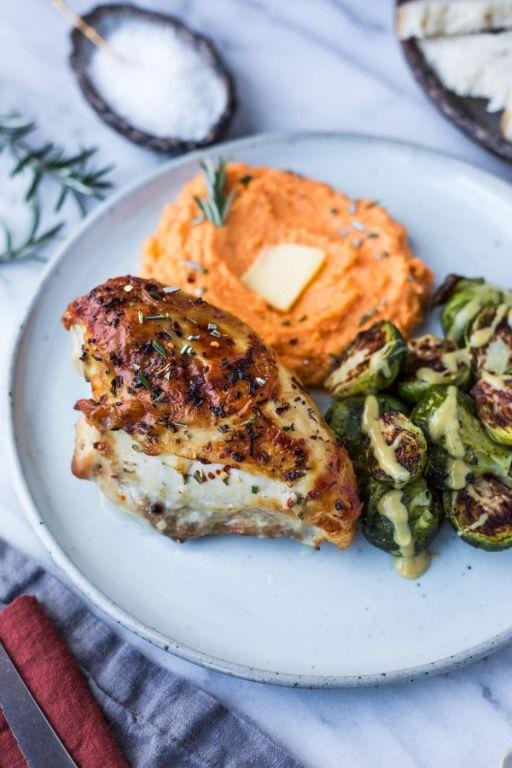
Velvety and fragrant straight from the oven, this chicken boasts a glossy, slightly sticky glaze that pairs beautifully with the tender, juicy meat inside. I love serving it over fluffy quinoa or with roasted sweet potatoes to soak up every bit of the savory-sweet sauce, and it’s just as delicious cold the next day in salads or sandwiches.
Oven-Baked Ranch Chicken
Perfectly crispy, golden-brown chicken with that signature ranch tang—this is the weeknight dinner hero that never lets me down. I first discovered this recipe when my friend Sarah brought it to our potluck, and now it’s my go-to when I need something delicious without the fuss. There’s something magical about how simple ingredients transform into such a flavorful meal.
4
portions15
minutes40
minutesIngredients
- 2 lbs chicken thighs (I always use bone-in for extra juiciness)
- 1 packet (1 oz) ranch seasoning mix (the hidden valley brand is my favorite)
- 1/2 cup panko breadcrumbs (they create the perfect crunch)
- 1/4 cup grated parmesan cheese (the fresh stuff makes all the difference)
- 2 tbsp olive oil (extra virgin is my kitchen staple)
- 1/2 cup buttermilk (this tenderizes the chicken beautifully)
Instructions
- Preheat your oven to 400°F and line a baking sheet with parchment paper—this prevents sticking and makes cleanup a breeze.
- Pat the chicken thighs completely dry with paper towels (this helps the coating stick better).
- Pour buttermilk into a shallow bowl and dip each chicken thigh, making sure it’s fully coated.
- In a separate bowl, combine ranch seasoning, panko breadcrumbs, and parmesan cheese, mixing thoroughly with a fork.
- Press each buttermilk-coated chicken thigh into the dry mixture, ensuring an even coating on all sides.
- Place the coated chicken thighs on the prepared baking sheet, spacing them about 1 inch apart for even cooking.
- Drizzle olive oil evenly over the top of each chicken thigh using a spoon.
- Bake at 400°F for 35-40 minutes until the internal temperature reaches 165°F and the coating is deep golden brown.
- Let the chicken rest on the baking sheet for 5 minutes before serving (this allows juices to redistribute).
Fantastic straight from the oven, this chicken develops an incredible crispy crust while staying remarkably juicy inside. The ranch flavor permeates every bite without being overwhelming, and I love serving it sliced over a bed of greens or alongside roasted potatoes for a complete meal that always earns compliments.
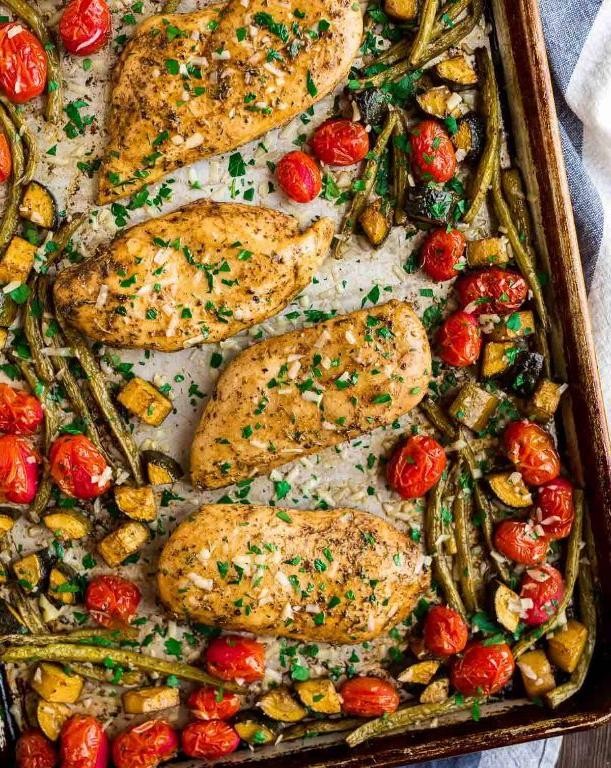
Italian Herb Baked Chicken and Vegetables
As someone who’s always juggling work deadlines and family dinners, I’ve come to rely on this Italian Herb Baked Chicken and Vegetables recipe more times than I can count—it’s my go-to when I need something delicious but don’t want to spend hours in the kitchen. There’s something so comforting about the way the herbs fill my kitchen with that unmistakable cozy aroma, reminding me of Sunday dinners at my grandma’s house.
3
servings15
minutes29
minutesIngredients
- 1.5 lbs boneless, skinless chicken thighs (I find thighs stay juicier than breasts)
- 2 cups baby potatoes, halved (the small ones roast up so creamy inside)
- 1 large red bell pepper, chopped into 1-inch pieces (I love the sweet pop of color)
- 1 medium zucchini, sliced into half-moons (from my neighbor’s garden when in season)
- 1 small red onion, cut into wedges (they caramelize beautifully)
- 3 tbsp extra virgin olive oil (my everyday good-quality bottle)
- 2 tbsp Italian seasoning blend (I make my own mix but store-bought works great)
- 1 tsp garlic powder (fresh minced garlic burns too easily here)
- 1 tsp kosher salt (I prefer the texture over table salt)
- ½ tsp black pepper, freshly ground
Instructions
- Preheat your oven to 400°F and line a large baking sheet with parchment paper—this makes cleanup so much easier.
- Pat the chicken thighs completely dry with paper towels to ensure they brown nicely instead of steaming.
- In a large bowl, combine olive oil, Italian seasoning, garlic powder, salt, and pepper, whisking until fully incorporated.
- Add chicken thighs to the bowl and toss thoroughly until every piece is coated with the herb mixture.
- Arrange the coated chicken thighs in a single layer on one side of the prepared baking sheet.
- Place potatoes, bell pepper, zucchini, and red onion in the same bowl (no need to wash it) and toss with any remaining herb mixture.
- Spread vegetables in a single layer on the empty side of the baking sheet, making sure nothing is overcrowded.
- Roast for 25 minutes at 400°F until chicken reaches 165°F internally and vegetables are tender.
- Switch your oven to broil on high and cook for 3-4 more minutes until chicken skin is crispy and golden.
- Remove from oven and let rest for 5 minutes before serving—this allows juices to redistribute through the chicken.
During those final minutes of roasting, the chicken develops the most satisfying crispy edges while the vegetables become meltingly tender with sweet, caramelized spots. I love serving this straight from the sheet pan over creamy polenta or tossing the leftovers into a salad the next day—the flavors somehow get even better overnight.
Teriyaki Glazed Baked Chicken
Perfectly glazed and irresistibly tender, this Teriyaki Glazed Baked Chicken has become my family’s favorite weeknight dinner solution. I first discovered this recipe during a busy holiday season when I needed something both impressive and easy, and now it’s my go-to when I want that restaurant-quality glaze without the fuss.
5
servings15
minutes45
minutesIngredients
- 2 lbs chicken thighs (I prefer bone-in for extra flavor, but boneless works too)
- 1/2 cup soy sauce (I always use low-sodium to control the saltiness)
- 1/4 cup brown sugar (packed firmly – my grandma taught me this trick for richer flavor)
- 2 tbsp rice vinegar (this adds the perfect tang to balance the sweetness)
- 2 cloves garlic, minced (fresh is essential here – no jarred substitutes!)
- 1 tbsp grated ginger (I keep ginger in my freezer for easy grating anytime)
- 1 tbsp cornstarch (this creates that beautiful glossy coating we all love)
- 2 tbsp water (cold water works best for mixing with cornstarch)
- 1 tbsp sesame oil (toasted sesame oil makes all the difference in flavor)
- 2 green onions, sliced (I save the green parts for garnish at the end)
Instructions
- Preheat your oven to 375°F and line a baking sheet with parchment paper – this prevents sticking and makes cleanup a breeze.
- Pat the chicken thighs completely dry with paper towels, which helps the skin crisp up beautifully during baking.
- Arrange the chicken thighs skin-side up on the prepared baking sheet, spacing them about 1 inch apart for even cooking.
- Bake the chicken for 25 minutes at 375°F while you prepare the teriyaki glaze.
- Combine soy sauce, brown sugar, rice vinegar, minced garlic, and grated ginger in a small saucepan over medium heat.
- Whisk the mixture constantly for 3 minutes until the brown sugar completely dissolves and the sauce begins to simmer.
- Mix cornstarch with cold water in a separate small bowl until no lumps remain – this slurry prevents clumping in your sauce.
- Slowly pour the cornstarch mixture into the simmering sauce while whisking continuously.
- Cook the sauce for 2 more minutes, whisking constantly, until it thickens enough to coat the back of a spoon.
- Remove the thickened sauce from heat and stir in sesame oil for that authentic Asian flavor profile.
- Take the chicken out of the oven after 25 minutes and brush each piece generously with the teriyaki glaze.
- Return the glazed chicken to the oven and bake for another 15 minutes at 375°F until the internal temperature reaches 165°F.
- Brush the chicken with another layer of glaze and broil on high for 2-3 minutes until the edges caramelize and bubble.
- Remove the chicken from the oven and let it rest for 5 minutes before serving to allow the juices to redistribute.
- Garnish with sliced green onions and serve immediately.
Nothing beats the sticky-sweet caramelization that forms on these chicken thighs, creating that perfect balance between savory and sweet. The meat stays incredibly juicy while the glaze develops those beautiful glossy edges that crackle when you bite into them. I love serving this over steamed jasmine rice to soak up every last drop of that amazing teriyaki sauce.
Oven-Fried Panko Chicken
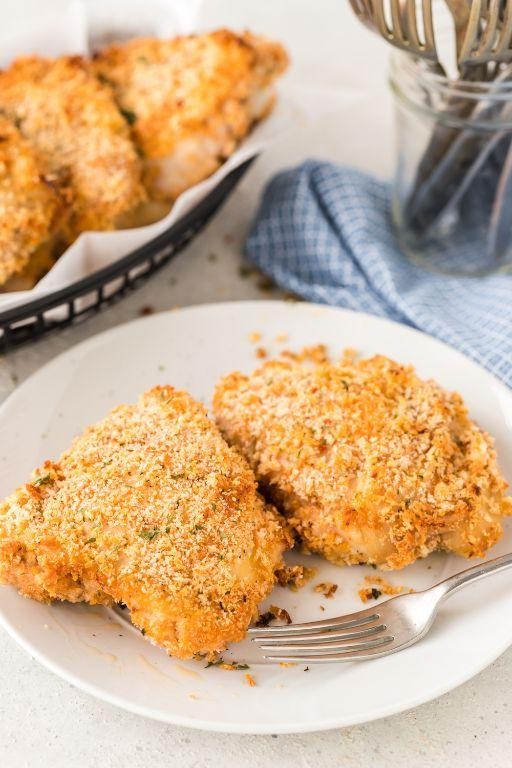
Venturing into the world of oven-fried chicken has been my latest kitchen obsession—it gives me that satisfying crunch without the mess of deep frying. Just last week, my kids declared this panko version their new favorite dinner, which means I’ll be making it on repeat. Honestly, once you try this method, you might never go back to traditional frying.
3
portions15
minutes40
minutesIngredients
– 1.5 lbs chicken thighs (bone-in, skin-on for maximum juiciness)
– 1 cup panko breadcrumbs (the Japanese-style ones create the best crispy texture)
– 2 large eggs (I always let mine come to room temperature for better coating)
– 1/2 cup all-purpose flour
– 1 tsp garlic powder (I’m generous with this—it adds such depth)
– 1 tsp paprika (smoked paprika is my secret weapon for that smoky hint)
– 1/2 tsp black pepper (freshly ground makes all the difference)
– 1 tsp salt
– 3 tbsp olive oil (extra virgin is my kitchen staple)
Instructions
1. Preheat your oven to 400°F and line a baking sheet with parchment paper.
2. Pat the chicken thighs completely dry with paper towels—this helps the coating stick better.
3. In a shallow bowl, whisk the eggs until fully blended and smooth.
4. Place the flour in another shallow bowl and mix in the salt, black pepper, garlic powder, and paprika.
5. Spread the panko breadcrumbs in a third shallow bowl and drizzle with the olive oil, tossing to coat evenly.
6. Dredge each chicken thigh first in the flour mixture, shaking off any excess.
7. Dip the floured chicken into the egg mixture, letting any extra drip off.
8. Press the chicken firmly into the panko breadcrumbs, ensuring full coverage on all sides.
9. Arrange the coated chicken thighs in a single layer on the prepared baking sheet, skin-side up.
10. Bake for 35-40 minutes until the internal temperature reaches 165°F and the coating is golden brown.
11. Let the chicken rest for 5 minutes before serving to allow juices to redistribute.
Delightfully crispy on the outside while staying incredibly moist inside, this chicken has become my go-to for busy weeknights. The panko creates these wonderful little shards of crunch that hold up beautifully against sauces. I love serving it alongside roasted potatoes or shredding it over a fresh green salad for next-day lunches.
Balsamic & Honey Baked Chicken
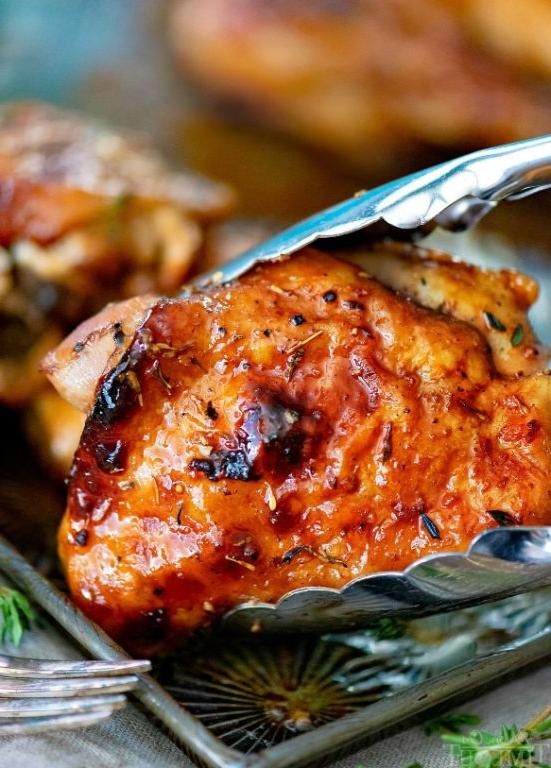
Nothing beats the comforting aroma of balsamic and honey wafting through my kitchen on a busy weeknight. I first stumbled upon this flavor combination when trying to use up pantry staples, and now it’s my family’s most-requested chicken dish. Trust me, the sweet and tangy glaze will have everyone asking for seconds!
5
servings10
minutes30
minutesIngredients
- 4 boneless, skinless chicken breasts (I always buy the organic ones from my local butcher)
- 1/4 cup balsamic vinegar (the good stuff makes all the difference here)
- 3 tablespoons honey (local raw honey adds such depth)
- 2 tablespoons extra virgin olive oil (my go-to for everything)
- 3 garlic cloves, minced (fresh only – no jarred garlic in this house!)
- 1 teaspoon dried thyme (rubbed between my palms to release the oils)
- 1/2 teaspoon salt (I prefer fine sea salt for even distribution)
- 1/4 teaspoon black pepper (freshly ground, always)
Instructions
- Preheat your oven to 375°F and grab your favorite baking dish – I use my trusty ceramic one that never lets me down.
- Pat the chicken breasts completely dry with paper towels – this helps the glaze stick better and creates a nicer sear.
- Whisk together balsamic vinegar, honey, olive oil, minced garlic, dried thyme, salt, and black pepper in a small bowl until fully combined.
- Place the dried chicken breasts in your baking dish, making sure they’re not crowded – they need their personal space to cook evenly.
- Pour the balsamic-honey mixture evenly over all four chicken breasts, making sure every inch gets coated.
- Bake at 375°F for 25-30 minutes – the chicken should reach 165°F internally when tested with a meat thermometer.
- Remove from oven and let the chicken rest for 5 minutes before slicing – this keeps all those delicious juices inside.
- While resting, spoon the pan juices over the chicken to create an extra glossy finish.
Caramelized and sticky-sweet, this chicken emerges with the most beautiful glossy sheen. The balsamic reduces into a thick, syrupy glaze that clings to every tender bite, while the honey provides just enough sweetness to balance the vinegar’s sharpness. I love serving it over creamy polenta or with roasted vegetables to soak up every last drop of that incredible sauce.
Spicy Sriracha Lime Baked Chicken
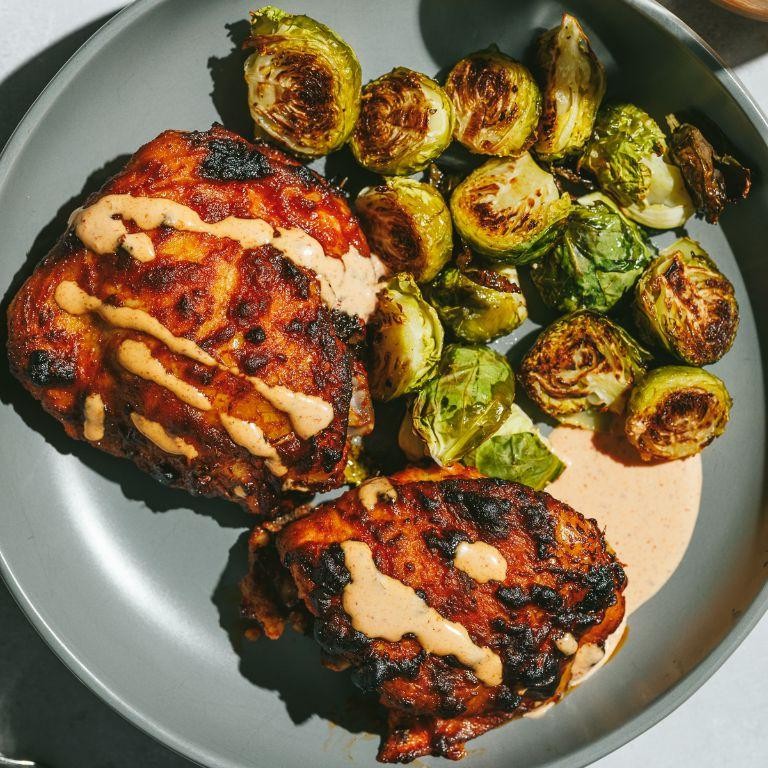
Tired of the same old chicken recipes? I was too, until I discovered this magical combination of spicy sriracha and zesty lime that completely transforms ordinary baked chicken into something extraordinary. Let me share my favorite weeknight dinner that never fails to impress even my pickiest eaters.
5
servings15
minutes40
minutesIngredients
– 2 lbs chicken thighs (bone-in, skin-on for maximum juiciness – trust me on this)
– 1/4 cup sriracha sauce (I always use the classic rooster bottle)
– 3 tbsp honey (local raw honey adds the best flavor)
– 2 tbsp olive oil (extra virgin is my kitchen staple)
– 3 cloves garlic, minced (freshly minced makes all the difference)
– 2 limes (one for juice, one for garnish – I buy extra limes just in case)
– 1 tsp salt (kosher salt distributes more evenly)
– 1/2 tsp black pepper (freshly ground, of course)
Instructions
1. Preheat your oven to 400°F and line a baking sheet with parchment paper.
2. Pat the chicken thighs completely dry with paper towels – this helps the skin get extra crispy.
3. In a medium bowl, whisk together sriracha, honey, olive oil, minced garlic, juice from one lime, salt, and black pepper until smooth.
4. Place chicken thighs skin-side up on the prepared baking sheet.
5. Brush the sriracha mixture generously over both sides of each chicken thigh, making sure to get under the skin too.
6. Arrange chicken thighs with at least 1 inch of space between them for even cooking.
7. Bake at 400°F for 35-40 minutes until the internal temperature reaches 165°F and the skin is caramelized.
8. Let the chicken rest for 5 minutes before serving to allow juices to redistribute.
9. Squeeze fresh lime juice from the remaining lime over the chicken just before serving.
Let me tell you, the crispy, sticky glaze against the tender, juicy chicken creates the perfect texture contrast. The spicy kick from the sriracha mellows beautifully with the sweet honey and bright lime, making this dish incredibly addictive. I love serving it over cilantro lime rice with extra lime wedges for squeezing at the table.
Conclusion
Amazingly versatile, this collection proves oven-baked chicken is anything but boring! From quick weeknight dinners to impressive weekend feasts, there’s something here for every craving. We’d love to hear which recipes become your new favorites—drop a comment below and share your top picks on Pinterest so fellow home cooks can discover these delicious dishes too!


