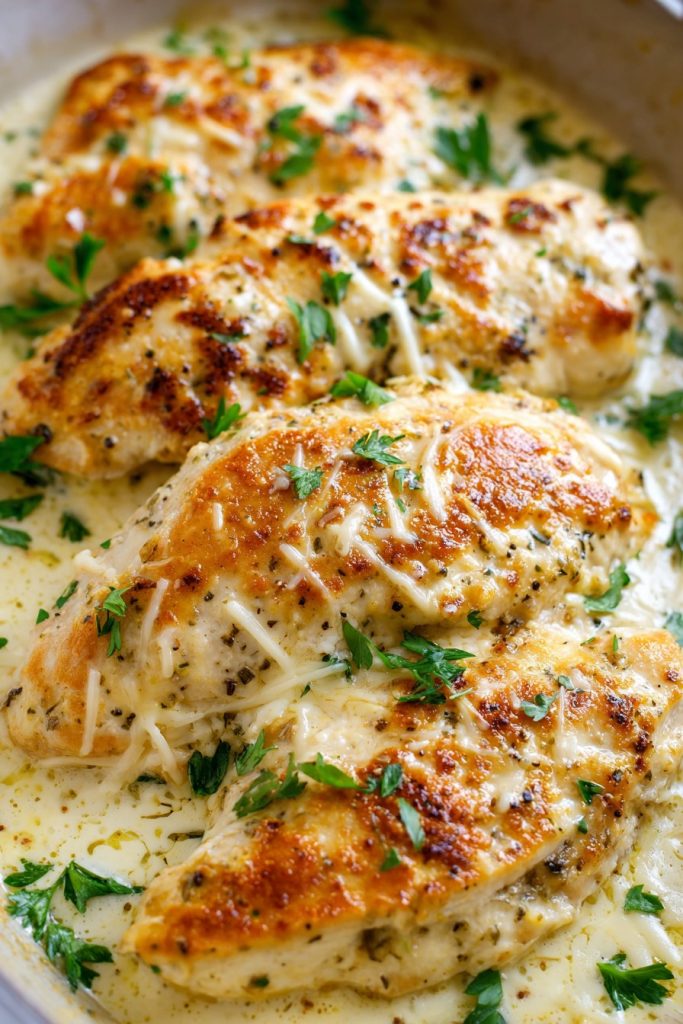
Let’s be real, folks – some days you just need dinner to be easy, delicious, and downright comforting. Luckily, this baked chicken ranch recipe checks all those boxes and then some, combining juicy chicken with that iconic ranch flavor we all know and love. It’s the kind of meal that makes everyone at the table happy without requiring a culinary degree or hours in the kitchen.
Why This Recipe Works
- The ranch seasoning blend, with its mix of herbs and spices, not only adds incredible flavor but also helps create a beautifully golden, slightly crispy crust on the chicken as it bakes.
- Using a combination of olive oil and ranch dressing ensures the chicken stays moist and tender throughout the cooking process, preventing any dreaded dryness.
- Baking at a moderate temperature allows the chicken to cook evenly without burning the seasoning, giving you perfectly cooked meat every single time.
- This recipe requires minimal prep work and uses ingredients you probably already have in your pantry, making it ideal for busy weeknights or last-minute dinner plans.
- The versatility of this dish means you can easily customize it with different seasonings or sides, ensuring it never gets boring no matter how often you make it.
Ingredients
- 4 boneless, skinless chicken breasts (about 1.5 pounds total)
- 1/2 cup ranch dressing (store-bought or homemade)
- 2 tablespoons olive oil
- 1 packet (1 ounce) ranch seasoning mix
- 1 teaspoon garlic powder
- 1/2 teaspoon smoked paprika
- 1/4 teaspoon black pepper
- 1/4 cup grated Parmesan cheese
- Fresh parsley, chopped (for garnish)
Equipment Needed
- 9×13 inch baking dish
- Mixing bowls
- Whisk or fork
- Measuring cups and spoons
- Meat thermometer
- Aluminum foil or parchment paper (optional)
Instructions
Step 1: Preheat and Prepare Your Oven
Preheat your oven to 375°F – this moderate temperature is perfect for cooking chicken through without drying it out or burning the seasoning. While the oven heats up, grab your 9×13 inch baking dish and give it a light coating of non-stick spray or a quick wipe with olive oil to prevent any sticking disasters. Trust me, nobody wants to spend extra time scrubbing baked-on ranch residue later! This is also the perfect time to take your chicken breasts out of the refrigerator if you haven’t already – letting them sit at room temperature for about 15-20 minutes helps them cook more evenly. Just don’t leave them out too long; food safety first, my friends!
Step 2: Create the Flavor-Packed Ranch Coating
In a medium mixing bowl, combine the ranch dressing, olive oil, ranch seasoning packet, garlic powder, smoked paprika, and black pepper. Whisk everything together until you have a smooth, well-combined mixture that smells absolutely heavenly – if you’re not tempted to dip a carrot stick in it right now, you’re stronger than I am! The olive oil helps thin the dressing slightly while adding richness, and the smoked paprika gives it that beautiful color and subtle smoky note that takes this beyond basic ranch. Pro tip: if your mixture seems too thick, you can add another tablespoon of olive oil or even a splash of buttermilk to reach a brushable consistency. This coating is what transforms ordinary chicken into something truly special, so make sure every ingredient is thoroughly incorporated.
Step 3: Coat the Chicken Evenly
Place your chicken breasts on a clean cutting board and pat them completely dry with paper towels – this crucial step helps the ranch mixture adhere properly rather than sliding off wet chicken. Using a pastry brush or your hands (clean hands, please!), generously coat each chicken breast on all sides with the ranch mixture, making sure to get into every nook and cranny. Don’t be shy here – really slather it on! Once coated, arrange the chicken in your prepared baking dish in a single layer, making sure they aren’t crowded or overlapping. Sprinkle the grated Parmesan cheese evenly over the top of each breast; this will create a deliciously cheesy, slightly crispy crust as it bakes. The Parmesan adds a savory depth that complements the ranch flavors perfectly.
Step 4: Bake to Perfection
Place the baking dish in your preheated 375°F oven and set your timer for 25 minutes. After 25 minutes, check the internal temperature of the thickest part of the chicken using a meat thermometer – you’re looking for 165°F for fully cooked chicken. If it hasn’t reached temperature yet, continue baking in 5-minute increments until it does. The total baking time will typically be 25-35 minutes depending on the thickness of your chicken breasts. While baking, you’ll notice the most amazing aroma filling your kitchen – that’s the ranch seasoning working its magic! The chicken should be golden brown on top, juicy inside, and the Parmesan should have formed a beautiful crust. Avoid opening the oven door too frequently as this can cause temperature fluctuations and uneven cooking.
Step 5: Rest and Serve Immediately
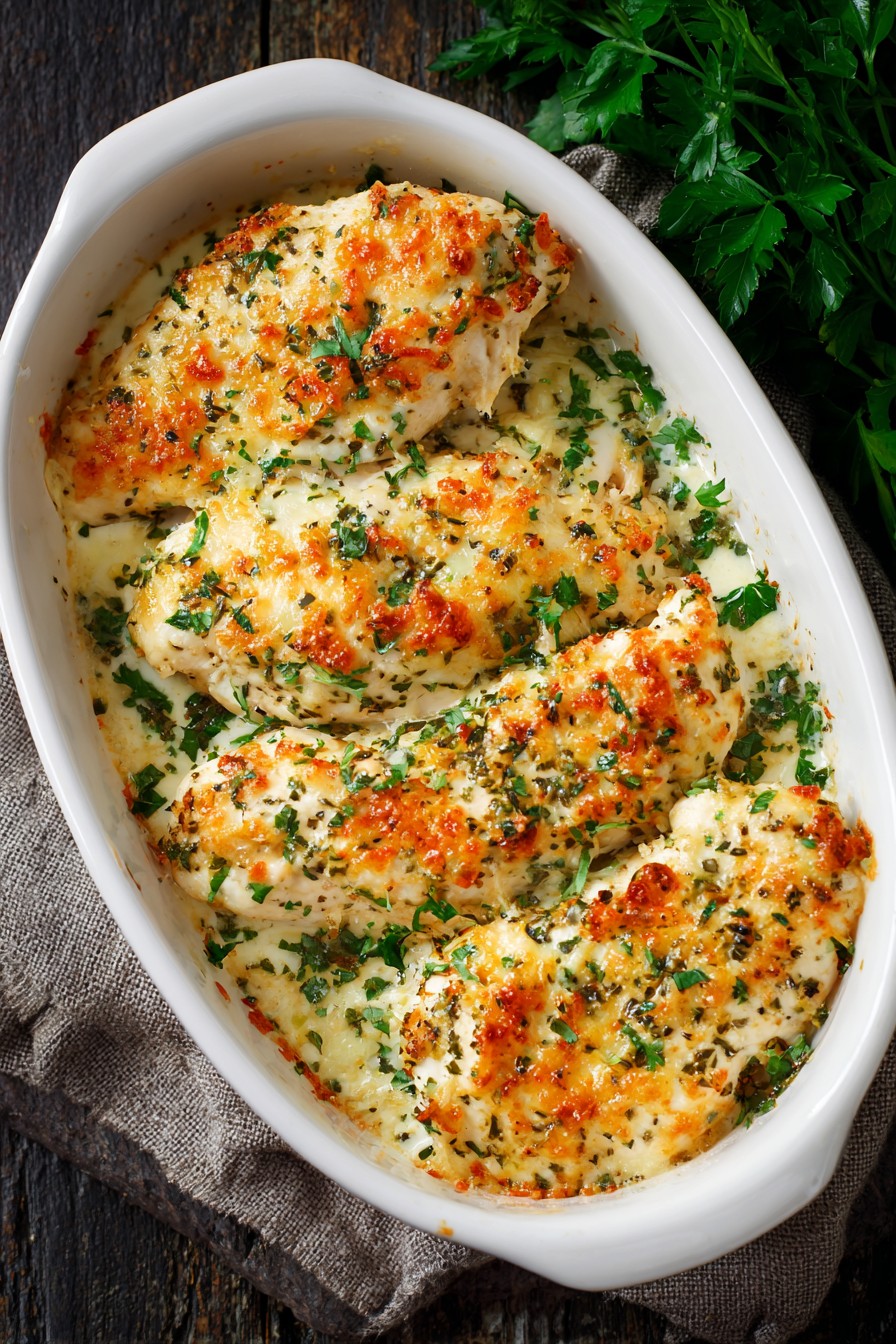
Once your chicken reaches 165°F internally, carefully remove it from the oven – remember, that baking dish is hot! Transfer the chicken to a clean plate or cutting board and let it rest for 5-10 minutes before serving. This resting period allows the juices to redistribute throughout the meat, ensuring every bite is moist and flavorful rather than having all the juices run out when you cut into it. While resting, garnish with freshly chopped parsley for a pop of color and freshness. Serve immediately with your favorite sides – mashed potatoes, roasted vegetables, or a simple green salad all work beautifully. The leftover ranch sauce in the baking dish makes an incredible gravy for potatoes or rice, so don’t let that goodness go to waste!
Tips and Tricks
If you want to take your baked ranch chicken to the next level, consider pounding your chicken breasts to an even thickness before coating them. This ensures they cook uniformly without the thinner parts drying out while waiting for the thicker sections to finish. Simply place each breast between two pieces of plastic wrap or parchment paper and gently pound with a meat mallet or rolling pin until they’re about 1/2 to 3/4 inch thick throughout. For extra crispy goodness, try placing a wire rack inside your baking dish before adding the chicken – this elevates the meat and allows hot air to circulate underneath, preventing sogginess and promoting even browning on all sides. If you’re watching your sodium intake, you can make your own lower-sodium ranch seasoning by combining dried dill, parsley, garlic powder, onion powder, and a touch of salt rather than using the pre-packaged mix. For maximum flavor penetration, consider marinating the chicken in the ranch mixture for 30 minutes to 2 hours before baking – just be sure to keep it refrigerated during marinating time. If you find the top browning too quickly during baking, simply tent the dish loosely with aluminum foil for the remaining cooking time. Leftovers store beautifully in an airtight container in the refrigerator for 3-4 days and reheat wonderfully in the oven at 350°F for about 15 minutes or until heated through. For meal prep purposes, you can assemble the coated chicken in the baking dish, cover tightly, and refrigerate for up to 24 hours before baking – just add a few extra minutes to the cooking time since it’s going into the oven cold. If you’re serving guests and want to make it extra special, garnish with additional fresh herbs like chives or dill right before serving for that restaurant-quality presentation.
Recipe Variations
- For a spicy kick, add 1-2 teaspoons of cayenne pepper or chili powder to the ranch mixture, or use a spicy ranch dressing if available. You could also sprinkle some crushed red pepper flakes over the chicken before baking for those who really love heat. Serve with cool cucumber salad or ranch dipping sauce on the side to balance the spice level.
- Create a ranch parmesan crust by mixing 1/2 cup panko breadcrumbs with the grated Parmesan before sprinkling over the chicken. This adds wonderful texture and makes the topping even crispier. For extra flavor, toast the panko in a dry skillet with a little garlic powder before mixing with the cheese.
- Transform this into a complete sheet pan meal by adding vegetables to the baking dish. Chopped potatoes, carrots, broccoli, or bell peppers all work beautifully – just toss them with a little olive oil, salt, and pepper before arranging around the chicken. The vegetables will roast in the delicious ranch-infused juices while the chicken cooks.
- For a creamier version, during the last 10 minutes of baking, top each chicken breast with a slice of provolone, mozzarella, or Monterey Jack cheese until melted and bubbly. The cheesy ranch combination is absolutely irresistible and makes the dish even more comforting and family-friendly.
- Make it low-carb by using almond flour or crushed pork rinds instead of breadcrumbs if you’re doing the crispy variation. You can also serve it over zucchini noodles or with a side of cauliflower mash instead of traditional potatoes to keep it keto-friendly while still enjoying all that fantastic ranch flavor.
Frequently Asked Questions
Can I use chicken thighs instead of breasts?
Absolutely! Bone-in, skin-on chicken thighs work wonderfully with this recipe and actually stay even more moist during baking. You’ll want to increase the cooking time to about 40-45 minutes at 375°F, or until the internal temperature reaches 165°F. The skin gets beautifully crispy while the ranch flavor penetrates the dark meat beautifully. Just be sure to arrange them skin-side up in the baking dish and consider using a wire rack to elevate them for maximum crispiness all around.
How do I know when the chicken is fully cooked?
The most reliable method is using an instant-read meat thermometer inserted into the thickest part of the chicken without touching bone – you’re looking for 165°F. If you don’t have a thermometer, you can check that the juices run clear when pierced with a knife and there’s no pinkness in the meat. Visual cues include the chicken being firm to the touch and the coating being golden brown. Remember that carryover cooking will continue after you remove it from the oven, so it’s better to pull it at 160°F if you’re using a thermometer.
Can I make this recipe gluten-free?
Yes, easily! Many store-bought ranch seasoning mixes and dressings are naturally gluten-free, but always check the labels to be sure. If you’re making your own ranch seasoning, simply ensure all your spices are gluten-free. For the crispy variation, use gluten-free breadcrumbs or crushed gluten-free crackers instead of traditional breadcrumbs. The basic recipe without breadcrumbs is naturally gluten-free as long as your ranch products are certified gluten-free.
What’s the best way to store and reheat leftovers?
Store leftover baked ranch chicken in an airtight container in the refrigerator for up to 4 days. For best results when reheating, use the oven at 350°F for about 15-20 minutes until heated through. This helps maintain the texture better than microwaving, which can make the coating soggy. If you must use the microwave, do it at 50% power and consider placing a paper towel underneath to absorb excess moisture. The chicken also makes fantastic cold additions to salads or sandwiches the next day!
Can I freeze the baked chicken ranch?
You can freeze it after baking, though the texture may change slightly upon thawing. Cool completely, then wrap individual portions tightly in plastic wrap and aluminum foil before placing in freezer bags. It will keep for 2-3 months. Thaw in the refrigerator overnight before reheating in the oven. For best results, you can also freeze the uncooked, coated chicken in the baking dish covered tightly – then bake directly from frozen, adding 15-20 minutes to the cooking time.
Summary
This baked chicken ranch recipe delivers maximum flavor with minimal effort, featuring juicy chicken coated in a savory ranch and Parmesan crust. Perfect for busy weeknights, it’s customizable, family-friendly, and guaranteed to become a regular in your dinner rotation.
Baked Chicken Ranch Recipe
6
servings10
minutes30
minutesIngredients
Instructions
- 1 Preheat oven to 375°F and prepare a 9x13 inch baking dish with non-stick spray.
- 2 In a bowl, whisk together ranch dressing, olive oil, ranch seasoning, garlic powder, paprika, and pepper.
- 3 Pat chicken dry, coat evenly with ranch mixture, place in baking dish, and top with Parmesan.
- 4 Bake for 25-35 minutes until internal temperature reaches 165°F.
- 5 Rest for 5-10 minutes, garnish with parsley, and serve immediately.


