
Unbelievably delicious and ridiculously easy, these baked chicken quarters will become your go-to dinner solution. Using just a handful of pantry staples, you’ll create a meal that’s crispy on the outside, juicy on the inside, and guaranteed to make your taste buds do a happy dance.
Why This Recipe Works
- The high-fat content in chicken quarters keeps them incredibly moist and flavorful during baking, preventing the dreaded dry chicken syndrome that plagues so many home cooks.
- Starting with a hot oven creates that perfect golden-brown crust while locking in all the natural juices, giving you that restaurant-quality texture without any fancy techniques.
- The simple seasoning blend of garlic powder, paprika, and herbs enhances the natural chicken flavor without overwhelming it, making this recipe versatile enough to pair with any side dish.
- Baking at 400°F for the perfect amount of time ensures the skin gets crispy while the meat reaches the ideal internal temperature of 165°F for food safety and maximum juiciness.
- Resting the chicken after baking allows the juices to redistribute throughout the meat, resulting in every single bite being moist, tender, and absolutely bursting with flavor.
Ingredients
- 4 chicken leg quarters (about 3-4 pounds total), skin-on and bone-in
- 2 tablespoons olive oil
- 1 tablespoon garlic powder
- 1 tablespoon paprika
- 2 teaspoons dried thyme
- 1 teaspoon onion powder
- 1 teaspoon salt
- ½ teaspoon black pepper
- ½ teaspoon cayenne pepper (optional for heat)
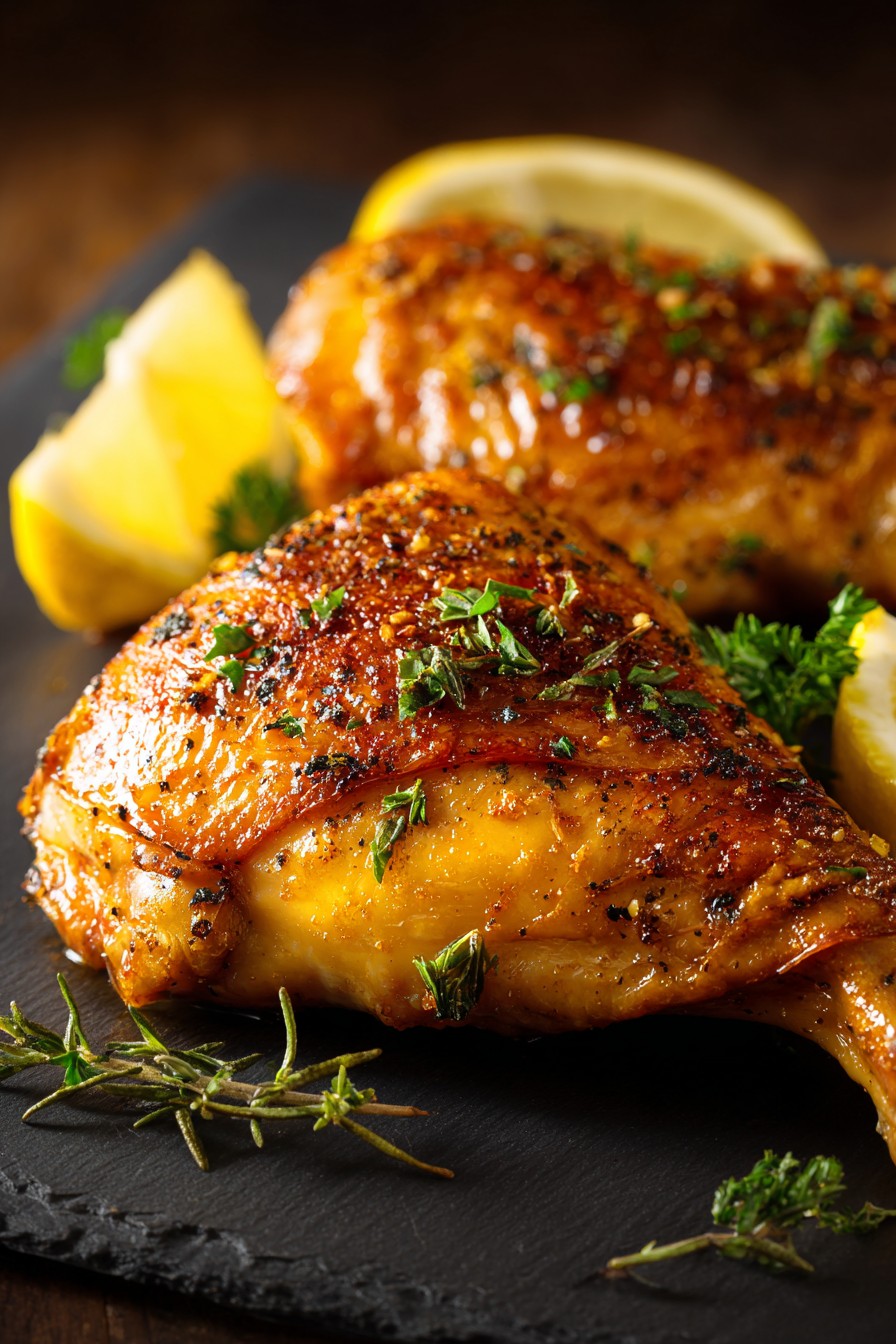
- Fresh parsley, chopped (for garnish)
- Lemon wedges (for serving)
Equipment Needed
- Rimmed baking sheet
- Wire rack (optional but recommended)
- Mixing bowl
- Measuring spoons
- Tongs
- Meat thermometer
- Paper towels
Instructions
Preheat and Prep Your Oven
Preheat your oven to 400°F and position the rack in the center of the oven. This ensures even heat distribution and proper browning. While the oven heats up, take your rimmed baking sheet and line it with aluminum foil for easy cleanup—trust me, you’ll thank yourself later when there’s no scrubbing involved. If you’re using a wire rack, place it on top of the baking sheet; this elevates the chicken and allows hot air to circulate underneath, resulting in crispier skin all around rather than just on top. The wire rack method is my secret weapon for achieving that perfect texture, but if you don’t have one, don’t worry—the chicken will still turn out deliciously crispy.
Pat Dry and Season Generously
Remove the chicken quarters from their packaging and pat them completely dry with paper towels—this is crucial for getting that crispy skin we all crave. In a small bowl, combine the garlic powder, paprika, dried thyme, onion powder, salt, black pepper, and cayenne pepper if using. Drizzle the olive oil over the chicken quarters, making sure to coat all sides, then sprinkle the seasoning mixture evenly over every surface, including under the skin if possible. Gently lifting the skin and rubbing some seasoning directly onto the meat adds incredible flavor penetration. Don’t be shy with the seasoning—chicken quarters can handle bold flavors, and every nook and cranny deserves some love.
Arrange and Bake to Perfection
Arrange the seasoned chicken quarters skin-side up on the prepared baking sheet or wire rack, making sure they aren’t touching each other to allow for proper air circulation. Place the baking sheet in the preheated 400°F oven and bake for 45-50 minutes. The high temperature will render the fat under the skin, creating that beautiful crispy texture while keeping the meat incredibly moist. About halfway through the cooking time, you might want to rotate the baking sheet 180 degrees to ensure even browning, especially if your oven has hot spots. You’ll know it’s working when your kitchen starts smelling absolutely heavenly and the skin begins turning a gorgeous golden brown.
Check Temperature and Doneness
After 45 minutes, insert an instant-read meat thermometer into the thickest part of the chicken quarter, making sure not to touch the bone, which can give a false reading. The chicken is perfectly done when it reaches an internal temperature of 165°F. If it hasn’t reached this temperature yet, continue baking in 5-minute increments until it does. The skin should be deep golden brown and crispy, and the juices should run clear when pierced with a knife. If the skin is getting too dark but the internal temperature hasn’t been reached, you can loosely tent the chicken with foil to prevent further browning while the inside finishes cooking.
Rest and Serve Like a Pro
Once the chicken reaches 165°F, remove it from the oven and transfer it to a clean plate or cutting board. Let it rest for at least 10 minutes before serving—this waiting period is non-negotiable for juicy chicken! During this time, the muscle fibers relax and reabsorb all those delicious juices that would otherwise end up on your cutting board. While the chicken rests, you can prepare your side dishes or make a quick pan sauce with the drippings left on the baking sheet. Garnish with fresh chopped parsley and serve with lemon wedges for squeezing over the top, which adds a bright, fresh contrast to the rich, savory chicken.
Tips and Tricks
For the crispiest skin imaginable, try patting the chicken quarters dry and then leaving them uncovered in the refrigerator for a few hours or overnight before cooking. This air-drying technique removes even more surface moisture than just patting dry, resulting in skin that crackles when you bite into it. If you’re really serious about crispy skin, you can even rub a small amount of baking powder into the skin before seasoning—the alkaline nature of baking powder helps break down proteins and promotes browning and crisping. Just use about ½ teaspoon per quarter and make sure it’s evenly distributed.
When it comes to seasoning, don’t limit yourself to the blend in this recipe—this is your chance to get creative! Consider using different herb combinations like rosemary and lemon zest, or go for smoky flavors with chipotle powder and cumin. If you have time, letting the seasoned chicken sit in the refrigerator for 30 minutes to 2 hours before baking allows the flavors to penetrate deeper into the meat. For an extra flavor boost, you can create a compound butter with herbs and garlic and slide it under the skin before baking—this melts into the meat as it cooks, keeping it incredibly moist and infusing every bite with flavor.
If you’re cooking for a crowd or want to meal prep, chicken quarters freeze beautifully either before or after cooking. To freeze raw, season the chicken and place it on a parchment-lined baking sheet until frozen solid, then transfer to freezer bags—this prevents them from sticking together. They can go directly from freezer to oven, though you’ll need to add 10-15 minutes to the cooking time. For cooked chicken, let it cool completely before freezing, and reheat in a 350°F oven until warmed through. The bone-in nature of quarters makes them more forgiving when reheating, as they’re less likely to dry out compared to boneless cuts.
Don’t discard those delicious pan drippings! After removing the chicken, pour off excess fat (save it for roasting vegetables—it’s incredible!), then deglaze the pan with a bit of chicken broth, white wine, or even water. Scrape up all those browned bits—that’s pure flavor gold—and simmer for a few minutes to create a simple but amazing pan sauce. You can thicken it with a cornstarch slurry or mount it with a tablespoon of butter for extra richness. This impromptu sauce takes your chicken from great to restaurant-quality with almost no extra effort.
Recipe Variations
- For a Mediterranean twist, replace the paprika and thyme with dried oregano, lemon zest, and a sprinkle of sumac. Add kalamata olives and cherry tomatoes to the baking sheet during the last 20 minutes of cooking for a complete sheet pan meal that screams Greek vacation vibes.
- Create a barbecue-inspired version by brushing the chicken with your favorite barbecue sauce during the last 10 minutes of baking. For extra smokiness, add a teaspoon of smoked paprika to the dry rub, and serve with coleslaw and cornbread for the ultimate comfort food experience.
- Go Asian fusion by marinating the chicken in a mixture of soy sauce, ginger, garlic, and a touch of honey for at least 30 minutes before baking. Sprinkle with sesame seeds and green onions before serving, and pair with steamed rice and stir-fried vegetables for an easy weeknight fakeout meal.
- For a herbaceous lemon-garlic variation, create a paste with minced fresh garlic, lemon juice, chopped fresh rosemary, and olive oil. Rub this under the skin and all over the chicken before baking. The fresh herbs and citrus brighten up the rich chicken flavor beautifully.
- Try a spicy buffalo version by tossing the baked chicken quarters in your favorite buffalo sauce right after they come out of the oven. Serve with celery sticks, carrot sticks, and blue cheese or ranch dressing for a game-day favorite that’s actually baked, not fried.
Frequently Asked Questions
Can I use boneless, skinless chicken thighs instead of quarters?
Absolutely! Boneless, skinless thighs will work beautifully, though the cooking time will be significantly shorter—start checking at around 25 minutes. Since they lack skin and bone, they won’t get quite as crispy, but they’ll still be incredibly flavorful and moist. You might want to increase the seasoning slightly since there’s less surface area, and consider adding a tablespoon of butter to the baking sheet to keep them from drying out. The internal temperature should still reach 165°F, but because they’re thinner, they’ll cook much faster, so keep a close eye on them to prevent overcooking.
How do I know when the chicken is done without a thermometer?
While I highly recommend using a meat thermometer for food safety and perfect results, if you don’t have one, there are visual cues you can rely on. The chicken is done when the juices run clear when pierced with a knife in the thickest part, and the meat is no longer pink near the bone. The leg joint should move easily when wiggled, indicating the connective tissues have broken down properly. Additionally, the skin should be golden brown and crispy, and the chicken should feel firm to the touch rather than soft and squishy. However, these methods are less reliable than a thermometer, so consider investing in one—they’re inexpensive and guarantee perfect results every time.
Can I make this recipe ahead of time?
You can absolutely prepare elements ahead of time to make weeknight dinners easier! The chicken can be seasoned and stored in the refrigerator for up to 24 hours before baking—this actually allows the flavors to penetrate deeper. You can also mix the dry seasoning blend in advance and store it in an airtight container for quick use. After baking, the chicken quarters will keep well in the refrigerator for 3-4 days and reheat beautifully in the oven or air fryer to restore crispiness. For meal prep, I often bake a double batch on Sunday and enjoy it throughout the week in salads, sandwiches, or as a main course with different sides.
Why did my chicken skin turn out soggy instead of crispy?
Soggy skin usually results from excess moisture, overcrowding on the pan, or insufficient oven temperature. Make sure you pat the chicken completely dry before seasoning—I mean really dry, like no moisture visible on the surface. Using a wire rack elevates the chicken and allows air to circulate underneath, preventing steam from making the bottom skin soggy. Also, ensure your oven is fully preheated to 400°F before the chicken goes in, and don’t open the door frequently during cooking, as temperature fluctuations can affect crisping. If your chicken releases a lot of liquid during baking, you might have overcrowded the pan—the quarters shouldn’t be touching each other.
What sides pair well with baked chicken quarters?
These flavorful chicken quarters pair beautifully with almost any side dish! For classic comfort food, serve with mashed potatoes and gravy made from the pan drippings, along with roasted carrots or green beans. For something lighter, a big fresh salad with vinaigrette provides a nice contrast to the rich chicken. Rice pilaf, quinoa, or couscous are excellent for soaking up the delicious juices, while roasted vegetables like Brussels sprouts, broccoli, or sweet potatoes cooked on the same baking sheet make for an easy one-pan meal. Don’t forget crusty bread for wiping up every last bit of flavor from your plate!
Summary
These baked chicken quarters deliver maximum flavor with minimal effort—crispy skin, juicy meat, and versatile enough for any night of the week. Perfect for beginners and sure to impress even the pickiest eaters!
Juicy Baked Chicken Quarters
4
servings10
minutes50
minutesIngredients
Instructions
- 1 Preheat oven to 400°F and line a rimmed baking sheet with foil, optionally placing a wire rack on top.
- 2 Pat chicken quarters completely dry with paper towels, then drizzle with olive oil and rub to coat all surfaces.
- 3 Combine all dry seasonings in a small bowl, then sprinkle evenly over chicken, including under the skin if possible.
- 4 Arrange chicken skin-side up on prepared pan, not touching, and bake for 45-50 minutes until internal temperature reaches 165°F.
- 5 Remove from oven, let rest 10 minutes, then garnish with parsley and serve with lemon wedges.


