Settle in, food friends, because we’re about to create the most epic baked chicken parmesan that’ll have your family begging for seconds. Seriously, this dish combines crispy chicken, tangy marinara, and melty cheese into one glorious baked masterpiece that’s surprisingly easy to make at home.
Why This Recipe Works
- Our double-dredging technique creates an incredibly crispy crust that stays crunchy even after baking, thanks to the perfect combination of panko breadcrumbs and Parmesan cheese that forms a protective barrier against moisture.
- Baking instead of frying means less mess and guilt while still achieving that golden-brown perfection, plus it allows the cheese to melt evenly without burning the breading underneath.
- The strategic layering of marinara sauce ensures every bite is saucy without making the bottom crust soggy, while the mozzarella and Parmesan combination creates that signature stretchy, cheesy goodness we all crave.
- Resting the chicken after baking is the secret weapon that lets the juices redistribute, resulting in incredibly tender meat that cuts cleanly without tearing the beautiful crust you worked so hard to create.
Ingredients
- 4 boneless, skinless chicken breasts (about 6 ounces each), pounded to ½-inch thickness
- 1 cup all-purpose flour
- 3 large eggs, beaten
- 2 cups panko breadcrumbs
- 1 cup grated Parmesan cheese, divided
- 2 teaspoons Italian seasoning
- 1 teaspoon garlic powder
- 1 teaspoon onion powder
- ½ teaspoon black pepper
- 1 teaspoon salt
- 2 cups marinara sauce (homemade or quality jarred)
- 2 cups shredded mozzarella cheese
- ¼ cup fresh basil leaves, chopped
- 2 tablespoons olive oil
- Cooking spray
Equipment Needed
- Large baking sheet
- Wire rack
- Three shallow dishes (for dredging station)
- Meat mallet or rolling pin
- Measuring cups and spoons
- Cheese grater
- Tongs
- Aluminum foil
Instructions
Step 1: Prepare the Chicken and Dredging Station
Place each chicken breast between two pieces of plastic wrap and pound them to an even ½-inch thickness using a meat mallet or rolling pin – this ensures even cooking and tender results. Set up your dredging station with three shallow dishes: place flour in the first dish, beaten eggs in the second, and in the third dish combine panko breadcrumbs, ½ cup of Parmesan cheese, Italian seasoning, garlic powder, onion powder, black pepper, and salt. Mix the breadcrumb mixture thoroughly with your fingers, breaking up any clumps to ensure even coating. This organized setup makes the breading process smooth and prevents cross-contamination between stations.
Step 2: Bread the Chicken Thoroughly
Working with one chicken breast at a time, dredge it in flour, shaking off any excess, then dip it completely in the beaten eggs, allowing the excess to drip off. Finally, press the chicken firmly into the breadcrumb mixture, ensuring every surface is thoroughly coated – don’t be shy about really pressing those crumbs into the meat! Place the breaded chicken on a wire rack set over a baking sheet and repeat with remaining chicken. Let the breaded chicken rest for 15 minutes at room temperature; this helps the coating adhere better during baking. Pro tip: use one hand for dry ingredients and the other for wet to avoid breaded fingers!
Step 3: Bake the Chicken to Golden Perfection
Preheat your oven to 425°F and position the rack in the center. Lightly spray the breaded chicken with olive oil or cooking spray – this helps achieve that beautiful golden brown color. Bake for 20-22 minutes until the coating is crisp and golden brown, flipping the chicken halfway through using tongs. The internal temperature should reach 165°F when checked with an instant-read thermometer inserted into the thickest part of the chicken. The coating should sound hollow when tapped and look evenly browned without any pale spots. Avoid opening the oven door frequently as this causes temperature fluctuations that can affect crisping.
Step 4: Add Sauce and Cheese Layers
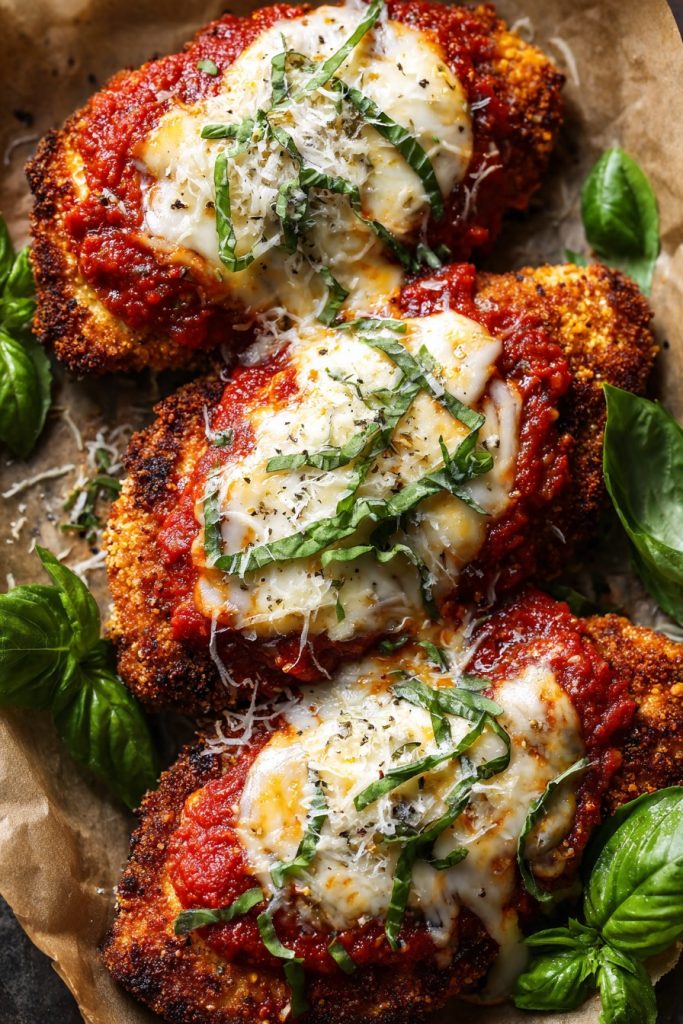
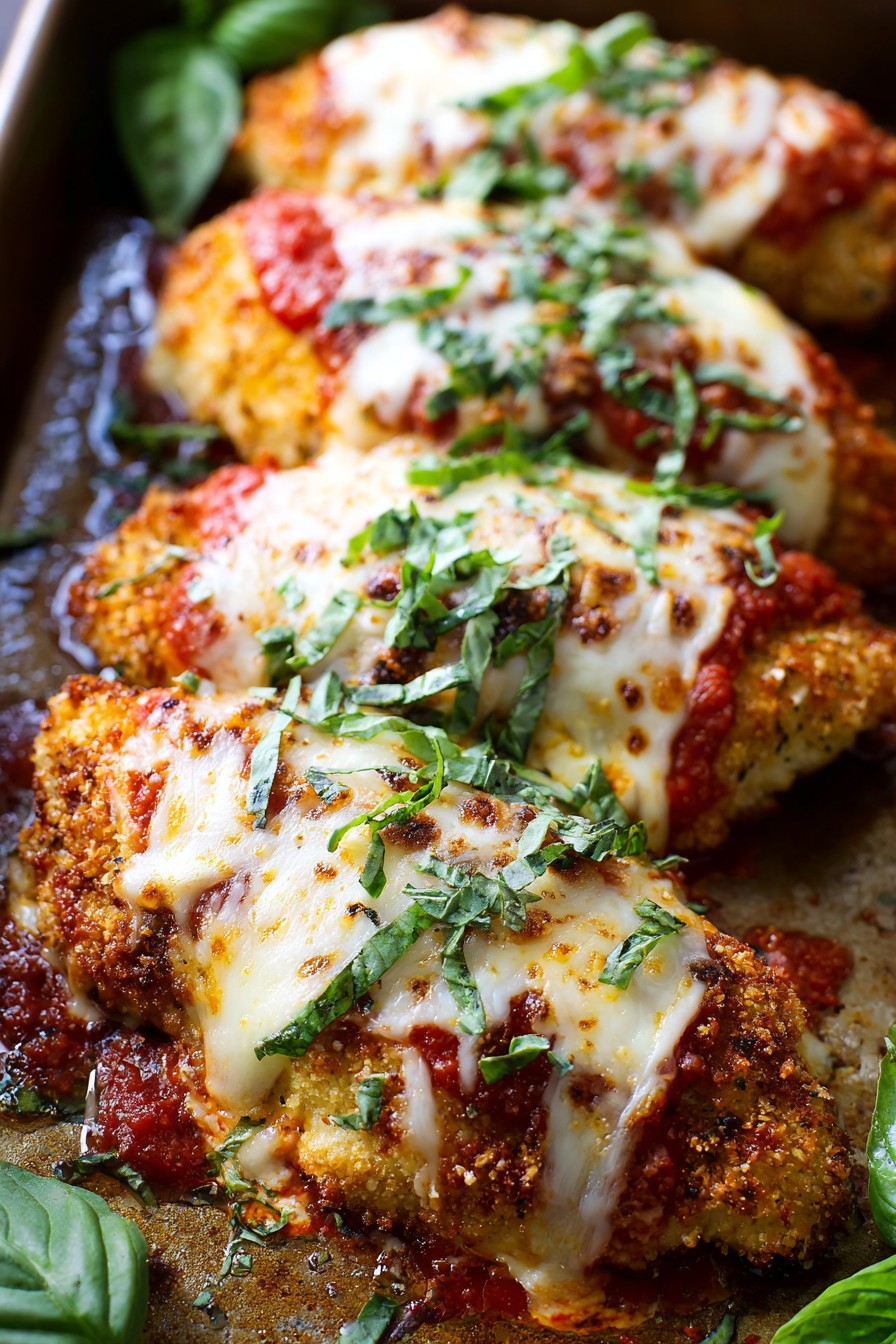
Remove the baking sheet from the oven and reduce oven temperature to 400°F. Spoon about 2 tablespoons of marinara sauce over each chicken breast, spreading it evenly but leaving a ½-inch border around the edges to prevent the sauce from making the crust soggy. Sprinkle ½ cup of mozzarella cheese over each breast, followed by the remaining ½ cup of Parmesan cheese. The cheese should cover the sauce completely but not spill over onto the baking sheet where it could burn. Return to the oven and bake for an additional 8-10 minutes until the cheese is completely melted, bubbly, and lightly spotted with golden brown areas.
Step 5: Rest and Serve Immediately
Remove the chicken parmesan from the oven and let it rest on the baking sheet for 5 minutes before serving – this allows the juices to redistribute and the cheese to set slightly for cleaner slicing. Garnish with fresh chopped basil and serve immediately with additional warmed marinara sauce on the side. The internal temperature will rise about 5 degrees during resting, ensuring perfectly cooked chicken. Serve over pasta, with a side salad, or enjoy it straight up – it’s that good! The crust should remain crispy while the cheese stays gloriously stretchy.
Tips and Tricks
For the ultimate crispy coating, try placing the breaded chicken on a wire rack in the refrigerator for 30 minutes before baking – this helps the coating set and adhere even better. If you’re watching calories, you can use part-skim mozzarella and reduce the Parmesan by half, though the flavor won’t be quite as rich. For extra flavor, mix ¼ cup of chopped fresh parsley into the breadcrumb mixture or add a pinch of red pepper flakes for some heat. If your chicken breasts are particularly thick, butterfly them before pounding rather than trying to pound them too thin – this preserves the meat’s texture better. Always use a wire rack rather than placing chicken directly on the baking sheet; this allows air circulation that keeps the bottom crispy. For make-ahead convenience, you can bread the chicken and refrigerate it for up to 4 hours before baking – just add 2-3 minutes to the initial baking time. If your cheese isn’t browning to your liking, switch to the broiler for the last 1-2 minutes but watch carefully to prevent burning. For extra saucy chicken parm, warm additional marinara sauce to serve on the side rather than adding more before baking. If you don’t have panko, regular breadcrumbs work but will result in a denser coating – toast them in a dry skillet first for better texture. Always let your chicken come to room temperature for 15 minutes before breading – cold chicken can cause the coating to slide off during baking.
Recipe Variations
- Spicy Chicken Parmesan: Add 1 teaspoon of crushed red pepper flakes to the breadcrumb mixture and use spicy marinara sauce for an extra kick that’ll wake up your taste buds without overwhelming the other flavors.
- Eggplant Parmesan Style: Replace chicken with ½-inch thick eggplant slices, salt them for 30 minutes to draw out moisture, pat dry, then proceed with the same breading and baking process for a vegetarian alternative.
- Chicken Parmesan Sliders: Use chicken cutlets or pound chicken thinner, then after baking, place on slider buns with extra marinara and provolone cheese for perfect party food that everyone can enjoy handheld.
- Gluten-Free Version: Substitute gluten-free flour and gluten-free panko breadcrumbs, ensuring all other ingredients are certified gluten-free for those with dietary restrictions without sacrificing texture.
- Air Fryer Method: Prepare chicken as directed but cook in air fryer at 400°F for 12-15 minutes, add sauce and cheese, then cook 2-3 minutes more for faster results with even crispier coating.
Frequently Asked Questions
Can I make chicken parmesan ahead of time?
Absolutely! You can bread the chicken and refrigerate it for up to 4 hours before baking – just add 2-3 minutes to the initial baking time. For fully cooked chicken parmesan, it reheats surprisingly well: place on a baking sheet at 350°F for 15-20 minutes until heated through. I don’t recommend freezing after adding sauce and cheese as the texture becomes watery, but you can freeze the breaded baked chicken before saucing for up to 3 months.
Why did my coating fall off during baking?
The most common reason is not letting the breaded chicken rest before baking – those 15 minutes allow the coating to adhere properly. Also ensure you’re shaking off excess flour and egg between steps, and press the breadcrumbs firmly into the chicken. Using a wire rack instead of placing directly on the baking sheet helps prevent steaming that can loosen the coating. If your chicken was too cold when breaded, that can also cause separation during baking.
What’s the best cheese combination for authentic flavor?
While mozzarella and Parmesan are classic, I often add a few tablespoons of grated Pecorino Romano to the breadcrumb mixture for extra sharpness. Some Italian grandmothers swear by adding a thin slice of provolone under the mozzarella for extra creaminess. For maximum stretch, use whole milk mozzarella rather than part-skim, and always grate your own cheese instead of using pre-shredded varieties that contain anti-caking agents.
How do I prevent the bottom from getting soggy?
The wire rack is your best friend here – it allows air circulation that keeps the entire surface crispy. Also, leave that ½-inch border when adding sauce so it doesn’t touch the edges where it can seep underneath. Make sure your initial bake is sufficient – the coating should be fully crisp before adding toppings. If you’re still having issues, try baking the breaded chicken directly on parchment paper for the first half, then transfer to a rack for the cheesy phase.
Can I use chicken thighs instead of breasts?
Certainly! Chicken thighs will give you more flavorful, juicier results though they may require 3-5 additional minutes of baking time. Remove excess fat and skin, pound to even thickness, and note that the higher fat content might make the coating slightly less crisp. Thighs can handle stronger flavors too – consider adding extra garlic or herbs to the breading mixture to complement their richer taste.
Summary
This baked chicken parmesan delivers restaurant-quality results with less guilt and mess. Crispy coating, melty cheese, and perfect saucing make it a family favorite that’s surprisingly easy to master at home.
Baked Chicken Parmesan
6
servings25
minutes30
minutesIngredients
Instructions
- 1 Pound chicken to ½-inch thickness. Set up dredging stations: flour, beaten eggs, and breadcrumb mixture (panko, ½ cup Parmesan, seasonings).
- 2 Dredge chicken in flour, egg, then breadcrumb mixture. Place on wire rack and rest 15 minutes.
- 3 Bake at 425°F for 20-22 minutes, flipping halfway, until golden and internal temperature reaches 165°F.
- 4 Top with marinara, remaining cheeses. Bake at 400°F for 8-10 minutes until cheese is melted and bubbly.
- 5 Rest 5 minutes, garnish with basil, and serve immediately.


