Sizzling, succulent, and seriously simple—this baked chicken breast recipe is about to become your weeknight superhero. Seriously, who needs takeout when you can achieve restaurant-quality results with minimal effort right in your own oven? Say goodbye to dry, boring chicken and hello to juicy perfection that pairs with literally anything.
Why This Recipe Works
- Brining the chicken in a saltwater solution for just 30 minutes ensures maximum moisture retention, preventing that dreaded dryness even if you accidentally overcook it a smidge.
- Using a high-temperature blast (450°F) for the first 10 minutes creates a beautiful golden-brown crust while locking in all those delicious juices, followed by lowering the heat to finish cooking gently.
- The simple yet powerful seasoning blend of garlic powder, paprika, and black pepper amplifies the natural flavor of the chicken without overwhelming it, making it versatile enough for any meal.
- Resting the chicken for 5-10 minutes after baking allows the fibers to relax and reabsorb the juices, guaranteeing every bite is tender and flavorful rather than leaking all over your cutting board.
- An instant-read thermometer takes the guesswork out of doneness, ensuring you pull the chicken at the perfect 165°F every single time—no more cutting into it to check and losing precious juices.
Ingredients
- 4 boneless, skinless chicken breasts (about 6 ounces each), patted dry with paper towels
- 1/4 cup kosher salt for brining
- 4 cups cold water for brining
- 2 tablespoons olive oil
- 1 teaspoon garlic powder
- 1 teaspoon smoked paprika
- 1/2 teaspoon freshly ground black pepper
- 1/2 teaspoon onion powder (optional but recommended)
- 1/4 teaspoon cayenne pepper for a subtle kick (optional)
- Fresh chopped parsley for garnish (about 2 tablespoons)
Equipment Needed
- Large bowl for brining
- Paper towels
- Rimmed baking sheet
- Parchment paper or aluminum foil
- Small bowl for mixing spices
- Instant-read meat thermometer
- Tongs or a spatula
- Cutting board
- Sharp knife
Instructions

Step 1: Brine the Chicken for Maximum Juiciness
In a large bowl, dissolve 1/4 cup of kosher salt in 4 cups of cold water, stirring until the salt is completely incorporated. Submerge the chicken breasts in the brine, ensuring they are fully covered. Let them sit at room temperature for exactly 30 minutes—no longer, or they might become too salty. This step is crucial because the saltwater solution helps the chicken retain moisture during the high-heat baking process, resulting in incredibly juicy meat. While waiting, you can prep your seasoning blend and line your baking sheet. After 30 minutes, remove the chicken from the brine, rinse briefly under cold water to remove excess salt, and pat thoroughly dry with paper towels. Drying is essential for achieving a good sear and preventing steaming.
Step 2: Preheat Oven and Prepare Seasoning Blend
Preheat your oven to 450°F—yes, that high! This initial blast of heat will create a gorgeous crust. While the oven heats up, in a small bowl, combine 1 teaspoon garlic powder, 1 teaspoon smoked paprika, 1/2 teaspoon black pepper, 1/2 teaspoon onion powder (if using), and 1/4 teaspoon cayenne pepper (if you like a hint of heat). Mix these spices well to ensure even distribution. Line a rimmed baking sheet with parchment paper or aluminum foil for easy cleanup. Tip: If you have time, let the chicken sit out for 10-15 minutes after brining to take the chill off—this promotes more even cooking. Now, drizzle the patted-dry chicken breasts with 2 tablespoons of olive oil, rubbing it all over to coat every nook and cranny.
Step 3: Season and Arrange Chicken on Baking Sheet
Sprinkle the seasoning blend evenly over both sides of the chicken breasts, pressing gently to help the spices adhere. Don’t be shy—get those seasonings into every crevice! Arrange the chicken on the prepared baking sheet, leaving at least an inch of space between each breast to allow for proper air circulation and even browning. If your chicken breasts are uneven in thickness (which they often are), place a piece of plastic wrap over them and gently pound the thicker parts with a rolling pin or meat mallet to create a more uniform thickness. This prevents the thinner ends from overcooking while the center catches up. Uniformity is key to perfection here!
Step 4: Bake at High Heat to Create a Golden Crust
Place the baking sheet in the preheated 450°F oven and bake for exactly 10 minutes. This high-temperature start will give you that beautiful, slightly crispy exterior without drying out the interior. After 10 minutes, reduce the oven temperature to 400°F—do not open the oven door during this change! Let the chicken continue baking for another 10-15 minutes, depending on the thickness of your breasts. For 1-inch thick breasts, aim for 15 minutes; for thinner ones, check at 10 minutes. Tip: Rotate the baking sheet halfway through if your oven has hot spots to ensure even cooking. You’re looking for a golden-brown color and an internal temperature of 165°F when checked with an instant-read thermometer.
Step 5: Rest, Slice, and Serve Perfectly Juicy Chicken
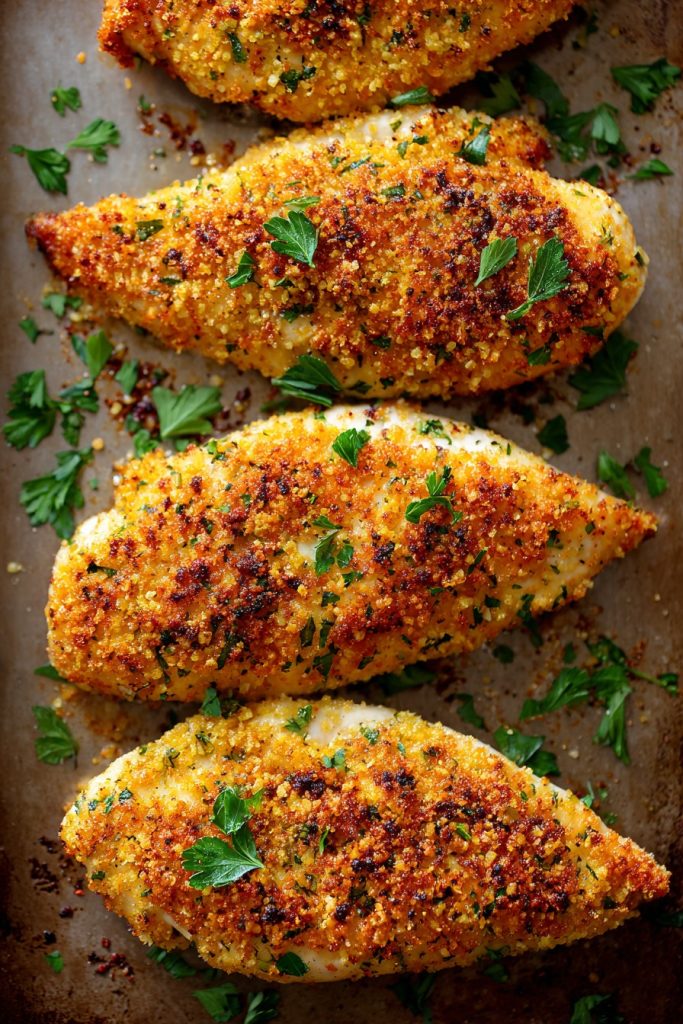
Using tongs, transfer the chicken breasts to a clean cutting board and let them rest for 5-10 minutes. This resting period is non-negotiable—it allows the juices to redistribute throughout the meat, so when you slice into it, you get tender, moist chicken instead of a dry mess. After resting, slice against the grain into 1/2-inch thick pieces for maximum tenderness. Garnish with freshly chopped parsley for a pop of color and freshness. Serve immediately with your favorite sides—mashed potatoes, roasted veggies, or a crisp salad. Tip: If you have leftovers, store them in an airtight container in the fridge for up to 3 days; they reheat beautifully in a skillet with a splash of broth to keep them moist.
Tips and Tricks
For the absolute best results, consider these pro tips. First, if you’re really short on time, you can skip the brining step, but I highly recommend at least doing a quick 15-minute brine—it makes a noticeable difference in juiciness. If you forget to brine, a simple trick is to sprinkle the chicken lightly with salt and let it sit for 10 minutes before patting dry and proceeding; this partial dry-brine can help. Second, invest in an instant-read thermometer—they’re inexpensive and take the guesswork out of doneness. Insert it into the thickest part of the breast without touching bone (though there’s none here) for an accurate reading. Pull the chicken at 165°F, but remember it will carry over cook a few degrees while resting.
Third, if your chicken breasts are huge (like those monster 8-ounce ones), consider butterflying them or pounding them to an even 1-inch thickness for consistent cooking. Uneven chicken is the enemy of perfection! Fourth, for extra flavor, marinate the chicken after brining but before seasoning—try a mixture of lemon juice, olive oil, and herbs for 30 minutes in the fridge. Fifth, if you love a super crispy exterior, place a wire rack on your baking sheet and bake the chicken on that; it allows hot air to circulate underneath, preventing sogginess. Sixth, don’t overcrowd the baking sheet—give each breast space to breathe, or they’ll steam instead of bake. Seventh, if you’re doubling the recipe, use two baking sheets and rotate them top to bottom halfway through for even browning.
Eighth, for meal prep, bake a big batch on Sunday and slice it for salads, wraps, or grain bowls throughout the week. Ninth, if you accidentally overcook the chicken, don’t panic! Slice it thin and toss it with a sauce—like barbecue or teriyaki—to add moisture back. Tenth, always pat your chicken dry after brining and before oiling; moisture is the enemy of browning. Lastly, experiment with different spice blends—Italian seasoning, Cajun spice, or even a simple lemon-pepper mix can keep things exciting. Remember, baking is forgiving, so have fun with it!
Recipe Variations
- Lemon Herb Delight: Swap the paprika and cayenne for 2 teaspoons of dried Italian seasoning and the zest of one lemon. Add 2 tablespoons of fresh lemon juice to the olive oil before coating. Bake as directed, and garnish with extra lemon slices and fresh thyme. This bright, zesty version is perfect for spring and summer meals, pairing wonderfully with asparagus or a light pasta salad. The acidity from the lemon cuts through the richness and adds a refreshing twist that feels fancy without the effort.
- Spicy Southwest Style: Replace the smoked paprika with 2 teaspoons of chili powder and add 1 teaspoon of cumin to the spice blend. After baking, top with a fresh salsa made from diced tomatoes, red onion, cilantro, and a squeeze of lime. Serve with black beans and corn for a fiesta-inspired meal that brings the heat and the flavor. This variation is great for tacos, bowls, or just alongside some creamy avocado—it’s a crowd-pleaser for sure!
- Creamy Parmesan Crust: After seasoning, press each chicken breast into a mixture of 1/2 cup grated Parmesan cheese and 1/4 cup panko breadcrumbs mixed with 1 tablespoon melted butter. Bake as usual—the cheese will form a delicious, crispy, golden crust that adds a decadent touch. This is ideal for when you want something indulgent but still relatively healthy; serve with marinara sauce for a chicken Parmesan vibe without the frying. Kids and adults alike will devour this cheesy masterpiece.
- Honey Mustard Glaze: Whisk together 3 tablespoons Dijon mustard, 2 tablespoons honey, 1 tablespoon olive oil, and 1 minced garlic clove. Brush this mixture over the chicken before baking and again halfway through cooking. The result is a sweet, tangy, caramelized exterior that’s absolutely irresistible. Pair with roasted sweet potatoes or a simple green salad for a balanced meal that feels special. This variation is a fantastic way to dress up chicken for guests or a date night at home.
- Mediterranean Twist: Use a spice blend of 1 teaspoon dried oregano, 1/2 teaspoon garlic powder, and 1/2 teaspoon onion powder. After baking, top with a mixture of chopped Kalamata olives, crumbled feta cheese, and a drizzle of olive oil. Serve with couscous or a Greek salad for a healthy, flavorful dinner that transports you to the shores of the Aegean. This is light, fresh, and packed with Mediterranean flavors that are both satisfying and nutritious.
Frequently Asked Questions
Can I use chicken thighs instead of breasts?
Absolutely! Chicken thighs are more forgiving due to their higher fat content, so they’re harder to dry out. Use boneless, skinless thighs and follow the same brining and seasoning steps. Bake at 400°F for 20-25 minutes, or until they reach an internal temperature of 165°F. Thighs might take a bit longer because they’re often thicker, so keep that thermometer handy. They’ll be juicier and more flavorful, but if you prefer leaner meat, stick with breasts. Either way, this method works beautifully.
How do I know when the chicken is done without a thermometer?
While I strongly recommend using a thermometer for accuracy, if you don’t have one, press the chicken with your finger—it should feel firm and spring back slightly, not soft or squishy. Also, the juices should run clear when pierced with a knife, not pink. For a 1-inch thick breast, at 400°F, it usually takes 20-25 minutes total. But honestly, thermometers are cheap and foolproof; grab one to avoid guesswork and ensure perfect results every time. Overcooked chicken is sad chicken!
Can I make this ahead for meal prep?
Yes, this recipe is fantastic for meal prep! After baking and resting, let the chicken cool completely, then slice or chop it. Store in an airtight container in the refrigerator for up to 3 days. To reheat, place it in a skillet with a tablespoon of broth or water over medium heat for 2-3 minutes, or until warm. Avoid microwaving alone, as it can make the chicken rubbery. Pair with prepped veggies and grains for easy lunches or dinners all week. It’s a lifesaver for busy schedules!
Why is my chicken sometimes dry even when I follow the recipe?
Dry chicken usually happens due to overcooking or uneven thickness. Ensure your breasts are pounded to an even 1-inch thickness so they cook uniformly. Always use a thermometer and pull at 165°F—remember, carryover cooking will add a few degrees. Also, don’t skip the brining step; it’s a game-changer for moisture. If your oven runs hot, check early. Lastly, resting is crucial; cutting too soon lets juices escape. Follow these tips, and you’ll have juicy chicken every time!
Can I freeze the baked chicken?
Yes, you can freeze it! Let the baked chicken cool completely, then wrap individual portions tightly in plastic wrap and aluminum foil, or place in freezer-safe bags. It will keep for up to 3 months. To thaw, move it to the refrigerator overnight. Reheat in a 350°F oven for 10-15 minutes, or in a skillet with a bit of liquid to prevent drying out. Freezing might slightly change the texture, making it best for use in soups, casseroles, or shredded dishes rather than eating plain.
Summary
This baked chicken breast recipe guarantees juicy, flavorful results every time with a simple brine, high-heat start, and perfect seasoning. Ideal for weeknights or meal prep, it’s versatile, easy, and downright delicious. Say hello to chicken that never disappoints!
Baked Chicken Breast
4
servings40
minutes20
minutesIngredients
Instructions
- 1 Brine chicken in saltwater for 30 minutes, then rinse and pat dry.
- 2 Preheat oven to 450°F and mix spices in a small bowl.
- 3 Coat chicken with oil, season evenly, and arrange on baking sheet.
- 4 Bake at 450°F for 10 minutes, then reduce to 400°F for 10-15 minutes until 165°F.
- 5 Rest for 5-10 minutes, slice, garnish with parsley, and serve.