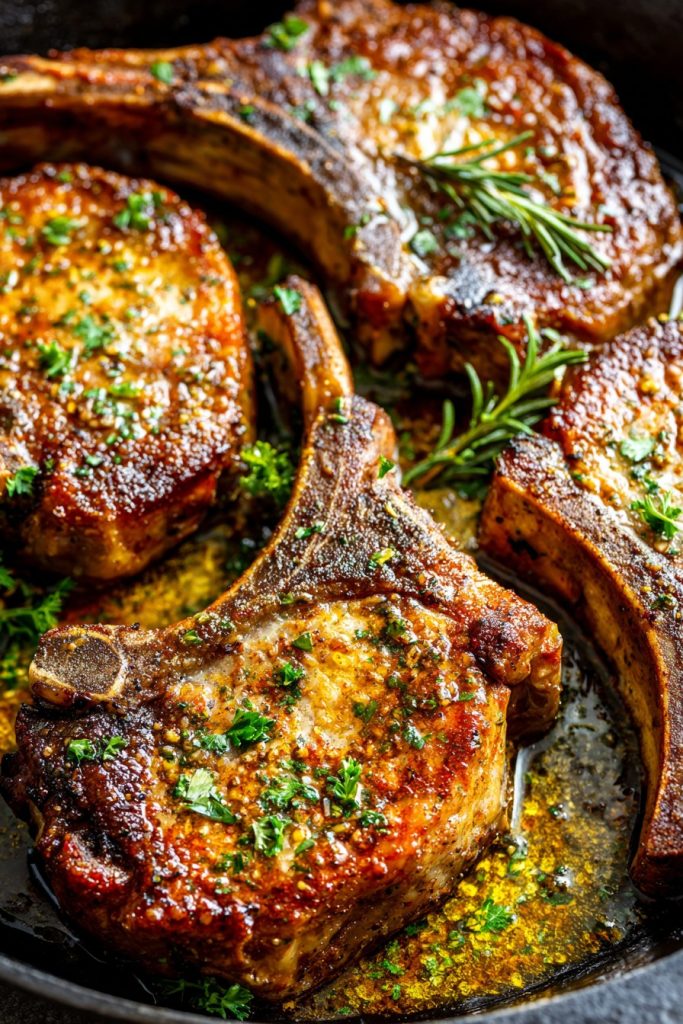
Unfolding the worn recipe card from my grandmother’s tin box always brings back memories of Sunday dinners around the big oak table. Using simple ingredients and time-honored techniques, these baked pork chops transform humble cuts into something truly extraordinary that will have your family gathering in the kitchen, drawn by the comforting aromas wafting from the oven.
Why This Recipe Works
- The initial searing creates a beautiful golden crust that locks in all the natural juices, ensuring each bite remains moist and flavorful rather than drying out during the longer baking time. This crucial step develops deep, complex flavors through the Maillard reaction that simply can’t be achieved by baking alone.
- Baking at a moderate 375°F allows the pork chops to cook through gently and evenly without toughening the meat fibers, resulting in that perfect fall-off-the-bone tenderness that makes these chops so memorable and satisfying with every single bite you take.
- The simple herb and garlic rub penetrates deep into the meat during the resting period, infusing every fiber with aromatic flavors that complement the natural sweetness of the pork without overwhelming its delicate taste profile.
- Using a combination of butter and olive oil provides both rich flavor and a higher smoke point for perfect searing, while the butter bastes the chops as they bake, creating an irresistible pan sauce that’s perfect for drizzling over mashed potatoes.
- Allowing the pork chops to rest for a full 10 minutes after baking gives the muscle fibers time to relax and reabsorb all those precious juices, ensuring they stay on your plate rather than running out when you cut into them.
Ingredients
- 4 bone-in pork chops, 1-inch thick
- 2 tablespoons olive oil
- 3 tablespoons unsalted butter, divided
- 4 cloves garlic, minced
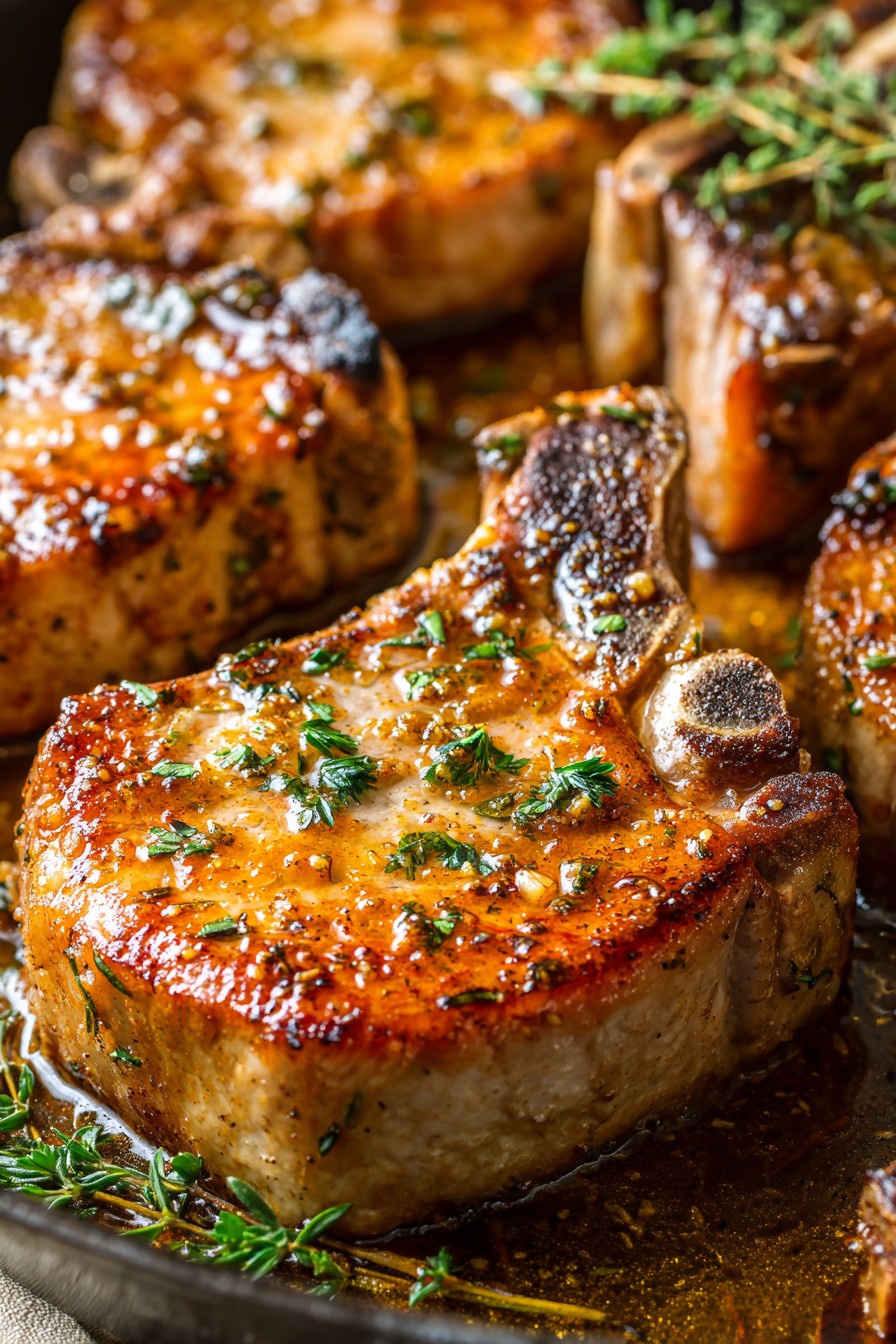
- 1 teaspoon dried thyme
- 1 teaspoon dried rosemary, crushed
- 1 teaspoon paprika
- 1 teaspoon kosher salt
- ½ teaspoon freshly ground black pepper
- ½ cup chicken broth
- 2 tablespoons fresh parsley, chopped
Equipment Needed
- Large oven-safe skillet
- Measuring spoons
- Small mixing bowl
- Tongs
- Instant-read thermometer
- Cutting board
- Chef’s knife
Instructions
Prepare the Pork Chops and Herb Rub
Begin by patting your pork chops completely dry with paper towels – this is absolutely essential for achieving that beautiful sear we’re after. In a small bowl, combine the minced garlic, dried thyme, crushed rosemary, paprika, kosher salt, and black pepper. The act of crushing the rosemary between your fingers releases its wonderful aromatic oils, filling your kitchen with that familiar, comforting scent. Rub this mixture generously over both sides of each pork chop, making sure to work it into every nook and cranny. Let them sit at room temperature for about 20-30 minutes while you preheat your oven to 375°F. This resting period allows the seasoning to penetrate deeper into the meat and helps the chops cook more evenly, much like my grandmother always insisted upon when preparing her Sunday dinners.
Sear to Golden Perfection
Place your large oven-safe skillet over medium-high heat and add the olive oil and 1 tablespoon of butter. Wait until the butter has melted and the mixture is shimmering hot – you should see little waves forming in the oil. Carefully place the pork chops in the skillet, being sure not to overcrowd them. You’ll hear that satisfying sizzle as they make contact with the hot surface. Sear for 3-4 minutes without moving them, until a deep golden-brown crust forms on the bottom. Using tongs, flip each chop and sear the other side for another 3-4 minutes until equally beautifully browned. This initial searing creates incredible flavor and helps seal in all those precious juices. Tip: Don’t be tempted to move the chops around while searing – letting them develop that crust undisturbed is key to achieving restaurant-quality results at home.
Transfer to Oven and Bake
Once both sides are perfectly seared, transfer the entire skillet directly to your preheated 375°F oven. The even, surrounding heat will gently cook the pork chops through without the risk of burning the exterior. Bake for 15-20 minutes, depending on the thickness of your chops. For 1-inch thick chops, aim for about 18 minutes for that perfect doneness. The bone-in cuts will help conduct heat more evenly through the meat, resulting in more consistent cooking. You’ll know they’re progressing well when your kitchen fills with that irresistible aroma of roasting pork and herbs. This gentle baking method is what transforms good pork chops into extraordinary ones, creating that melt-in-your-mouth texture we all crave.
Check for Doneness and Rest
After the baking time has elapsed, carefully remove the skillet from the oven using oven mitts – remember that handle will be extremely hot! Insert an instant-read thermometer into the thickest part of the chop, avoiding the bone. You’re looking for an internal temperature of 145°F for perfectly cooked pork that’s still wonderfully juicy. If they haven’t quite reached temperature, return them to the oven for another 2-3 minutes and check again. Once they’ve reached the perfect temperature, transfer the pork chops to a clean plate or cutting board and let them rest for a full 10 minutes. Tip: This resting period is non-negotiable – it allows the muscle fibers to relax and reabsorb all the juices that have been pushed toward the center during cooking.
Create the Pan Sauce and Serve
While the pork chops are resting, place the same skillet back over medium heat on the stovetop. You’ll notice all those beautiful browned bits stuck to the bottom – that’s pure flavor waiting to be transformed! Add the remaining 2 tablespoons of butter and let it melt, then pour in the chicken broth. Use a wooden spoon to scrape up all those delicious browned bits, stirring constantly as the liquid bubbles and reduces slightly. This process, called deglazing, creates the most wonderful simple pan sauce that captures all the essence of your cooking. Stir in the fresh parsley right at the end for a burst of color and freshness. Tip: For an extra-rich sauce, you can swirl in another tablespoon of cold butter off the heat just before serving – it creates a lovely velvety texture.
Tips and Tricks
Choosing the right cut of pork chop can make all the difference in your final result. I always recommend bone-in chops that are about 1-inch thick – the bone helps conduct heat more evenly and adds incredible flavor to the meat. Thinner chops tend to dry out quickly in the oven, while thicker cuts might require adjusting both searing and baking times. Look for chops with a nice marbling of fat around the edges, as this will render down during cooking and keep the meat moist and flavorful. When it comes to bringing your pork chops to room temperature before cooking, this step is more important than many home cooks realize. Taking the chill off the meat ensures more even cooking from edge to center, reducing the risk of an overcooked exterior while the interior remains underdone. However, don’t leave them out for more than 30-40 minutes to ensure food safety. The type of skillet you use matters more than you might think. While cast iron is my personal favorite for its excellent heat retention and ability to go seamlessly from stovetop to oven, a heavy-bottomed stainless steel or oven-safe non-stick skillet will work beautifully too. The key is ensuring your pan can handle high heat for searing and then transition to the oven without any issues. If you find your pork chops are cooking too quickly or the herbs in your rub are burning during searing, don’t hesitate to lower the heat slightly. It’s better to achieve a slightly lighter sear than to burn those precious seasonings. When checking for doneness, remember that the temperature will continue to rise about 5 degrees during the resting period, so removing them at 145°F is perfect. If you don’t have an instant-read thermometer, you can make a small cut near the bone to check that the juices run clear and there’s no pink remaining. For those who prefer their pork cooked a bit more, you can take it to 150°F, but be careful not to go beyond that or you risk dry, tough meat. Leftover pork chops store beautifully in an airtight container in the refrigerator for up to 3 days and make wonderful sandwiches or can be chopped up for salads or fried rice.
Recipe Variations
- For a creamy mushroom version, slice 8 ounces of cremini mushrooms and sauté them in the skillet after removing the pork chops. Add 1 minced shallot and cook until softened, then stir in ½ cup of heavy cream and 2 tablespoons of Dijon mustard. Return the pork chops to the skillet and bake as directed, creating a rich, comforting sauce that pairs beautifully with the savory pork.
- Create an apple cider glaze by reducing 1 cup of apple cider with 2 tablespoons of brown sugar and 1 tablespoon of apple cider vinegar in the skillet after searing the chops. The sweet-tart combination complements the pork wonderfully and adds a lovely autumnal touch that will make your kitchen smell absolutely heavenly throughout the baking process.
- Try a Parmesan crust by mixing ½ cup of grated Parmesan cheese with ¼ cup of breadcrumbs and 2 tablespoons of melted butter. Press this mixture onto the pork chops after searing them, then bake as directed. The result is a wonderfully crispy, cheesy crust that adds fantastic texture and flavor contrast to the tender meat beneath.
- For a spicy kick, add 1 teaspoon of smoked paprika and ½ teaspoon of cayenne pepper to your herb rub. The smoky heat pairs beautifully with the natural sweetness of the pork and creates a more complex flavor profile that’s perfect for those who enjoy a bit of warmth in their meals.
- Create a honey mustard version by brushing the pork chops with a mixture of 3 tablespoons of Dijon mustard and 2 tablespoons of honey during the last 5 minutes of baking. The sweet and tangy glaze caramelizes beautifully and creates a stunning presentation that’s sure to impress your dinner guests.
Frequently Asked Questions
Can I use boneless pork chops instead of bone-in?
Absolutely, you can use boneless pork chops, though you’ll need to adjust the cooking time slightly since boneless cuts tend to cook a bit faster. Reduce the baking time by about 3-5 minutes and keep a close eye on the internal temperature, checking early and often. The bone in traditional chops does provide some insulation and helps conduct heat more evenly, but boneless chops will still turn out beautifully tender and flavorful when prepared using this method. Just be extra careful not to overcook them, as boneless cuts can dry out more quickly than their bone-in counterparts.
How do I know when my pork chops are done without a thermometer?
While I always recommend using an instant-read thermometer for perfect results every time, you can check doneness by making a small cut near the bone and looking at the color of the meat and juices. The meat should be white or very pale pink throughout with no traces of red, and the juices should run completely clear rather than pinkish. Another method is the finger test – press the center of the chop with your finger; properly cooked pork should feel firm but still have some give, similar to the fleshy part of your palm when you touch your thumb to your middle finger.
Can I prepare these pork chops ahead of time?
You can certainly prepare the herb rub and season the pork chops up to 24 hours in advance, storing them covered in the refrigerator. This actually allows the flavors to penetrate even deeper into the meat. However, I don’t recommend fully cooking them ahead and reheating, as pork chops are best enjoyed fresh from the oven. If you must reheat, do so gently in a 300°F oven with a bit of broth or sauce to keep them moist, or slice and use in other dishes where texture is less critical.
What sides pair well with baked pork chops?
These versatile pork chops pair beautifully with so many classic comfort food sides. Creamy mashed potatoes are my personal favorite, as they’re perfect for soaking up that delicious pan sauce. Buttered green beans, roasted carrots, or a simple garden salad also complement the rich pork wonderfully. For something a bit different, try serving them with apple sauce or cinnamon-spiced apples to highlight the natural sweetness of the meat, or with cornbread stuffing for a truly hearty meal that reminds me of holiday dinners at my grandmother’s farmhouse table.
Why did my pork chops turn out tough?
Tough pork chops are usually the result of overcooking or not allowing them to rest properly after cooking. Pork continues to cook from residual heat after being removed from the oven, so taking them out at 145°F is crucial. Also, ensure you’re using chops that are at least 1-inch thick – thinner cuts cook too quickly and are much more prone to drying out. The initial searing at the proper temperature and not moving the chops during this process also contributes significantly to achieving that perfect tender texture we all love in well-prepared pork chops.
Summary
This timeless baked pork chop recipe transforms simple ingredients into extraordinary comfort food through proper searing, gentle baking, and patient resting. The result is fall-off-the-bone tender chops with incredible flavor that will become a cherished family favorite for generations to come.
Grandma's Perfect Baked Pork Chops
6
servings10
minutes25
minutesIngredients
Instructions
- 1 Preheat oven to 375°F. Pat pork chops dry and rub with garlic, thyme, rosemary, paprika, salt, and pepper. Let rest 20-30 minutes.
- 2 Heat olive oil and 1 tablespoon butter in large oven-safe skillet over medium-high heat. Sear chops 3-4 minutes per side until golden brown.
- 3 Transfer skillet to oven and bake 15-20 minutes until internal temperature reaches 145°F.
- 4 Remove chops from skillet and let rest 10 minutes on cutting board.
- 5 Add remaining butter and chicken broth to skillet over medium heat, scraping up browned bits. Stir in parsley and serve over chops.


