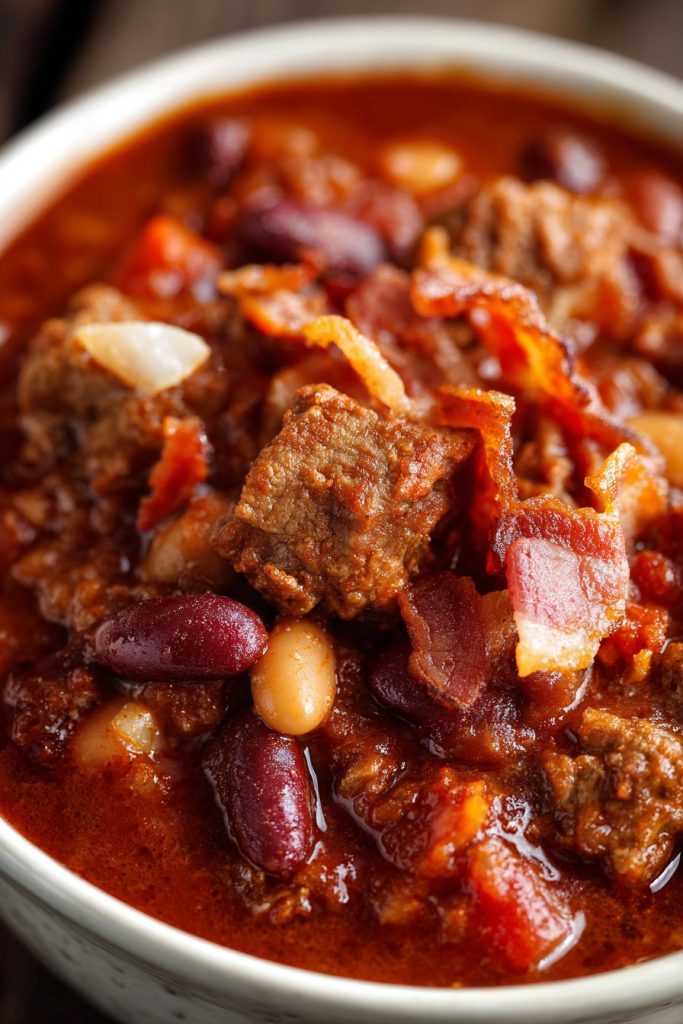
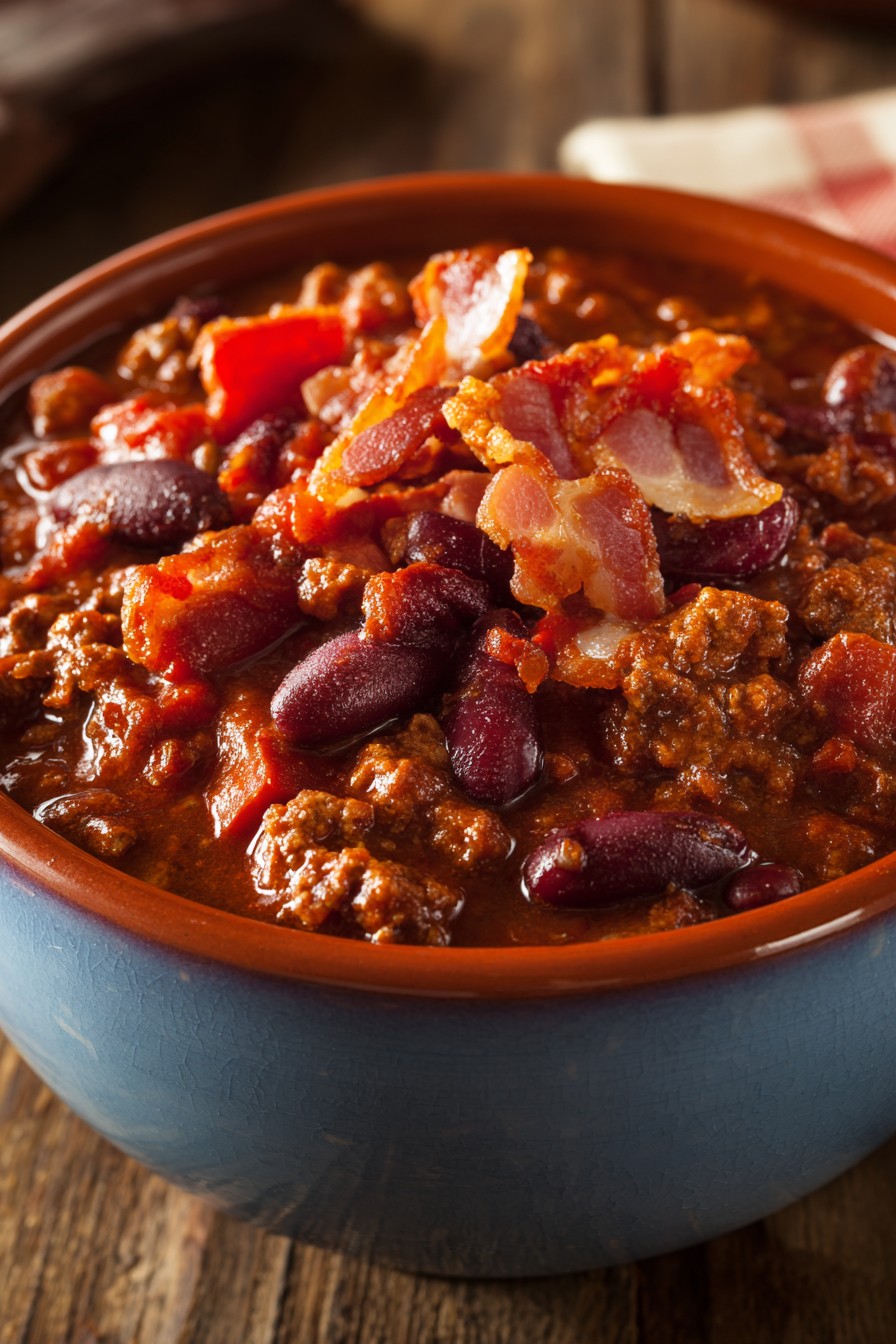
Unforgettable aromas still fill my kitchen whenever I make this chili, transporting me back to crisp autumn evenings at Grandma’s farmhouse table. Using my grandmother’s cherished recipe that won our county fair’s blue ribbon three years running, this chili represents more than just ingredients—it’s the embodiment of family traditions passed down through generations, each spoonful carrying the warmth of childhood memories and the comforting certainty that some things never change.
Why This Recipe Works
- The slow-cooked combination of three different meats creates layers of flavor that develop beautifully over time, much like the family stories we’d share while waiting for this chili to reach perfection.
- Toasting the dried chilies and spices releases their essential oils, creating a depth of flavor that reminds me of how Grandma would always say “patience makes the pot” as she carefully tended to each ingredient.
- The addition of dark chocolate and coffee might seem unusual, but they provide a subtle bitterness that balances the sweetness of the tomatoes, creating the same magical alchemy I witnessed in my grandmother’s kitchen decades ago.
- Allowing the chili to rest overnight lets the flavors marry completely, transforming good chili into extraordinary chili—a lesson in delayed gratification that has served me well in life beyond the kitchen.
- The perfect balance of heat comes from using multiple chili varieties rather than relying solely on one, creating complexity that dances on the tongue like the changing seasons of my childhood.
Ingredients
- 2 pounds ground beef (80/20 blend for optimal flavor)
- 1 pound pork shoulder, cut into ½-inch cubes
- 8 ounces bacon, chopped into small pieces
- 2 large yellow onions, finely diced
- 6 cloves garlic, minced
- 3 tablespoons chili powder
- 2 tablespoons ground cumin
- 1 tablespoon smoked paprika
- 1 teaspoon dried oregano
- 3 dried ancho chilies, stems and seeds removed
- 2 dried guajillo chilies, stems and seeds removed
- 2 cups beef broth
- 1 cup strong brewed coffee
- 2 (28-ounce) cans crushed tomatoes
- 2 (15-ounce) cans kidney beans, drained and rinsed
- 1 (15-ounce) can pinto beans, drained and rinsed
- 2 tablespoons brown sugar
- 1 ounce dark chocolate (70% cacao), chopped
- 2 tablespoons apple cider vinegar
- 2 teaspoons kosher salt
- 1 teaspoon freshly ground black pepper
- Optional garnishes: shredded cheddar cheese, sour cream, chopped green onions, cornbread
Equipment Needed
- Large Dutch oven or heavy-bottomed stockpot
- Cutting board and sharp chef’s knife
- Measuring cups and spoons
- Wooden spoon or sturdy spatula
- Small skillet for toasting spices
- Blender or food processor
- Can opener
- Ladle for serving
Instructions
Prepare and Toast the Chilies and Spices
Begin by removing the stems and seeds from your dried ancho and guajillo chilies, just as my grandmother taught me when I was barely tall enough to see over the counter. Place a small skillet over medium heat and toast the chilies for about 2-3 minutes per side until they become fragrant and slightly darkened—you’ll know they’re ready when the kitchen fills with that earthy, slightly smoky aroma that always takes me back to childhood autumns. In the same skillet, toast your chili powder, cumin, and smoked paprika for just 30-60 seconds until they release their essential oils, being careful not to burn them as this can create bitterness. Transfer the toasted chilies to a blender along with 1 cup of beef broth and blend until completely smooth, creating a rich chili paste that will form the foundation of your award-winning flavor profile. This careful preparation step ensures maximum flavor extraction, much like how taking time to properly prepare creates the strongest family bonds.
Brown the Meats and Build Flavor Foundation
Place your large Dutch oven over medium-high heat and add the chopped bacon, cooking until crispy and the fat has rendered out completely—this should take about 8-10 minutes, filling your kitchen with that unmistakable bacon aroma that always made Saturday mornings special in my childhood home. Remove the bacon with a slotted spoon, leaving the precious rendered fat in the pot, then add the cubed pork shoulder in a single layer, browning each piece for 3-4 minutes per side until they develop a beautiful golden crust. Remove the pork and add the ground beef, breaking it up with your wooden spoon and cooking until no pink remains, about 8-10 minutes, creating that rich meaty base that forms the heart of this family recipe. Drain any excess grease if necessary, then return all the meats to the pot along with the diced onions, cooking until the onions become translucent and fragrant, about 6-8 minutes. Add the minced garlic during the last minute of cooking, stirring constantly to prevent burning, as garlic can turn bitter if overcooked—a lesson Grandma imparted during many kitchen sessions.
Combine Ingredients and Begin Simmering
Now comes the magical moment when all components unite, much like family gatherings where separate stories weave together into one beautiful narrative. Add your toasted spice mixture and the prepared chili paste to the pot, stirring constantly for 2 minutes to coat all the meats and vegetables, allowing the spices to “bloom” and release their full potential. Pour in the remaining beef broth, strong brewed coffee, and crushed tomatoes, stirring to combine all elements into that familiar chili consistency I’ve loved since childhood. Stir in the drained kidney beans and pinto beans, along with the brown sugar, chopped dark chocolate, apple cider vinegar, kosher salt, and black pepper, bringing everything to a gentle boil while stirring to ensure the chocolate melts evenly throughout. Reduce the heat to low, cover the pot with a tight-fitting lid, and let it simmer for the first hour, stirring occasionally to prevent sticking—this initial cooking period allows the flavors to begin their beautiful dance of integration.
Slow Cook to Perfection
After the first hour of simmering, remove the lid and continue cooking uncovered for another 2-3 hours, stirring every 20-30 minutes to prevent the bottom from scorching—this extended cooking time is crucial for developing the deep, complex flavors that made this recipe an award-winner. You’ll notice the chili gradually thickening as the liquid reduces, creating that rich, spoon-coating consistency that defines truly great chili, much like how family stories gain depth with each retelling. During the final hour of cooking, taste and adjust seasoning as needed, remembering that flavors will continue to develop and concentrate as the liquid reduces further. The chili is ready when the pork cubes become fork-tender and the overall texture is thick enough that a spoon dragged across the bottom leaves a clear path that fills in slowly. This patient cooking process transforms simple ingredients into something extraordinary, teaching us that the best things in life—like family traditions—require time and attention to reach their full potential.
Rest and Serve with Love
Once your chili has reached the perfect consistency, remove it from the heat and let it rest for at least 30 minutes before serving—this resting period allows the flavors to meld completely and the temperature to become ideal for enjoying. For truly exceptional results, transfer the chili to containers and refrigerate overnight, then reheat gently the next day, as the flavors will have deepened and harmonized in ways that immediate serving simply cannot achieve. When ready to serve, ladle the chili into warm bowls and top with your favorite garnishes—shredded cheddar cheese, a dollop of sour cream, chopped green onions, or perhaps a side of warm cornbread for dipping. Serve immediately to grateful family and friends, knowing you’re sharing not just a meal but a piece of culinary heritage that has warmed hearts and filled bellies for generations in my family.
Tips and Tricks
Beyond the basic instructions, there are several techniques I’ve learned over years of making this family recipe that can elevate your chili from good to truly memorable. When selecting your dried chilies, look for ones that are still pliable rather than brittle—they should bend without snapping, indicating they still contain their precious oils and haven’t been sitting on the shelf too long. If you prefer a smoother chili texture, you can use an immersion blender to partially puree the mixture after cooking, creating a more uniform consistency while still maintaining some texture from the beans and meat chunks. For those who enjoy experimenting, try substituting different dried chili varieties—chipotle chilies will add smokiness, while arbol chilies bring intense heat, allowing you to customize the flavor profile to your family’s preferences. When browning the meats, resist the temptation to overcrowd the pan—working in batches ensures each piece develops that crucial Maillard reaction crust that adds depth to the final dish. If your chili becomes too thick during cooking, you can thin it with additional beef broth or even a bit of beer, which adds another layer of complexity to the flavor profile. For freezing, portion the cooled chili into airtight containers, leaving about an inch of headspace for expansion, where it will keep beautifully for up to three months—perfect for those busy weeknights when you need a taste of home without the lengthy preparation. Finally, don’t underestimate the power of proper salting—add salt gradually throughout the cooking process rather than all at once, tasting as you go, since the reduction of liquids will concentrate the seasoning, and you can always add more but can’t take it out once it’s there.
Recipe Variations
- For a turkey chili variation that’s lighter but still packed with flavor, substitute ground turkey for the beef and pork, and add 8 ounces of chopped mushrooms to maintain that meaty texture and umami depth. Use chicken broth instead of beef broth and consider adding a tablespoon of tomato paste for extra richness. This version became a family favorite during healthier eating phases while still delivering that comforting chili experience we all craved.
- Create a vegetarian masterpiece by replacing the meats with 2 cups of quinoa and 4 cups of mixed vegetables like diced carrots, celery, and bell peppers. Use vegetable broth instead of beef broth and add 2 tablespoons of soy sauce or tamari for that savory depth typically provided by meat. Increase the beans to four cans total, using a variety like black beans and chickpeas alongside the traditional kidney and pinto beans.
- For a white chicken chili that offers a completely different flavor profile while maintaining the comforting qualities of traditional chili, use 3 pounds of cooked, shredded chicken breast instead of the red meats. Replace the tomatoes with 4 cups of chicken broth and two (15-ounce) cans of white beans, and incorporate 4 ounces of chopped green chilies and 1 teaspoon of ground coriander for that distinctive white chili character.
- Transform this into a Cincinnati-style chili by adding 2 tablespoons of unsweetened cocoa powder, 1 tablespoon of cinnamon, 1 teaspoon of allspice, and 1/2 teaspoon of cloves to the spice mixture. Serve over spaghetti with a mountain of shredded cheddar cheese on top, creating that iconic “three-way” chili that represents a different regional tradition while maintaining the heartwarming qualities of the original recipe.
- For those who enjoy extra heat and smokiness, incorporate 2 chipotle peppers in adobo sauce (minced) along with their sauce, and add 1 tablespoon of Worcestershire sauce for additional umami complexity. You might also include 1 cup of corn kernels (frozen or canned) for sweetness and texture contrast, creating a chili with bolder flavors that still respects the foundational principles of the original family recipe.
Frequently Asked Questions
Can I make this chili in a slow cooker instead of on the stove?
Absolutely, and this method often makes the chili even more convenient for busy families, much like how modern kitchen tools have helped preserve our traditional recipes despite our faster-paced lives. After browning the meats and vegetables on the stove as directed, transfer everything to your slow cooker along with the remaining ingredients except for the beans. Cook on low for 6-8 hours or high for 3-4 hours, adding the beans during the last hour of cooking to prevent them from becoming too soft. The extended, gentle heat of slow cooking allows flavors to develop beautifully, though you may need to remove the lid for the final hour if the chili needs thickening. This method perfectly suits today’s lifestyle while still delivering that slow-cooked flavor Grandma would approve of.
How can I adjust the spiciness level for children or sensitive palates?
Creating a family-friendly version that still delivers on flavor is something I’ve perfected over years of cooking for multi-generational gatherings where heat tolerance varies widely. Begin by reducing or omitting the dried guajillo chilies, which contribute significant heat, while keeping the milder ancho chilies for their rich flavor without intense spice. You can also decrease the chili powder to 1 tablespoon and eliminate any additional spicy elements, then serve with hot sauce on the side for those who want to add heat individually. Another approach involves making the full recipe as written, then removing a portion for children before adding the final round of spices, allowing you to customize heat levels while maintaining the same foundational flavor profile that makes this chili so special.
What’s the purpose of adding chocolate and coffee to chili?
This question always takes me back to my first cooking lesson with Grandma, where she explained that these seemingly unusual ingredients provide depth and balance that elevate chili from ordinary to extraordinary. The dark chocolate adds a subtle bitterness and richness that complements the sweetness of the tomatoes and the heat of the chilies, creating a more complex flavor profile that develops beautifully during the long cooking process. Meanwhile, the coffee enhances the earthy notes of the chilies and spices while contributing its own subtle bitterness that rounds out the overall flavor without making the chili taste like coffee. Together, they create a sophisticated balance that might not be individually identifiable but contributes significantly to the award-winning character of this family recipe, much like how small, thoughtful gestures can strengthen family bonds in ways that aren’t always immediately apparent.
Can I freeze this chili, and if so, what’s the best method?
Freezing is an excellent way to preserve this taste of family tradition for future busy days, and I’ve refined my freezing technique over years of batch cooking for my own family. Allow the chili to cool completely to room temperature, then portion it into freezer-safe containers, leaving about an inch of headspace to accommodate expansion during freezing. For individual servings, consider using muffin tins to create chili “pucks” that freeze quickly and can be transferred to freezer bags once solid, perfect for single servings or adding to other dishes. Properly stored, your chili will maintain its quality for 3-4 months in a standard freezer, though I find the flavor actually improves after the first month as the ingredients continue to meld. When ready to enjoy, thaw overnight in the refrigerator before reheating gently on the stove, adding a splash of broth if needed to restore the perfect consistency.
Why is resting the chili overnight so important for the best flavor?
The overnight rest represents one of those kitchen truths passed down through generations, much like family stories that gain meaning with each retelling. During this resting period, the flavors have time to fully integrate and harmonize, with the starches from the beans continuing to absorb liquid and seasonings, creating a more cohesive final product. The fats from the meats redistribute throughout the chili, carrying flavor compounds to every spoonful rather than remaining concentrated in specific areas. Additionally, any harsh notes from spices or acidity mellow during this time, resulting in a smoother, more balanced flavor profile that feels comforting rather than aggressive. This patient approach mirrors how family relationships deepen over time, with initial intensity giving way to nuanced understanding and appreciation that only develops with patience and presence.
Summary
This award-winning chili recipe represents more than just ingredients—it’s a tangible connection to family traditions, childhood memories, and the comforting certainty that some culinary treasures transcend generations. With its perfect balance of spices, thoughtful technique, and patient cooking process, this chili delivers both exceptional flavor and heartwarming nostalgia in every spoonful, creating new family memories while honoring old ones.
Award-Winning Chili Recipe
6
servings45
minutes4
minutesIngredients
Instructions
- 1 Toast dried chilies in skillet 2-3 minutes per side, then blend with 1 cup beef broth until smooth. Toast spices 30-60 seconds until fragrant.
- 2 Cook bacon until crispy, remove. Brown pork cubes 3-4 minutes per side, remove. Brown ground beef 8-10 minutes, drain excess grease. Return all meats to pot, add onions and cook 6-8 minutes until translucent. Add garlic last minute.
- 3 Add toasted spice mixture and chili paste, cook 2 minutes. Add remaining broth, coffee, tomatoes, beans, brown sugar, chocolate, vinegar, salt, and pepper. Bring to boil, then reduce to simmer.
- 4 Cover and simmer 1 hour, then uncover and simmer 2-3 more hours until thickened and pork is tender, stirring regularly.
- 5 Remove from heat, rest 30 minutes minimum (overnight preferred). Reheat gently if needed, serve with desired garnishes.


