Packed with flavor and perfect for anyone embracing low-carb living, these Atkins diet recipes make healthy eating anything but boring. Whether you’re craving quick weeknight dinners, satisfying comfort food, or fresh seasonal favorites, we’ve gathered 25 delicious options that prove cutting carbs doesn’t mean sacrificing taste. Get ready to transform your meals and keep your taste buds happy—let’s dive into these mouthwatering recipes!
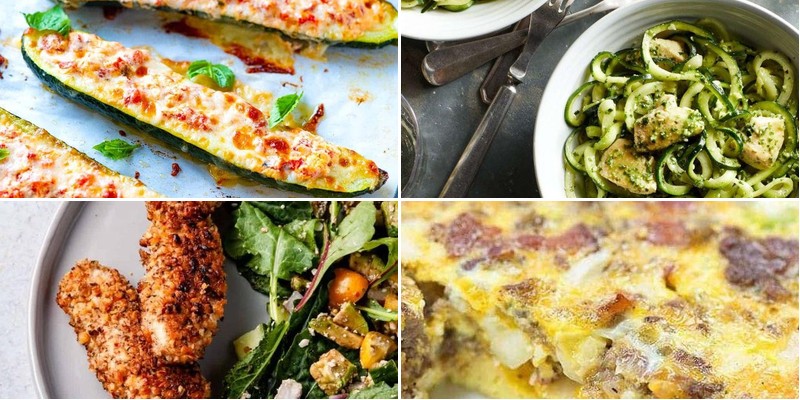
Cheesy Baked Zucchini Boats
Unbelievably, I found myself with a surplus of zucchini from my garden last weekend, and after staring at those beautiful green vegetables for what felt like hours, I remembered my grandmother’s brilliant solution for using up summer squash. These cheesy baked zucchini boats have become my go-to comfort food that somehow feels both indulgent and wholesome at the same time.
5
portions20
minutes50
minutesIngredients
– 4 medium zucchini, halved lengthwise
– 2 tablespoons extra virgin olive oil
– 1 teaspoon kosher salt
– ½ teaspoon freshly ground black pepper
– 1 cup finely diced yellow onion
– 3 cloves garlic, minced
– 1 pound ground Italian sausage
– 1 cup marinara sauce
– 1 cup whole milk ricotta cheese
– 1 cup shredded mozzarella cheese
– ½ cup grated Parmesan cheese
– 2 tablespoons chopped fresh basil
– 1 large pasture-raised egg, lightly beaten
Instructions
1. Preheat your oven to 400°F and line a baking sheet with parchment paper.
2. Using a melon baller or small spoon, carefully scoop out the center flesh of each zucchini half, leaving a ¼-inch thick shell.
3. Brush the zucchini boats with extra virgin olive oil and season with kosher salt and freshly ground black pepper.
4. Place the zucchini boats cut-side up on the prepared baking sheet and bake for 15 minutes until slightly softened.
5. While the zucchini bakes, heat a large skillet over medium-high heat and sauté the diced yellow onion for 4-5 minutes until translucent.
6. Add the minced garlic and cook for 1 minute until fragrant.
7. Crumble the ground Italian sausage into the skillet and cook for 6-8 minutes, breaking it up with a wooden spoon, until browned and cooked through.
8. Stir in the marinara sauce and simmer for 3 minutes to combine flavors.
9. In a medium bowl, combine the whole milk ricotta cheese, shredded mozzarella cheese, grated Parmesan cheese, chopped fresh basil, and lightly beaten pasture-raised egg.
10. Remove the partially baked zucchini from the oven and carefully fill each boat with the sausage mixture.
11. Top each zucchini boat with the cheese mixture, spreading it evenly over the filling.
12. Return the baking sheet to the oven and bake for 20-25 minutes until the cheese is golden brown and bubbly.
13. Let the zucchini boats rest for 5 minutes before serving to allow the filling to set.
Zesty and satisfying, these baked zucchini boats offer a wonderful textural contrast between the tender zucchini shell and the rich, cheesy filling. The combination of creamy ricotta with the savory Italian sausage creates layers of flavor that develop beautifully during baking. For an elegant presentation, garnish with additional fresh basil and serve alongside a crisp arugula salad dressed with lemon vinaigrette.
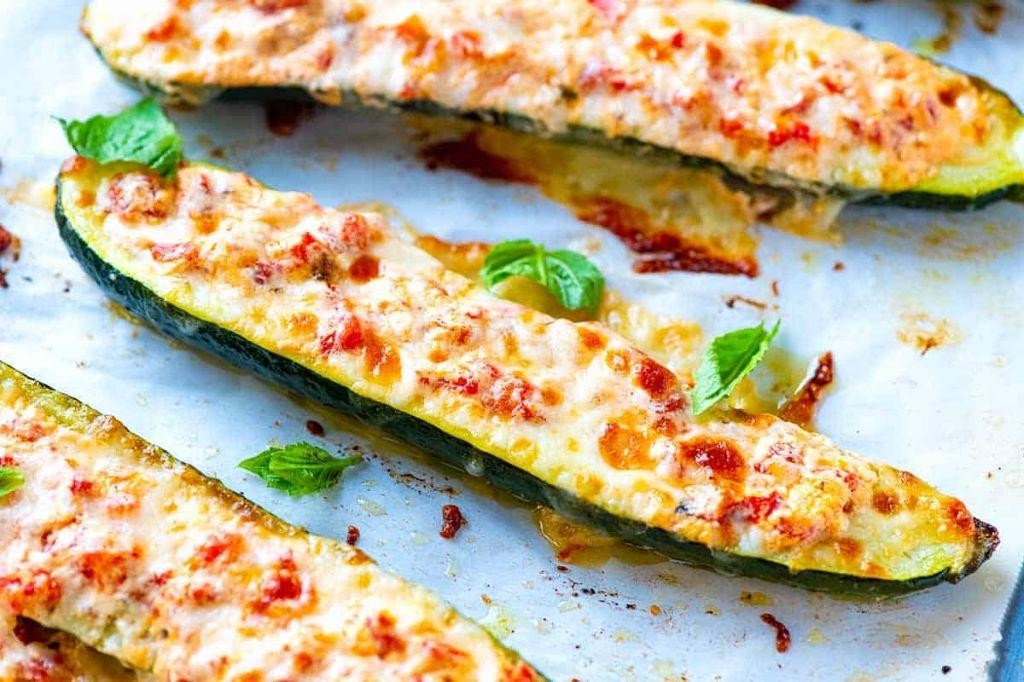
Keto Garlic Butter Steak Bites
Yesterday evening, as I was rummaging through my freezer for dinner inspiration, I rediscovered a beautiful sirloin steak that sparked this incredibly simple yet decadent recipe. There’s something magical about how quickly these keto garlic butter steak bites come together, making them perfect for those busy weeknights when you want something special without the fuss. I love how the garlic infuses the butter while the steak gets that perfect sear—it’s become my go-to for impromptu dinners.
4
servings10
minutes5
minutesIngredients
– 1.5 lbs sirloin steak, cut into 1-inch cubes
– 3 tbsp clarified butter
– 6 garlic cloves, thinly sliced
– 2 tbsp fresh thyme leaves
– 1 tsp coarse sea salt
– ½ tsp freshly cracked black pepper
– ¼ tsp smoked paprika
Instructions
1. Pat the sirloin steak cubes completely dry using paper towels to ensure proper searing.
2. Season all sides of the steak cubes evenly with coarse sea salt, freshly cracked black pepper, and smoked paprika.
3. Heat a large cast-iron skillet over medium-high heat until a drop of water sizzles and evaporates immediately upon contact.
4. Add clarified butter to the hot skillet and swirl to coat the entire surface.
5. Carefully arrange the seasoned steak cubes in a single layer, ensuring they don’t touch for optimal browning.
6. Sear the steak cubes for 2 minutes without moving them to develop a deep golden-brown crust.
7. Flip each steak cube using tongs and cook for another 90 seconds for medium-rare doneness.
8. Transfer the seared steak bites to a clean plate, allowing them to rest undisturbed.
9. Reduce the skillet heat to medium-low and add the thinly sliced garlic cloves.
10. Sauté the garlic for 45-60 seconds until fragrant and lightly golden, stirring constantly to prevent burning.
11. Return the rested steak bites to the skillet along with any accumulated juices.
12. Add fresh thyme leaves and toss everything together for 30 seconds to coat evenly.
13. Remove the skillet from heat immediately to prevent overcooking.
The tender steak bites practically melt in your mouth, while the garlic-infused butter creates this rich, aromatic sauce that clings to every piece. I love serving these over cauliflower mash or tossing them with zucchini noodles—the buttery garlic sauce makes everything it touches absolutely irresistible.
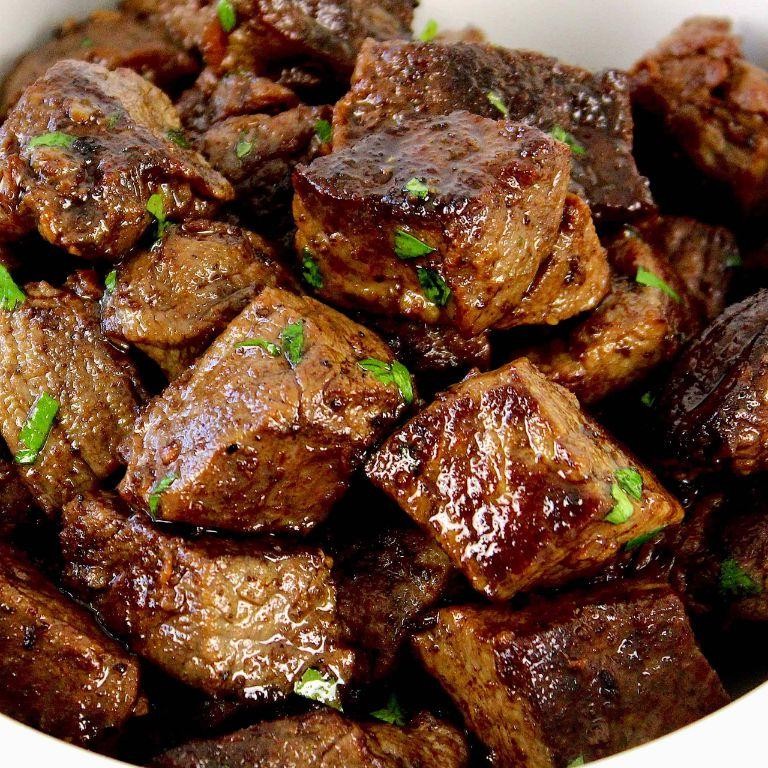
Atkins-Friendly Cauliflower Fried Rice
Sometimes I find myself craving takeout fried rice, but my commitment to low-carb eating means I need to get creative in the kitchen. That’s how this cauliflower fried rice became my go-to weeknight savior—it satisfies those cravings without derailing my dietary goals. Seriously, you won’t miss the grains once you taste how flavorful this version is!
4
servings15
minutes12
minutesIngredients
– 1 large head of cauliflower, riced (about 4 cups)
– 2 tablespoons avocado oil
– 3 pasture-raised eggs, lightly beaten
– 1 cup diced yellow onion
– 3 cloves garlic, minced
– 1 tablespoon freshly grated ginger
– ½ cup frozen organic peas
– 2 tablespoons coconut aminos
– 1 teaspoon toasted sesame oil
– 2 sliced scallions for garnish
Instructions
1. Heat 1 tablespoon of avocado oil in a large wok or skillet over medium-high heat until shimmering.
2. Pour the lightly beaten pasture-raised eggs into the hot oil and cook for 45 seconds without stirring to create a thin omelet.
3. Flip the egg omelet and cook for an additional 15 seconds, then transfer to a cutting board and slice into thin ribbons.
4. Add the remaining tablespoon of avocado oil to the same wok and heat until it reaches 350°F.
5. Sauté the diced yellow onion for 3-4 minutes until translucent and lightly caramelized at the edges.
6. Add the minced garlic and freshly grated ginger, stirring constantly for 45 seconds until fragrant but not browned.
7. Incorporate the riced cauliflower and frozen organic peas, spreading them in an even layer across the cooking surface.
8. Cook the cauliflower mixture undisturbed for 2 minutes to develop a slight sear, then stir and repeat this process twice more for optimal texture.
9. Drizzle the coconut aminos and toasted sesame oil over the cauliflower mixture, tossing thoroughly to coat every component.
10. Fold in the egg ribbons and cook for 1 final minute until everything is heated through and well-combined.
11. Garnish with sliced scallions and serve immediately.
The finished dish has a remarkably satisfying texture that mimics traditional fried rice, with the cauliflower maintaining just enough bite to feel substantial. I love how the nutty sesame oil complements the subtle sweetness from the caramelized onions, creating layers of flavor that make this feel indulgent rather than restrictive. For an extra protein boost, I sometimes top it with seared shrimp or shredded rotisserie chicken right before serving.
Low-Carb Zucchini Noodles with Pesto
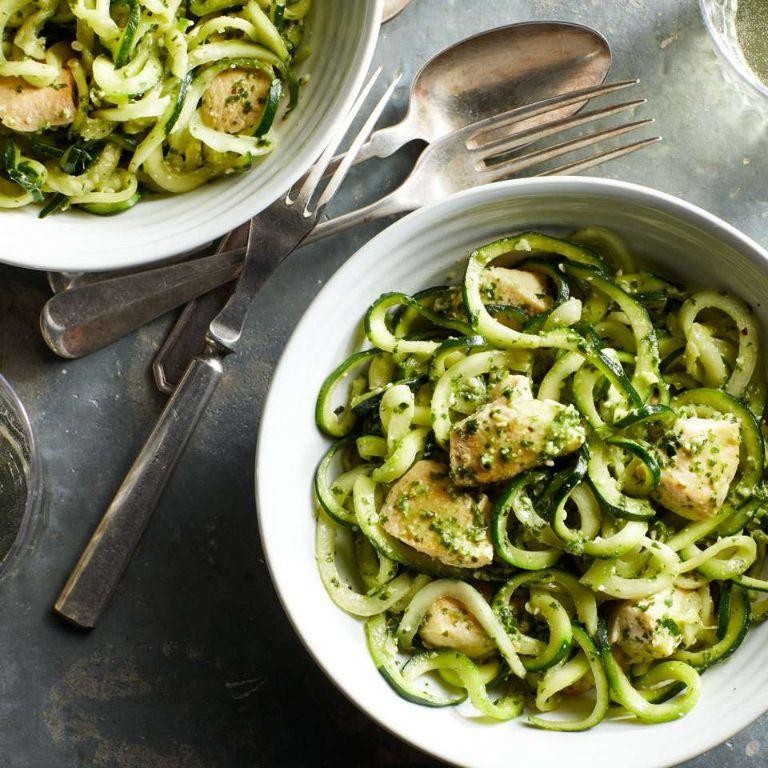
Craving something light yet satisfying that won’t weigh you down? I’ve been spiralizing my way through summer’s zucchini bounty, and this low-carb pesto dish has become my go-to weeknight savior—it’s so fresh and vibrant, it practically shouts “healthy indulgence” from the bowl.
5
servings15
minutes7
minutesIngredients
– 4 medium zucchini, spiralized into noodles
– 1/2 cup extra-virgin olive oil
– 2 cups fresh basil leaves, packed
– 1/3 cup pine nuts, lightly toasted
– 2 garlic cloves, minced
– 1/2 cup Parmigiano-Reggiano cheese, freshly grated
– 1/4 tsp fine sea salt
– 1/8 tsp freshly cracked black pepper
– 2 tbsp unsalted butter
– 1/4 cup heavy cream
Instructions
1. Place pine nuts in a dry skillet over medium heat and toast for 3-4 minutes, shaking the pan frequently, until golden and fragrant—watch closely as they burn easily.
2. Combine toasted pine nuts, basil leaves, minced garlic, and grated Parmigiano-Reggiano in a food processor.
3. Pulse the mixture 5-6 times until coarsely chopped, then scrape down the sides with a spatula to ensure even blending.
4. With the processor running on low speed, slowly drizzle in extra-virgin olive oil over 30 seconds until a smooth paste forms.
5. Season the pesto with fine sea salt and freshly cracked black pepper, then pulse twice more to incorporate.
6. Melt unsalted butter in a large skillet over medium-high heat until it sizzles gently, about 1 minute.
7. Add spiralized zucchini noodles to the skillet and sauté for 2-3 minutes, tossing constantly with tongs, until just tender but still al dente—overcooking makes them watery.
8. Pour heavy cream into the skillet and stir continuously for 1 minute until it thickens slightly and coats the noodles.
9. Remove the skillet from heat and fold in the prepared pesto until the zucchini noodles are evenly coated.
10. Serve immediately in warmed bowls. Keep leftovers in an airtight container—the pesto may darken but still tastes fantastic. Knowing how the creamy pesto clings to each tender-crisp zucchini strand makes this dish irresistible; the garlic and basil sing through every bite, while a sprinkle of extra Parmigiano-Reggiano or grilled shrimp turns it into a stunning main course.
Creamy Spinach and Mushroom Chicken
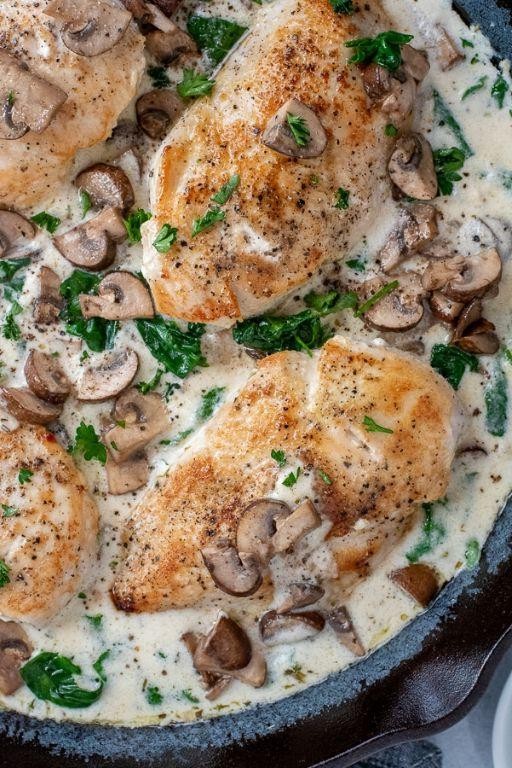
Recently, I found myself craving that perfect comfort food that feels both indulgent and nourishing—something creamy, savory, and packed with veggies. This creamy spinach and mushroom chicken has become my go-to weeknight dinner, especially after a long day when I want something impressive without the fuss. I love how the flavors meld together in one pan, making cleanup a breeze and leaving my kitchen smelling incredible.
3
servings15
minutes28
minutesIngredients
– 1.5 pounds boneless, skinless chicken breasts, pounded to ½-inch thickness
– 2 tablespoons clarified butter
– 8 ounces cremini mushrooms, thinly sliced
– 3 cloves garlic, minced
– 5 ounces fresh baby spinach
– 1 cup heavy cream
– ½ cup chicken broth
– ¼ cup grated Parmigiano-Reggiano cheese
– 1 teaspoon fresh thyme leaves
– ½ teaspoon freshly grated nutmeg
– Kosher salt and freshly cracked black pepper
Instructions
1. Pat the chicken breasts completely dry with paper towels and season both sides generously with kosher salt and freshly cracked black pepper.
2. Heat 1 tablespoon of clarified butter in a large skillet over medium-high heat until it shimmers and just begins to smoke.
3. Carefully place the chicken breasts in the hot skillet and sear for 5–6 minutes without moving them to develop a deep golden-brown crust.
4. Flip the chicken using tongs and cook for another 5–6 minutes until the internal temperature reaches 165°F on an instant-read thermometer.
5. Transfer the chicken to a clean plate and tent loosely with foil to rest.
6. Reduce the heat to medium and add the remaining 1 tablespoon of clarified butter to the same skillet.
7. Add the thinly sliced cremini mushrooms and sauté for 4–5 minutes, stirring occasionally, until they release their moisture and turn golden brown.
8. Stir in the minced garlic and cook for 30 seconds until fragrant but not browned.
9. Add the fresh baby spinach in two batches, wilting each addition completely before adding the next, about 2–3 minutes total.
10. Pour in the heavy cream and chicken broth, scraping up any browned bits from the bottom of the skillet with a wooden spoon.
11. Bring the sauce to a gentle simmer and cook for 3–4 minutes until it thickens slightly and coats the back of a spoon.
12. Whisk in the grated Parmigiano-Reggiano cheese, fresh thyme leaves, and freshly grated nutmeg until the cheese is fully melted and incorporated.
13. Return the rested chicken and any accumulated juices to the skillet, spooning the creamy sauce over the top.
14. Simmer gently for 2–3 minutes to rewarm the chicken and allow the flavors to meld.
Zesty, creamy, and utterly satisfying, this dish delivers tender chicken swathed in a velvety sauce that clings beautifully to every bite. The earthy mushrooms and vibrant spinach create wonderful textural contrasts, while the nutmeg adds a subtle warmth that elevates the entire experience. For a restaurant-worthy presentation, serve it over creamy polenta or alongside crusty bread to soak up every last drop of that luxurious sauce.
Keto Shrimp and Avocado Salad
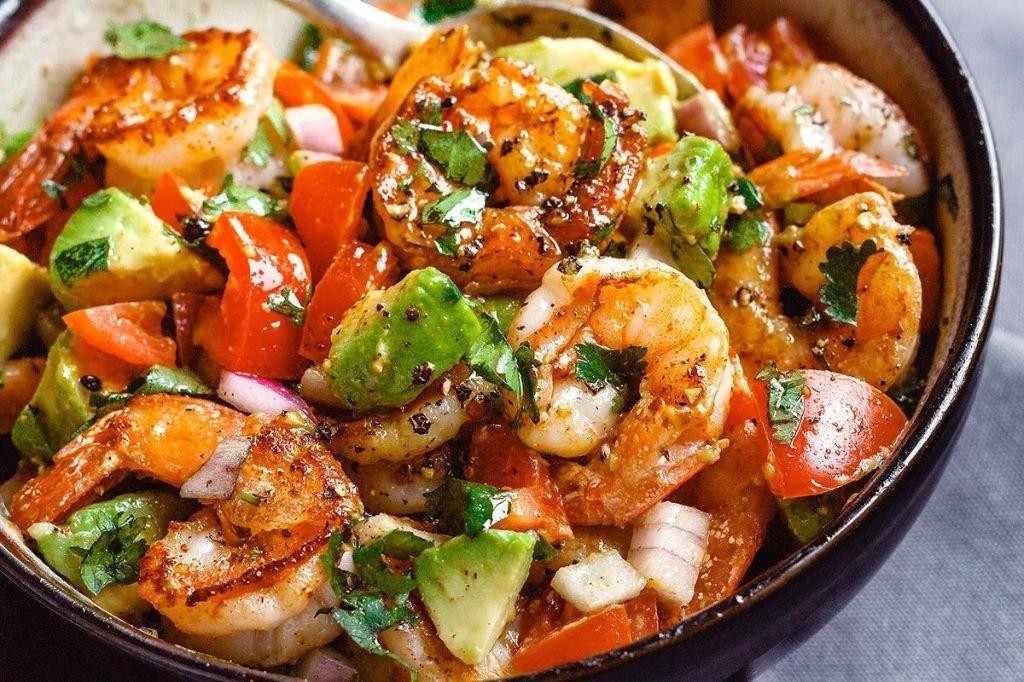
Sometimes the simplest combinations create the most memorable meals, and this keto shrimp and avocado salad has become my go-to lunch when I want something satisfying yet light. I first discovered this pairing during a beach vacation when I needed a quick, no-cook option that wouldn’t weigh me down in the summer heat. Now it’s my secret weapon for busy weekdays when I want restaurant-quality food without the fuss.
3
servings15
minutes4
minutesIngredients
– 1 pound wild-caught shrimp, peeled and deveined
– 2 ripe Hass avocados, diced
– 1/4 cup extra virgin olive oil
– 2 tablespoons fresh lime juice
– 1/4 cup finely chopped red onion
– 1/4 cup chopped fresh cilantro
– 1/2 teaspoon sea salt
– 1/4 teaspoon freshly cracked black pepper
Instructions
1. Pat the wild-caught shrimp completely dry with paper towels to ensure proper searing.
2. Season the shrimp evenly with sea salt and freshly cracked black pepper on both sides.
3. Heat 2 tablespoons of extra virgin olive oil in a large skillet over medium-high heat until shimmering.
4. Arrange the shrimp in a single layer in the hot skillet, cooking for 2 minutes per side until they curl and turn opaque pink.
5. Transfer the cooked shrimp to a cutting board and let them rest for 3 minutes to redistribute juices.
6. Chop the cooled shrimp into bite-sized pieces while maintaining some texture variation.
7. In a medium mixing bowl, whisk together the remaining 2 tablespoons of extra virgin olive oil and fresh lime juice until emulsified.
8. Add the finely chopped red onion and chopped fresh cilantro to the dressing, stirring to combine.
9. Gently fold in the diced Hass avocados, being careful not to mash them during mixing.
10. Incorporate the chopped shrimp into the avocado mixture until evenly distributed throughout. Getting that perfect creamy-crunchy balance makes all the difference in this salad. Great served immediately while the shrimp retains its warmth against the cool avocado, or you can chill it for 30 minutes to let the flavors meld more deeply. The buttery avocado contrasts beautifully with the firm shrimp texture, and I love serving it in lettuce cups for an extra crunch factor that makes it feel like a special treat.
Atkins Citrus Herb Grilled Salmon
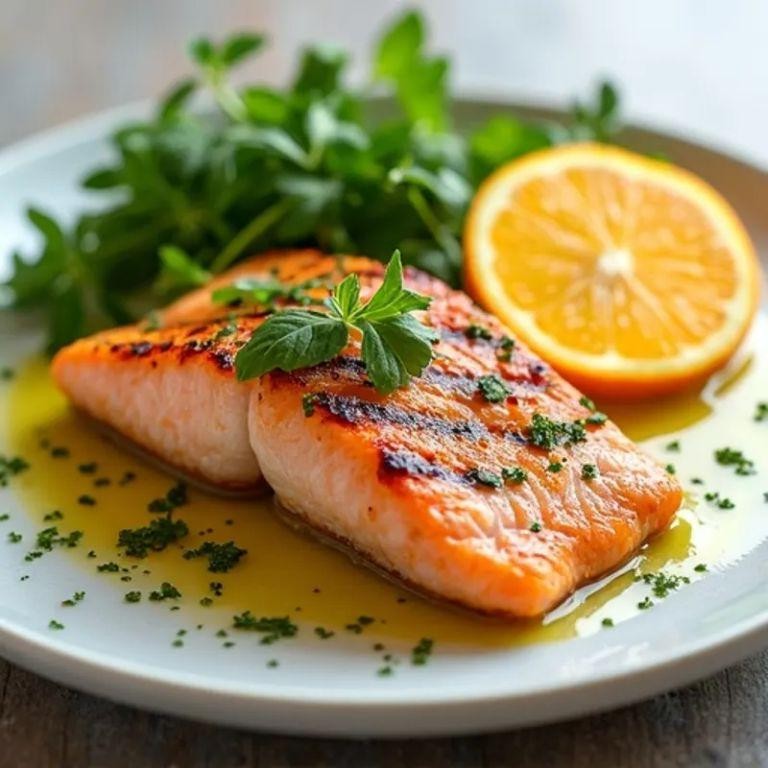
My kitchen smelled like a sunny Mediterranean afternoon when I first tested this recipe—the kind of dish that makes you feel fancy without the fuss. I love how the bright citrus cuts through the richness of the salmon, and it’s become my go-to for easy dinners that still impress guests.
4
servings15
minutes9
minutesIngredients
- 4 (6-ounce) skin-on wild-caught salmon fillets, patted dry
- 2 tablespoons extra-virgin olive oil
- 1 tablespoon freshly squeezed lemon juice
- 1 teaspoon finely grated orange zest
- 2 cloves garlic, minced
- 1 teaspoon fresh thyme leaves, stripped from stems
- 1 teaspoon fresh rosemary, finely chopped
- ½ teaspoon kosher salt
- ¼ teaspoon freshly cracked black pepper
- Lemon wedges, for serving
Instructions
- Preheat a gas or charcoal grill to medium-high heat, maintaining a steady temperature of 400°F.
- Whisk together the extra-virgin olive oil, freshly squeezed lemon juice, finely grated orange zest, minced garlic, fresh thyme leaves, finely chopped rosemary, kosher salt, and freshly cracked black pepper in a small glass bowl until fully emulsified.
- Brush the salmon fillets evenly on both sides with the citrus-herb marinade, ensuring the skin side receives a light coating.
- Place the salmon fillets skin-side down on the preheated grill grates, positioning them at a 45-degree angle to create professional grill marks.
- Grill the salmon undisturbed for 4–5 minutes, until the skin releases easily from the grates and appears crisp and golden.
- Flip the salmon fillets using a thin, flexible fish spatula to prevent breaking the delicate flesh.
- Continue grilling for another 3–4 minutes, until the internal temperature reaches 125°F for medium-rare or 135°F for medium, as measured with an instant-read thermometer inserted into the thickest part of the fillet.
- Transfer the grilled salmon to a clean platter and let rest for 2 minutes to allow the juices to redistribute.
- Garnish with fresh lemon wedges just before serving.
This salmon emerges with a perfectly crisp exterior that gives way to moist, flaky flesh inside. The herbaceous notes from the rosemary and thyme beautifully complement the citrus brightness, making it wonderful served over a bed of quinoa pilaf or alongside roasted asparagus spears.
Almond Crusted Chicken Tenders
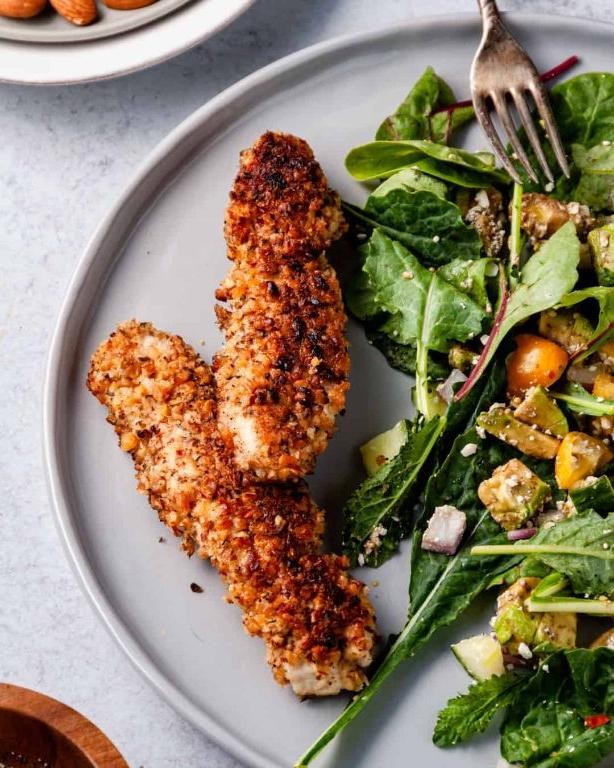
Yesterday, I found myself craving that perfect combination of crispy and tender, the kind that makes you forget you’re eating something relatively healthy. After experimenting with various coatings, I landed on this almond-crusted version that’s become my go-to weeknight dinner—it’s so good my kids haven’t realized they’re eating anything other than “fancy chicken nuggets.”
3
servings15
minutes19
minutesIngredients
– 1.5 pounds organic chicken tenders
– 1 cup finely ground blanched almond flour
– 1/2 cup panko breadcrumbs
– 2 large pasture-raised eggs, lightly beaten
– 1/4 cup whole milk
– 1 teaspoon Diamond Crystal kosher salt
– 1/2 teaspoon freshly cracked black pepper
– 1/2 teaspoon smoked paprika
– 1/4 teaspoon garlic powder
– 1/4 cup clarified butter
– 2 tablespoons avocado oil
Instructions
1. Preheat your oven to 400°F and position a rack in the center.
2. Pat the chicken tenders completely dry using paper towels.
3. Create your dredging station with three shallow bowls: almond flour mixed with panko in the first, beaten eggs whisked with milk in the second, and all dry seasonings combined in the third.
4. Dredge each chicken tender first in the seasoned flour mixture, shaking off excess.
5. Dip the floured tender into the egg mixture, allowing excess to drip off.
6. Return the tender to the flour mixture for a second coating, pressing gently to adhere.
7. Heat clarified butter and avocado oil in a large cast-iron skillet over medium-high heat until shimmering (about 350°F).
8. Working in batches, pan-sear tenders for 2 minutes per side until golden brown.
9. Transfer the seared tenders to a wire rack set over a baking sheet.
10. Bake for 12-15 minutes until the internal temperature reaches 165°F.
11. Let the tenders rest on the wire rack for 3 minutes before serving.
Buttery from the almond crust with a satisfying crunch that gives way to incredibly juicy chicken, these tenders are elevated enough for dinner parties yet simple enough for busy nights. I love serving them with a bright lemon-dill yogurt sauce or stacking them on a grain bowl with roasted vegetables for a complete meal.
Low-Carb Stuffed Bell Peppers
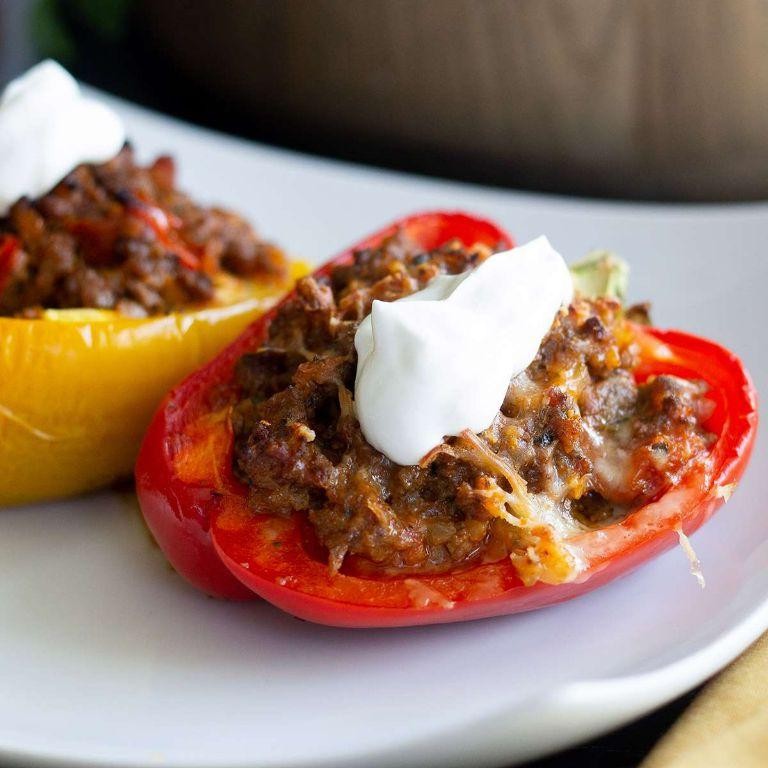
During my recent quest for satisfying low-carb dinners that don’t sacrifice flavor, I rediscovered stuffed bell peppers—they’ve become my go-to meal prep solution that even my carb-loving family devours without complaint. Don’t let their simple appearance fool you; these peppers transform humble ingredients into something truly special with minimal effort.
8
portions20
minutes53
minutesIngredients
– 4 large bell peppers, halved lengthwise and seeded
– 1 lb grass-fed ground beef
– 1 cup cauliflower rice
– ½ cup aged sharp cheddar cheese, finely grated
– ¼ cup heavy cream
– 2 tbsp extra virgin olive oil
– 1 tbsp unsalted butter
– 1 small yellow onion, finely diced
– 2 garlic cloves, minced
– 1 tsp smoked paprika
– ½ tsp dried oregano
– ¼ tsp crushed red pepper flakes
– Sea salt and freshly ground black pepper
Instructions
1. Preheat your oven to 375°F and lightly brush the bell pepper halves with 1 tablespoon of olive oil.
2. Arrange the peppers cut-side up in a 9×13-inch baking dish and roast for 15 minutes until slightly softened.
3. Meanwhile, heat the remaining olive oil and unsalted butter in a large skillet over medium-high heat until the butter foams.
4. Add the finely diced yellow onion and sauté for 4-5 minutes until translucent and fragrant.
5. Stir in the minced garlic and cook for 30 seconds until aromatic but not browned.
6. Crumble the grass-fed ground beef into the skillet and cook for 6-7 minutes, breaking it up with a spatula until no pink remains.
7. Sprinkle the smoked paprika, dried oregano, crushed red pepper flakes, 1 teaspoon sea salt, and ½ teaspoon black pepper over the beef mixture.
8. Add the cauliflower rice and cook for 3-4 minutes, stirring frequently, until the cauliflower is tender-crisp.
9. Pour in the heavy cream and simmer for 2 minutes until the mixture thickens slightly.
10. Remove the skillet from heat and fold in half of the finely grated aged sharp cheddar cheese.
11. Carefully spoon the filling into the partially roasted pepper halves, mounding it slightly.
12. Top each pepper with the remaining cheese and return to the oven for 20-25 minutes until the peppers are tender and the cheese is golden and bubbly.
13. Let the stuffed peppers rest for 5 minutes before serving to allow the filling to set.
Each bite delivers a wonderful contrast between the tender-crisp pepper shell and the rich, savory filling that’s surprisingly creamy thanks to the cheese and heavy cream. I love serving these alongside a simple arugula salad dressed with lemon vinaigrette to cut through the richness, or sometimes I’ll make extra filling to use for quick lunches throughout the week.
Atkins Egg and Sausage Casserole

Breakfast casseroles have become my weekend ritual—there’s something so comforting about prepping everything the night before and waking up to a house filled with the aroma of baked eggs and savory sausage. I first tried this Atkins-friendly version when my keto-curious sister visited, and now it’s our go-to for lazy Sunday brunches when we want something satisfying without the carb crash.
8
portions20
minutes52
minutesIngredients
- 1 pound pork breakfast sausage, casings removed
- 2 tablespoons unsalted butter
- 1 cup yellow onion, finely diced
- 1 cup cremini mushrooms, thinly sliced
- 8 large pasture-raised eggs, lightly beaten
- 1 cup heavy cream
- 1 teaspoon fine sea salt
- ½ teaspoon freshly cracked black pepper
- ¼ teaspoon freshly grated nutmeg
- 1 cup sharp white cheddar cheese, freshly grated
- 2 tablespoons fresh chives, finely chopped
Instructions
- Preheat your oven to 375°F and generously butter a 9×13-inch ceramic baking dish.
- Heat a large cast-iron skillet over medium-high heat and cook the sausage, breaking it into small crumbles with a wooden spoon, for 6-8 minutes until browned and cooked through.
- Transfer the cooked sausage to a paper towel-lined plate using a slotted spoon, reserving 1 tablespoon of rendered fat in the skillet.
- Add butter to the skillet and sauté the diced onion for 4-5 minutes until translucent and fragrant.
- Add the sliced mushrooms and cook for another 5-6 minutes until they’ve released their moisture and developed a golden-brown sear.
- In a large mixing bowl, whisk together the beaten eggs, heavy cream, sea salt, black pepper, and nutmeg until fully emulsified.
- Stir in the sausage, onion-mushroom mixture, and ¾ cup of grated cheddar cheese until evenly distributed.
- Pour the egg mixture into the prepared baking dish and top with the remaining ¼ cup cheddar cheese.
- Bake on the center rack for 28-32 minutes until the edges are set and the center reaches 165°F on an instant-read thermometer.
- Let the casserole rest for 8-10 minutes before garnishing with fresh chives and slicing.
Something magical happens when this casserole rests—the layers settle into a creamy, custard-like texture that holds perfect slices. The nutmeg adds a subtle warmth that plays beautifully against the sharp cheddar and savory sausage. For an elegant brunch presentation, I sometimes bake individual portions in ramekins and serve with a simple arugula salad dressed with lemon vinaigrette.
Bacon-Wrapped Asparagus Spears
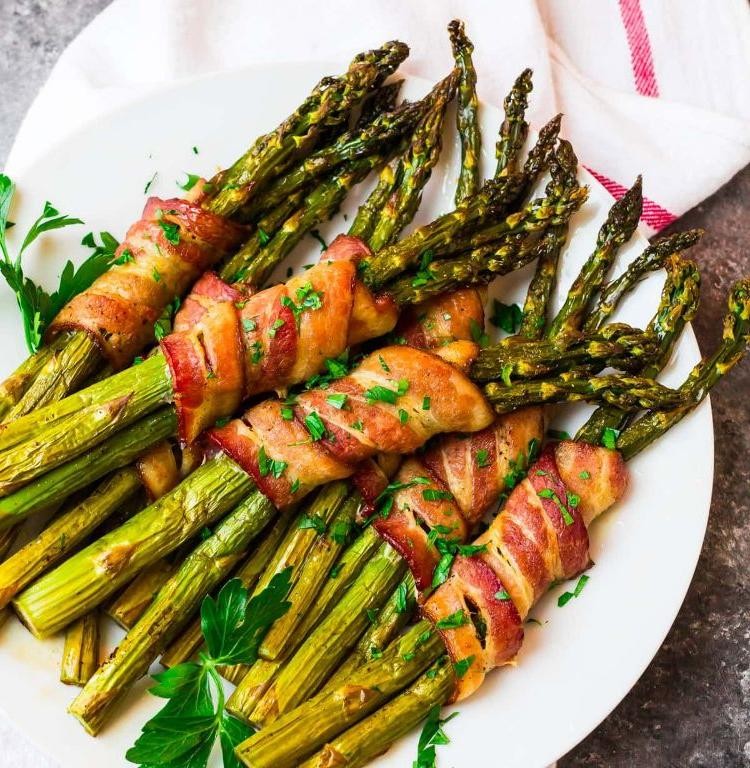
Tender asparagus wrapped in crispy bacon—this elegant yet simple side dish has become my go-to for dinner parties and weeknight meals alike. I first discovered this combination at a friend’s potluck years ago, and now I’ve perfected my own version that balances the earthy green spears with that irresistible smoky crunch. There’s something magical about how these two humble ingredients transform into such a sophisticated bite.
8
bundles10
minutes22
minutesIngredients
– 1 pound fresh asparagus spears, trimmed
– 8 slices thick-cut applewood-smoked bacon
– 2 tablespoons extra virgin olive oil
– 1 teaspoon freshly cracked black pepper
– ½ teaspoon smoked paprika
– ¼ teaspoon fine sea salt
Instructions
1. Preheat your oven to 400°F and line a rimmed baking sheet with parchment paper.
2. Trim the woody ends from the asparagus spears by snapping them where they naturally break.
3. Drizzle the asparagus with extra virgin olive oil, ensuring each spear is lightly coated.
4. Season the asparagus with fine sea salt, freshly cracked black pepper, and smoked paprika.
5. Divide the asparagus into 8 equal bundles of 3-4 spears each.
6. Wrap one slice of thick-cut applewood-smoked bacon snugly around the center of each asparagus bundle.
7. Arrange the wrapped bundles on the prepared baking sheet, ensuring they don’t touch.
8. Roast at 400°F for 18-22 minutes, until the bacon is crisp and the asparagus is tender-crisp.
9. Flip the bundles halfway through cooking using tongs to ensure even browning.
10. Transfer to a wire rack for 2 minutes before serving to maintain crispness.
Delightfully crisp bacon gives way to tender, perfectly cooked asparagus with just the right amount of resistance. The smoky paprika enhances the bacon’s richness while the black pepper adds subtle heat. For an elegant presentation, I love serving these spears crossed over a creamy polenta or alongside a perfectly seared steak—they never fail to impress.
Lemon Herb Grilled Chicken Breasts
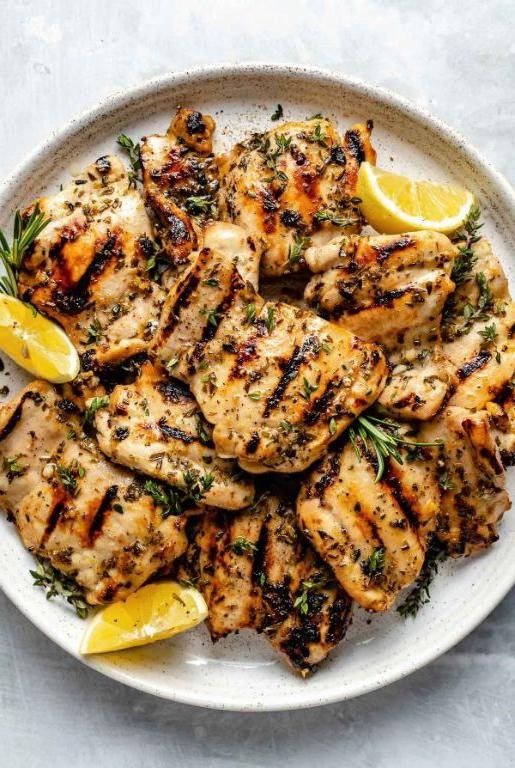
Tender, juicy grilled chicken with a bright citrus kick—this lemon herb grilled chicken has been my go-to summer dinner for years. There’s something magical about how the fresh herbs and zesty lemon transform simple chicken breasts into something truly special, perfect for those warm evenings when you want something light yet satisfying without spending hours in the kitchen.
5
servings15
minutes12
minutesIngredients
– 4 boneless, skinless chicken breasts (6-8 ounces each)
– ¼ cup extra-virgin olive oil
– 3 tablespoons freshly squeezed lemon juice
– 4 garlic cloves, minced
– 1 tablespoon fresh rosemary leaves, finely chopped
– 1 tablespoon fresh thyme leaves
– 1 teaspoon kosher salt
– ½ teaspoon freshly cracked black pepper
– 1 lemon, sliced into ¼-inch rounds
Instructions
1. Place chicken breasts between two sheets of parchment paper and pound to an even ¾-inch thickness using a meat mallet.
2. Whisk together olive oil, lemon juice, minced garlic, chopped rosemary, thyme leaves, kosher salt, and black pepper in a medium bowl until fully emulsified.
3. Transfer chicken breasts to a gallon-sized resealable bag and pour the marinade over them, ensuring each piece is thoroughly coated.
4. Seal the bag, removing excess air, and refrigerate for exactly 30 minutes—no longer, as the acid in the lemon juice can begin to break down the protein.
5. Preheat a gas grill to medium-high heat (400-450°F), cleaning the grates thoroughly with a grill brush.
6. Remove chicken from marinade, allowing excess to drip off, and discard the used marinade.
7. Place chicken breasts on the hot grill at a 45-degree angle to the grates for better sear marks.
8. Grill for 5-6 minutes until the bottom develops deep golden-brown grill marks and releases easily from the grates.
9. Flip chicken using tongs and arrange lemon slices directly on the grill beside the chicken.
10. Continue grilling for another 5-6 minutes until the internal temperature reaches 165°F when tested with an instant-read thermometer in the thickest part.
11. Transfer chicken to a clean cutting board and let rest for 5 minutes to allow juices to redistribute.
12. Serve each chicken breast topped with a grilled lemon slice.Deliciously charred on the outside while remaining incredibly moist inside, the rosemary and thyme create an aromatic earthiness that balances perfectly with the bright lemon notes. I love serving this over a bed of arugula with shaved Parmesan for a complete meal, or slicing it thin for the most incredible chicken sandwiches the next day—if there are any leftovers, that is.
Garlic Parmesan Broccoli Bites
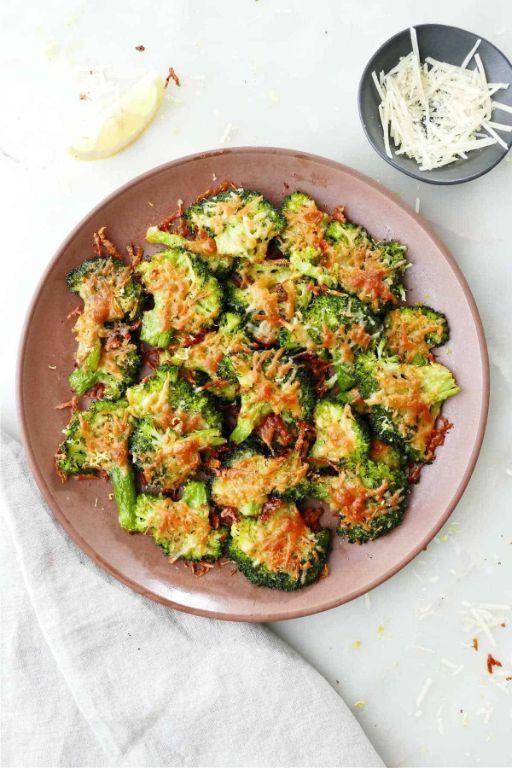
Whenever I’m craving something crispy and savory but want to keep things on the healthier side, these garlic parmesan broccoli bites are my absolute go-to. I first discovered this recipe during a busy weeknight when I needed to use up some broccoli florets, and now they’ve become a regular in my snack rotation—perfect for game day gatherings or even as a fun side dish that gets my kids excited about vegetables.
2
servings15
minutes22
minutesIngredients
– 1 large head of broccoli, cut into uniform florets (approximately 4 cups)
– 2 large pasture-raised eggs, lightly beaten
– 1 cup panko breadcrumbs
– ¾ cup freshly grated Parmigiano-Reggiano cheese
– 3 cloves garlic, microplaned into a fine paste
– 2 tablespoons clarified butter, melted
– ½ teaspoon fine sea salt
– ¼ teaspoon freshly cracked black pepper
– ¼ teaspoon smoked paprika
Instructions
1. Preheat your oven to 425°F and line a baking sheet with parchment paper.
2. Steam the broccoli florets for exactly 4 minutes until bright green and tender-crisp, then immediately transfer to an ice bath to halt the cooking process—this preserves the vibrant color and prevents mushiness.
3. Thoroughly pat the cooled broccoli completely dry using paper towels, as any residual moisture will prevent proper crisping.
4. In a medium mixing bowl, combine the panko breadcrumbs, freshly grated Parmigiano-Reggiano, garlic paste, fine sea salt, black pepper, and smoked paprika.
5. Dip each broccoli floret into the lightly beaten eggs, allowing excess to drip off.
6. Roll the egg-coated florets in the breadcrumb mixture, pressing gently to ensure even adhesion.
7. Arrange the coated florets in a single layer on the prepared baking sheet, ensuring they don’t touch for optimal air circulation.
8. Drizzle the melted clarified butter evenly over the florets—this creates a richer flavor and superior browning compared to regular butter.
9. Bake at 425°F for 18-20 minutes until the coating is deep golden brown and crispy, rotating the pan halfway through for even cooking.
10. Remove from oven and let rest for 3 minutes before serving to allow the crust to set properly.
Absolutely irresistible when served warm, these bites offer a satisfying crunch that gives way to tender broccoli inside. The microplaned garlic distributes its flavor evenly throughout each bite, while the smoked paprika adds a subtle depth that complements the salty Parmigiano-Reggiano beautifully. I love serving these with a lemon aioli for dipping or crumbling them over salads for an unexpected crispy element.
Cauliflower Crust Mini Pizzas

When I first tried making cauliflower crust, I’ll admit I was skeptical—would it really satisfy that pizza craving? After perfecting this method through countless Friday night experiments, these mini pizzas have become my go-to for guilt-free indulgence that even my carb-loving friends request repeatedly.
5
portions25
minutes29
minutesIngredients
– 1 medium head cauliflower, riced (about 4 cups)
– 2 pasture-raised eggs, lightly beaten
– 1 cup finely grated Parmigiano-Reggiano cheese
– 1 teaspoon dried oregano
– ½ teaspoon garlic powder
– ¼ teaspoon fine sea salt
– ½ cup low-moisture whole milk mozzarella, shredded
– ⅓ cup organic tomato basil marinara sauce
– 8 fresh basil leaves, chiffonade-cut
Instructions
1. Preheat your oven to 425°F and line a baking sheet with parchment paper.
2. Process cauliflower florets in a food processor until they reach a rice-like consistency.
3. Steam the riced cauliflower in a microwave-safe bowl for 5 minutes, then transfer to a clean kitchen towel.
4. Twist the towel tightly to squeeze out all excess moisture—this crucial step prevents soggy crust.
5. Combine the drained cauliflower, beaten eggs, Parmigiano-Reggiano, oregano, garlic powder, and sea salt in a mixing bowl.
6. Divide the mixture into 4 equal portions and press each into ¼-inch thick circles on the prepared baking sheet.
7. Bake the crusts for 15 minutes until the edges turn golden brown and the surfaces feel firm to the touch.
8. Flip each crust carefully using a thin spatula and bake for another 8 minutes to crisp both sides evenly.
9. Spread 1½ tablespoons of marinara sauce over each crust, leaving a ½-inch border around the edges.
10. Sprinkle shredded mozzarella evenly over the sauced crusts.
11. Return the pizzas to the oven and bake for 6-8 minutes until the cheese is fully melted and bubbly.
12. Remove from oven and immediately garnish with fresh basil chiffonade. Seriously, that crispy-edged crust with the creamy mozzarella and bright basil creates such satisfying texture contrast—I love serving these as appetizers with a balsamic glaze drizzle for entertaining, or stacking them with different toppings for a personalized pizza party experience.
Conclusion
Whether you’re new to low-carb living or a seasoned pro, these 25 delicious Atkins diet recipes prove that eating well doesn’t mean sacrificing flavor. We hope you’ll whip up some of these dishes in your own kitchen! Don’t forget to share your favorite recipes in the comments below and pin this article to your Pinterest boards for easy reference. Happy cooking!


