You know those evenings when everyone needs something sweet but you’re completely tapped out from work, homework, and the endless cycle of household tasks? This simple apple tart is my go-to solution for those exact moments. Years of testing different approaches have led me to this streamlined version that delivers impressive results with minimal effort.
Why This Recipe Works
- Uses store-bought puff pastry instead of making dough from scratch, saving you at least 30 minutes of prep time and cleanup
- Requires only one baking sheet and minimal utensils, meaning you’re not facing a mountain of dishes afterward
- Simple ingredient list focuses on pantry staples you likely already have, eliminating last-minute grocery runs
- Flexible baking time window means you can’t really mess it up – perfect for distracted cooking while managing kids’ activities
- Works equally well for weeknight desserts or last-minute guests, making you look like a baking pro with zero stress
Ingredients
- 1 sheet frozen puff pastry, thawed according to package directions
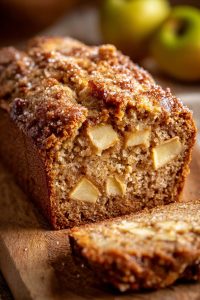
- 3 medium apples (any variety you have), peeled, cored, and thinly sliced
- 2 tablespoons granulated sugar
- 1 tablespoon brown sugar
- 1 teaspoon ground cinnamon
- 1/4 teaspoon ground nutmeg
- 1 tablespoon unsalted butter, cut into small pieces
- 1 tablespoon apricot jam or honey for glazing (optional)
- 1 teaspoon lemon juice to prevent apple browning
Equipment Needed
- Baking sheet
- Parchment paper
- Sharp knife
- Cutting board
- Small bowl for mixing spices
- Pastry brush (optional, for glazing)
Instructions
Prepare Your Baking Station
First things first – let’s set up for minimal mess. Line your baking sheet with parchment paper and place the thawed puff pastry sheet right in the center. No need to roll it out or fuss with it – the store-bought sheets come perfectly sized. While you’re at it, preheat your oven to 400°F. This temperature gives us that perfect balance between cooking the apples through and achieving a beautifully golden, flaky crust. Take your three apples, peel them if you prefer (though leaving the skin on works fine too for extra fiber), core them, and slice them about 1/4-inch thick. Toss the slices with a teaspoon of lemon juice as you go to prevent browning – this step takes maybe two minutes but makes a huge difference in presentation. Pro tip: If your kids are around and able to help safely, this is a great step to delegate while you handle the next preparation.
Season and Arrange the Apples
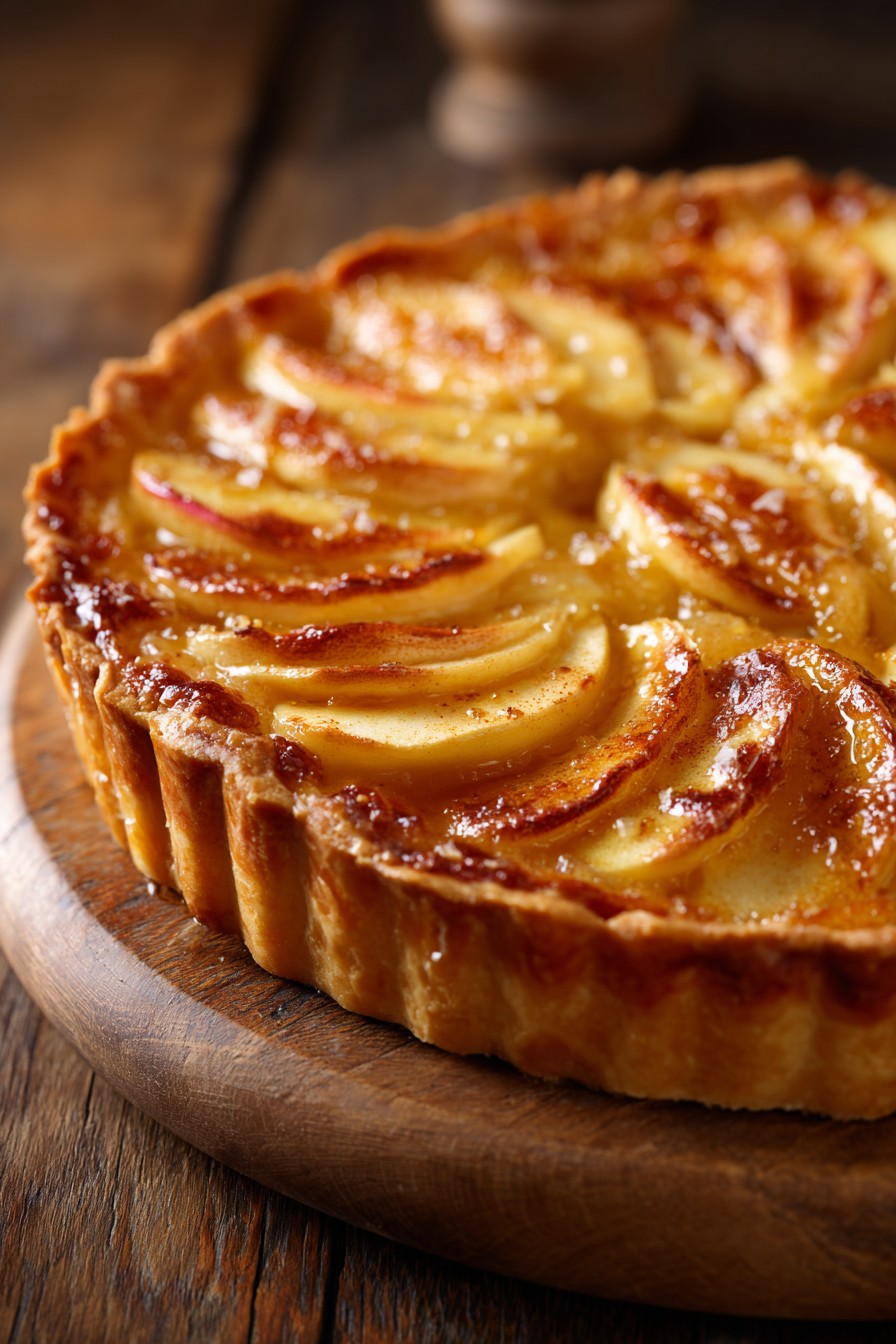
In a small bowl, combine your two tablespoons of granulated sugar, one tablespoon of brown sugar, one teaspoon of cinnamon, and 1/4 teaspoon of nutmeg. Mix these dry ingredients thoroughly with a fork or small whisk until they’re completely blended and you have a uniform spice mixture. Now take your apple slices and sprinkle this mixture over them, tossing gently to coat every slice. You don’t need to be perfect here – just make sure most slices get some of that sweet spiciness. Arrange the apple slices in slightly overlapping rows on top of the puff pastry, leaving about a 1-inch border around all edges. This border will puff up beautifully in the oven and create a natural crust edge. Don’t worry about making it look magazine-perfect – rustic is actually more charming and definitely more realistic for busy family cooking.
Add the Finishing Touches Before Baking
Take your tablespoon of butter and cut it into small pieces – about the size of peas works perfectly. Scatter these butter pieces evenly over the arranged apples. The butter will melt during baking and help caramelize the sugars while adding rich flavor. If you’re feeling fancy, you can fold that 1-inch border of puff pastry up over the edges of the apples, but honestly? I usually just leave it flat – it still tastes amazing and saves another step. Another time-saving trick: If you have cookie cutters, let your kids press them into the border area to create fun shapes before baking – it makes the tart more engaging for little ones. Now your tart is ready for the oven, and you’ve only used one bowl, one knife, and one cutting board so far.
Bake to Golden Perfection
Place your prepared tart in the preheated 400°F oven on the middle rack. Set your timer for 20 minutes initially. After 20 minutes, check the tart – the edges should be starting to puff and turn light golden brown. Rotate the baking sheet 180 degrees to ensure even baking (ovens often have hot spots). Continue baking for another 10-15 minutes, watching closely during the final minutes. You’re looking for deeply golden puff pastry edges and apples that are tender when pierced with a fork – they should have some give but not be mushy. Total baking time typically ranges from 30-35 minutes, but ovens vary, so trust the visual cues more than the clock. The apples will have released some juices that mingle with the butter and sugars to create a lovely caramel-like sauce.
Finish and Serve Warm
Once your tart is out of the oven, let it cool on the baking sheet for about 10 minutes – this allows the juices to thicken slightly and makes slicing cleaner. If you’re using the optional glaze, warm your tablespoon of apricot jam or honey in the microwave for 15-20 seconds until it’s thin enough to brush, then gently brush it over the apple surfaces. This adds shine and extra sweetness, but skip it if you’re really pressed for time – the tart is delicious without it. Use a sharp pizza cutter or knife to slice into portions directly on the baking sheet – no need for another serving platter. Serve warm as is, or with a scoop of vanilla ice cream if you want to make it extra special. Cleanup is literally just tossing the parchment paper and washing a few items.
Tips and Tricks
If you want to prep this even faster, many grocery stores now sell pre-sliced apples in the produce section – they’re more expensive per pound, but when you’re weighing time versus money on a busy weeknight, sometimes the convenience is worth it. You can also mix apple varieties for more complex flavor – try combining tart Granny Smith with sweeter Fuji or Honeycrisp apples. The different textures and sweetness levels create a more interesting eating experience. For families with varying sweetness preferences, you can reduce the sugar to just one tablespoon total and let people add their own sweet toppings at the table. If you have picky eaters who don’t like “spicy” flavors, you can omit the cinnamon and nutmeg entirely – the butter and natural apple sweetness still make a delicious dessert.
Storage is straightforward – cover any leftovers loosely with foil and leave at room temperature for up to two days. The pastry will lose some crispness but still tastes great. You can also refrigerate it for up to four days, though I find the texture is best when served the same day. To reheat, place individual slices in a 350°F oven for 5-7 minutes to restore some crispness to the crust. If you want to get ahead, you can prep the apple slices and spice mixture up to a day in advance – store the apples in an airtight container with the lemon juice and keep the spice mix separate until you’re ready to assemble and bake.
For even easier cleanup, look for parchment paper sheets that are pre-cut to fit standard baking sheets – they’re slightly more expensive but eliminate the wrestling with roll parchment that never wants to lie flat. If you don’t have parchment paper, you can bake directly on the baking sheet, but expect slightly more sticking and definitely more cleanup afterward. When slicing the apples, don’t worry about perfect uniformity – varying thicknesses actually create nice textural contrast in the finished tart. Thinner slices will become softer while slightly thicker ones retain more bite.
Recipe Variations
- Savory twist: Skip the sugars and spices, and instead top with sliced apples, caramelized onions, and crumbled goat cheese for an impressive appetizer that transitions beautifully from casual to company-worthy
- Pear alternative: Substitute ripe but firm pears for the apples, using the same spice mixture or experimenting with cardamom instead of nutmeg for a more sophisticated flavor profile that still comes together just as quickly
- Berry burst: During summer months when berries are abundant and inexpensive, replace the apples with two cups of mixed berries (blueberries, raspberries, blackberries) and reduce sugar to one tablespoon since berries are naturally sweeter
- Nutty crunch: Before baking, sprinkle 1/4 cup of chopped walnuts or pecans over the arranged apples for added texture and protein – this makes the tart feel more substantial as a dessert
- Dairy-free option: Replace the butter with coconut oil or vegan butter spread, and use maple syrup instead of honey for the glaze to accommodate dietary restrictions without compromising flavor
Frequently Asked Questions
Can I make this apple tart ahead of time?
Absolutely, and this is one of my favorite make-ahead strategies for busy weeks. You can assemble the entire tart up to the point of baking, then cover it tightly with plastic wrap and refrigerate for up to 24 hours. When you’re ready to bake, simply remove it from the refrigerator while preheating your oven, then bake as directed, adding maybe 2-3 extra minutes to account for starting with a cold tart. The pastry might not puff quite as dramatically, but the flavor and texture are still excellent. This approach works perfectly for having dessert ready to pop in the oven while you’re eating dinner.
What’s the best apple variety to use for this recipe?
Honestly, use whatever apples you have on hand or whatever is on sale – this recipe is very forgiving. That said, firmer apples like Granny Smith, Honeycrisp, or Braeburn hold their shape better during baking and provide nice texture contrast with the soft pastry. Softer varieties like Red Delicious will become quite soft, which some people prefer. I often use a mix of whatever is in my fruit bowl – maybe one Granny Smith for tartness and two sweeter apples to balance it out. The key is slicing them uniformly about 1/4-inch thick so they cook evenly regardless of variety.
My puff pastry didn’t puff much – what went wrong?
This is common and usually has simple fixes. First, ensure your pastry was properly thawed – it should be cold but pliable, not frozen and not room temperature. If it got too warm, the butter layers melt before baking and won’t create steam to lift the layers. Also, check your oven temperature with an oven thermometer – many home ovens run cooler than indicated. If the temperature is too low, the butter melts slowly instead of creating that explosive puff. Finally, don’t overload with toppings – too many apples or too much moisture can weigh down the pastry. But even if it doesn’t puff dramatically, it will still taste delicious!
Can I freeze the baked tart for later?
Yes, though the texture will change slightly. Cool the baked tart completely, then wrap tightly in plastic wrap followed by aluminum foil. Freeze for up to 3 months. To serve, reheat from frozen in a 350°F oven for 15-20 minutes until warmed through. The pastry won’t be quite as flaky as fresh, but it’s still very good – perfect for those nights when you need dessert but have zero time to bake. I sometimes make two at once and freeze one for unexpected guests or particularly chaotic weeks when even this simple recipe feels like too much effort.
Summary
This streamlined apple tart delivers impressive flavor with minimal effort, using store-bought pastry and simple ingredients. Perfect for busy families needing quick dessert solutions that feel special without creating kitchen chaos or lengthy cleanup sessions.