Every single bite of these apple pie bars will transport you straight to dessert heaven, where flaky crusts meet perfectly spiced apple filling in the most irresistible handheld form imaginable. Embrace the revolutionary baking experience that combines all the cozy comfort of classic apple pie with the incredible convenience of grab-and-go perfection that will have your family begging for more.
Why This Recipe Works
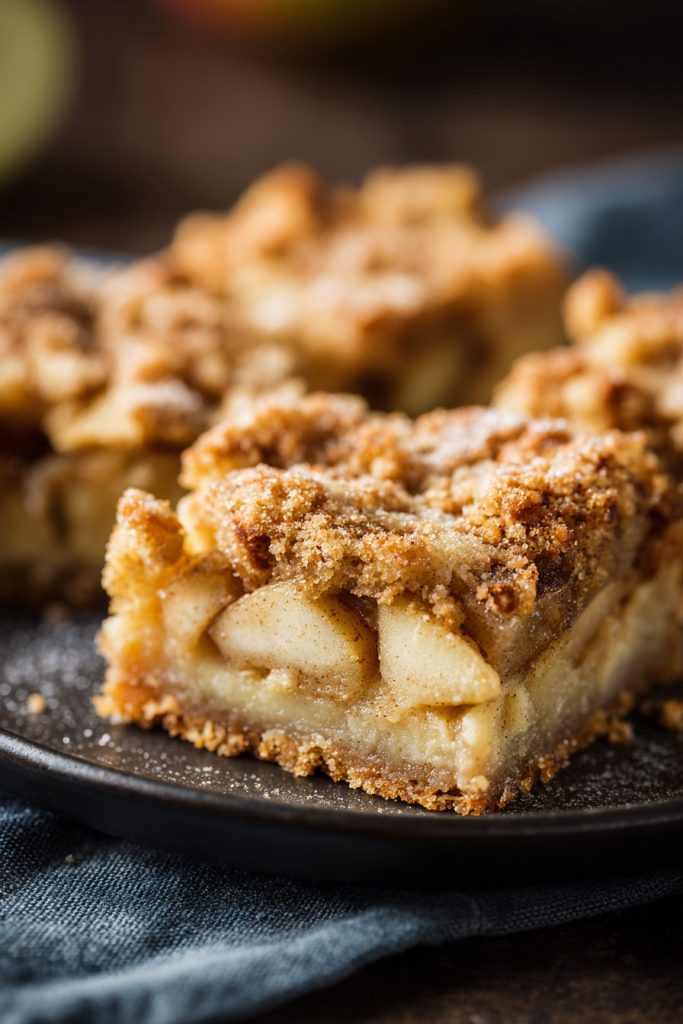
This recipe delivers absolute baking perfection through three game-changing elements that will transform your dessert game forever. The buttery shortbread crust creates an unforgettably tender foundation that melts in your mouth while providing the perfect structural integrity to hold those glorious apple layers. Our secret spice blend featuring cinnamon, nutmeg, and a hint of cardamom elevates the apple filling to celestial levels of flavor complexity that will make your taste buds sing with joy. The crumb topping adds that essential textural contrast with its irresistible crunch that perfectly complements the soft, tender apples beneath. Finally, the brilliant bar format means you get all the nostalgic comfort of apple pie without the messy slicing drama, making these the ultimate portable dessert for parties, picnics, or just satisfying those midnight cravings in spectacular fashion.
Ingredients
For the Crust and Topping:
– 3 cups all-purpose flour
– 1 cup granulated sugar
– 1 teaspoon baking powder
– 1/4 teaspoon salt
– 1 cup cold unsalted butter, cubed
– 1 large egg, beaten
– 1 teaspoon vanilla extract
For the Apple Filling:
– 8 medium Granny Smith apples, peeled and thinly sliced
– 1/2 cup brown sugar, packed
– 1/4 cup granulated sugar
– 3 tablespoons all-purpose flour
– 2 teaspoons ground cinnamon
– 1/4 teaspoon ground nutmeg
– 1/8 teaspoon ground cardamom
– 1 tablespoon lemon juice
– 2 tablespoons cold butter, cubed
Equipment Needed
– 9×13 inch baking pan
– Parchment paper
– Large mixing bowls
– Measuring cups and spoons
– Pastry cutter or food processor
– Apple peeler and corer
– Sharp knife
– Rolling pin
– Cooling rack
Instructions

Prepare the Game-Changing Shortbread Base
Transform your baking experience by starting with the most incredible shortbread crust that will literally melt in your mouth. Combine 3 cups of all-purpose flour, 1 cup of granulated sugar, 1 teaspoon of baking powder, and 1/4 teaspoon of salt in a large mixing bowl, whisking vigorously until every single ingredient is perfectly incorporated and the mixture appears light and airy. Now for the magical part – cut in 1 cup of cold, cubed unsalted butter using a pastry cutter or your fingertips, working quickly to create coarse crumbs that resemble beautiful pebbles on a beach. The temperature of your butter is absolutely crucial here – it must be refrigerator-cold to achieve that perfect flaky texture that will make these bars legendary. Mix in 1 beaten large egg and 1 teaspoon of pure vanilla extract until the dough just comes together in the most glorious buttery mass. Reserve exactly one-third of this heavenly mixture for the crumb topping that will later become the crowning glory of your creation.
Create the Perfect Crust Foundation
Prepare your 9×13 inch baking pan by lining it with parchment paper, leaving some overhang on the sides to create those magical handles that will make removal an absolute breeze. Take the remaining two-thirds of your shortbread dough and press it firmly and evenly into the bottom of the prepared pan, using the flat bottom of a measuring cup to create a perfectly smooth surface that will bake into golden perfection. The pressure you apply here is absolutely critical – press firmly enough to compact the crust but not so hard that it becomes dense and tough. You’re looking for that beautiful uniform thickness that will provide the ideal foundation for your spectacular apple filling. This step sets the stage for baking success, creating that essential barrier that prevents sogginess while delivering that satisfying crunch with every single bite. Pro tip: Chill the pressed crust in the refrigerator for 15 minutes before adding the filling to ensure maximum flakiness.
Prepare the Mind-Blowing Apple Filling
Witness the transformation of simple apples into the most spectacular filling you’ve ever experienced. Peel and thinly slice 8 medium Granny Smith apples, creating uniform pieces that will cook evenly and create that perfect tender-yet-firm texture that defines exceptional apple desserts. In a separate large bowl, combine 1/2 cup packed brown sugar, 1/4 cup granulated sugar, 3 tablespoons all-purpose flour, 2 teaspoons ground cinnamon, 1/4 teaspoon ground nutmeg, and 1/8 teaspoon ground cardamom, whisking until every spice particle is perfectly distributed through the sugar mixture. The combination of brown and white sugars creates incredible depth of flavor while the flour acts as your secret thickening agent that prevents runny filling disasters. Toss the apple slices with 1 tablespoon of fresh lemon juice to prevent browning, then add the spectacular spice mixture, coating every single apple slice until they glisten with sugary, spicy perfection. The aroma alone will have your kitchen smelling like autumn heaven.
Assemble Your Masterpiece
This is where the magic truly happens as you build the layers that will become your legendary apple pie bars. Arrange the beautifully coated apple slices evenly over the chilled shortbread crust, creating multiple layers that will bake into tender, spiced perfection. The way you layer matters – slightly overlapping the slices creates that classic apple pie appearance while ensuring every bite contains maximum apple goodness. Dot the top of the apple layer with 2 tablespoons of cold, cubed butter that will melt during baking, creating pockets of rich, buttery flavor that will elevate your filling to celestial levels. Now take that reserved shortbread mixture and crumble it evenly over the apple layer, creating those irresistible nuggets that will bake into golden, crunchy perfection. The crumb distribution is key – you want some larger chunks for textural variety and finer crumbs to fill in the gaps, creating that beautiful mosaic effect that bakes into pure deliciousness.
Bake to Golden Perfection
Preheat your oven to 350°F and position the rack in the center for ideal heat distribution that ensures even baking from edge to edge. Place your assembled masterpiece in the oven and bake for 45-55 minutes, watching for the magical transformation as the crust turns golden brown and the filling bubbles with fragrant intensity. The visual cues are everything here – look for that deep golden color on the crumb topping and visible bubbling around the edges that signals the apples have released their juices and the filling has thickened to perfection. The aroma filling your kitchen will be absolutely intoxicating, with cinnamon and butter notes that will have everyone gathered around the oven in anticipation. For the perfect texture, the center should feel set when gently pressed and a toothpick inserted into the apple layer should meet slight resistance but not raw crunch. Pro tip: Rotate the pan halfway through baking to ensure even browning.
The Crucial Cooling Process
Resist every temptation to cut into these bars immediately – the cooling process is absolutely essential for achieving the perfect texture and clean slices that will make your creation look professionally made. Remove the pan from the oven and place it on a wire cooling rack, allowing the bars to cool completely in the pan for at least 2 hours, or better yet, overnight. This patience pays off in spectacular fashion as the filling continues to thicken and set, creating that perfect sliceable consistency that holds together beautifully when served. The cooling allows the flavors to meld and intensify, transforming good apple bars into absolutely extraordinary ones that will have people talking for weeks. Once completely cooled, use the parchment paper handles to lift the entire slab out of the pan onto a cutting board for the cleanest, most professional-looking slices imaginable.
Slice and Serve with Flair
Using a sharp knife, cut your cooled apple pie bars into 12-16 perfect rectangles, wiping the blade clean between cuts to ensure those pristine edges that photograph like a dream. The serving possibilities are endless – enjoy them warm with a scoop of vanilla ice cream that creates that magical hot-cold contrast, or at room temperature for that perfect portable treat. For an extra touch of elegance, dust the tops with powdered sugar just before serving, creating that beautiful snowy effect that makes every bar look like it came from a fancy bakery. Store any leftovers in an airtight container at room temperature for up to 3 days, though we both know there won’t be any leftovers once your friends and family get a taste of these incredible creations. Each perfect bar represents the culmination of your baking mastery, delivering all the comfort of apple pie in the most convenient, shareable form imaginable.
Tips and Tricks
Elevate your apple pie bars from amazing to absolutely extraordinary with these professional secrets that will transform your baking game forever. When selecting apples, don’t be afraid to mix varieties – combining tart Granny Smith with sweeter Honeycrisp or Fuji apples creates incredible depth of flavor and varied textures that will make your bars stand out from all others. For the ultimate flaky crust, freeze your butter for 15 minutes before cutting it into the flour mixture, and handle the dough as little as possible to prevent gluten development that can make the crust tough. If your kitchen tends to be warm, chill your mixing bowl and tools before starting to keep everything at the ideal temperature for perfect shortbread texture. For those who love extra crunch in their crumb topping, add 1/4 cup of chopped pecans or walnuts to the reserved dough mixture, toasting the nuts first for maximum flavor impact. If you’re making these for a crowd and need to work ahead, you can prepare the apple filling up to 24 hours in advance and store it covered in the refrigerator – the extra time actually allows the flavors to meld more beautifully. For picture-perfect slices every single time, chill the completely cooled bars in the refrigerator for 30 minutes before cutting, using a sharp knife dipped in hot water and wiped dry between each cut. If your apples seem particularly juicy, increase the flour in the filling by 1 tablespoon to ensure proper thickening without compromising that beautiful apple flavor. For an extra flavor boost, add 1 teaspoon of orange zest to the apple filling – the citrus notes complement the spices beautifully and add another layer of complexity that will have people wondering about your secret ingredient. When measuring flour, always use the spoon-and-level method rather than scooping directly from the container to prevent dense, heavy crusts that can ruin the delicate texture you’re aiming for. If you find your crumb topping is browning too quickly during baking, simply tent the pan with aluminum foil for the remaining baking time to protect that beautiful golden color while allowing the filling to cook through completely.
Recipe Variations
Transform these already incredible apple pie bars into completely new dessert experiences with these spectacular variations that will keep your baking repertoire fresh and exciting. For the ultimate autumn indulgence, create caramel apple pie bars by swirling 1/2 cup of homemade or high-quality store-bought caramel sauce into the apple filling before adding the crumb topping, creating gooey pockets of caramel that will make every bite pure bliss. Chocolate lovers will adore the decadent apple-cranberry version featuring 1 cup of fresh or frozen cranberries added to the apple mixture and 1/2 cup of white chocolate chips sprinkled over the filling before adding the crumb topping, creating beautiful tart-sweet contrasts that are absolutely unforgettable. For a sophisticated twist perfect for holiday gatherings, incorporate 1/2 cup of finely chopped crystallized ginger into the crumb topping and add 1/4 teaspoon of freshly grated ginger to the apple filling, creating spicy warmth that complements the cinnamon beautifully. Health-conscious bakers can create a whole wheat version by substituting half the all-purpose flour with whole wheat pastry flour and reducing the sugar in both the crust and filling by 1/4 cup, creating bars that feel slightly indulgent while being better for you. For the ultimate showstopper, prepare a simple cream cheese glaze by beating 4 ounces of softened cream cheese with 1 cup of powdered sugar, 2 tablespoons of milk, and 1 teaspoon of vanilla extract, then drizzle this heavenly topping over the cooled bars for added richness that will have everyone reaching for seconds.
Frequently Asked Questions
Can I use different types of apples for this recipe?
Absolutely, and experimenting with apple varieties can create spectacular flavor variations that will make your bars truly unique. While Granny Smith apples provide that perfect tartness and firm texture that holds up beautifully during baking, combining them with sweeter varieties like Honeycrisp, Fuji, or Braeburn creates incredible complexity that will elevate your bars to new heights. The key is using apples that maintain their structure during baking rather than turning completely mushy – avoid Red Delicious and McIntosh apples for this purpose as they break down too much. For the ultimate balanced flavor profile, I recommend using 50% tart apples and 50% sweet apples, which creates that perfect sweet-tart dynamic that makes every bite absolutely irresistible. The variety of textures from different apples also adds wonderful complexity that will have your taste buds dancing with joy from the first glorious bite to the last.
How should I store these apple pie bars and how long do they last?
Proper storage is crucial for maintaining that perfect texture and flavor that makes these bars so extraordinary. Once completely cooled, store your apple pie bars in an airtight container at room temperature for up to 3 days, placing parchment paper between layers if stacking to preserve that beautiful crumb topping. For longer storage, these bars freeze magnificently – wrap individual bars tightly in plastic wrap and then place them in a freezer-safe container or bag where they’ll maintain their quality for up to 3 months. When ready to enjoy frozen bars, simply thaw them at room temperature for 2-3 hours or warm them gently in a 300°F oven for 10-15 minutes to restore that fresh-baked texture and aroma. Avoid refrigerating the bars as this can cause the crust to become soggy and compromise that perfect flaky texture you worked so hard to achieve.
Can I make these bars gluten-free or vegan?
You can absolutely adapt this recipe to accommodate dietary restrictions while still maintaining that incredible flavor and texture that makes these bars so special. For gluten-free version, substitute the all-purpose flour with your favorite 1:1 gluten-free flour blend and add 1/2 teaspoon of xanthan gum to ensure proper binding and texture in both the crust and crumb topping. For vegan adaptation, replace the butter with high-quality vegan butter sticks and use a flax egg (1 tablespoon ground flaxseed mixed with 3 tablespoons water) instead of the regular egg. The baking time may need slight adjustment with these substitutions, so watch for the same visual cues – golden brown crust and bubbling filling – to determine doneness. Both variations will deliver delicious results that everyone can enjoy, proving that dietary restrictions don’t mean sacrificing flavor or that perfect apple pie bar experience.
Summary
These spectacular apple pie bars combine flaky shortbread crust, perfectly spiced apple filling, and irresistible crumb topping in the most convenient handheld form. They deliver all the nostalgic comfort of traditional apple pie with none of the slicing drama, creating the ultimate shareable dessert that will become your new baking obsession. Perfect for parties, gifts, or satisfying those autumn cravings in the most delicious way imaginable.
Apple Pie Bars
4
servings30
minutes50
minutesIngredients
Instructions
- 1 Preheat oven to 350°F and line 9x13 inch pan with parchment paper
- 2 Combine flour, sugar, baking powder, and salt for crust
- 3 Cut in cold butter until coarse crumbs form
- 4 Mix in egg and vanilla, reserve 1/3 for topping
- 5 Press remaining dough into prepared pan
- 6 Combine apples with sugars, flour, spices, and lemon juice
- 7 Arrange apple mixture over crust
- 8 Dot with cold butter cubes
- 9 Crumble reserved dough over apples
- 10 Bake 45-55 minutes until golden and bubbling
- 11 Cool completely before slicing