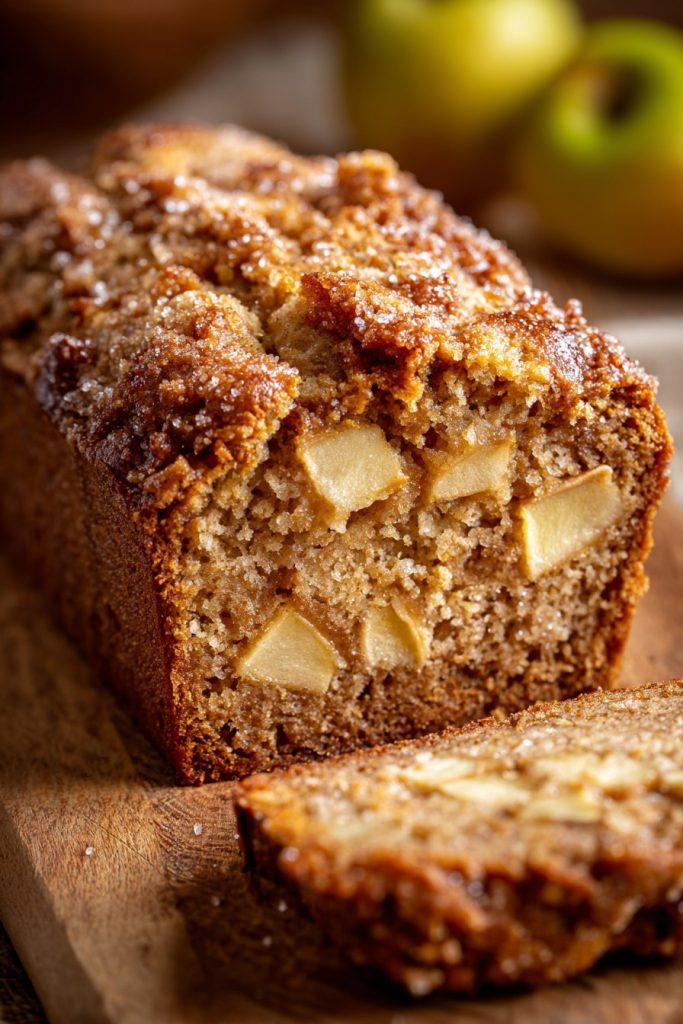
Dawn breaks with a gentle chill in the air, and in this quiet moment, I find myself drawn to the kitchen, where the scent of cinnamon and ripe fruit promises comfort. This apple banana bread is more than mere sustenance—it’s a tender embrace in loaf form, perfect for sharing with someone special as leaves dance outside your window.
Why This Recipe Works
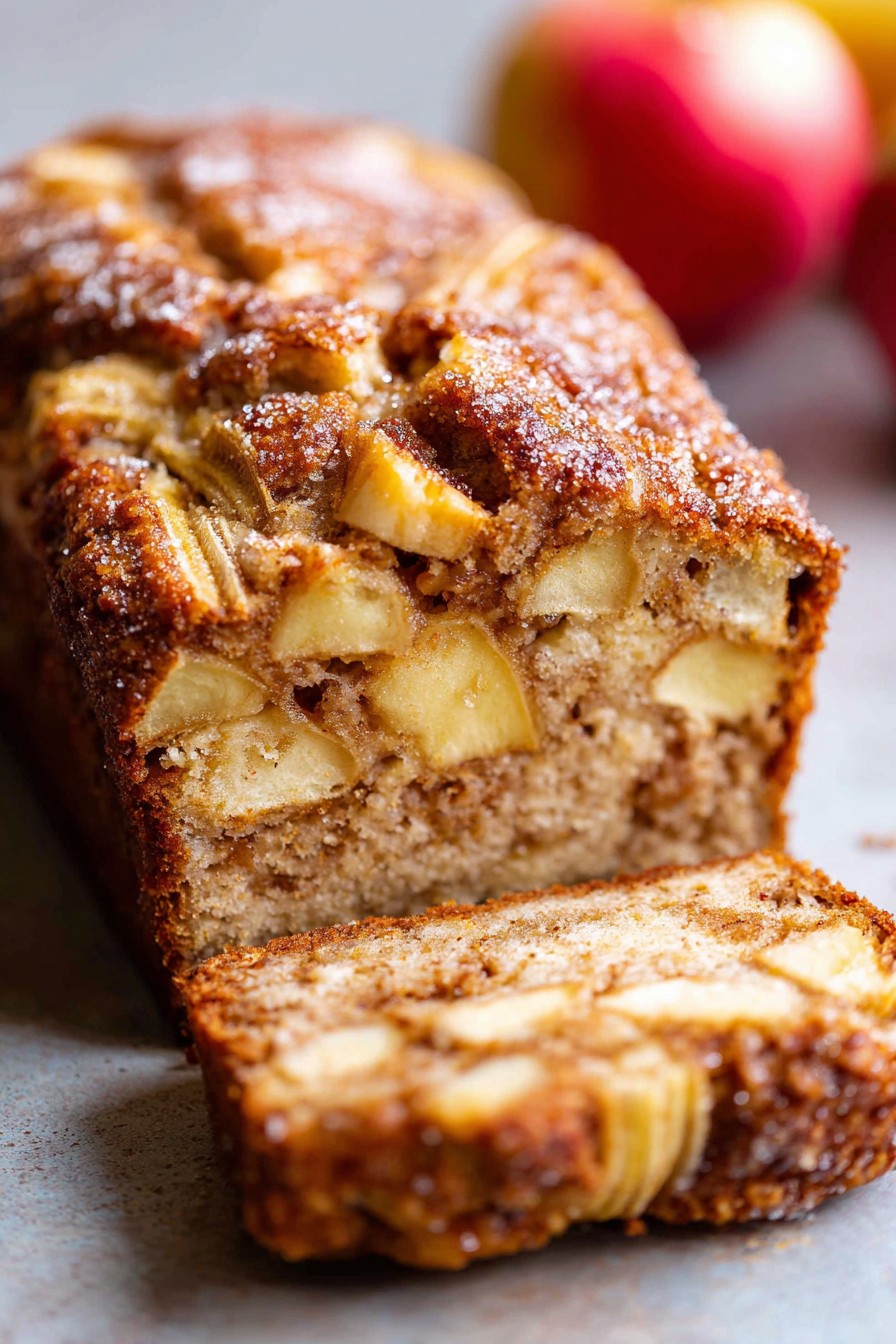
- The marriage of sweet bananas and tart apples creates a symphony of flavors that dance across your palate, each bite revealing new layers of comfort and complexity that make this bread unforgettable.
- Moisture from both fruits ensures every slice remains tender and rich, eliminating any risk of dryness while creating a texture that melts like autumn mist upon your tongue.
- Warm spices weave through the batter like whispered secrets, enhancing the natural sweetness without overpowering the delicate fruit notes that make this bread so special.
- The crisp sugar topping provides a delightful contrast to the soft crumb, creating textural harmony that keeps you coming back for just one more slice.
- Simple preparation means more time spent savoring the process rather than laboring over complicated techniques, allowing the romance of baking to fully envelop your kitchen.
Ingredients
- 3 very ripe medium bananas, mashed until smooth with only small lumps remaining
- 1 cup peeled and finely diced Granny Smith apples (about 1 large apple)
- 2 large eggs at room temperature, beaten until pale and frothy
- 1/2 cup unsalted butter, melted and cooled slightly but still warm to touch
- 3/4 cup light brown sugar, packed firmly into measuring cup
- 1 teaspoon pure vanilla extract, the good kind that smells like heaven
- 2 cups all-purpose flour, spooned and leveled carefully
- 1 teaspoon baking soda, fresh and bubbly when tested
- 1/2 teaspoon fine sea salt, the kind that dissolves like snowflakes
- 1 teaspoon ground cinnamon, freshly ground if possible
- 1/4 teaspoon freshly grated nutmeg, just enough to whisper through
- 1/4 cup granulated sugar for the sparkling crust
Equipment Needed
- 9×5 inch loaf pan
- Mixing bowls (one large, one medium)
- Whisk and rubber spatula
- Measuring cups and spoons
- Cooling rack
- Toothpick for testing doneness
Instructions
Prepare Your Fruits and Wet Ingredients
Begin by gently peeling your bananas and placing them in your large mixing bowl, then use a fork or potato masher to crush them until they resemble a thick, lumpy puree with some texture remaining. In a separate small bowl, combine your finely diced apples—I prefer Granny Smith for their tart contrast—with one tablespoon of the measured flour, tossing until each piece glistens with a delicate coating that will prevent sinking. Now, pour your melted butter over the bananas, watching as the golden liquid swirls into the pale fruit, then add the brown sugar, stirring until the mixture becomes a caramel-hued dream. Crack your room-temperature eggs into this mixture one at a time, whisking gently after each addition until the batter takes on a silken quality, then drizzle in the vanilla extract, its aroma rising to meet you like an old friend’s embrace. The secret here is to ensure all wet ingredients are fully incorporated but not overmixed, creating a base that promises tenderness in every future bite.
Combine Dry Ingredients with Care
Prepare the Pan and Bake to Perfection
Preheat your oven to 350°F—not a degree more or less—as this moderate temperature allows the bread to rise gently without forming a hard crust too quickly. While the oven warms, prepare your loaf pan by greasing it thoroughly with butter or baking spray, then line the bottom with parchment paper for easy removal later. Pour your completed batter into the prepared pan, using your spatula to spread it evenly into all corners, then sprinkle the entire surface with that quarter-cup of granulated sugar, creating a sparkling crust that will crackle delightfully. Place the pan in the center rack of your preheated oven and set your timer for 55 minutes—this is when you’ll perform the first doneness test, though total baking time typically reaches 65-70 minutes. The bread is ready when a toothpick inserted into the center comes out clean or with just a few moist crumbs clinging to it, and the top springs back gently when pressed.
Cool with Patience and Grace
When your bread has reached perfection, remove it from the oven and place the entire pan on a cooling rack, allowing it to rest for exactly 15 minutes—this waiting period allows the structure to set properly without continuing to cook from residual heat. After this brief interlude, carefully run a butter knife around the edges of the pan to loosen any stuck portions, then invert the pan over the cooling rack, gently tapping if necessary until the bread releases its golden form. Now, carefully flip the bread right-side-up and allow it to cool completely on the rack—this typically takes 2-3 hours, during which time the flavors continue to develop and meld together beautifully. Resist the temptation to slice while warm, as the crumb needs this time to set properly, though I understand completely if you cannot wait and must sample a warm slice despite my advice.
Slice and Serve with Love
Once fully cooled—and I do mean fully, when the bottom feels room temperature to the touch—use a serrated bread knife to slice your masterpiece into thick, generous portions that showcase the beautiful distribution of apples throughout. The ideal slice should be about one inch thick, revealing the tender crumb and speckles of fruit that tell the story of your careful preparation. Serve on your favorite plates, perhaps with a pat of softened butter melting into the warm surface, or simply enjoy as is with a cup of tea or coffee as you watch the world outside your window. Store any remaining bread wrapped tightly in plastic wrap at room temperature for up to three days, though I suspect it will disappear long before then, each slice carrying with it the memory of this beautiful baking experience.
Tips and Tricks
For bananas at the perfect stage of ripeness, look for ones that are heavily speckled with brown spots and feel soft to the touch—if yours aren’t quite there yet, you can speed the process by placing them on a baking sheet in a 300°F oven for 15-20 minutes until the skins blacken. When measuring flour, always use the spoon-and-level method rather than scooping directly from the bag, as the latter can pack in up to 25% more flour and result in a dense, dry bread that lacks the tender crumb we’re seeking. If you find yourself without brown sugar, you can create a substitute by combining one cup of white sugar with one tablespoon of molasses, stirring vigorously until fully incorporated—the molasses not only provides the color but also that deep, caramel-like flavor that complements the fruits so beautifully. For an extra flavor dimension, consider toasting your nuts before adding them to the batter—spread them in a single layer on a baking sheet and toast at 350°F for 8-10 minutes until fragrant, then chop and fold in during the final mixing stage. If your bread begins browning too quickly during baking, tent it loosely with aluminum foil during the final 15-20 minutes of baking to prevent over-browning while allowing the interior to continue cooking properly. For the most beautiful slices, use a serrated knife and employ a gentle sawing motion rather than pressing down, which can compress the tender crumb—some bakers even recommend chilling the bread briefly before slicing for cleaner cuts, though this sacrifices that wonderful fresh-baked texture. When testing for doneness, remember that a toothpick inserted into the center should come out with a few moist crumbs clinging to it rather than completely clean, as the bread will continue to cook slightly during the cooling process. If you plan to freeze your bread for future enjoyment, allow it to cool completely first, then wrap tightly in plastic wrap followed by aluminum foil before placing in freezer bags—it will keep beautifully for up to three months, ready to bring comfort whenever the mood strikes.
Recipe Variations
- For a decadent twist, fold in one cup of semi-sweet chocolate chips during the final mixing stage—the melted chocolate creates beautiful ribbons throughout each slice and complements the banana flavor exquisitely. You could also use white chocolate chips for a sweeter variation, or dark chocolate for a more sophisticated bitterness that plays wonderfully against the sweet fruits.
- Add one cup of chopped walnuts or pecans to introduce a delightful crunch and nutty depth to each bite—toasting the nuts first enhances their flavor dramatically. For those with nut allergies, sunflower seeds or pumpkin seeds make excellent substitutes that provide similar textural contrast without compromising safety or flavor.
- Incorporate one teaspoon of orange or lemon zest into the wet ingredients to brighten the flavor profile and cut through the richness—citrus and apple are particularly beautiful companions. The zest adds a fragrant quality that makes each bite feel more complex and sophisticated, perfect for serving to guests or on special occasions.
- Replace one cup of the all-purpose flour with whole wheat flour for a heartier, nuttier version with additional fiber—the denser texture pairs wonderfully with a strong cup of coffee on crisp mornings. You could also experiment with using half all-purpose and half spelt flour for an ancient grain variation that adds depth and nutritional benefits.
- Create a streusel topping by combining 1/4 cup flour, 1/4 cup brown sugar, two tablespoons cold butter, and 1/2 teaspoon cinnamon until crumbly, then sprinkling over the batter before baking for a bakery-style finish. For an extra special touch, add 1/4 cup rolled oats to the streusel mixture to create additional texture and visual appeal that will make your bread look professionally crafted.
Frequently Asked Questions
Can I use frozen bananas for this recipe?
Absolutely, frozen bananas work wonderfully in this recipe—simply thaw them completely at room temperature or in the refrigerator overnight before using. The freezing process actually breaks down the banana’s cellular structure, resulting in an even softer, sweeter puree that contributes to the bread’s moist texture. When thawing, place the bananas in a bowl as they will release quite a bit of liquid—this liquid is packed with banana flavor, so be sure to include it when mashing. The only consideration is that frozen bananas may make your batter slightly more liquid, which could add 5-10 minutes to your baking time, so be sure to test thoroughly for doneness before removing from the oven.
What’s the best way to store apple banana bread?
Once completely cooled, wrap your bread tightly in plastic wrap or aluminum foil and store at room temperature for up to three days—the fruits will keep it moist without refrigeration. If you prefer to refrigerate, it will keep for up to one week, though the cold can slightly alter the texture, making it denser. For longer storage, slice the bread and freeze individual portions wrapped in plastic then placed in freezer bags for up to three months—this allows you to enjoy a fresh-tasting slice whenever the craving strikes. When ready to enjoy frozen slices, simply thaw at room temperature or warm gently in a 300°F oven for 10-15 minutes to restore that fresh-baked quality.
Can I make this recipe gluten-free or vegan?
For a gluten-free version, substitute the all-purpose flour with your favorite 1:1 gluten-free flour blend—I’ve had excellent results with blends containing xanthan gum already included. Be sure to let the batter rest for 10-15 minutes before baking to allow the flours to hydrate properly, which prevents grittiness in the final product. For a vegan adaptation, replace the eggs with flax eggs (1 tablespoon ground flaxseed mixed with 3 tablespoons water per egg) and use vegan butter or coconut oil instead of dairy butter. The baking time may need slight adjustment with these substitutions, so begin checking for doneness about 10 minutes earlier than the recipe suggests and watch for visual cues of completion.
Why did my bread sink in the middle?
A sunken center typically indicates one of three issues: underbaking, overmixing, or expired leavening agents. If removed from the oven too early, the structure hasn’t set sufficiently to support itself as it cools, causing collapse. Overmixing develops too much gluten, creating tunnels that rise then collapse when the structure can’t support them. Old baking soda loses its potency and cannot provide adequate lift—test yours by adding a teaspoon to vinegar; it should bubble vigorously. To prevent this, always test for doneness with a toothpick, mix only until ingredients are just combined, and ensure your leavening agents are fresh for reliable results every time.
Can I make this recipe as muffins instead?
Absolutely—this batter adapts beautifully to muffin form, yielding approximately 12 standard muffins when portioned using a 1/3 cup measure. Reduce the baking temperature to 375°F and begin checking for doneness at 18-20 minutes, though they may need up to 25 minutes total depending on your oven. The higher temperature helps create that beautiful domed top we all love in bakery-style muffins, while the reduced baking time prevents drying out the smaller portions. For an extra special touch, fill the muffin cups only 2/3 full and sprinkle with turbinado sugar before baking for a sparkling, crackly top that makes them irresistible straight from the oven.
Summary
This apple banana bread combines seasonal fruits with warm spices in a tender, moist loaf that fills your kitchen with comforting aromas and your heart with contentment. Perfect for cozy mornings or intimate evenings, it’s a simple pleasure that feels like home.
Apple Banana Bread
5
servings20
minutes65
minutesIngredients
Instructions
- 1 Preheat oven to 350°F and prepare a 9x5 inch loaf pan with greasing and parchment paper.
- 2 Mash bananas in large bowl, then stir in melted butter, brown sugar, eggs, and vanilla until combined.
- 3 In separate bowl, whisk together flour, baking soda, salt, cinnamon, and nutmeg.
- 4 Gradually add dry ingredients to wet ingredients, mixing until just combined, then fold in diced apples.
- 5 Pour batter into prepared pan, sprinkle with granulated sugar, and bake for 55-70 minutes until toothpick comes out clean.
- 6 Cool in pan for 15 minutes, then transfer to wire rack to cool completely before slicing.


