Unleash your midday cravings with these 31 delicious American lunch recipes! Whether you’re craving quick comfort food, fresh seasonal favorites, or easy-to-make classics, this roundup has something for every home cook. Dive in and discover new go-to dishes that will make your lunch breaks something to truly savor.
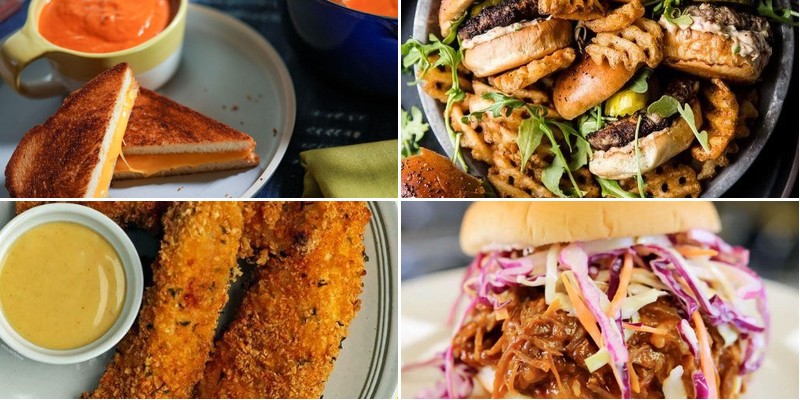
Classic Grilled Cheese Sandwich with Tomato Soup

Perfect your cozy game with this iconic duo. Grab your skillet and let’s transform basic ingredients into pure comfort. This combo hits every time—crispy, cheesy, and dippable.
2
sandwiches10
minutes25
minutesIngredients
- 4 slices sourdough bread (or any sturdy bread)
- 4 tbsp unsalted butter, softened (for easy spreading)
- 6 oz sharp cheddar cheese, shredded (melts better than slices)
- 1 tbsp olive oil (or any neutral oil)
- 1 small yellow onion, diced
- 2 garlic cloves, minced
- 1 (28 oz) can crushed tomatoes
- 2 cups vegetable broth (low sodium preferred)
- 1/2 cup heavy cream (for richness)
- 1 tsp dried basil
- 1/2 tsp smoked paprika
- Salt and black pepper (adjust to taste)
Instructions
- Heat a soup pot over medium heat and add 1 tbsp olive oil.
- Sauté diced onion for 5 minutes until translucent, stirring occasionally.
- Add minced garlic and cook for 1 minute until fragrant.
- Pour in crushed tomatoes and 2 cups vegetable broth, then stir to combine.
- Season with 1 tsp dried basil, 1/2 tsp smoked paprika, salt, and black pepper.
- Bring soup to a simmer, then reduce heat to low and cook uncovered for 15 minutes.
- While soup simmers, spread 1 tbsp softened butter on one side of each bread slice.
- Place two bread slices buttered-side down in a cold skillet.
- Divide 6 oz shredded cheddar evenly between the two slices in the skillet.
- Top with remaining bread slices, buttered-side up.
- Turn skillet to medium-low heat and cook sandwiches for 4–5 minutes until golden brown.
- Flip sandwiches carefully using a spatula and cook another 4–5 minutes until second side is golden and cheese is melted.
- Remove grilled cheese sandwiches from skillet and let rest 1 minute before slicing.
- Stir 1/2 cup heavy cream into the finished soup until fully incorporated.
- Ladle soup into bowls and serve immediately with grilled cheese sandwiches.
The sandwich delivers a shatteringly crisp exterior with oozy, sharp cheddar inside. Dunk each cheesy corner into the velvety, tomato-forward soup for the ultimate savory bite. Try sprinkling fresh basil over the soup or adding a dash of hot sauce to kick up the heat.
Hearty Philly Cheesesteak Sandwich

Viral food trends come and go, but this Philly cheesesteak delivers timeless satisfaction. Grab your skillet and transform simple ingredients into a legendary sandwich that’ll have everyone begging for your recipe.
4
sandwiches15
minutes15
minutesIngredients
– 1 lb ribeye steak, thinly sliced (freeze for 15 minutes first for easier slicing)
– 2 tbsp vegetable oil (or any neutral high-smoke-point oil)
– 1 large yellow onion, thinly sliced
– 1 green bell pepper, thinly sliced
– 4 hoagie rolls, split lengthwise
– 8 slices provolone cheese (American cheese works too for extra meltiness)
– 2 tbsp Worcestershire sauce
– 1 tsp garlic powder
– Salt and black pepper to taste
Instructions
1. Heat a large cast-iron skillet or heavy pan over medium-high heat until a drop of water sizzles immediately.
2. Add vegetable oil and swirl to coat the entire cooking surface evenly.
3. Place sliced onions and bell peppers in the hot skillet, spreading them in a single layer.
4. Cook vegetables for 6-8 minutes, stirring every 2 minutes, until onions turn translucent and peppers soften with slight char marks.
5. Push vegetables to one side of the skillet using a spatula.
6. Add thinly sliced ribeye steak to the empty side of the skillet in a single layer, ensuring pieces don’t overlap.
7. Sear steak for 2 minutes without moving to develop a golden-brown crust on one side.
8. Flip all steak pieces using tongs and cook for another 90 seconds until no pink remains.
9. Mix steak with vegetables thoroughly using your spatula.
10. Sprinkle garlic powder evenly over the meat and vegetable mixture.
11. Drizzle Worcestershire sauce directly over the hot ingredients.
12. Season with salt and black pepper, stirring to distribute all flavors evenly.
13. Divide the hot mixture into four equal portions directly in the skillet.
14. Place two slices of provolone cheese over each portion, covering the meat completely.
15. Reduce heat to low and cover the skillet with a lid for 1-2 minutes until cheese melts into a smooth layer.
16. While cheese melts, toast hoagie rolls cut-side down in a separate dry skillet over medium heat for 1-2 minutes until golden and crisp.
17. Use a spatula to transfer each cheesesteak portion directly into toasted hoagie rolls.
18. Serve immediately while the cheese is still hot and stretchy.
Unbelievably tender ribeye mingles with sweet caramelized onions and melted provolone in every bite. The toasted hoagie provides the perfect crunch against the juicy filling—drizzle with hot sauce or serve alongside crispy potato wedges for the ultimate game-day feast.
Juicy Beef Sliders with Homemade Pickles
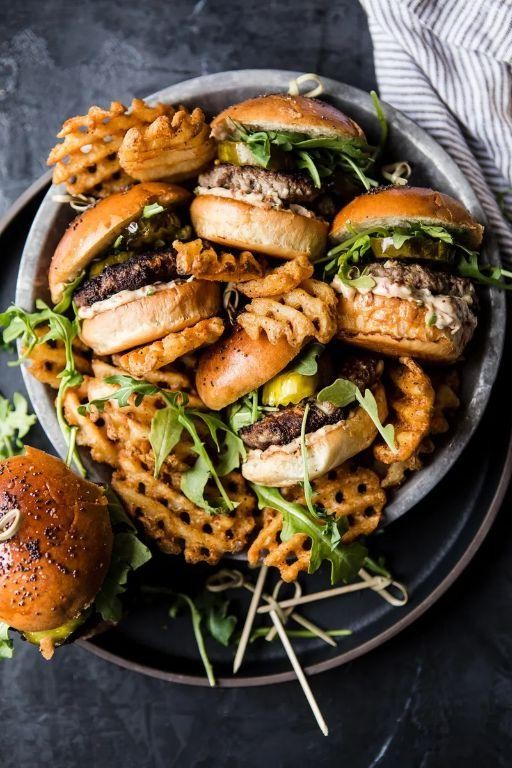
Aren’t you tired of dry, boring sliders? These juicy beef sliders with homemade pickles will change your burger game forever. Get ready for flavor explosions in every bite.
8
sliders15
minutes10
minutesIngredients
– 1 lb ground beef (80/20 blend for best juiciness)
– 8 slider buns (brioche recommended for sweetness)
– 1 cup sliced cucumbers (English cucumbers work best)
– 1/2 cup white vinegar
– 1/4 cup water
– 2 tbsp sugar
– 1 tsp salt
– 1 tbsp vegetable oil (or any neutral oil)
– 4 slices American cheese
– 1/4 cup mayonnaise
– 2 tbsp ketchup
– 1 tsp Worcestershire sauce
– 1/2 tsp garlic powder
– 1/4 tsp black pepper
Instructions
1. Combine sliced cucumbers, white vinegar, water, sugar, and salt in a small bowl.
2. Press cucumbers down to submerge completely in the brine.
3. Let pickles sit at room temperature for 30 minutes while you prepare the sliders.
4. Mix ground beef with Worcestershire sauce, garlic powder, and black pepper in a medium bowl.
5. Divide the beef mixture into 8 equal portions using a scale or eyeball method.
6. Shape each portion into 1/2-inch thick patties slightly larger than your buns.
7. Press your thumb gently into the center of each patty to prevent doming during cooking.
8. Heat vegetable oil in a large skillet over medium-high heat until shimmering, about 2 minutes.
9. Place patties in the hot skillet, leaving space between them for even cooking.
10. Cook patties for 3 minutes until bottoms develop a deep brown crust.
11. Flip patties and immediately place half a slice of American cheese on each one.
12. Cook for another 2-3 minutes until cheese melts and internal temperature reaches 160°F.
13. Remove patties from skillet and let rest on a plate for 2 minutes to redistribute juices.
14. Mix mayonnaise and ketchup in a small bowl to create your burger sauce.
15. Lightly toast slider buns in the same skillet for 30 seconds until golden.
16. Spread burger sauce on both sides of each toasted bun.
17. Place cooked patties on bottom buns and top with homemade pickles.
18. Close sliders with top buns and serve immediately.
You’ll love the crispy, tangy pickles against the juicy, cheesy beef patties. These sliders stay incredibly moist thanks to the thumbprint technique. Try stacking them with extra pickles for maximum crunch in every bite.
Southern Fried Chicken and Waffles

Viral comfort food just leveled up. This crispy, sweet-savory mashup brings restaurant magic to your kitchen. Get ready for that perfect crunch-meets-fluff moment.
4
portions255
minutes60
minutesIngredients
– 2 lbs chicken thighs, bone-in, skin-on (for maximum juiciness)
– 2 cups buttermilk (or sub with milk + 1 tbsp vinegar)
– 2 cups all-purpose flour
– 1 tbsp paprika (smoked adds depth)
– 1 tsp garlic powder
– 1 tsp onion powder
– 1 tsp cayenne pepper (adjust for heat)
– 2 tsp salt
– 1 tsp black pepper
– 4 cups vegetable oil (or any neutral high-smoke-point oil)
– 2 cups waffle mix (like Krusteaz)
– 1 ⅓ cups water
– ¼ cup vegetable oil
– 2 large eggs
– ½ cup maple syrup (warm for drizzling)
– 4 tbsp unsalted butter (for serving)
Instructions
1. Place chicken thighs in a large bowl and pour buttermilk over them, ensuring all pieces are fully submerged.
2. Cover the bowl and refrigerate for at least 4 hours or overnight for maximum tenderness.
3. In a separate large bowl, whisk together flour, paprika, garlic powder, onion powder, cayenne, salt, and black pepper until fully combined.
4. Remove one chicken piece from buttermilk, letting excess drip off, then dredge thoroughly in the flour mixture.
5. Press flour firmly onto the chicken to create a thick, even coating that will yield extra crunch.
6. Place the coated chicken on a wire rack and repeat with all remaining pieces.
7. Let the breaded chicken rest on the rack for 15 minutes to help the coating adhere during frying.
8. Pour vegetable oil into a heavy Dutch oven until it reaches 2 inches deep and heat to 350°F on a thermometer.
9. Carefully place 3 chicken pieces into the hot oil using tongs, avoiding overcrowding.
10. Fry for 12-14 minutes, turning once halfway, until the internal temperature reaches 165°F and the coating is deep golden brown.
11. Remove chicken and drain on a clean wire rack set over a baking sheet—this keeps it crispy unlike paper towels.
12. Maintain oil temperature at 350°F and repeat frying with remaining chicken in batches.
13. Preheat your waffle iron to medium-high heat according to manufacturer instructions.
14. In a medium bowl, whisk together waffle mix, water, ¼ cup oil, and eggs until just combined; a few lumps are fine for tender waffles.
15. Pour ½ cup batter onto the hot waffle iron and cook for 4-5 minutes until steam stops and waffles are golden brown.
16. Keep cooked waffles warm in a 200°F oven while finishing the batch.
Kick back and admire that golden stack. The chicken’s shatter-crisp crust gives way to juicy meat, while fluffy waffles soak up maple syrup and melted butter. For a next-level move, top with pickled jalapeños or hot honey—your taste buds will throw a party.
Buffalo Chicken Wrap with Crunchy Slaw
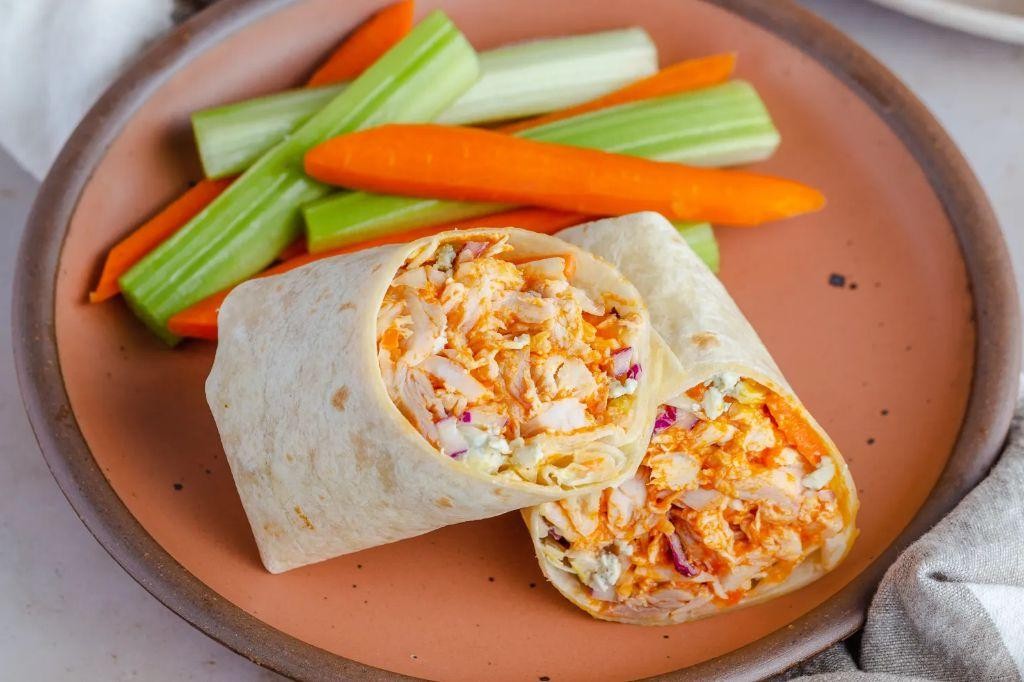
A buffalo chicken wrap that’ll make your taste buds dance! This handheld hero combines spicy, saucy chicken with cool, crunchy slaw for the ultimate lunchtime win. Get ready to wrap and roll your way to flavor town.
4
sandwiches15
minutes15
minutesIngredients
– 1 lb boneless, skinless chicken breasts, cut into 1-inch strips (thaw if frozen)
– 1/2 cup buffalo sauce (Frank’s RedHot recommended)
– 2 tbsp unsalted butter, melted (or olive oil for dairy-free)
– 1 tsp garlic powder
– 1/2 tsp smoked paprika
– 1/4 tsp black pepper
– 4 large flour tortillas, 10-inch size (wheat or spinach work too)
– 2 cups shredded coleslaw mix
– 1/4 cup ranch dressing (blue cheese works great too)
– 1/2 cup crumbled blue cheese (optional, omit for milder flavor)
– 2 tbsp chopped fresh cilantro (parsley if you prefer)
Instructions
1. Preheat a large skillet over medium-high heat for 2 minutes until hot.
2. Pat chicken strips completely dry with paper towels—this ensures a good sear.
3. Season chicken evenly with garlic powder, smoked paprika, and black pepper.
4. Add chicken to the hot skillet in a single layer, cooking for 4-5 minutes without moving.
5. Flip chicken and cook another 4-5 minutes until internal temperature reaches 165°F.
6. Reduce heat to low and pour buffalo sauce and melted butter over chicken, tossing to coat thoroughly.
7. Simmer for 1 minute until sauce thickens slightly and clings to the chicken.
8. Remove skillet from heat and let chicken rest for 2 minutes to absorb flavors.
9. Warm tortillas in a dry skillet for 15 seconds per side or microwave for 20 seconds—this prevents cracking.
10. In a medium bowl, toss coleslaw mix with ranch dressing until evenly coated.
11. Arrange one tortilla on a clean surface and spoon 1/4 of the buffalo chicken down the center.
12. Top with 1/2 cup dressed slaw, then sprinkle with blue cheese and cilantro.
13. Fold bottom edge of tortilla over filling, then tightly roll from one side, tucking ingredients as you go.
14. Repeat with remaining tortillas and ingredients.
15. Slice each wrap diagonally in half for easier handling and presentation.
But that crispy-cool slaw against the spicy chicken creates the perfect texture contrast. Serve these wraps with extra ranch for dipping, or pack them whole for a mess-free lunch that travels beautifully.
New England Clam Chowder in a Bread Bowl
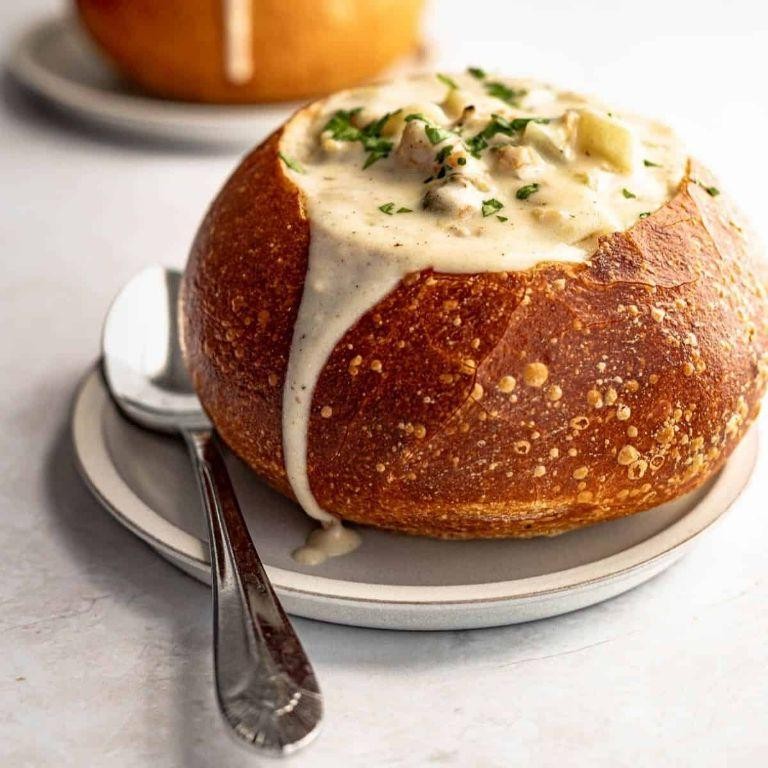
Unlock the ultimate cozy comfort with this creamy New England clam chowder served right in its own edible bowl. Grab your spoon and dive into rich, briny flavors that’ll warm you from the inside out. Perfect for chilly nights when only something hearty will do.
3
servings25
minutes40
minutesIngredients
- 4 large sourdough bread bowls (or any crusty round bread)
- 2 cups chopped clams, drained (canned works great)
- 4 slices thick-cut bacon, chopped (or pancetta)
- 1 large yellow onion, diced
- 2 celery stalks, finely chopped
- 3 medium Yukon Gold potatoes, peeled and cubed ½-inch
- 3 cups whole milk (for creamier texture)
- 1 cup heavy cream
- 4 tbsp unsalted butter
- 3 tbsp all-purpose flour
- 2 cups clam juice (reserved from cans)
- 1 bay leaf
- 1 tsp fresh thyme leaves (or ½ tsp dried)
- ½ tsp black pepper
- ¼ tsp salt (adjust after tasting)
- 2 tbsp chopped fresh parsley (for garnish)
Instructions
- Slice off the top quarter of each bread bowl and hollow out the center, leaving ½-inch thick walls.
- Place hollowed bread bowls on a baking sheet and bake at 350°F for 8 minutes to crisp the interior.
- Chop bacon into ¼-inch pieces and cook in a large pot over medium heat for 6-8 minutes until crispy.
- Remove bacon with a slotted spoon, leaving 2 tablespoons of drippings in the pot.
- Add diced onion and celery to the pot and sauté for 5 minutes until translucent.
- Stir in cubed potatoes and cook for 2 minutes to coat in flavors.
- Sprinkle flour over vegetables and cook for 1 minute while stirring constantly to make a roux.
- Pour in clam juice gradually while whisking to prevent lumps from forming.
- Add bay leaf, thyme, black pepper, and salt, then bring to a simmer.
- Cover and cook for 15 minutes until potatoes are fork-tender.
- Reduce heat to low and stir in whole milk and heavy cream.
- Add chopped clams and cooked bacon, then heat for 3 minutes until warmed through.
- Remove bay leaf and stir in butter until melted and incorporated.
- Ladle hot chowder into prepared bread bowls and garnish with fresh parsley.
Hearty and satisfying, this chowder delivers velvety texture with chunks of tender potato and briny clams in every spoonful. The bread bowl soaks up the creamy broth, creating edible deliciousness you won’t want to waste. Serve with extra crackers for dipping and watch it disappear faster than you can say “seconds please!”
Cheesy Macaroni and Cheese with Bacon

Grab your skillet because this cheesy macaroni and cheese with bacon is about to become your new comfort food obsession. Get ready for crispy bacon mixed with creamy, dreamy cheese sauce coating every single noodle. This dish delivers maximum flavor with minimal fuss—perfect for busy weeknights or cozy weekends.
4
servings15
minutes40
minutesIngredients
– 8 oz elbow macaroni (or any small pasta shape)
– 6 slices thick-cut bacon, chopped (use kitchen scissors for easy cutting)
– 2 tbsp unsalted butter (salted works too, adjust salt later)
– 2 tbsp all-purpose flour
– 2 cups whole milk, warmed (microwave 45 seconds to prevent curdling)
– 2 cups shredded sharp cheddar cheese (pre-shredded melts faster)
– 1/2 tsp garlic powder
– 1/4 tsp smoked paprika
– 1/4 tsp black pepper
– 1/4 cup panko breadcrumbs (regular breadcrumbs work too)
Instructions
1. Preheat your oven to 375°F and bring a large pot of salted water to a rolling boil.
2. Add elbow macaroni to the boiling water and cook for 7 minutes until al dente (it will finish cooking in the oven).
3. While pasta cooks, place chopped bacon in a cold oven-safe skillet and turn heat to medium.
4. Cook bacon for 8-10 minutes until crispy, stirring occasionally, then transfer to paper towels using a slotted spoon.
5. Drain all but 1 tablespoon of bacon grease from the skillet (save extra for other recipes).
6. Melt butter in the same skillet over medium heat until foamy but not browned.
7. Whisk in flour continuously for 1 minute until smooth and golden to create a roux.
8. Gradually pour in warm milk while whisking constantly to prevent lumps.
9. Cook sauce for 3-4 minutes until thickened enough to coat the back of a spoon.
10. Remove skillet from heat and stir in shredded cheddar until completely melted and smooth.
11. Mix in garlic powder, smoked paprika, and black pepper until fully incorporated.
12. Drain cooked macaroni and add it directly to the cheese sauce in the skillet.
13. Fold in reserved crispy bacon until evenly distributed throughout the macaroni.
14. Sprinkle panko breadcrumbs evenly over the top of the mac and cheese mixture.
15. Bake at 375°F for 15 minutes until breadcrumbs are golden and sauce is bubbly.
16. Let rest for 5 minutes before serving (this allows the sauce to thicken perfectly). Keep those leftovers because the crispy bacon bits stay wonderfully textured even after reheating. The smoked paprika adds a subtle depth that plays beautifully against the sharp cheddar. Try serving it in individual cast iron skillets for a restaurant-style presentation that keeps it hot through the entire meal.
BBQ Pulled Pork Sandwiches with Coleslaw
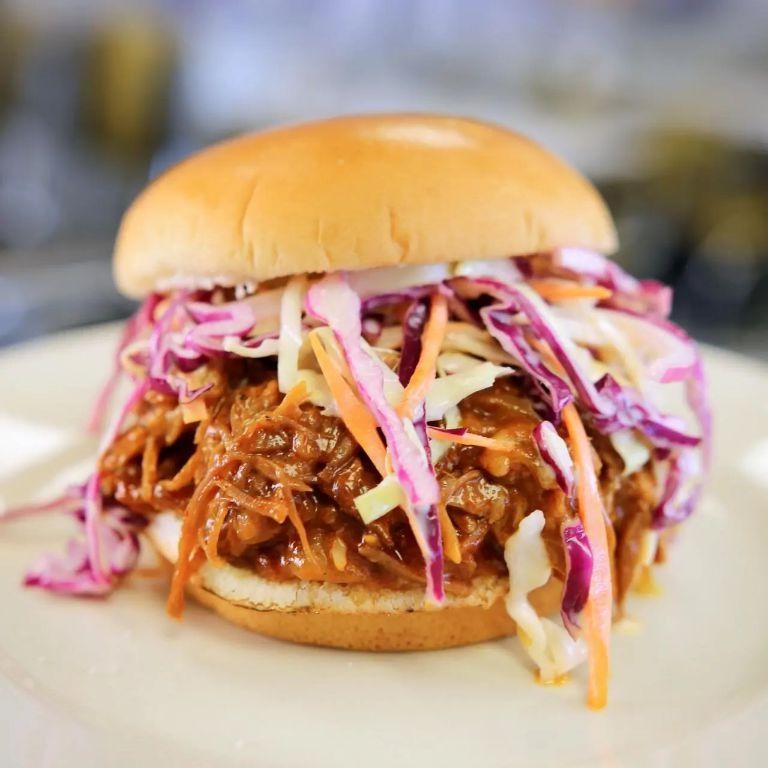
Bring your A-game to backyard BBQs with these epic pulled pork sandwiches. Bold flavors meet tender, juicy pork that shreds effortlessly. Top it with crunchy coleslaw for the ultimate texture contrast.
6
sandwiches20
minutes240
minutesIngredients
- 4 lb pork shoulder (trim excess fat for leaner results)
- 2 tbsp olive oil (or any neutral oil)
- 1 cup BBQ sauce (choose your favorite brand)
- 1/4 cup brown sugar (pack it firmly)
- 2 tbsp apple cider vinegar (balances sweetness)
- 1 tbsp smoked paprika (for that smoky depth)
- 1 tsp garlic powder (or fresh minced garlic)
- 1 tsp onion powder
- 1/2 tsp black pepper (freshly ground preferred)
- 1/2 tsp salt (adjust to taste)
- 4 cups shredded cabbage (pre-shredded saves time)
- 1/2 cup mayonnaise (full-fat for creaminess)
- 2 tbsp lemon juice (fresh squeezed brightens flavor)
- 1 tbsp honey (or maple syrup alternative)
- 6 brioche buns (toast for extra crunch)
Instructions
- Preheat your oven to 300°F.
- Pat the pork shoulder completely dry with paper towels.
- Rub olive oil evenly over all surfaces of the pork.
- Combine brown sugar, smoked paprika, garlic powder, onion powder, black pepper, and salt in a small bowl.
- Massage the spice mixture thoroughly onto the pork, covering every side.
- Place the seasoned pork in a Dutch oven or oven-safe pot with a lid.
- Pour apple cider vinegar around (not over) the pork.
- Cover the pot tightly and roast for 4 hours at 300°F.
- Check internal temperature reaches 195°F with a meat thermometer.
- Remove pork from oven and let rest 15 minutes.
- Transfer pork to a large bowl, reserving 1/4 cup cooking juices.
- Use two forks to shred the pork completely.
- Mix shredded pork with BBQ sauce and reserved cooking juices.
- Combine shredded cabbage, mayonnaise, lemon juice, and honey in a separate bowl.
- Toss the coleslaw until evenly coated.
- Toast brioche buns lightly in a dry skillet over medium heat for 2 minutes per side.
- Pile BBQ pulled pork generously onto bottom bun halves.
- Top each with a heaping spoonful of coleslaw.
- Cap with top bun halves and serve immediately.
Juicy, fall-apart pork meets creamy, crunchy slaw in every bite. The sweet-smoky BBQ sauce soaks into the toasted brioche for maximum flavor absorption. Try serving these on Hawaiian rolls for a sweeter twist or with pickled onions for extra tang.
California Club Sandwich with Avocado
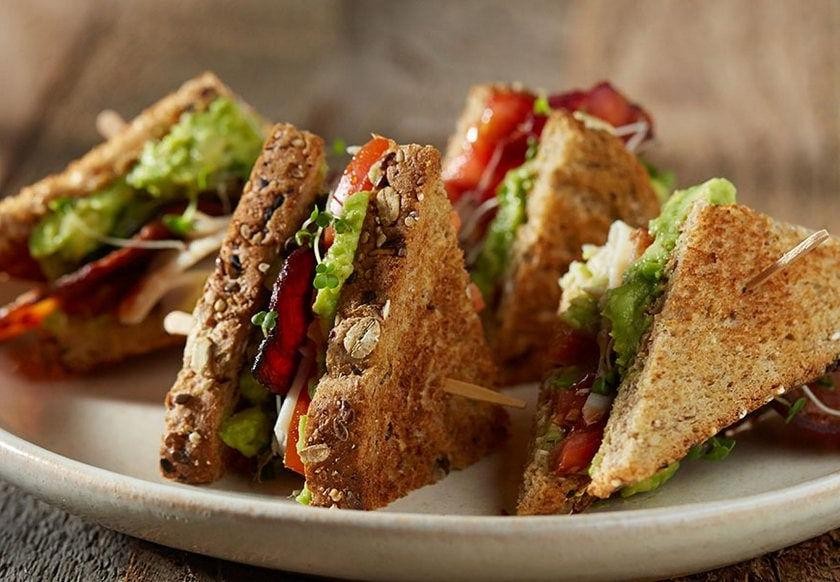
Huddle up, sandwich lovers! This California Club with avocado brings serious West Coast energy to your kitchen. Stack it high with creamy avocado, crispy bacon, and fresh veggies for that perfect crunch-and-cream combo.
2
sandwiches15
minutes4
minutesIngredients
– 8 slices sourdough bread (toasted for extra crunch)
– 1 large avocado, sliced (use ripe but firm)
– 8 slices cooked bacon (crispy works best)
– 1 cup shredded romaine lettuce (iceberg works too)
– 1 large tomato, sliced ¼-inch thick
– ½ cup mayonnaise (light mayo if preferred)
– 1 tbsp Dijon mustard (whole grain mustard alternative)
– 8 oz sliced turkey breast (deli-style or roasted)
– 4 slices provolone cheese (Swiss or cheddar substitutes)
Instructions
1. Toast all 8 slices of sourdough bread in a toaster or 400°F oven for 3-4 minutes until golden brown.
2. Mix ½ cup mayonnaise with 1 tbsp Dijon mustard in a small bowl until fully combined.
3. Spread the mayonnaise mixture evenly on one side of each toasted bread slice.
4. Layer 4 slices of bread (mayo-side up) with 2 oz sliced turkey breast each.
5. Place 1 slice provolone cheese on top of the turkey on each sandwich.
6. Add 2 slices cooked bacon per sandwich, breaking if needed to fit evenly.
7. Arrange ¼ cup shredded romaine lettuce over the bacon on each sandwich.
8. Place 2-3 tomato slices (¼-inch thick) over the lettuce on each sandwich.
9. Fan ¼ of the sliced avocado evenly over the tomato on each sandwich.
10. Top each sandwich with remaining bread slices, mayo-side down, pressing gently.
11. Cut each sandwich diagonally with a serrated knife for clean slices.
12. Secure each half with a toothpick through the center to hold layers.
Buttery avocado melts into crisp bacon while the tangy mayo cuts through the richness. Serve these stacked beauties with sweet potato fries or wrap tightly for a picnic-ready meal that travels surprisingly well.
Chili Con Carne with Cornbread

You’re craving that perfect comfort food combo. This chili con carne with cornbread delivers bold flavors and cozy textures in one epic meal. Get ready to wow your taste buds with minimal effort.
4
portions15
minutes46
minutesIngredients
– 1 lb ground beef (80/20 for best flavor)
– 1 onion, diced
– 2 cloves garlic, minced
– 1 tbsp olive oil (or any neutral oil)
– 1 can (15 oz) kidney beans, drained
– 1 can (15 oz) diced tomatoes
– 2 tbsp chili powder
– 1 tsp cumin
– 1 cup cornmeal
– 1 cup all-purpose flour
– 1 cup milk
– 1 egg
– ¼ cup vegetable oil
– 1 tbsp baking powder
– 1 tsp salt
– ½ tsp black pepper
Instructions
1. Preheat your oven to 400°F.
2. Heat olive oil in a large oven-safe skillet over medium-high heat for 2 minutes.
3. Add diced onion and cook for 5 minutes until translucent.
4. Add minced garlic and cook for 1 minute until fragrant.
5. Add ground beef and cook for 8 minutes, breaking it up with a spoon until browned.
6. Stir in chili powder, cumin, salt, and black pepper.
7. Add diced tomatoes and kidney beans, then simmer for 15 minutes.
8. While chili simmers, whisk cornmeal, flour, baking powder, and remaining salt in a bowl.
9. In another bowl, combine milk, egg, and vegetable oil.
10. Pour wet ingredients into dry ingredients and stir until just combined.
11. Drop cornbread batter by spoonfuls over the chili in the skillet.
12. Bake at 400°F for 20 minutes until cornbread is golden brown and a toothpick comes out clean.
13. Let rest for 5 minutes before serving.
Golden cornbread tops the spicy, meaty chili creating incredible texture contrast. The cornbread soaks up the rich tomato sauce while keeping its crumbly top. Serve it straight from the skillet for that rustic family-style vibe everyone loves.
Crispy Baked Chicken Tenders with Honey Mustard Sauce

Sick of soggy chicken tenders? Skip the deep fryer and bake them to crispy perfection. This healthier version delivers that satisfying crunch with a sweet-tangy honey mustard sauce that’ll have everyone dipping for more.
3
servings15
minutes33
minutesIngredients
– 1.5 lbs chicken tenders (or chicken breasts cut into strips)
– 1 cup panko breadcrumbs (for extra crunch)
– 1/2 cup grated Parmesan cheese
– 1 tsp garlic powder
– 1 tsp paprika (adds color and mild heat)
– 1/2 tsp black pepper
– 1/2 cup all-purpose flour
– 2 large eggs
– 2 tbsp olive oil (or any neutral oil)
– 1/2 cup mayonnaise
– 2 tbsp Dijon mustard
– 2 tbsp honey
– 1 tbsp lemon juice (fresh squeezed preferred)
Instructions
1. Preheat your oven to 400°F and line a baking sheet with parchment paper.
2. Pat the chicken tenders completely dry with paper towels—this helps the coating stick better.
3. In a shallow bowl, combine panko breadcrumbs, Parmesan cheese, garlic powder, paprika, and black pepper.
4. Place flour in a separate shallow bowl.
5. Whisk eggs in a third bowl until fully blended.
6. Dredge each chicken tender in flour, shaking off any excess.
7. Dip the floured chicken into the beaten eggs, letting excess drip off.
8. Press the chicken firmly into the panko mixture, coating all sides evenly.
9. Arrange the coated tenders in a single layer on the prepared baking sheet.
10. Drizzle olive oil over the top of each tender for maximum crispiness.
11. Bake for 15-18 minutes, then flip each tender using tongs.
12. Continue baking for another 10-12 minutes until golden brown and internal temperature reaches 165°F.
13. While chicken bakes, whisk together mayonnaise, Dijon mustard, honey, and lemon juice in a small bowl.
14. Let chicken rest for 5 minutes before serving—this keeps them juicy inside.
15. Serve immediately with the honey mustard sauce for dipping.
Outrageously crunchy outside, tender and juicy inside—these baked tenders rival any fried version. The honey mustard sauce adds the perfect sweet-tangy balance. Try serving them over a crisp salad or stuffed into warm pita bread for a complete meal.
Tex-Mex Chicken Tacos with Lime Crema

Jazz up your taco night with these flavor-packed Tex-Mex chicken tacos. Just marinate, sear, and assemble for restaurant-quality results in under 30 minutes. That zesty lime crema takes everything to the next level.
8
tacos15
minutes12
minutesIngredients
– 1 lb boneless, skinless chicken thighs (or breasts, sliced thin)
– 2 tbsp olive oil (or any neutral oil)
– 1 tbsp chili powder
– 1 tsp cumin
– 1 tsp smoked paprika
– 1/2 tsp garlic powder
– 1/2 tsp onion powder
– 1/4 tsp cayenne pepper (optional, for heat)
– 1/2 cup sour cream
– 2 tbsp fresh lime juice (about 1 lime)
– 1 tsp lime zest
– 8 small corn tortillas
– 1 cup shredded red cabbage
– 1/4 cup chopped fresh cilantro
– 1/4 cup crumbled cotija cheese (or feta)
Instructions
1. Combine chili powder, cumin, smoked paprika, garlic powder, onion powder, and cayenne in a small bowl.
2. Pat chicken thighs completely dry with paper towels for better browning.
3. Rub spice mixture evenly over all surfaces of the chicken thighs.
4. Heat 1 tablespoon olive oil in a large skillet over medium-high heat until shimmering.
5. Place chicken in the hot skillet and cook undisturbed for 6 minutes to develop a golden crust.
6. Flip chicken and cook for another 6 minutes until internal temperature reaches 165°F.
7. Transfer chicken to a cutting board and let rest for 5 minutes to redistribute juices.
8. While chicken rests, whisk together sour cream, lime juice, and lime zest in a small bowl.
9. Warm tortillas directly over a gas flame for 15 seconds per side, or in a dry skillet until pliable.
10. Thinly slice the rested chicken against the grain for maximum tenderness.
11. Fill each warm tortilla with sliced chicken.
12. Top with shredded red cabbage for crunch.
13. Drizzle generously with lime crema.
14. Sprinkle with chopped cilantro and crumbled cotija cheese.
Keep those tortillas warm in a clean kitchen towel while you assemble—they won’t crack. The tender, spiced chicken pairs perfectly with the cool, creamy lime crema and crunchy cabbage. Try serving them open-face style for maximum topping visibility, or double up the tortillas for extra-sturdy tacos that won’t fall apart.
Conclusion
Delicious American lunches await in this collection! From comforting classics to fresh favorites, these recipes make midday meals something to savor. We hope you find new go-to dishes that bring joy to your table. Try them out, leave a comment with your favorites, and share these tasty ideas on Pinterest for fellow food lovers to enjoy!


