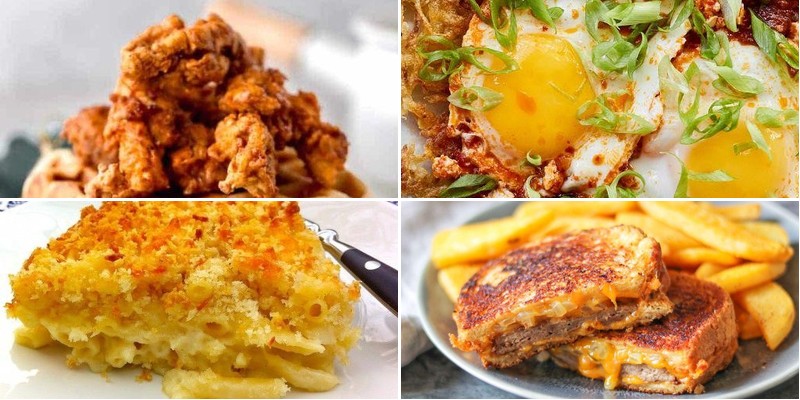
You’re in for a treat! We’ve gathered 34 classic American diner recipes that bring the cozy comfort of a roadside booth right to your kitchen. From fluffy pancakes to juicy burgers, these beloved dishes are perfect for quick dinners or weekend feasts. Get ready to savor the flavors and create some delicious memories—let’s dive into the list!
All-American Cheeseburger with Secret Sauce
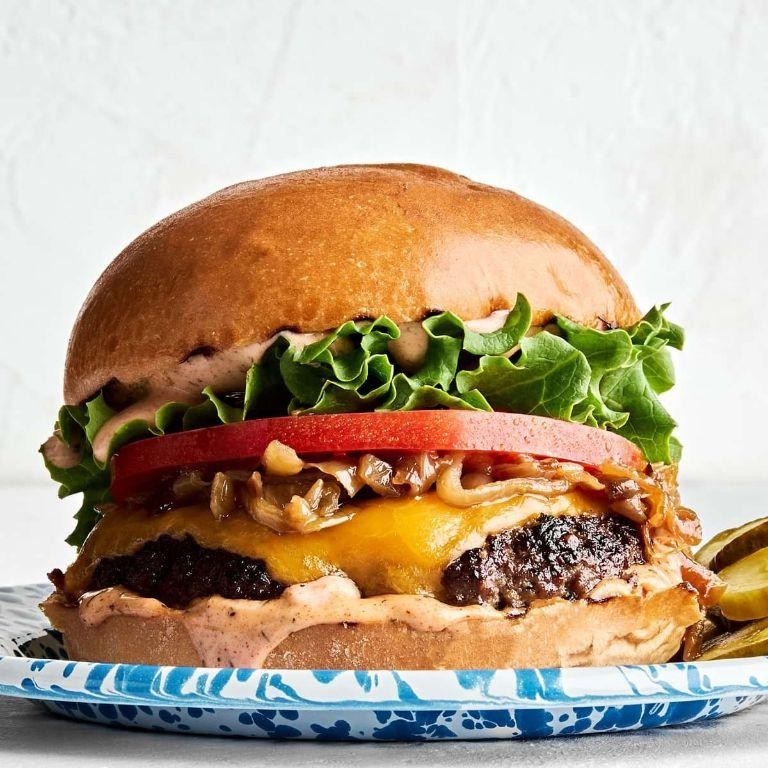
Dive into the ultimate backyard classic with a twist. This All-American Cheeseburger gets its irresistible edge from a tangy secret sauce. It’s a juicy, satisfying meal that comes together in minutes.
Serving: 4 | Pre Time: 15 minutes | Cooking Time: 10 minutes
Ingredients
– 1 lb 80/20 ground beef chuck
– 4 soft brioche burger buns
– 4 slices sharp cheddar cheese
– 1/2 cup mayonnaise
– 2 tbsp ketchup
– 1 tbsp yellow mustard
– 1 tbsp sweet pickle relish
– 1 tsp smoked paprika
– 1/2 tsp garlic powder
– 1/4 tsp finely ground black pepper
– 4 crisp iceberg lettuce leaves
– 1 ripe beefsteak tomato, sliced
– 1/2 yellow onion, thinly sliced
Instructions
1. Combine 1/2 cup mayonnaise, 2 tbsp ketchup, 1 tbsp yellow mustard, 1 tbsp sweet pickle relish, 1 tsp smoked paprika, 1/2 tsp garlic powder, and 1/4 tsp finely ground black pepper in a small bowl. Whisk until smooth and set aside.
2. Divide 1 lb 80/20 ground beef chuck into 4 equal portions. Gently form each into a 3/4-inch thick patty, pressing a slight dimple in the center to prevent puffing during cooking.
3. Preheat a cast-iron skillet or grill over medium-high heat until it reaches 375°F.
4. Place patties on the hot surface. Cook undisturbed for 3-4 minutes until a deep brown crust forms on the bottom.
5. Flip patties using a spatula. Immediately top each with 1 slice sharp cheddar cheese. Cook for another 3-4 minutes until the cheese melts and the internal temperature reaches 160°F.
6. While patties cook, lightly toast 4 soft brioche burger buns on the grill or in a toaster until golden, about 1 minute.
7. Spread a generous layer of the prepared secret sauce on the bottom half of each toasted bun.
8. Place 1 crisp iceberg lettuce leaf on the sauce, followed by 1-2 slices ripe beefsteak tomato and a few slices of 1/2 yellow onion.
9. Transfer each cooked patty onto the assembled vegetables. Cap with the top bun.
10. Serve immediately while hot and juicy.
Buttery brioche buns cradle the smoky, charred beef patty, which oozes melted sharp cheddar. The secret sauce adds a creamy, tangy kick that cuts through the richness, while crisp lettuce and juicy tomato provide fresh crunch. For a fun twist, serve these burgers with crispy sweet potato fries or a classic dill pickle spear on the side.
Southern Fried Chicken and Waffles

Unbelievably satisfying, Southern Fried Chicken and Waffles combines crispy, savory chicken with sweet, fluffy waffles for a perfect comfort food clash. This iconic dish delivers crunch and softness in every bite. Let’s get cooking.
Serving: 4 | Pre Time: 30 minutes | Cooking Time: 25 minutes
Ingredients
– 4 boneless, skinless chicken breasts
– 2 cups buttermilk
– 2 cups all-purpose flour
– 1 tbsp smoked paprika
– 1 tbsp garlic powder
– 1 tbsp onion powder
– 1 tsp cayenne pepper
– 2 tsp kosher salt
– 1 tsp freshly ground black pepper
– 4 cups vegetable oil for frying
– 2 cups waffle batter mix
– 2 large farm-fresh eggs
– 1/2 cup melted unsalted butter
– 1 1/2 cups whole milk
– Pure maple syrup for serving
– 4 tbsp softened salted butter for serving
Instructions
1. Place 4 boneless, skinless chicken breasts in a large bowl.
2. Pour 2 cups buttermilk over the chicken, ensuring it’s fully submerged.
3. Cover the bowl and refrigerate for at least 4 hours or overnight for maximum tenderness.
4. In a separate shallow dish, combine 2 cups all-purpose flour, 1 tbsp smoked paprika, 1 tbsp garlic powder, 1 tbsp onion powder, 1 tsp cayenne pepper, 2 tsp kosher salt, and 1 tsp freshly ground black pepper.
5. Remove chicken from buttermilk, letting excess drip off.
6. Dredge each chicken breast thoroughly in the flour mixture, pressing to adhere.
7. Heat 4 cups vegetable oil in a large, heavy-bottomed pot to 350°F, using a thermometer for accuracy.
8. Carefully place chicken in the hot oil, frying for 6-8 minutes per side until golden brown and internal temperature reaches 165°F.
9. Transfer fried chicken to a wire rack over a baking sheet to drain and stay crisp.
10. Preheat a waffle iron to medium-high heat.
11. In a mixing bowl, whisk together 2 cups waffle batter mix, 2 large farm-fresh eggs, 1/2 cup melted unsalted butter, and 1 1/2 cups whole milk until smooth.
12. Pour batter onto the hot waffle iron, cooking for 4-5 minutes until golden and crisp.
13. Repeat until all waffles are cooked, keeping them warm in a 200°F oven.
14. Serve each waffle topped with a piece of fried chicken.
15. Drizzle with pure maple syrup and add a pat of softened salted butter.
Here, the chicken’s crunchy, well-seasoned crust gives way to juicy meat, while the waffles offer a sweet, airy contrast. For a creative twist, try drizzling hot honey instead of syrup or adding pickled jalapeños for a spicy kick. This dish shines when served immediately, balancing textures and flavors in every forkful.
Hearty Meatloaf with Mashed Potatoes

Mention meatloaf and watch eyes light up—this classic comfort dish delivers savory satisfaction with minimal fuss. Our version pairs juicy, herb-kissed meatloaf with creamy, buttery mashed potatoes for a complete, crowd-pleasing meal.
Serving: 6 | Pre Time: 20 minutes | Cooking Time: 60 minutes
Ingredients
– 2 lbs ground beef (80/20 blend for juiciness)
– 1 cup fresh breadcrumbs (from crusty white bread)
– 1 large yellow onion, finely diced
– 2 farm-fresh eggs, lightly beaten
– 1/2 cup whole milk
– 1/4 cup ketchup
– 2 tbsp Worcestershire sauce
– 2 tsp Dijon mustard
– 2 tsp dried thyme
– 1 tsp garlic powder
– 1 tsp kosher salt
– 1/2 tsp finely ground black pepper
– 3 lbs russet potatoes, peeled and quartered
– 1/2 cup unsalted butter, cubed
– 1/2 cup heavy cream, warmed
– 1 tsp sea salt
– 1/2 tsp white pepper
Instructions
1. Preheat oven to 375°F. Line a baking sheet with parchment paper.
2. In a large bowl, combine ground beef, breadcrumbs, diced onion, eggs, milk, ketchup, Worcestershire sauce, Dijon mustard, dried thyme, garlic powder, kosher salt, and black pepper.
3. Mix ingredients gently with your hands until just combined—overmixing creates a dense loaf.
4. Shape mixture into a 9×5-inch loaf on the prepared baking sheet.
5. Bake meatloaf at 375°F for 50-60 minutes, until internal temperature reaches 160°F.
6. While meatloaf bakes, place quartered potatoes in a large pot and cover with cold water by 2 inches.
7. Bring potatoes to a boil over high heat, then reduce to a simmer and cook for 15-20 minutes until fork-tender.
8. Drain potatoes thoroughly and return to the hot pot to evaporate excess moisture.
9. Mash potatoes with a potato masher or ricer until smooth.
10. Fold in cubed butter, warmed heavy cream, sea salt, and white pepper until creamy and well-incorporated—warming the cream prevents a gluey texture.
11. Let meatloaf rest for 10 minutes before slicing to retain juices.
12. Slice meatloaf and serve alongside mashed potatoes.
This meatloaf emerges moist and flavorful with a caramelized crust, while the potatoes offer velvety richness. Try topping slices with extra ketchup or a quick gravy, or form leftovers into sandwiches the next day.
Creamy Mac and Cheese with a Crispy Crust
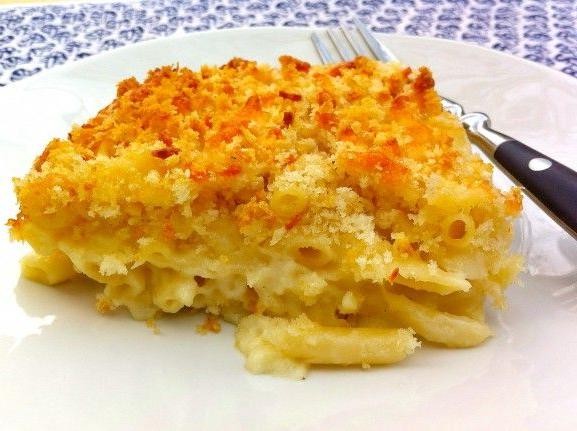
Everyone needs a mac and cheese that delivers both comfort and crunch. This version combines a velvety cheese sauce with a golden, crispy topping that crackles with every bite. It’s the ultimate upgrade to a classic dish.
Serving: 6 | Pre Time: 15 minutes | Cooking Time: 35 minutes
Ingredients
– 1 pound elbow macaroni
– 4 tablespoons unsalted butter, divided
– 1/4 cup all-purpose flour
– 3 cups whole milk, warmed
– 8 ounces sharp cheddar cheese, freshly grated
– 4 ounces Gruyère cheese, freshly grated
– 1/2 teaspoon smoked paprika
– 1/2 teaspoon garlic powder
– 1/2 teaspoon kosher salt
– 1/4 teaspoon freshly ground black pepper
– 1 cup panko breadcrumbs
– 2 tablespoons grated Parmesan cheese
– 1 tablespoon chopped fresh parsley
Instructions
1. Preheat your oven to 375°F.
2. Bring a large pot of salted water to a rolling boil.
3. Cook the elbow macaroni for 7 minutes, until just al dente.
4. Drain the pasta and set it aside.
5. Melt 3 tablespoons of unsalted butter in a large saucepan over medium heat.
6. Whisk in the all-purpose flour and cook for 1 minute to form a roux.
7. Gradually whisk in the warmed whole milk until the mixture is smooth.
8. Cook the sauce, whisking constantly, for 5 minutes until it thickens enough to coat the back of a spoon.
9. Remove the saucepan from the heat.
10. Stir in the freshly grated sharp cheddar and Gruyère cheeses until fully melted and smooth.
11. Season the cheese sauce with smoked paprika, garlic powder, kosher salt, and freshly ground black pepper.
12. Tip: For the smoothest sauce, grate the cheese yourself instead of using pre-shredded.
13. Fold the drained macaroni into the cheese sauce until evenly coated.
14. Transfer the macaroni and cheese mixture to a 9×13-inch baking dish.
15. Melt the remaining 1 tablespoon of unsalted butter in a small skillet over medium heat.
16. Add the panko breadcrumbs and toast, stirring frequently, for 3 minutes until golden brown.
17. Tip: Toasting the panko separately ensures a consistently crispy crust without burning.
18. Remove the skillet from the heat and stir in the grated Parmesan cheese and chopped fresh parsley.
19. Sprinkle the breadcrumb mixture evenly over the macaroni and cheese.
20. Bake in the preheated oven for 20 minutes, until the sauce is bubbling around the edges.
21. Tip: For extra browning, broil the dish for the final 2 minutes, watching closely to prevent burning.
22. Let the dish rest for 5 minutes before serving.
The creamy interior is luxuriously smooth, packed with the sharp, nutty flavors of cheddar and Gruyère. The panko crust adds a satisfying, shattering crunch with every forkful. Serve it straight from the baking dish for a family-style meal, or pair it with a simple green salad to cut through the richness.
Old-Fashioned Chicken Pot Pie
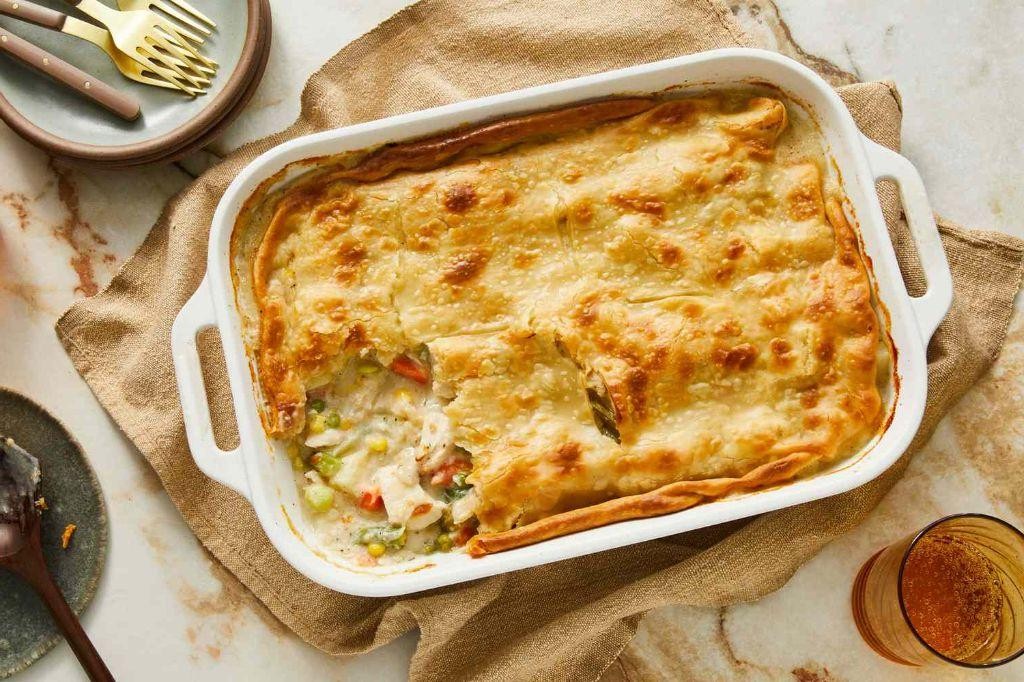
Perfect for chilly evenings, this classic comfort dish delivers flaky pastry and a creamy chicken filling. It’s a nostalgic meal that warms both kitchen and soul.
Serving: 6 | Pre Time: 25 minutes | Cooking Time: 45 minutes
Ingredients
– 2 cups cooked, shredded rotisserie chicken
– 1 cup frozen sweet peas
– 1 cup diced carrots
– 1/2 cup diced celery
– 1/3 cup unsalted butter
– 1/3 cup all-purpose flour
– 1 3/4 cups rich chicken broth
– 2/3 cup whole milk
– 1 teaspoon kosher salt
– 1/2 teaspoon freshly ground black pepper
– 1 package (14.1 oz) refrigerated pie crusts
– 1 large egg, beaten
Instructions
1. Preheat oven to 425°F.
2. Melt unsalted butter in a large skillet over medium heat.
3. Add diced carrots and diced celery; sauté for 5 minutes until slightly softened.
4. Sprinkle all-purpose flour over vegetables; cook for 1 minute while stirring constantly to form a roux.
5. Gradually whisk in rich chicken broth and whole milk until smooth.
6. Bring mixture to a simmer, stirring frequently, and cook for 3–5 minutes until thickened.
7. Stir in shredded rotisserie chicken, frozen sweet peas, kosher salt, and freshly ground black pepper; remove from heat.
8. Unroll one refrigerated pie crust and press into a 9-inch pie dish.
9. Pour chicken filling into crust-lined dish.
10. Top with second pie crust; crimp edges to seal and cut 4 slits in the top.
11. Brush beaten egg over top crust for a golden finish.
12. Bake at 425°F for 30–35 minutes until crust is deeply golden and filling is bubbling.
13. Let rest for 10 minutes before serving.
Buttery, flaky pastry gives way to a velvety filling packed with tender chicken and sweet vegetables. Serve slices alongside a crisp green salad for contrast, or enjoy leftovers reheated—the flavors deepen overnight.
Loaded Chili Cheese Fries
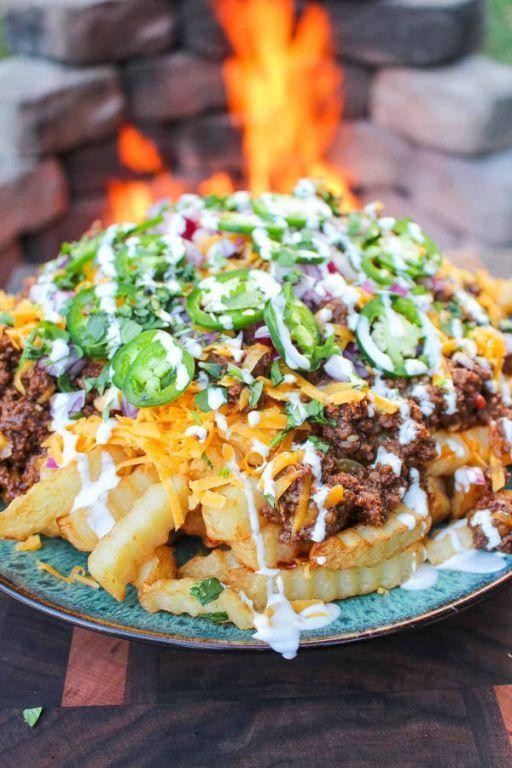
Hearty and indulgent, loaded chili cheese fries are the ultimate comfort food mashup. Crispy fries get smothered in spicy chili and melted cheese for a crowd-pleasing snack. Perfect for game day or a cozy night in.
Serving: 4 | Pre Time: 15 minutes | Cooking Time: 30 minutes
Ingredients
– 2 pounds frozen crispy crinkle-cut fries
– 1 tablespoon high-smoke-point vegetable oil
– 1 pound lean ground beef (90/10)
– 1 medium yellow onion, finely diced
– 2 cloves garlic, minced
– 1 (15-ounce) can fire-roasted diced tomatoes, undrained
– 1 (15-ounce) can dark red kidney beans, rinsed and drained
– 2 tablespoons rich chili powder
– 1 teaspoon ground cumin
– 1/2 teaspoon smoked paprika
– 1/4 teaspoon cayenne pepper (optional, for heat)
– 1 cup low-sodium beef broth
– 2 cups shredded sharp cheddar cheese
– 1/2 cup fresh scallions, thinly sliced
– 1/2 cup cool sour cream
Instructions
1. Preheat your oven to 425°F (218°C) and line a large baking sheet with parchment paper.
2. Spread the frozen crinkle-cut fries in a single layer on the prepared baking sheet.
3. Bake the fries for 20-25 minutes, flipping them halfway through, until golden brown and crispy.
4. While the fries bake, heat the high-smoke-point vegetable oil in a large Dutch oven or heavy-bottomed pot over medium-high heat.
5. Add the lean ground beef to the pot and cook for 5-7 minutes, breaking it up with a wooden spoon, until no pink remains.
6. Tip: Drain any excess grease from the beef for a less greasy chili.
7. Add the finely diced yellow onion to the pot and cook for 3-4 minutes, until softened and translucent.
8. Stir in the minced garlic and cook for 1 minute, until fragrant.
9. Add the undrained fire-roasted diced tomatoes, rinsed dark red kidney beans, rich chili powder, ground cumin, smoked paprika, and optional cayenne pepper to the pot.
10. Pour in the low-sodium beef broth and stir to combine all ingredients.
11. Bring the chili to a simmer, then reduce the heat to low.
12. Let the chili simmer uncovered for 15-20 minutes, stirring occasionally, until slightly thickened.
13. Tip: For a thicker chili, let it simmer a few minutes longer.
14. Once the fries are baked, transfer them to a large, oven-safe serving platter or cast-iron skillet.
15. Pour the hot chili evenly over the bed of crispy fries.
16. Sprinkle the shredded sharp cheddar cheese evenly over the chili layer.
17. Place the platter under the broiler for 2-3 minutes, watching closely, until the cheese is fully melted and bubbly.
18. Tip: Broiling quickly melts the cheese without overcooking the fries underneath.
19. Remove the platter from the oven and top with the thinly sliced fresh scallions and dollops of cool sour cream.
20. Serve immediately while hot and melty.
Flavor-packed and texturally satisfying, each bite offers a crunch from the fry, a meaty spice from the chili, and a creamy sharpness from the cheese. The cool sour cream cuts through the richness perfectly. For a fun twist, serve individual portions in small paper cones for easy handling at parties.
Traditional Patty Melt Sandwich
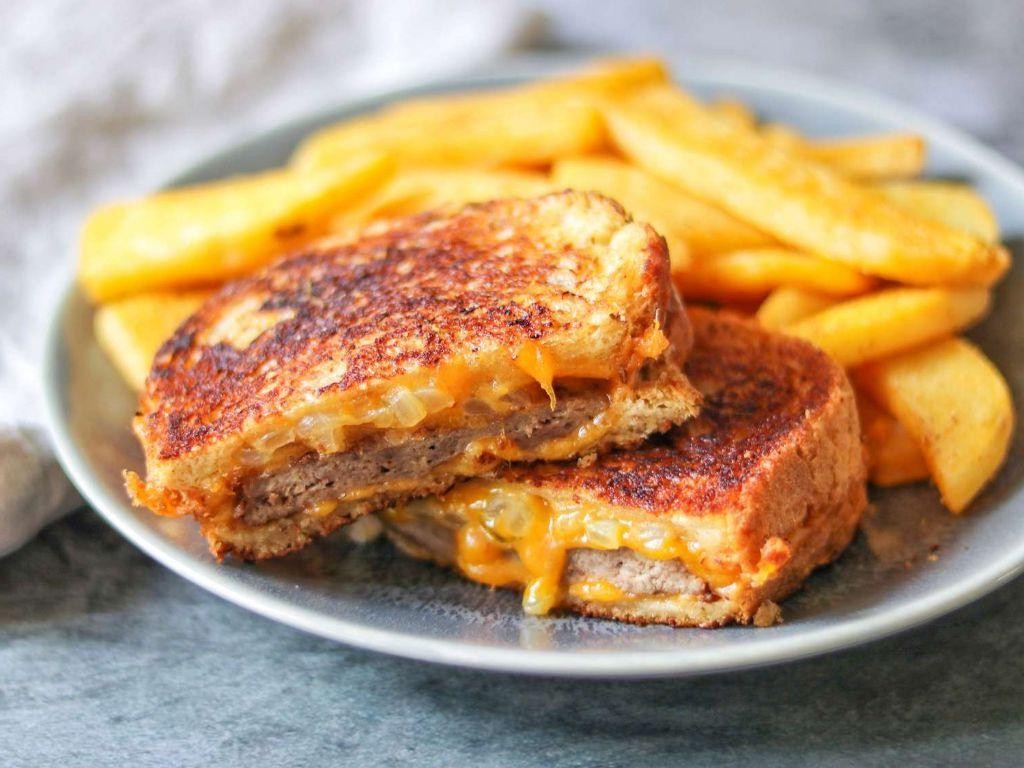
Just when you think a burger can’t get better, the patty melt proves you wrong. This diner classic stacks juicy beef, caramelized onions, and melted cheese between buttery grilled rye for the ultimate comfort food. It’s simple, satisfying, and ready in minutes.
Serving: 2 | Pre Time: 10 minutes | Cooking Time: 15 minutes
Ingredients
– 1 lb 80/20 ground beef
– 2 medium yellow onions, thinly sliced
– 4 slices Swiss cheese
– 4 slices seeded rye bread
– 4 tbsp unsalted butter, softened
– 1 tbsp vegetable oil
– Kosher salt
– Freshly ground black pepper
Instructions
1. Heat 1 tbsp vegetable oil in a large skillet over medium heat.
2. Add thinly sliced yellow onions and cook, stirring occasionally, for 10-12 minutes until deeply golden and caramelized. Tip: Don’t rush this—low and slow cooking builds flavor.
3. Transfer onions to a plate and wipe the skillet clean.
4. Divide 1 lb 80/20 ground beef into two equal portions and shape into oval patties slightly larger than your bread slices.
5. Season both sides of the patties generously with kosher salt and freshly ground black pepper.
6. Reheat the same skillet over medium-high heat.
7. Cook the patties for 3-4 minutes per side until a firm crust forms and internal temperature reaches 160°F. Tip: Press gently with a spatula only once to avoid squeezing out juices.
8. Remove patties and top each immediately with 2 slices Swiss cheese to melt.
9. Spread 1 tbsp softened unsalted butter evenly on one side of each slice of seeded rye bread.
10. Place two bread slices butter-side down in the skillet over medium heat.
11. Layer each with a cheesy patty and a generous scoop of caramelized onions.
12. Top with remaining bread slices, butter-side up.
13. Grill for 2-3 minutes per side until golden brown and crispy. Tip: Use a lid or press lightly with a spatula to help the cheese melt completely.
14. Remove from heat and let rest for 1 minute before slicing diagonally.
Crispy, buttery rye gives way to a juicy, well-seasoned beef patty, while the Swiss cheese adds a creamy tang that balances the sweet onions. Serve it with a side of dill pickle spears and potato chips for the full diner experience, or try dipping each bite in thousand island dressing for an extra flavor boost.
Classic Club Sandwich with Turkey and Bacon
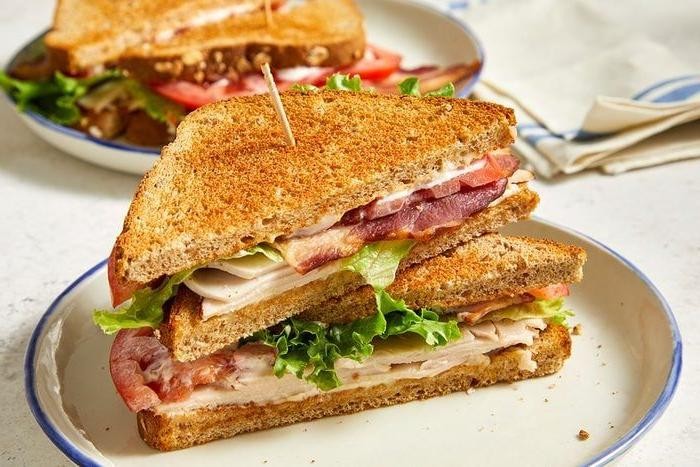
Bold flavors and satisfying textures make this classic sandwich a lunchtime favorite. It’s a triple-decker masterpiece of savory turkey, crispy bacon, and fresh vegetables. You’ll assemble it in minutes for a hearty, no-fuss meal.
Serving: 2 | Pre Time: 10 minutes | Cooking Time: 10 minutes
Ingredients
– 6 slices of thick-cut, artisanal sourdough bread
– 8 ounces of thinly sliced, roasted turkey breast
– 6 strips of applewood-smoked bacon
– 4 tablespoons of creamy, high-quality mayonnaise
– 4 crisp leaves of butter lettuce
– 2 ripe, juicy beefsteak tomatoes
– 1 ripe Hass avocado
– 2 tablespoons of unsalted, European-style butter
– 1/4 teaspoon of finely ground black pepper
Instructions
1. Place 6 strips of applewood-smoked bacon in a single layer in a cold, large skillet.
2. Cook the bacon over medium heat for 8–10 minutes, flipping halfway, until deeply browned and crisp. Tip: Starting in a cold pan renders fat slowly for even cooking.
3. Transfer the bacon to a paper towel-lined plate to drain; discard all but 1 tablespoon of bacon fat from the skillet.
4. Spread 2 tablespoons of unsalted, European-style butter evenly on one side of each of the 6 slices of thick-cut, artisanal sourdough bread.
5. Toast the bread, butter-side down, in the skillet with reserved bacon fat over medium heat for 2–3 minutes per side until golden brown and crisp.
6. Slice 2 ripe, juicy beefsteak tomatoes into 1/4-inch thick rounds; season lightly with 1/4 teaspoon of finely ground black pepper.
7. Halve, pit, and thinly slice 1 ripe Hass avocado.
8. Spread 1 tablespoon of creamy, high-quality mayonnaise on the unbuttered side of 2 toasted bread slices.
9. Layer 2 crisp leaves of butter lettuce, half the sliced avocado, and half the tomato slices on each mayonnaise-coated slice.
10. Top each with a second toasted bread slice, unbuttered side up.
11. Spread 1 tablespoon of mayonnaise on each of these second slices.
12. Layer 4 ounces of thinly sliced, roasted turkey breast and 3 strips of cooked bacon on each.
13. Cap each sandwich with the remaining toasted bread slices, buttered side out. Tip: Secure with long toothpicks through all layers before cutting.
14. Cut each sandwich diagonally into quarters with a serrated knife. Tip: A gentle sawing motion prevents ingredients from squishing out.
Elegant layers deliver a crunch from the toast and bacon, creaminess from avocado and mayo, and bright freshness from lettuce and tomato. For a twist, serve it open-faced or add a swipe of spicy aioli. It’s a timeless combination that never disappoints.
Golden Buttermilk Pancakes with Maple Syrup

Let’s get straight to these fluffy, golden pancakes. Light and airy with a subtle tang, they’re the perfect weekend breakfast. Just add maple syrup and you’re set.
Serving: 4 | Pre Time: 10 minutes | Cooking Time: 15 minutes
Ingredients
– 1 ½ cups all-purpose flour
– 2 tablespoons granulated sugar
– 2 teaspoons baking powder
– ½ teaspoon baking soda
– ½ teaspoon fine sea salt
– 1 ¼ cups cold buttermilk
– 1 large farm-fresh egg
– 3 tablespoons melted unsalted butter
– 1 teaspoon pure vanilla extract
– 2 tablespoons vegetable oil for cooking
– Pure maple syrup for serving
Instructions
1. Whisk 1 ½ cups all-purpose flour, 2 tablespoons granulated sugar, 2 teaspoons baking powder, ½ teaspoon baking soda, and ½ teaspoon fine sea salt in a large bowl.
2. In a separate bowl, whisk 1 ¼ cups cold buttermilk, 1 large farm-fresh egg, 3 tablespoons melted unsalted butter, and 1 teaspoon pure vanilla extract until smooth.
3. Pour the wet ingredients into the dry ingredients. Gently fold with a spatula until just combined; lumps are fine to avoid tough pancakes.
4. Heat a non-stick skillet or griddle over medium heat (350°F). Add ½ tablespoon vegetable oil and swirl to coat.
5. Pour ¼ cup batter per pancake onto the hot surface. Cook until bubbles form on the surface and edges look set, about 2-3 minutes.
6. Flip each pancake with a spatula. Cook until golden brown on the second side, about 1-2 minutes more.
7. Transfer cooked pancakes to a warm oven (200°F) on a baking sheet to keep them hot. Repeat with remaining batter, adding oil as needed.
8. Serve immediately with pure maple syrup drizzled generously over the top.
Stack them high for a dramatic presentation. Soft and pillowy inside with crisp, buttery edges, these pancakes soak up syrup beautifully. Try adding fresh berries or a dollop of whipped cream for extra flair.
Retro Milkshake with Whipped Cream and Cherry

Perfect for a nostalgic treat, this retro milkshake brings back classic diner vibes with its creamy texture and sweet toppings. It’s quick to whip up for a satisfying dessert or afternoon pick-me-up.
Serving: 2 | Pre Time: 5 minutes | Cooking Time: 0 minutes
Ingredients
– 4 cups of high-quality vanilla ice cream
– 1 cup of whole milk
– 2 tablespoons of pure vanilla extract
– 1 cup of heavy whipping cream
– 2 tablespoons of granulated sugar
– 2 maraschino cherries with stems
Instructions
1. Place 4 cups of high-quality vanilla ice cream into a blender.
2. Pour 1 cup of whole milk over the ice cream in the blender.
3. Add 2 tablespoons of pure vanilla extract to the blender mixture.
4. Blend the ingredients on high speed for 30 seconds until smooth and creamy, scraping down the sides if needed for even consistency.
5. Chill two tall glasses in the freezer for 5 minutes to keep the milkshakes cold longer.
6. Pour the blended milkshake evenly into the chilled glasses, leaving about 1 inch of space at the top for whipped cream.
7. In a separate mixing bowl, combine 1 cup of heavy whipping cream and 2 tablespoons of granulated sugar.
8. Whip the cream mixture with an electric mixer on medium-high speed for 2-3 minutes until stiff peaks form, being careful not to over-whip to avoid a grainy texture.
9. Spoon or pipe the whipped cream generously on top of each milkshake in the glasses.
10. Garnish each milkshake with 1 maraschino cherry with stem placed on the whipped cream.
11. Serve immediately with a straw and long spoon for the full retro experience.
As you sip, the thick, velvety milkshake melts into a rich vanilla flavor, balanced by the airy whipped cream and sweet cherry burst. For a fun twist, add a sprinkle of crushed cookies or a drizzle of chocolate syrup before the whipped cream to customize it to your taste.
Crispy Hash Browns with Eggs

Crispy hash browns with eggs make a perfect breakfast that’s both satisfying and simple to prepare. This classic combination delivers crunch and richness in every bite, requiring just a few quality ingredients and straightforward techniques to shine. Get ready to transform basic potatoes and eggs into a standout morning meal.
Serving: 2 | Pre Time: 10 minutes | Cooking Time: 20 minutes
Ingredients
– 2 medium russet potatoes, peeled and grated
– 4 large farm-fresh eggs
– 2 tbsp rich extra virgin olive oil
– 1 tbsp creamy unsalted butter
– 1/2 tsp coarse kosher salt
– 1/4 tsp finely ground black pepper
– 1/4 tsp smoked paprika
Instructions
1. Place grated potatoes in a clean kitchen towel and squeeze firmly to remove excess moisture.
2. Heat 1 tbsp extra virgin olive oil in a large nonstick skillet over medium-high heat until shimmering.
3. Spread potatoes evenly in the skillet, pressing down with a spatula to form a compact layer.
4. Cook potatoes for 8-10 minutes without disturbing until the bottom turns golden brown and crispy.
5. Carefully flip the hash browns using a large spatula, adding the remaining 1 tbsp olive oil around the edges.
6. Cook the second side for 6-8 minutes until uniformly crispy and deeply golden.
7. Season the hash browns with coarse kosher salt, finely ground black pepper, and smoked paprika.
8. Transfer crispy hash browns to a plate and cover loosely with foil to keep warm.
9. In the same skillet, melt creamy unsalted butter over medium heat until foamy.
10. Crack farm-fresh eggs directly into the skillet, spacing them evenly apart.
11. Cook eggs for 3-4 minutes until the whites are fully set but yolks remain runny.
12. Season eggs lightly with remaining salt and pepper.
13. Slide eggs onto the plate with hash browns, serving immediately.
Every element of this dish offers distinct textures—the shatteringly crisp potatoes contrast beautifully with the creamy, runny egg yolks. For a creative twist, top with sliced avocado or a drizzle of hot sauce to add brightness and heat that complements the savory foundation.
Savory Country Biscuits and Gravy
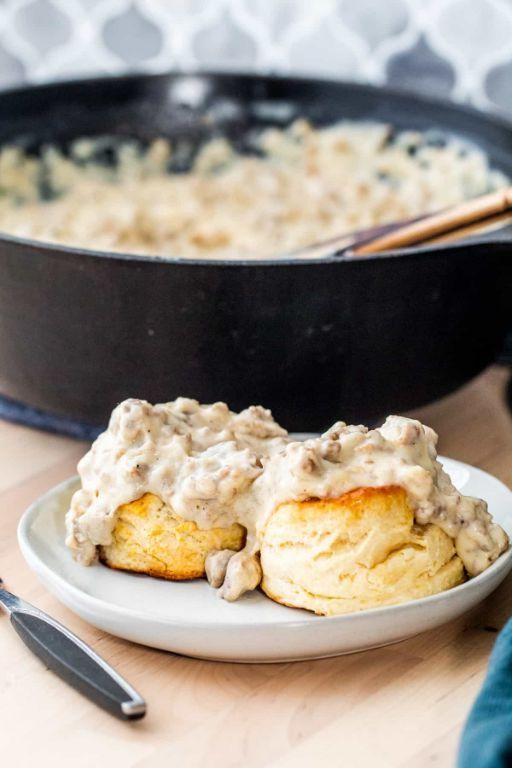
Venture into a classic American breakfast with flaky biscuits smothered in a creamy, peppery sausage gravy. This hearty dish delivers comfort in every bite, perfect for lazy weekend mornings or a satisfying brunch.
Serving: 6 | Pre Time: 15 minutes | Cooking Time: 25 minutes
Ingredients
– 2 cups all-purpose flour
– 1 tbsp baking powder
– 1 tsp salt
– 1/2 cup cold unsalted butter, cubed
– 3/4 cup cold buttermilk
– 1 lb bulk breakfast sausage
– 1/4 cup all-purpose flour
– 3 cups whole milk
– 1 tsp freshly ground black pepper
– 1/2 tsp salt
Instructions
1. Preheat your oven to 425°F.
2. In a large bowl, whisk together 2 cups of all-purpose flour, 1 tablespoon of baking powder, and 1 teaspoon of salt.
3. Add 1/2 cup of cold, cubed unsalted butter to the flour mixture.
4. Use a pastry cutter or your fingers to work the butter into the flour until pea-sized crumbs form.
5. Pour in 3/4 cup of cold buttermilk and stir just until a shaggy dough comes together.
6. Turn the dough onto a lightly floured surface and gently pat it into a 1-inch thick rectangle.
7. Fold the dough in half and pat it down again to create flaky layers.
8. Use a 2.5-inch round cutter to cut out biscuits, pressing straight down without twisting.
9. Place the biscuits on a parchment-lined baking sheet, spacing them 2 inches apart.
10. Bake for 12-15 minutes, until golden brown and puffed.
11. While the biscuits bake, cook 1 pound of bulk breakfast sausage in a large skillet over medium heat, breaking it into crumbles with a spatula.
12. Once the sausage is browned and no longer pink, sprinkle 1/4 cup of all-purpose flour over it and stir for 1 minute to cook off the raw flour taste.
13. Gradually whisk in 3 cups of whole milk, stirring constantly to prevent lumps.
14. Bring the gravy to a simmer and cook for 5-7 minutes, until thickened to a creamy consistency.
15. Stir in 1 teaspoon of freshly ground black pepper and 1/2 teaspoon of salt.
16. Split the warm biscuits in half and place them on plates.
17. Ladle the hot sausage gravy generously over the biscuit halves.
Warm, flaky biscuits soak up the rich, peppery gravy for a melt-in-your-mouth experience. The creamy texture contrasts beautifully with the tender sausage crumbles. For a twist, top with a fried egg or serve alongside roasted potatoes for a full Southern-style feast.
Conclusion
Whether you’re craving fluffy pancakes, a juicy burger, or a slice of classic pie, this collection brings the heart of the American diner right to your kitchen. We hope these 34 timeless recipes inspire your next home-cooked meal. Give them a try, leave a comment with your favorite, and don’t forget to share this delicious roundup on Pinterest!