
Whether you’re craving crispy comfort food or quick, healthy lunches, your air fryer is about to become your new best friend. We’ve gathered 26 mouthwatering recipes that transform simple ingredients into satisfying midday meals in minutes. From golden veggie wraps to perfectly crisp chicken tenders, get ready to revolutionize your lunch routine with these delicious, fuss-free creations that will have you looking forward to noon every day!
Crispy Air Fryer Chicken Tenders

Nailed it, folks—crispy, golden chicken tenders without the deep-fryer guilt! These air fryer wonders deliver that satisfying crunch we all crave, minus the oil-splattered kitchen and questionable life choices. Get ready to meet your new weeknight hero that’ll have even the pickiest eaters begging for seconds.
3
servings15
minutes18
minutesIngredients
– 1 pound chicken tenders (I grab the fresh ones—they’re juicier than frozen!)
– 1 cup all-purpose flour (spoon and level it, or you’ll end up with a flour avalanche)
– 2 large eggs, lightly beaten (room temp eggs bind the coating better, trust me)
– 1 cup panko breadcrumbs (the secret to that epic crunch—don’t skimp!)
– 1 teaspoon garlic powder (because everything’s better with garlic)
– 1 teaspoon paprika (for a subtle smoky kick and gorgeous color)
– 1/2 teaspoon salt (I use fine sea salt—it distributes evenly)
– 1/4 teaspoon black pepper (freshly ground if you’re feeling fancy)
– Cooking spray (my go-to is avocado oil spray for its high smoke point)
Instructions
1. Preheat your air fryer to 400°F for 3 minutes—this ensures even cooking from the start.
2. Pat the chicken tenders completely dry with paper towels (this is my top tip for maximum crispiness!).
3. In a shallow bowl, whisk together the flour, garlic powder, paprika, salt, and black pepper.
4. Pour the beaten eggs into a second shallow bowl.
5. Place the panko breadcrumbs in a third shallow bowl.
6. Dredge each chicken tender in the flour mixture, shaking off any excess.
7. Dip the floured tender into the eggs, letting any extra drip back into the bowl.
8. Press the tender firmly into the panko breadcrumbs, coating all sides evenly (press hard—this is tip #2 for that crunch factor!).
9. Arrange the coated tenders in a single layer in the air fryer basket, leaving space between them.
10. Lightly spray the tenders with cooking spray for golden perfection.
11. Air fry at 400°F for 10 minutes, then flip each tender carefully with tongs.
12. Spray the flipped side lightly with cooking spray.
13. Air fry for another 5–7 minutes, until the internal temperature reaches 165°F and the coating is deep golden brown (use a meat thermometer—tip #3 for perfectly cooked chicken every time!).
14. Let the tenders rest for 2 minutes before serving—they’ll stay juicier.
Just imagine that first bite: shatteringly crisp outside, tender and juicy inside, with a hint of smoky paprika. Serve them stacked high with honey mustard for dipping, or chop them over a fresh salad for a crunchy protein boost—either way, they’re downright irresistible.
Air Fryer Turkey Avocado Wraps

Virtually every lunchtime, I face the eternal struggle: something delicious, healthy, and ready before my stomach stages a full-blown mutiny. Enter these air fryer turkey avocado wraps, the crispy, creamy solution that has officially dethroned sad desk salads. They’re so good, you might just start looking forward to Mondays.
2
wraps10
minutes16
minutesIngredients
– 4 large flour tortillas (the burrito-sized ones are my heroes for holding the goods)
– 1 lb thinly sliced turkey breast (I go for the oven-roasted kind for maximum flavor)
– 1 large avocado, pitted and sliced (get one that’s just ripe—yields slightly to pressure)
– 1 cup shredded Monterey Jack cheese (because melty cheese is non-negotiable)
– 1/2 cup plain Greek yogurt (my secret for a tangy, protein-packed spread)
– 1 tbsp fresh lime juice (a squeeze from about half a lime brightens everything up)
– 1/2 tsp garlic powder (the lazy chef’s best friend for instant flavor)
– 1/2 tsp smoked paprika (for that subtle, smoky kick)
– Cooking spray (avocado oil spray is my go-to for its high smoke point)
Instructions
1. Preheat your air fryer to 375°F for 3 minutes to ensure it’s ready for crispiness.
2. In a small bowl, mash the avocado with the Greek yogurt, lime juice, garlic powder, and smoked paprika until mostly smooth.
3. Lay one tortilla flat on a clean surface and spread a quarter of the avocado-yogurt mixture evenly over the center, leaving a 1-inch border.
4. Layer 1/4 of the sliced turkey breast evenly over the avocado spread.
5. Sprinkle 1/4 cup of the shredded Monterey Jack cheese over the turkey.
6. Fold the bottom edge of the tortilla up over the filling, then fold in the sides, and roll tightly away from you to form a secure wrap. Tip: Don’t overfill, or you’ll have a leaky situation!
7. Repeat steps 3 through 6 with the remaining tortillas and ingredients.
8. Lightly spray the outside of each wrap with cooking spray to help them crisp up beautifully.
9. Place two wraps seam-side down in the air fryer basket, ensuring they aren’t touching.
10. Air fry at 375°F for 6-8 minutes, flipping halfway through, until the tortillas are golden brown and crispy. Tip: Check at 6 minutes—air fryers can vary, and you want that perfect golden hue.
11. Remove the first batch and repeat with the remaining two wraps.
12. Let the wraps rest for 2 minutes on a cutting board before slicing. Tip: This helps the cheese set so your fillings don’t escape!
Yum—these wraps are a textural dream with that crackly tortilla shell giving way to creamy avocado and savory turkey. Serve them whole for a handheld feast or slice them diagonally to show off those gorgeous layers at your next picnic. Honestly, they’re so good, you might just “accidentally” make a double batch.
Zesty Air Fryer Fish Tacos

Yikes, your boring dinner routine just got a major upgrade! These zesty air fryer fish tacos are here to rescue your weeknights with minimal effort and maximum flavor—because who has time for complicated cooking when there’s Netflix to binge?
8
tacos10
minutes13
minutesIngredients
– 1 lb white fish fillets (I’m team cod for its flaky texture, but tilapia works too)
– 2 tbsp olive oil (extra virgin is my kitchen MVP)
– 1 lime, juiced (freshly squeezed—none of that bottled stuff!)
– 1 tsp chili powder (kicks things up just right)
– 1/2 tsp cumin (the secret warmth whisperer)
– 1/2 tsp garlic powder (because fresh garlic can be fussy)
– 1/4 tsp salt (I use kosher for even distribution)
– 8 small corn tortillas (warmed and slightly charred—trust me)
– 1 cup shredded purple cabbage (for that satisfying crunch)
– 1/4 cup chopped cilantro (skip if you’re one of those soap-tasters)
– 1/4 cup sour cream (full-fat for creaminess, no regrets)
Instructions
1. Pat the fish fillets completely dry with paper towels to ensure crispiness.
2. In a medium bowl, whisk together olive oil, lime juice, chili powder, cumin, garlic powder, and salt.
3. Brush the spice mixture evenly over both sides of each fish fillet.
4. Preheat your air fryer to 400°F for 3 minutes—hot start for optimal cooking!
5. Arrange fish in a single layer in the air fryer basket, leaving space between pieces.
6. Air fry for 8–10 minutes until the edges are golden and fish flakes easily with a fork.
7. While fish cooks, warm tortillas in a dry skillet over medium heat for 30 seconds per side until pliable.
8. Flake the cooked fish into bite-sized chunks using two forks.
9. Spread 1 tablespoon sour cream onto each warmed tortilla.
10. Top tortillas evenly with shredded cabbage, flaked fish, and chopped cilantro.
Whoa, that crispy-spiced fish against the cool crunch of cabbage is pure magic! Serve these immediately with extra lime wedges for squeezing, or go wild by adding pickled onions—your taste buds will throw a fiesta.
Air Fryer Veggie-Stuffed Bell Peppers

Alright, let’s transform those lonely bell peppers into vibrant, veggie-packed vessels of deliciousness that even your pickiest eater might accidentally love. Air fryer magic means we’re cutting cooking time dramatically while achieving that perfect tender-yet-crisp texture we all crave.
3
portions15
minutes15
minutesIngredients
- 4 large bell peppers (any color—I’m partial to the red ones for their sweetness)
- 1 cup cooked quinoa (I like to make a big batch on Sundays for easy weeknight meals)
- 1 cup black beans, rinsed and drained (canned is perfectly fine—no judgment here)
- 1 cup corn kernels (frozen works great, just thaw it first)
- 1/2 cup diced red onion (because everything’s better with a little purple crunch)
- 1/2 cup shredded Monterey Jack cheese (the melty factor is non-negotiable)
- 2 tbsp olive oil (extra virgin is my kitchen workhorse)
- 1 tsp chili powder (smoked if you’re feeling fancy)
- 1/2 tsp garlic powder (the lazy cook’s best friend)
- 1/2 tsp cumin (for that warm, earthy vibe)
- 1/4 tsp salt (don’t skip this—it brings all the flavors together)
Instructions
- Slice the tops off all 4 bell peppers and remove the seeds and membranes, creating hollow pepper cups.
- Brush the outside of each pepper with 1 tablespoon of olive oil to help them crisp up beautifully in the air fryer.
- In a large bowl, combine the cooked quinoa, black beans, corn, diced red onion, 1/4 cup of the shredded cheese, chili powder, garlic powder, cumin, and salt.
- Mix the filling thoroughly until all ingredients are evenly distributed and coated with spices.
- Spoon the quinoa mixture evenly into each prepared bell pepper, packing it down gently but firmly.
- Sprinkle the remaining 1/4 cup of shredded cheese over the top of each stuffed pepper.
- Place the stuffed peppers in your air fryer basket, making sure they aren’t touching for optimal air circulation.
- Air fry at 375°F for 12-15 minutes, until the peppers are tender with slight charring on the edges and the cheese is golden and bubbly.
- Carefully remove the peppers from the air fryer using tongs—they’ll be hot!
- Let the peppers rest for 3-4 minutes before serving to allow the filling to set slightly.
What emerges are peppers with that perfect tender-crisp bite, giving way to a warmly spiced, cheesy filling that somehow feels both comforting and exciting. These beauties stand proudly on their own, but I love serving them sliced in half over a bed of greens for a deconstructed salad situation, or drizzled with a quick lime crema for extra zing.
Mediterranean Air Fryer Chicken Pitas
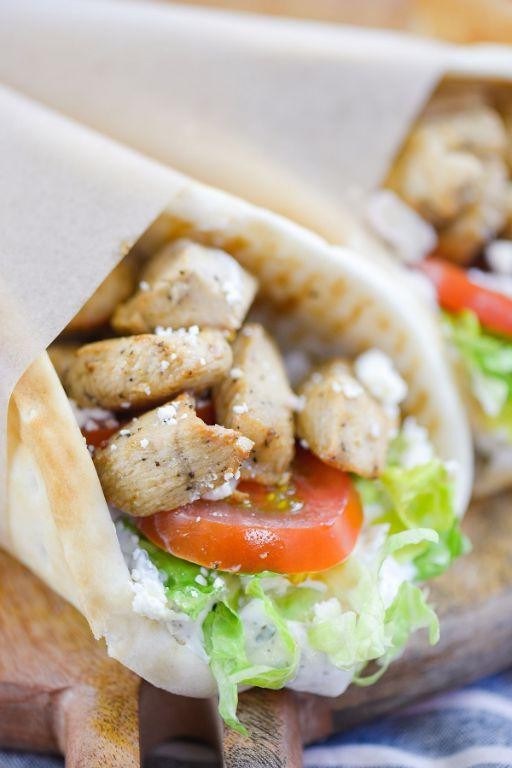
Zesty, zippy, and downright zany—these Mediterranean Air Fryer Chicken Pitas are the weeknight dinner hero you didn’t know you needed, ready to rescue you from the clutches of boring chicken and sad salads. Imagine juicy, herb-kissed chicken tucked into warm pitas with cool, crunchy veggies and a tangy yogurt sauce—it’s like a vacation for your taste buds without the airport security line. Trust me, your air fryer is about to become your new best friend (sorry, actual friends).
4
sandwiches15
minutes17
minutesIngredients
– 1 lb boneless, skinless chicken thighs (they stay juicier than breasts, I swear!)
– 2 tbsp extra virgin olive oil (my go-to for that fruity kick)
– 1 tsp dried oregano (crush it between your fingers to wake up the flavor)
– 1 tsp garlic powder (because fresh garlic can burn in the air fryer—learned that the hard way)
– ½ tsp smoked paprika (for a subtle smoky vibe)
– ½ tsp salt (I use fine sea salt for even distribution)
– ¼ tsp black pepper (freshly ground if you’re fancy)
– 4 medium pitas (I like the pocketless kind so fillings don’t escape)
– ½ cup plain Greek yogurt (full-fat for creaminess, don’t skimp!)
– 1 tbsp lemon juice (freshly squeezed—bottled stuff tastes like regret)
– 1 cup shredded romaine lettuce (crisp and sturdy, not wimpy)
– ½ cup diced cucumber (I prefer English cukes for fewer seeds)
– ¼ cup sliced Kalamata olives (pitted, unless you enjoy surprise dental work)
– 2 tbsp chopped fresh dill (dried dill is a sad imitation)
Instructions
1. Pat the chicken thighs completely dry with paper towels to ensure crispy edges in the air fryer.
2. In a medium bowl, whisk together the olive oil, oregano, garlic powder, smoked paprika, salt, and black pepper until combined.
3. Add the chicken thighs to the bowl and toss thoroughly to coat every surface with the spice mixture.
4. Preheat your air fryer to 375°F for 3 minutes—this helps the chicken cook evenly from the start.
5. Arrange the chicken in a single layer in the air fryer basket, leaving space between pieces for air circulation.
6. Air fry the chicken at 375°F for 12 minutes, flipping each piece halfway through with tongs.
7. Check that the chicken reaches an internal temperature of 165°F using a meat thermometer inserted into the thickest part.
8. Transfer the cooked chicken to a cutting board and let it rest for 5 minutes to redistribute juices.
9. While the chicken rests, warm the pitas in the air fryer at 350°F for 2 minutes until soft and pliable.
10. In a small bowl, stir together the Greek yogurt, lemon juice, and chopped dill to make the sauce.
11. Thinly slice or chop the rested chicken into bite-sized pieces.
12. Assemble each pita by spreading 2 tablespoons of the yogurt sauce inside, then adding shredded lettuce, diced cucumber, chicken pieces, and sliced olives.
Oh my goodness, the contrast of warm, herbaceous chicken against the cool, crunchy veggies and tangy yogurt sauce is pure magic. Serve these pitas wrapped in parchment paper for easy handling, or go full Mediterranean mezze by adding sides like hummus and roasted peppers—either way, prepare for empty plates and happy faces.
Air Fryer Falafel with Mint Yogurt Sauce

Ready to rock your taste buds with a crispy, guilt-free twist on a Middle Eastern classic? These air fryer falafel are about to become your new obsession—they’re so good, you’ll forget they’re not deep-fried. Let’s dive into this flavor fiesta that’s perfect for busy weeknights or impressing your foodie friends!
12
patties15
minutes17
minutesIngredients
- 1 (15-ounce) can chickpeas, drained and rinsed (I give them a quick pat dry to avoid soggy falafel)
- 1/4 cup finely chopped red onion (the sharper, the better for that zesty kick)
- 2 cloves garlic, minced (fresh is my go-to—none of that jarred stuff!)
- 1/4 cup fresh parsley, chopped (pack it in for maximum herby goodness)
- 2 tablespoons all-purpose flour (just enough to bind everything together)
- 1 teaspoon ground cumin (toasted cumin seeds? Even better if you’re feeling fancy)
- 1/2 teaspoon baking powder (the secret to fluffy insides)
- 1/2 teaspoon salt (I use sea salt for a clean finish)
- 2 tablespoons olive oil (extra virgin is my ride-or-die for spraying)
- 1 cup plain Greek yogurt (full-fat for creaminess, but low-fat works too)
- 2 tablespoons fresh mint, finely chopped (don’t skip this—it’s the sauce superstar)
- 1 tablespoon lemon juice (freshly squeezed, because bottled just won’t cut it)
Instructions
- Preheat your air fryer to 375°F for 3 minutes—this ensures even cooking from the start.
- Combine chickpeas, red onion, garlic, parsley, flour, cumin, baking powder, and salt in a food processor.
- Pulse the mixture for 15–20 seconds until it’s coarse but holds together when pressed (tip: don’t over-blend, or it’ll turn mushy).
- Shape the mixture into 12 equal-sized balls, about 1.5 inches each, and gently flatten them into patties.
- Lightly spray the air fryer basket with olive oil to prevent sticking.
- Arrange falafel patties in a single layer in the basket, leaving space between them for air circulation.
- Spray the tops of the patties with olive oil for that golden crispiness.
- Air fry at 375°F for 12–14 minutes, flipping halfway through, until deeply golden and firm to the touch (tip: check at 12 minutes—ovens vary!).
- While falafel cook, whisk Greek yogurt, mint, and lemon juice in a small bowl until smooth.
- Let falafel rest for 2 minutes after cooking to crisp up further (tip: patience pays off with extra crunch).
Hello, texture lovers! These falafel boast a crackly exterior giving way to a tender, herb-packed center, while the mint yogurt sauce adds a cool, tangy contrast. Stuff them into warm pita with crunchy veggies, or crumble over a salad for a protein punch—either way, they’re downright addictive.
Air Fryer BBQ Pulled Pork Sandwiches
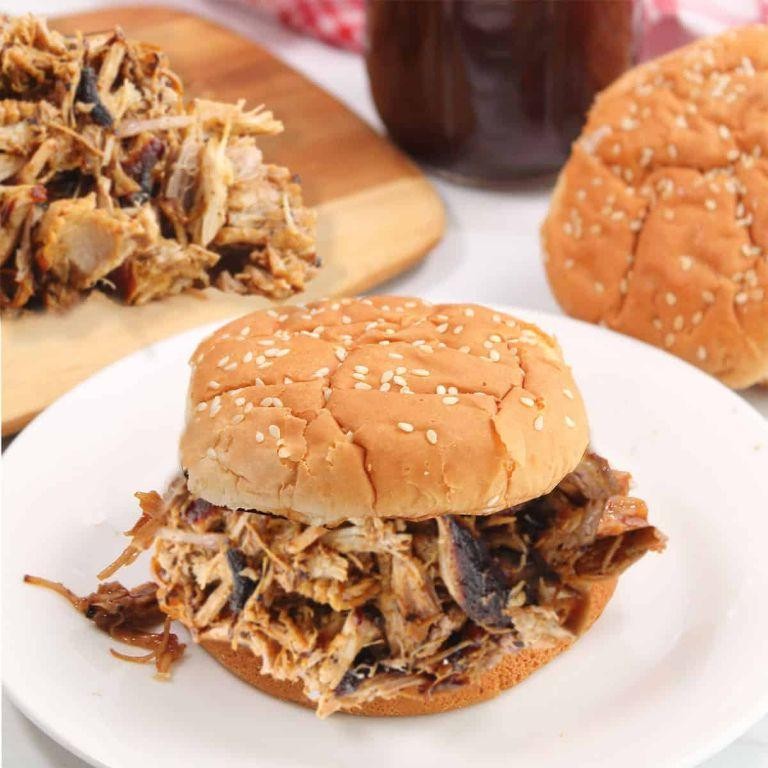
Ready to transform your air fryer from a frozen-fry specialist into a pulled pork powerhouse? This recipe delivers that slow-cooked, smoky flavor in a fraction of the time, proving your favorite kitchen gadget is far more versatile than it gets credit for.
2
sandwiches15
minutes55
minutesIngredients
- 2 lbs pork shoulder (cut into 2-inch chunks—trust me, smaller pieces are the secret to speed)
- 1/4 cup of your favorite BBQ sauce (I’m fiercely loyal to a sweet and smoky Kansas City style)
- 1 tbsp brown sugar (for that caramelized crust we all dream about)
- 1 tsp smoked paprika (the non-negotiable ingredient for fake-out smokiness)
- 1/2 tsp garlic powder (the quick-and-easy flavor hero)
- 1/2 tsp onion powder (its best friend in the spice cabinet)
- 1/2 tsp salt (I use fine sea salt for even distribution)
- 1/4 tsp black pepper (freshly cracked, always)
- 4 hamburger bles (the squishy, potato kind is my absolute favorite for sopping up juices)
Instructions
- Pat the pork shoulder chunks completely dry with paper towels—this is crucial for getting a proper sear instead of a steam.
- In a large bowl, combine the brown sugar, smoked paprika, garlic powder, onion powder, salt, and black pepper.
- Add the dried pork chunks to the bowl and toss vigorously until every piece is evenly coated in the spice rub.
- Arrange the seasoned pork in a single layer in your air fryer basket, ensuring no pieces are touching for optimal air circulation.
- Air fry at 375°F for 20 minutes to develop a flavorful, caramelized crust on the outside of the pork.
- Reduce the air fryer temperature to 325°F and continue cooking for another 25-30 minutes.
- Check for doneness—the pork should be fork-tender and shred easily when pulled with two forks. (Pro tip: If it doesn’t shred easily, cook in 5-minute increments until it does.)
- Transfer the cooked pork to a clean bowl and use two forks to shred it completely, discarding any large pieces of fat.
- Pour the BBQ sauce over the shredded pork and mix thoroughly until every strand is coated and glossy.
- Return the sauced pork to the air fryer basket and cook at 350°F for 5 minutes to heat the sauce through and let it slightly caramelize.
- While the pork heats for the final time, lightly toast your hamburger buns in a toaster or a dry skillet until golden brown.
- Pile the hot, saucy pulled pork generously onto the bottom halves of your toasted buns and top with the other halves.
Keep those napkins handy because the tender, juicy pork piled high on a soft bun creates a spectacularly messy eating experience. The magic is in the contrasting textures—the crispy, caramelized edges of pork against the saucy, melt-in-your-mouth shreds is pure barbecue bliss. For a next-level move, try serving these open-faced with a cool, crunchy coleslaw right on top to cut through the richness.
Savory Air Fryer Quinoa Cakes
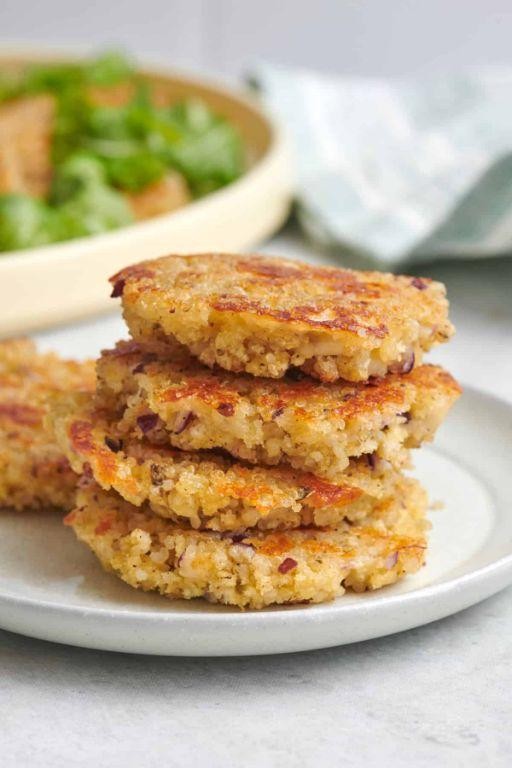
Now, who knew those little quinoa grains could transform into crispy, golden cakes that’ll make your air fryer do a happy dance? These savory quinoa cakes are the ultimate kitchen hack for when you want something fancy but have approximately zero patience for complicated recipes. They’re so good, you might just forget you’re eating something actually healthy!
8
portions20
minutes21
minutesIngredients
– 2 cups cooked quinoa (I always make extra the night before because lazy mornings are real)
– 1 large egg, lightly beaten (room temp works best for even mixing, trust me)
– 1/4 cup grated Parmesan cheese (the good stuff, not the sad green can)
– 2 tablespoons all-purpose flour (just enough to bind everything together)
– 2 tablespoons finely chopped fresh parsley (because everything’s better with fresh herbs)
– 1 teaspoon garlic powder (the lazy cook’s best friend)
– 1/2 teaspoon onion powder (its quieter but equally important cousin)
– 1/4 teaspoon smoked paprika (for that subtle smoky magic)
– 1/4 teaspoon salt (don’t skip this – bland quinoa cakes are sad quinoa cakes)
– 1/4 teaspoon black pepper (freshly ground if you’re feeling fancy)
– 2 tablespoons olive oil (my trusty extra virgin for that perfect crisp)
Instructions
1. Combine the cooked quinoa, beaten egg, grated Parmesan cheese, all-purpose flour, chopped parsley, garlic powder, onion powder, smoked paprika, salt, and black pepper in a large mixing bowl.
2. Mix all ingredients thoroughly with a fork until well combined and the mixture holds together when pressed. (Tip: If the mixture seems too wet, add another tablespoon of flour.)
3. Use your hands to form the quinoa mixture into 8 equal-sized patties, about 1/2-inch thick and 3 inches in diameter.
4. Place the formed patties on a plate and refrigerate for 15 minutes to help them firm up. (This chilling step is crucial – it prevents them from falling apart in the air fryer!)
5. Preheat your air fryer to 375°F for 3 minutes.
6. Lightly brush both sides of each quinoa cake with olive oil using a pastry brush.
7. Arrange the quinoa cakes in a single layer in the air fryer basket, leaving space between them for air circulation.
8. Air fry at 375°F for 10 minutes, then carefully flip each cake using tongs. (Tip: Don’t overcrowd the basket – cook in batches if needed for best results.)
9. Continue air frying for another 8-10 minutes until golden brown and crispy on both sides.
10. Remove the quinoa cakes from the air fryer and let them rest on a wire rack for 2 minutes before serving. (This resting time helps them firm up perfectly!)
Get ready for that satisfying crunch when you bite into these golden beauties! The exterior gives way to a tender, flavorful interior that’s packed with savory goodness. Try stacking them with a fried egg on top for breakfast, or serve alongside a zesty lemon aioli for dipping – they’re so versatile, you’ll want to make them your new go-to weeknight hero.
Air Fryer Stuffed Portobello Mushrooms

Let’s be real—your air fryer is basically a superhero in appliance form, and these stuffed portobello mushrooms are its latest crime-fighting masterpiece. They’re ridiculously easy, packed with flavor, and perfect for when you want to feel fancy without actually trying. Seriously, these bad boys will make you look like a gourmet chef while you’re secretly in your pajamas.
3
portions15
minutes14
minutesIngredients
- 4 large portobello mushroom caps, stems removed (go for the meatiest ones you can find—they hold up better!)
- 1 cup panko breadcrumbs (the crispy, light kind that makes everything better)
- 1/2 cup grated Parmesan cheese (the real stuff, not the shaky can—trust me on this)
- 1/4 cup extra virgin olive oil (my go-to for that fruity, rich flavor)
- 2 cloves garlic, minced (fresh is best, but I won’t judge if you use the jarred kind in a pinch)
- 1/4 cup chopped fresh parsley (it adds a bright, herby pop that dried just can’t match)
- 1/2 tsp salt (I use kosher salt for even distribution)
- 1/4 tsp black pepper (freshly ground if you’re feeling extra)
Instructions
- Preheat your air fryer to 375°F—this ensures even cooking from the get-go.
- Gently wipe the portobello caps with a damp paper towel to remove any dirt (no rinsing—they’re like sponges and will get soggy!).
- Use a spoon to scrape out the gills from the underside of each mushroom cap; this prevents a muddy flavor and makes more room for stuffing.
- Brush both sides of the mushroom caps with 2 tablespoons of the olive oil—this helps them crisp up beautifully.
- In a medium bowl, combine the panko, Parmesan, garlic, parsley, salt, pepper, and remaining 2 tablespoons of olive oil; mix until everything is well-coated and clumpy.
- Divide the stuffing mixture evenly among the mushroom caps, pressing it down firmly so it doesn’t fly around in the air fryer.
- Place the stuffed mushrooms in the air fryer basket in a single layer, leaving a little space between them for air circulation.
- Air fry at 375°F for 12–14 minutes, or until the tops are golden brown and the mushrooms are tender when pierced with a fork.
- Let them rest for 2–3 minutes before serving—this allows the juices to redistribute and prevents a steam burn.
Craving a bite? These mushrooms come out with a juicy, meaty base and a crispy, cheesy topping that’s downright addictive. Serve them as a standout appetizer or pile them on a bed of greens for a light meal—either way, they’ll disappear faster than you can say “more please.”
Spicy Air Fryer Buffalo Cauliflower Bites

Tired of the same old game day snacks that leave your taste buds snoozing? These fiery little florets are about to become your new MVP—crispy, saucy, and packing just enough heat to make your tongue do a happy dance without calling the fire department. Seriously, who needs wings when cauliflower can strut this confidently in buffalo sauce?
2
servings15
minutes25
minutesIngredients
– 1 large head of cauliflower, cut into bite-sized florets (go for those chunky pieces—they hold the crunch better!)
– 1 cup all-purpose flour (I like to use unbleached for a slightly heartier coating)
– 1 cup milk (whole milk is my secret for extra creamy batter, but any works)
– 2 teaspoons garlic powder (don’t skimp—this is the flavor backbone!)
– 1 teaspoon smoked paprika (adds that subtle smokiness that makes it sing)
– 1/2 teaspoon salt (I use fine sea salt for even distribution)
– 1/4 teaspoon black pepper (freshly ground if you’ve got it)
– 1/2 cup buffalo sauce (Frank’s RedHot is my go-to for that classic tang)
– 2 tablespoons melted unsalted butter (because butter makes everything better, right?)
– Cooking spray (avocado oil spray is my favorite for its high smoke point)
Instructions
1. Preheat your air fryer to 375°F—this ensures everything cooks evenly from the get-go.
2. In a large bowl, whisk together 1 cup all-purpose flour, 1 cup milk, 2 teaspoons garlic powder, 1 teaspoon smoked paprika, 1/2 teaspoon salt, and 1/4 teaspoon black pepper until smooth. Tip: Let the batter sit for 5 minutes to thicken slightly; it’ll cling to the cauliflower like a cozy blanket.
3. Add the bite-sized cauliflower florets to the batter and toss until each piece is fully coated.
4. Lightly spray the air fryer basket with cooking spray to prevent sticking.
5. Arrange the battered cauliflower in a single layer in the basket, leaving space between pieces for air circulation.
6. Air fry at 375°F for 12 minutes, then flip each piece using tongs. Tip: Flip gently to keep the coating intact—no one wants naked cauliflower!
7. Air fry for another 8-10 minutes until golden brown and crispy. Check for doneness by piercing a floret with a fork; it should be tender but not mushy.
8. While the cauliflower cooks, whisk 1/2 cup buffalo sauce and 2 tablespoons melted unsalted butter in a separate bowl.
9. Transfer the cooked cauliflower to a large bowl and pour the buffalo sauce mixture over it, tossing to coat evenly. Tip: Toss quickly while the cauliflower is hot so the sauce soaks in beautifully.
10. Return the sauced cauliflower to the air fryer basket and cook at 400°F for 3-4 minutes until the sauce is sticky and caramelized.
Zesty, tangy, and with a crunch that’ll make you forget they’re veggies, these bites are perfect piled high on a platter with celery sticks and blue cheese dressing for dipping. Serve them straight from the air fryer—the heat locks in that irresistible crispness while the sauce clings like a best friend who knows all your secrets.
Air Fryer Grilled Cheese and Tomato Soup Bites

Whoever said you can’t improve upon perfection clearly never tried stuffing grilled cheese and tomato soup into bite-sized air fryer magic. Welcome to the snack that solves the eternal “dip or dunk” debate by making every single bite a perfect marriage of crispy, cheesy, and soupy goodness. This is the ultimate cozy comfort food upgrade that’ll have you questioning all your previous life choices.
8
rolls15
minutes13
minutesIngredients
– 8 slices white sandwich bread (the fluffier, the better for maximum crisp-to-soft ratio)
– 1 cup shredded sharp cheddar cheese (I’m team extra-sharp for that tangy punch)
– 1/2 cup cream cheese, softened (room temp is crucial for smooth spreading)
– 1/2 cup canned tomato soup, undiluted (the classic condensed kind creates the perfect creamy filling)
– 1/4 cup unsalted butter, melted (I always use salted butter for that extra flavor boost)
– 1 tsp garlic powder (because everything’s better with garlic)
– 1/2 tsp dried basil (fresh works too, but dried gives that nostalgic soup flavor)
Instructions
1. Cut crusts off all 8 bread slices using a sharp knife, then roll each slice flat with a rolling pin until about 1/4-inch thick.
2. In a medium bowl, combine 1 cup shredded cheddar cheese, 1/2 cup softened cream cheese, 1/2 cup tomato soup, and 1/2 tsp dried basil until fully incorporated.
3. Spread approximately 2 tablespoons of the cheese-soup mixture evenly over each flattened bread slice, leaving a 1/2-inch border around the edges.
4. Tightly roll each bread slice from one short end to the other, pressing gently to seal the edge.
5. In a small bowl, mix 1/4 cup melted butter with 1 tsp garlic powder until well combined.
6. Brush the garlic butter mixture generously over all sides of each bread roll using a pastry brush.
7. Preheat your air fryer to 375°F for 3 minutes until the basket feels hot to the touch.
8. Arrange the rolls in a single layer in the air fryer basket, leaving space between each for proper air circulation.
9. Air fry at 375°F for 8-10 minutes, flipping halfway through, until golden brown and crispy on all sides.
10. Remove bites from the air fryer using tongs and let cool on a wire rack for 2 minutes before serving.
These little wonders emerge from the air fryer with the most satisfying crunch that gives way to that warm, gooey tomato-cheese center. The garlic butter crust adds that restaurant-quality flair while keeping everything perfectly handheld. Try serving them alongside extra tomato soup for dipping—because sometimes, you just can’t have too much of a good thing.
Air Fryer Sesame Shrimp Lettuce Wraps

Prepare to ditch the takeout menus, because these air fryer sesame shrimp lettuce wraps are about to become your new weeknight superhero—crispy, saucy, and ready faster than you can say “pass the soy sauce.”
8
wraps15
minutes11
minutesIngredients
- 1 lb raw shrimp, peeled and deveined—I like the jumbo ones for maximum crunch-to-bite ratio
- 2 tbsp soy sauce—the regular kind, not low-sodium, because we’re here for flavor
- 1 tbsp sesame oil—toasted, please, for that nutty aroma that makes your kitchen smell like a dream
- 1 tbsp honey—for a touch of sweetness that balances the salty soy
- 1 tsp grated ginger—freshly grated, because the jarred stuff just doesn’t hit the same
- 1 garlic clove, minced—don’t be shy, this is the flavor booster
- 1 tbsp cornstarch—the secret to getting that crispy coating without deep-frying
- 1 tbsp sesame seeds—for sprinkling, because everything’s better with a little crunch
- 8 large butter lettuce leaves—the perfect vessel, no floppy greens allowed
- 2 green onions, thinly sliced—for a fresh, oniony kick at the end
Instructions
- Pat the shrimp completely dry with paper towels—this is my top tip for ensuring they crisp up instead of steam.
- In a medium bowl, whisk together the soy sauce, sesame oil, honey, grated ginger, and minced garlic until well combined.
- Toss the dried shrimp in the cornstarch until evenly coated—this creates a light crust that crisps beautifully in the air fryer.
- Add the coated shrimp to the sauce mixture, stirring gently to coat each piece.
- Preheat your air fryer to 400°F for 3 minutes—trust me, this extra step makes all the difference for even cooking.
- Arrange the shrimp in a single layer in the air fryer basket, making sure none are overlapping.
- Air fry at 400°F for 6–8 minutes, flipping halfway through, until the shrimp are pink and crispy-edged.
- Sprinkle the sesame seeds over the shrimp during the last minute of cooking—this toasts them perfectly without burning.
- While the shrimp cook, rinse and pat dry the butter lettuce leaves, then arrange them on a serving platter.
- Divide the hot shrimp evenly among the lettuce leaves, then top with sliced green onions.
Bite into these and you’ll get that satisfying crunch from the sesame-coated shrimp, followed by the cool, crisp lettuce that keeps things light. The sweet-salty glaze clings to every nook, making these irresistible straight from the platter—or try stacking them high for a DIY wrap bar at your next gathering.
Air Fryer Margherita Flatbread Pizza

Mmm, let’s be real—your oven is probably judging you for all those frozen pizza boxes, but this air fryer flatbread is about to become your new kitchen BFF. Who needs delivery when you can have crispy, cheesy perfection in minutes without heating up your entire apartment?
1
flatbread5
minutes9
minutesIngredients
- 1 pre-made naan or flatbread (I grab the garlic kind because, well, garlic makes everything better)
- 1/4 cup pizza sauce (the jarred stuff works perfectly—no shame in this game)
- 1/2 cup shredded low-moisture mozzarella cheese (the melty, stringy kind that makes you feel like a pizza pro)
- 4-5 fresh basil leaves (torn, not chopped—it keeps those fragrant oils intact)
- 1 tbsp extra virgin olive oil (my go-to for that golden, crispy crust)
- 1/4 tsp dried oregano (a little sprinkle for that classic pizza parlor vibe)
Instructions
- Preheat your air fryer to 375°F for 3 minutes—this ensures your flatbread gets that instant crispiness instead of steaming.
- Brush the entire surface of your naan with 1/2 tablespoon of olive oil, paying extra attention to the edges (this is the secret to that golden, cracker-like crust).
- Spread pizza sauce evenly over the oiled naan, leaving a 1/2-inch border around the edges for proper crust formation.
- Sprinkle shredded mozzarella cheese uniformly over the sauce—don’t pile it too high in the center or you’ll get a soggy middle.
- Add dried oregano evenly across the cheese layer for that aromatic, herby kick.
- Carefully place the assembled flatbread into the preheated air fryer basket, ensuring it lies flat without overlapping edges.
- Air fry at 375°F for 5-6 minutes, watching closely after the 4-minute mark—you want bubbly, lightly browned cheese but not burnt edges.
- Remove the flatbread using tongs and immediately top with torn fresh basil leaves while still hot (the residual heat wilts the basil perfectly).
- Drizzle the remaining 1/2 tablespoon of olive oil over the finished pizza just before slicing.
- Let rest for 1 minute on a cutting board before slicing into wedges—this allows the cheese to set so it doesn’t slide off.
Every bite delivers that satisfying crunch from the oil-brushed crust contrasting with the stretchy mozzarella and bright basil. Try serving it alongside a simple arugula salad dressed with lemon vinaigrette for a full meal that’ll make you forget you ever dialed for delivery.
Air Fryer Stuffed Zucchini Boats

Every time my zucchini plants go into overdrive, I know it’s time for these glorious air fryer stuffed zucchini boats—because honestly, who has counter space for a dozen giant squashes? They’re basically edible canoes filled with cheesy, savory goodness that even veggie-skeptics will devour.
3
portions15
minutes26
minutesIngredients
– 4 medium zucchini (look for firm, vibrant green ones—no sad, floppy zucchinis allowed!)
– 1 tbsp extra virgin olive oil (my go-to for that fruity kick)
– 1/2 cup finely diced yellow onion (sweet and sassy, just how I like it)
– 2 cloves garlic, minced (fresh only—jarred garlic is a crime in my kitchen)
– 1/2 lb ground Italian sausage (mild or hot, depending on your spice tolerance)
– 1/2 cup marinara sauce (I use my homemade batch, but store-bought works in a pinch)
– 1/2 cup shredded mozzarella cheese (the meltier, the better)
– 1/4 cup grated Parmesan cheese (for that salty, umami punch)
– 1 tsp Italian seasoning (shake it like you mean it)
– 1/4 tsp black pepper (freshly ground, please—your taste buds will thank you)
Instructions
1. Preheat your air fryer to 375°F—this ensures even cooking from the get-go.
2. Slice each zucchini in half lengthwise, then use a spoon to scoop out the flesh, leaving a 1/4-inch thick shell. (Pro tip: Don’t toss the scooped flesh! Chop it finely and add it to the filling for extra moisture.)
3. Brush the zucchini boats lightly with olive oil inside and out—this helps them crisp up beautifully.
4. Air fry the empty zucchini boats for 8 minutes at 375°F until they’re slightly tender but still hold their shape.
5. While the boats cook, heat 1 tbsp olive oil in a skillet over medium heat and sauté the onion for 3–4 minutes until translucent.
6. Add the minced garlic and cook for 1 more minute until fragrant—don’t let it brown!
7. Crumble in the ground Italian sausage and cook for 6–8 minutes, breaking it up with a spatula, until fully browned and no pink remains.
8. Stir in the marinara sauce, Italian seasoning, and black pepper, then simmer for 2 minutes to let the flavors meld.
9. Remove the zucchini boats from the air fryer and evenly divide the sausage mixture among them.
10. Top each boat with a mix of mozzarella and Parmesan cheeses, pressing lightly so it sticks.
11. Air fry the stuffed boats at 375°F for 6–8 minutes until the cheese is bubbly and golden brown. (Watch closely—air fryers can go from perfectly melted to scorched in seconds!)
12. Let them rest for 2 minutes before serving to avoid molten cheese burns.
Yes, these zucchini boats deliver a satisfying crunch from the tender-yet-firm shells, balanced by the rich, savory filling. Serve them with a crisp side salad for a light dinner, or slice them into bite-sized pieces as a party appetizer that’ll disappear faster than you can say “more cheese, please!”
Southwest Air Fryer Chicken Quesadillas

Finally, a quesadilla that won’t judge you for skipping the skillet dance! These Southwest Air Fryer Chicken Quesadillas are the crispy, cheesy, hands-off heroes your weeknights have been desperately craving, delivering all the flavor without any of the fuss. Get ready to fall in love with your air fryer all over again.
3
quesadillas15
minutes20
minutesIngredients
– 1 pound boneless, skinless chicken breasts, thinly sliced (I always pound them slightly for even cooking)
– 1 tablespoon olive oil (extra virgin is my trusty sidekick)
– 1 teaspoon chili powder
– 1/2 teaspoon ground cumin
– 1/2 teaspoon garlic powder
– 1/4 teaspoon smoked paprika
– 1/4 teaspoon salt
– 1/4 teaspoon black pepper
– 1 cup shredded Monterey Jack cheese (the melty, gooey king)
– 1/2 cup canned black beans, rinsed and drained (no one wants extra bean juice)
– 1/2 cup frozen corn, thawed (a sweet little pop in every bite)
– 1/4 cup finely diced red bell pepper (for that vibrant crunch)
– 4 large flour tortillas (8-inch size is the sweet spot)
– Cooking spray (my air fryer’s best friend for non-stick success)
Instructions
1. Preheat your air fryer to 375°F for 3 minutes.
2. In a medium bowl, toss the sliced chicken breasts with 1 tablespoon olive oil until evenly coated.
3. Sprinkle 1 teaspoon chili powder, 1/2 teaspoon ground cumin, 1/2 teaspoon garlic powder, 1/4 teaspoon smoked paprika, 1/4 teaspoon salt, and 1/4 teaspoon black pepper over the chicken, rubbing the spices in with your hands.
4. Arrange the seasoned chicken in a single layer in the air fryer basket.
5. Air fry the chicken at 375°F for 10 minutes, flipping the pieces halfway through, until the internal temperature reaches 165°F and the exterior is lightly browned.
6. Transfer the cooked chicken to a cutting board and let it rest for 2 minutes.
7. Chop the rested chicken into small, bite-sized pieces.
8. In a clean bowl, combine the chopped chicken, 1 cup shredded Monterey Jack cheese, 1/2 cup black beans, 1/2 cup corn, and 1/4 cup diced red bell pepper, mixing gently with a spoon.
9. Lay one flour tortilla flat on your work surface.
10. Spoon one-quarter of the chicken mixture onto one half of the tortilla, leaving a 1/2-inch border around the edge.
11. Fold the empty half of the tortilla over the filling, pressing down lightly.
12. Repeat steps 9–11 with the remaining tortillas and filling.
13. Lightly spray both sides of each assembled quesadilla with cooking spray.
14. Place two quesadillas in the air fryer basket in a single layer, ensuring they do not overlap.
15. Air fry at 375°F for 5 minutes, carefully flipping them with tongs halfway through, until the tortillas are golden brown and crispy and the cheese is fully melted.
16. Remove the cooked quesadillas and repeat step 15 with the remaining two quesadillas.
17. Transfer the quesadillas to a cutting board and let them cool for 1 minute before slicing.
Just imagine that first bite: a shatteringly crisp tortilla gives way to a smoky, cheesy interior where tender chicken mingles with sweet corn and earthy beans. Serve these beauties with a dollop of cool sour cream or a zesty avocado crema for a textural party that’ll have everyone reaching for seconds.
Conclusion
Gathering these 26 air fryer lunch recipes makes midday meals both effortless and exciting! From crispy favorites to healthy options, there’s something for every craving. We’d love to hear which recipes become your go-to lunches—drop a comment below with your favorites. Don’t forget to share this roundup on Pinterest so other home cooks can discover these satisfying meals too!


