Ever feel like dinner prep is a race against the clock? You’re not alone! That’s why we’ve gathered 28 irresistible air fryer recipes perfect for busy cooks. From crispy weeknight dinners to comforting favorites, these easy ideas will have you serving up delicious meals in a flash. Get ready to make your air fryer your new kitchen bestie—let’s dive into these tasty solutions!
Crispy Air Fryer Chicken Wings

Every time game day rolls around, I find myself craving that perfect crispy chicken wing—the kind that’s juicy inside but shatteringly crisp outside, without the mess of deep frying. After plenty of trial and error, I’ve landed on this air fryer method that’s become my absolute go-to; it’s quick, reliable, and satisfies that crunch craving every single time.
Serving: 4 | Pre Time: 10 minutes | Cooking Time: 25 minutes
Ingredients
– 2 pounds chicken wings, split into drumettes and flats (I always pat them super dry with paper towels first—it’s the secret to maximum crispiness)
– 1 tablespoon baking powder (not baking soda! This little trick creates an incredibly crispy skin)
– 1 teaspoon kosher salt (I use Diamond Crystal for its fine texture)
– 1 teaspoon garlic powder
– 1 teaspoon smoked paprika (my favorite for that hint of smokiness)
– ½ teaspoon black pepper, freshly ground
– 2 tablespoons extra virgin olive oil (my go-to for a light, even coat)
– ½ cup buffalo sauce, such as Frank’s RedHot (I keep a bottle in the fridge at all times for wings)
– 2 tablespoons unsalted butter, melted (for tossing—it adds a rich, glossy finish)
Instructions
1. Pat the 2 pounds of chicken wings completely dry with paper towels to remove any moisture.
2. In a large bowl, combine 1 tablespoon baking powder, 1 teaspoon kosher salt, 1 teaspoon garlic powder, 1 teaspoon smoked paprika, and ½ teaspoon black pepper.
3. Add the dried wings to the bowl and drizzle with 2 tablespoons extra virgin olive oil, tossing until evenly coated with the spice mixture.
4. Preheat your air fryer to 400°F for 3 minutes to ensure it’s hot and ready.
5. Arrange the wings in a single layer in the air fryer basket, leaving space between them for air circulation.
6. Air fry at 400°F for 12 minutes, then flip each wing using tongs for even cooking.
7. Continue air frying for another 10–13 minutes at 400°F, until the wings are golden brown and crispy, with an internal temperature of 165°F when checked with a meat thermometer.
8. While the wings cook, combine ½ cup buffalo sauce and 2 tablespoons melted unsalted butter in a medium bowl.
9. Transfer the cooked wings directly from the air fryer to the bowl with the buffalo sauce mixture, tossing gently to coat evenly.
10. Serve immediately while hot and crispy.
So, what you get are wings with an audibly crunchy exterior that gives way to tender, juicy meat inside. The smoky paprika and garlic in the dry rub meld perfectly with the tangy buffalo sauce, making these irresistible straight from the bowl. For a fun twist, I love serving them with extra sauce on the side for dipping, or pairing them with crisp celery sticks and a cool blue cheese dressing to balance the heat.
Simple Air Fryer French Fries

Diving into my kitchen after a long day, I often crave something crispy and comforting without the guilt of deep frying—that’s where these Simple Air Fryer French Fries come in. They’re my go-to snack when I want to satisfy that salty craving quickly, and I love how they turn out perfectly golden every time with just a few pantry staples. Honestly, I’ve made these so often that my air fryer practically knows the drill by now!
Serving: 2 | Pre Time: 10 minutes | Cooking Time: 20 minutes
Ingredients
– 2 large russet potatoes (I always scrub them well but leave the skins on for extra texture and nutrients—it’s a habit from my grandma’s kitchen)
– 1 tablespoon extra virgin olive oil (my go-to for a light, fruity flavor that doesn’t overwhelm the potatoes)
– 1/2 teaspoon kosher salt (I prefer this over table salt for its coarse, even distribution)
– 1/4 teaspoon garlic powder (a little secret I picked up from a friend to add a subtle savory kick)
– 1/4 teaspoon paprika (this gives a lovely color and a hint of smokiness without being spicy)
Instructions
1. Preheat your air fryer to 400°F for 5 minutes—this ensures even cooking from the start, a tip I learned after a few soggy batches.
2. While the air fryer heats, scrub the 2 large russet potatoes under cold water to remove any dirt, then pat them completely dry with paper towels to prevent steaming.
3. Cut each potato into uniform 1/4-inch thick sticks; I aim for matchstick-like pieces so they cook evenly and get that ideal crispiness.
4. In a large bowl, toss the potato sticks with 1 tablespoon extra virgin olive oil until they’re lightly coated all over.
5. Sprinkle in 1/2 teaspoon kosher salt, 1/4 teaspoon garlic powder, and 1/4 teaspoon paprika, then toss again to distribute the seasonings evenly—don’t skimp here, as it makes all the difference in flavor.
6. Arrange the seasoned potato sticks in a single layer in the air fryer basket, avoiding overcrowding; I do this in batches if needed to ensure they crisp up properly, another key tip for perfect fries.
7. Air fry at 400°F for 10 minutes, then shake the basket gently to flip the fries for even browning.
8. Continue air frying for another 8–10 minutes, checking at the 8-minute mark until they’re golden brown and crispy to your liking—keep an eye out as cooking times can vary slightly by air fryer model.
9. Remove the fries from the air fryer and let them cool for 2–3 minutes on a plate; this helps them firm up and become extra crunchy, a final trick I swear by.
10. Serve immediately while hot and crispy.
Perfectly crisp on the outside and tender inside, these fries have a savory depth from the garlic and paprika that makes them irresistible on their own. I love dipping them in a cool ranch or spicy ketchup for a fun twist, and they’re always a hit at my casual get-togethers—simple, satisfying, and sure to disappear fast!
Easy Air Fryer Shrimp Tacos

Remember those lazy summer evenings when you just want something delicious without heating up the whole kitchen? That’s exactly why I fell in love with these air fryer shrimp tacos—they’re my go-to for a quick, satisfying meal that feels special without the fuss. I started making them on busy weeknights, and now they’re a regular in our rotation, especially when I’m craving something light yet packed with flavor.
Serving: 4 | Pre Time: 15 minutes | Cooking Time: 10 minutes
Ingredients
– 1 lb large raw shrimp, peeled and deveined (I always buy wild-caught for the best flavor)
– 2 tbsp extra virgin olive oil, my go-to for its fruity notes
– 1 tsp chili powder
– 1/2 tsp garlic powder
– 1/2 tsp cumin
– 1/4 tsp smoked paprika (it adds a subtle smokiness I adore)
– 1/4 tsp salt
– 8 small corn tortillas (I warm them up for that perfect pliable texture)
– 1 cup shredded cabbage, for a fresh crunch
– 1/2 cup diced tomatoes
– 1/4 cup chopped cilantro, because I love its bright, herbal kick
– 1 lime, cut into wedges
– 1/4 cup sour cream, for a creamy finish
Instructions
1. Pat the shrimp dry with paper towels to ensure they crisp up nicely in the air fryer.
2. In a medium bowl, combine the olive oil, chili powder, garlic powder, cumin, smoked paprika, and salt.
3. Add the shrimp to the bowl and toss until evenly coated with the spice mixture.
4. Preheat your air fryer to 400°F for 3 minutes—this helps the shrimp cook evenly from the start.
5. Arrange the shrimp in a single layer in the air fryer basket, avoiding overcrowding for the crispiest results.
6. Air fry the shrimp at 400°F for 6–8 minutes, shaking the basket halfway through, until they turn pink and opaque.
7. While the shrimp cook, warm the corn tortillas in a dry skillet over medium heat for about 30 seconds per side, just until soft and pliable.
8. Assemble the tacos by placing a few shrimp on each warmed tortilla.
9. Top with shredded cabbage, diced tomatoes, and chopped cilantro.
10. Drizzle with sour cream and serve immediately with lime wedges on the side for squeezing over.
And just like that, you’ve got tacos with juicy, perfectly seasoned shrimp and a delightful mix of textures—the crisp cabbage and soft tortillas make every bite a joy. I love serving these with an extra sprinkle of cilantro and a cold drink for a simple, vibrant meal that always hits the spot.
Quick Air Fryer Vegetable Medley

Veggie lovers, gather ’round! I’m always on the hunt for a side dish that’s as easy as it is delicious, especially on those busy weeknights when I’m juggling work and family. This Quick Air Fryer Vegetable Medley has become my go-to—it’s a vibrant, hands-off recipe that turns simple produce into something truly special, with minimal cleanup to boot.
Serving: 4 | Pre Time: 10 minutes | Cooking Time: 15 minutes
Ingredients
– 2 cups of broccoli florets (I chop them into bite-sized pieces for even cooking)
– 1 large red bell pepper, sliced into 1-inch strips (the color makes the dish pop!)
– 1 medium zucchini, sliced into 1/2-inch rounds (I love how tender it gets)
– 1 cup of baby carrots (no need to peel—just wash and halve lengthwise)
– 2 tbsp extra virgin olive oil (my go-to for its rich flavor)
– 1 tsp garlic powder (a pantry staple that adds depth)
– 1/2 tsp smoked paprika (it gives a lovely smoky hint)
– 1/2 tsp salt (I use kosher salt for better distribution)
– 1/4 tsp black pepper (freshly ground if you have it)
Instructions
1. Preheat your air fryer to 400°F for 3 minutes—this helps the veggies crisp up nicely from the start.
2. In a large bowl, combine the broccoli florets, red bell pepper strips, zucchini rounds, and baby carrots.
3. Drizzle the extra virgin olive oil over the vegetables, tossing gently to coat them evenly.
4. Sprinkle the garlic powder, smoked paprika, salt, and black pepper over the veggies, then toss again until everything is well-seasoned.
5. Transfer the vegetable mixture to the air fryer basket in a single layer, avoiding overcrowding to ensure crispiness.
6. Air fry at 400°F for 10 minutes, shaking the basket halfway through to promote even browning.
7. After 10 minutes, check for doneness—the veggies should be tender with slightly charred edges. If needed, air fry for an additional 3-5 minutes until they reach your desired texture.
8. Carefully remove the basket and let the vegetables cool for 2 minutes before serving to avoid burning your mouth.
Flavorful and satisfying, this medley comes out with a perfect balance of crisp-tender textures and a smoky, savory kick from the spices. I love serving it over quinoa for a hearty meal or alongside grilled chicken—it’s versatile enough to brighten up any plate!
Juicy Air Fryer Hamburgers

Zipping through my weeknight dinners, I’ve found that nothing beats a juicy burger made right in the air fryer—it’s quick, mess-free, and delivers that crave-worthy char without firing up the grill. As a busy food blogger, I rely on this method when I’m short on time but still want a satisfying homemade meal. Trust me, once you try these, you’ll wonder why you ever bothered with the stovetop splatter!
Serving: 4 | Pre Time: 10 minutes | Cooking Time: 12 minutes
Ingredients
– 1 pound ground beef (80/20 blend for the best juiciness—I grab mine from the local butcher)
– 1 teaspoon kosher salt (I always use Diamond Crystal for its fine texture)
– ½ teaspoon black pepper, freshly ground if you can
– 4 hamburger buns (brioche is my go-to for a buttery touch)
– 4 slices cheddar cheese (sharp cheddar melts beautifully here)
– 1 tablespoon vegetable oil (a light coating prevents sticking)
– Optional toppings: lettuce, tomato, onion, pickles, ketchup, or mustard—I love adding crispy bacon for extra crunch!
Instructions
1. Preheat your air fryer to 375°F for 3 minutes—this ensures even cooking from the start.
2. In a medium bowl, combine the ground beef, kosher salt, and black pepper gently with your hands; overmixing can make the burgers tough.
3. Divide the mixture into 4 equal portions and shape them into ½-inch-thick patties, pressing a slight dimple in the center to prevent puffing up.
4. Lightly brush both sides of each patty with vegetable oil using a pastry brush or your fingers.
5. Place the patties in the air fryer basket in a single layer, leaving space between them for air circulation.
6. Cook at 375°F for 6 minutes, then flip the patties carefully with tongs.
7. Cook for another 4 minutes, then top each patty with a slice of cheddar cheese and cook for 2 more minutes until the cheese is melted and the internal temperature reaches 160°F on a meat thermometer.
8. While the burgers cook, toast the hamburger buns in a toaster or oven until lightly golden—this adds a nice crunch.
9. Remove the burgers from the air fryer and let them rest on a plate for 2 minutes to lock in the juices.
10. Assemble the burgers on the toasted buns with your preferred toppings.
Kicking back with these burgers, you’ll love the tender, medium-well texture and the smoky flavor from the air fryer’s crisp exterior. Serve them with sweet potato fries or a simple side salad for a complete meal, and don’t forget to drizzle with extra sauce if you’re feeling indulgent!
Effortless Air Fryer Chicken Tenders

Nothing beats a quick, crispy dinner that feels like a treat without the guilt—especially on busy weeknights when my kids are begging for something fun. I’ve been making these air fryer chicken tenders for years, tweaking the method until they’re perfectly golden and juicy every time, and they’ve become our go-to for movie nights or last-minute meals.
Serving: 4 | Pre Time: 10 minutes | Cooking Time: 12 minutes
Ingredients
– 1.5 pounds boneless, skinless chicken tenders (I always grab the organic ones from my local butcher—they’re plumper and more tender)
– 1 cup all-purpose flour (I keep mine in a sealed container to avoid clumps)
– 2 large eggs, at room temperature (they coat better when not cold straight from the fridge)
– 1 cup panko breadcrumbs (the Japanese-style ones give an extra crunch that I love)
– 1 teaspoon garlic powder (my secret for a savory kick without overpowering)
– 1 teaspoon paprika (smoked paprika adds a nice depth, but regular works too)
– 1/2 teaspoon salt (I use fine sea salt for even seasoning)
– 1/4 teaspoon black pepper (freshly ground if possible)
– Cooking spray (I prefer avocado oil spray for its high smoke point)
Instructions
1. Preheat your air fryer to 400°F for 3 minutes—this ensures even cooking from the start.
2. Pat the chicken tenders dry with paper towels to help the coating stick better.
3. In a shallow bowl, mix the flour, garlic powder, paprika, salt, and pepper until well combined.
4. In another bowl, whisk the eggs until smooth and frothy.
5. Place the panko breadcrumbs in a third bowl, spreading them out for easy dipping.
6. Dredge each chicken tender in the flour mixture, shaking off any excess.
7. Dip the floured tender into the egg mixture, letting any drips fall back into the bowl.
8. Press the tender into the panko breadcrumbs, coating it evenly on all sides.
9. Lightly spray the air fryer basket with cooking spray to prevent sticking.
10. Arrange the coated tenders in a single layer in the basket, leaving space between them for air circulation.
11. Spray the tops of the tenders lightly with cooking spray to promote browning.
12. Cook at 400°F for 6 minutes, then flip each tender carefully using tongs.
13. Cook for another 6 minutes, or until the internal temperature reaches 165°F and the coating is golden brown and crispy.
14. Transfer the tenders to a wire rack to cool slightly—this keeps them from getting soggy.
Perfectly crisp on the outside and tender inside, these chicken tenders have a savory flavor that pairs wonderfully with honey mustard or a simple ranch dip. I love serving them over a fresh salad for a lighter meal or stacking them in a basket with fries for a classic diner-style treat—they’re so versatile and always disappear fast!
Fast Air Fryer Breakfast Sausages
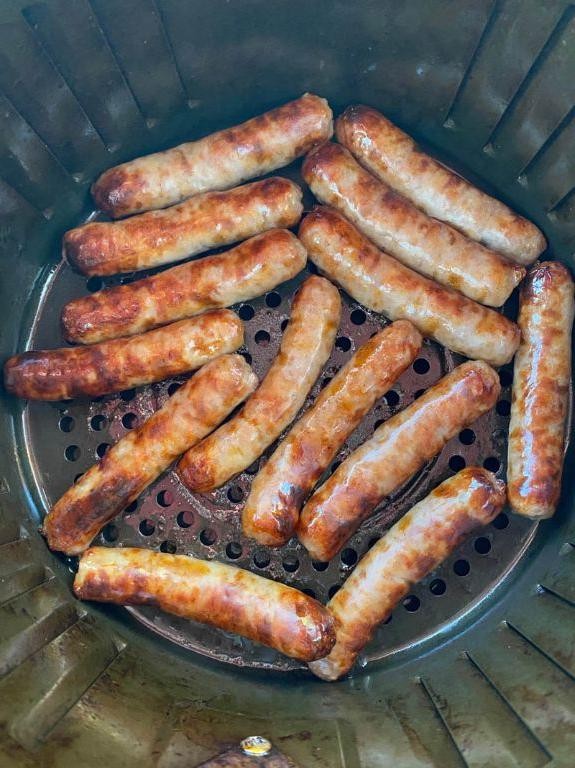
Pulling together a quick breakfast on busy mornings used to be my nemesis until I discovered how perfectly air fryers handle breakfast sausages. Now I can have crispy, juicy sausages ready in minutes without the mess of a skillet, and I’m sharing my go-to method so you can enjoy them too—whether you’re rushing out the door or making a lazy weekend brunch.
Serving: 4 | Pre Time: 5 minutes | Cooking Time: 10 minutes
Ingredients
– 1 pound breakfast sausage links (I love using pork sausage for that classic flavor, but turkey works great too)
– 1 tablespoon olive oil (extra virgin olive oil is my go-to for a light coating)
– 1 teaspoon maple syrup (a drizzle adds a hint of sweetness that balances the savory notes perfectly)
Instructions
1. Preheat your air fryer to 400°F for about 3 minutes—this ensures even cooking from the start.
2. In a small bowl, toss the 1 pound breakfast sausage links with 1 tablespoon olive oil and 1 teaspoon maple syrup until evenly coated; this helps them crisp up nicely.
3. Arrange the sausages in a single layer in the air fryer basket, leaving a little space between them for air circulation.
4. Cook at 400°F for 8–10 minutes, flipping them halfway through with tongs to ensure all sides are golden brown.
5. Check for doneness by inserting a meat thermometer into the thickest sausage—it should read 160°F internally, which guarantees they’re safe to eat.
6. Let the sausages rest in the basket for 2 minutes after cooking; this allows the juices to redistribute, keeping them moist.
7. Transfer to a plate and serve immediately while hot and crispy.
Golden and bursting with flavor, these sausages come out with a satisfying snap on the outside and a tender, juicy interior. I love pairing them with scrambled eggs or tucking them into a warm biscuit for a handheld breakfast—they’re so versatile and always a hit with my family.
Delicious Air Fryer Zucchini Fries

Whenever I’m craving something crispy but want to keep things on the lighter side, these air fryer zucchini fries are my absolute go-to. They’re so simple to whip up and always satisfy that crunchy snack craving without the guilt of deep frying—plus, my kids actually eat their veggies this way!
Serving: 4 | Pre Time: 15 minutes | Cooking Time: 12 minutes
Ingredients
– 2 medium zucchinis, sliced into ¼-inch thick fry shapes (I like to leave the skin on for extra nutrients and texture)
– ½ cup all-purpose flour (I always keep a bag in the freezer to keep it fresh)
– 2 large eggs, lightly beaten (room temperature eggs blend more smoothly with the flour)
– 1 cup panko breadcrumbs (the extra crunch from panko is totally worth it)
– ¼ cup grated Parmesan cheese (the pre-grated kind works fine, but fresh is even better)
– 1 tsp garlic powder (my secret flavor booster for almost everything)
– ½ tsp paprika (adds a nice smoky hint and a bit of color)
– ½ tsp salt (I use fine sea salt for even distribution)
– Cooking spray (I prefer an avocado oil spray for its high smoke point)
– ½ cup marinara sauce, for serving (store-bought is fine, but homemade is a game-changer)
Instructions
1. Preheat your air fryer to 400°F for 5 minutes to ensure it’s hot and ready.
2. Slice the zucchinis into ¼-inch thick fry-like strips, patting them completely dry with paper towels to remove excess moisture—this helps the coating stick better.
3. Place the all-purpose flour in a shallow bowl.
4. In a second shallow bowl, lightly beat the 2 large eggs until uniform.
5. In a third shallow bowl, combine the panko breadcrumbs, grated Parmesan cheese, garlic powder, paprika, and salt, mixing thoroughly with a fork.
6. Dredge each zucchini strip first in the flour, shaking off any excess.
7. Dip the floured zucchini into the beaten eggs, letting any extra drip off.
8. Press the zucchini firmly into the panko mixture, coating all sides evenly for maximum crispiness.
9. Lightly spray the air fryer basket with cooking spray to prevent sticking.
10. Arrange the coated zucchini fries in a single layer in the basket, leaving space between them for air circulation—don’t overcrowd, or they won’t crisp up properly.
11. Spray the tops of the fries lightly with more cooking spray.
12. Air fry at 400°F for 10-12 minutes, flipping them halfway through at the 6-minute mark, until golden brown and crispy.
13. Remove the fries from the air fryer and let them cool on a wire rack for 2-3 minutes to maintain their crunch.
14. Serve immediately with the marinara sauce for dipping.
Here’s why I love these fries: they come out with a satisfyingly crunchy exterior that gives way to a tender, almost creamy zucchini center. The hint of garlic and Parmesan adds a savory depth that pairs perfectly with the tangy marinara—try serving them alongside a burger or as a fun appetizer at your next gathering!
Speedy Air Fryer Salmon Fillets
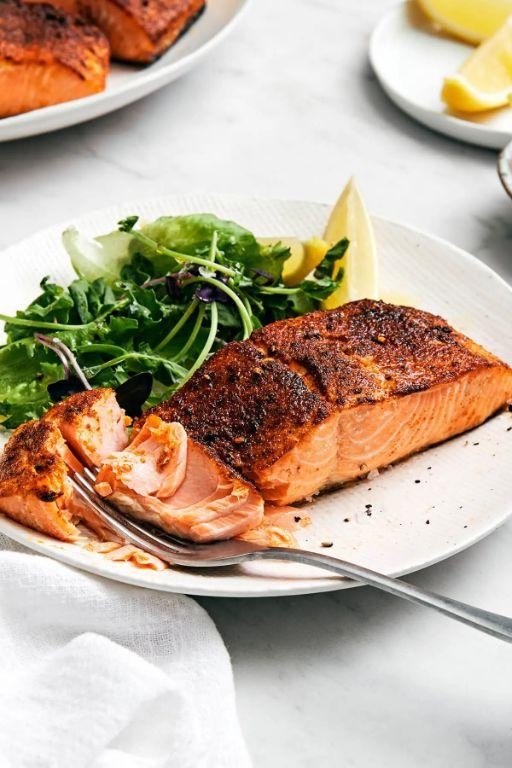
Busy weeknights call for quick, healthy dinners that don’t skimp on flavor, and these air fryer salmon fillets are my go-to lifesaver. I discovered this method during a hectic workweek when I needed something fast but still felt like a treat—now it’s a staple in my rotation, and I love how effortlessly it comes together. Trust me, even if you’re new to air frying, this recipe is foolproof and delivers restaurant-quality results in minutes.
Serving: 2 | Pre Time: 5 minutes | Cooking Time: 10 minutes
Ingredients
– 2 salmon fillets (about 6 oz each), skin-on for extra crispiness—I always grab wild-caught when it’s on sale.
– 1 tablespoon extra virgin olive oil, my kitchen staple for its mild, fruity notes.
– 1 teaspoon garlic powder, because I’m too lazy to mince fresh garlic on busy nights.
– 1 teaspoon smoked paprika, which adds a subtle smokiness I adore.
– ½ teaspoon kosher salt, which I find clings better than table salt.
– ¼ teaspoon black pepper, freshly ground if I have time—it makes a difference!
– 1 lemon, sliced into thin rounds for serving; I keep a bowl of lemons on my counter for brightness.
Instructions
1. Pat the salmon fillets dry with paper towels to remove excess moisture—this helps the skin get extra crispy in the air fryer.
2. In a small bowl, whisk together the extra virgin olive oil, garlic powder, smoked paprika, kosher salt, and black pepper until well combined.
3. Brush the spice mixture evenly over both sides of the salmon fillets, coating them thoroughly.
4. Preheat your air fryer to 400°F for 3 minutes to ensure even cooking from the start.
5. Place the salmon fillets skin-side down in the air fryer basket, leaving space between them for air circulation.
6. Air fry at 400°F for 8–10 minutes, depending on thickness—check at 8 minutes by inserting a fork; the salmon should flake easily but still be moist inside.
7. Remove the salmon from the air fryer using tongs and let it rest for 2 minutes on a plate to allow the juices to redistribute.
8. Serve the salmon hot, topped with the lemon slices for a zesty squeeze.
What I love most about this dish is how the skin crisps up perfectly while the interior stays tender and juicy, with the smoked paprika adding a warm, savory depth. Try pairing it with a simple quinoa salad or roasted veggies for a complete meal—it’s versatile enough for a casual dinner or impressing guests without the fuss.
Flavorful Air Fryer Stuffed Peppers

Unbelievably easy yet impressive, these air fryer stuffed peppers have become my go-to weeknight dinner—they’re the kind of dish that makes you feel like a kitchen hero without any fuss. I first tried them on a busy Tuesday when my fridge was nearly empty, and now they’re a regular in my rotation because they come together so quickly and pack a serious flavor punch. Honestly, they’re a lifesaver when you want something hearty and healthy without spending hours in the kitchen.
Serving: 4 | Pre Time: 15 minutes | Cooking Time: 20 minutes
Ingredients
– 4 large bell peppers, any color you like—I often mix red and green for a pop of color.
– 1 lb ground beef, I use 85% lean for the best balance of flavor and juiciness.
– 1 cup cooked white rice, leftover rice works perfectly here and saves time.
– 1/2 cup shredded cheddar cheese, plus extra for topping—I always grab sharp cheddar for that extra kick.
– 1/2 cup diced onion, I prefer yellow onion for its mild sweetness.
– 1/4 cup tomato sauce, from a can is fine, but I sometimes use homemade if I have it on hand.
– 2 tbsp extra virgin olive oil, my go-to for sautéing because it adds a nice fruity note.
– 1 tsp garlic powder, I keep this stocked for quick seasoning boosts.
– 1/2 tsp salt, I use kosher salt for even distribution.
– 1/4 tsp black pepper, freshly ground if possible for the best aroma.
Instructions
1. Preheat your air fryer to 375°F for about 5 minutes to ensure even cooking from the start.
2. Cut the tops off the bell peppers and remove the seeds and membranes, then set them aside.
3. In a large skillet over medium heat, heat the extra virgin olive oil until it shimmers, about 1 minute.
4. Add the diced onion to the skillet and sauté until softened and translucent, roughly 3-4 minutes.
5. Add the ground beef to the skillet, breaking it up with a spatula, and cook until no longer pink, about 5-7 minutes.
6. Drain any excess grease from the skillet, then stir in the cooked white rice, tomato sauce, garlic powder, salt, and black pepper until well combined.
7. Remove the skillet from heat and fold in the shredded cheddar cheese until melted and incorporated.
8. Spoon the beef and rice mixture evenly into the prepared bell peppers, packing it down lightly.
9. Place the stuffed peppers in the air fryer basket in a single layer, leaving space between them for air circulation.
10. Air fry at 375°F for 15-20 minutes, or until the peppers are tender and slightly charred at the edges.
11. Sprinkle extra shredded cheddar cheese on top of the peppers during the last 2 minutes of cooking to melt it perfectly.
12. Carefully remove the peppers from the air fryer using tongs and let them cool for 5 minutes before serving.
Generously stuffed and bursting with savory goodness, these peppers have a tender-crisp texture that holds up beautifully to the rich filling. I love serving them with a dollop of sour cream or a side salad for a complete meal—they’re so versatile and always disappear fast at my table!
Tasty Air Fryer Mozzarella Sticks

Remember those late-night cravings for crispy, gooey mozzarella sticks that always seemed like a restaurant-only treat? I used to think so too until my air fryer changed everything—now I make these at home whenever the mood strikes, and they’re just as satisfying without the deep-fryer mess. Let me share my foolproof method for golden, melty sticks that’ll have you skipping the takeout line.
Serving: 4 | Pre Time: 15 minutes | Cooking Time: 8 minutes
Ingredients
– 8 mozzarella string cheese sticks (I always keep a pack in the fridge for snacks)
– 1/2 cup all-purpose flour (I like to use a shallow bowl for easy dredging)
– 2 large eggs, lightly beaten (room temp eggs help the coating stick better)
– 1 cup Italian-seasoned breadcrumbs (the pre-seasoned kind saves time and adds flavor)
– 1/4 cup grated Parmesan cheese (the finely grated type blends perfectly with the breadcrumbs)
– Cooking spray (I use avocado oil spray for a light, even coat)
– 1/2 cup marinara sauce, for dipping (warmed up—it’s a must!)
Instructions
1. Cut each mozzarella string cheese stick in half crosswise to create 16 pieces total.
2. Place the 1/2 cup all-purpose flour in a shallow bowl.
3. In another shallow bowl, lightly beat the 2 large eggs until uniform.
4. In a third shallow bowl, combine the 1 cup Italian-seasoned breadcrumbs and 1/4 cup grated Parmesan cheese, mixing well with a fork.
5. Dredge each mozzarella piece first in the flour, shaking off any excess. Tip: Use one hand for dry ingredients and the other for wet to keep fingers less messy.
6. Dip the floured piece into the beaten eggs, coating it completely.
7. Roll the egg-coated piece in the breadcrumb-Parmesan mixture, pressing gently to adhere the crumbs evenly on all sides.
8. Place the coated mozzarella sticks on a plate and freeze for 10 minutes—this helps prevent cheese leakage during cooking. Tip: Don’t skip the freezing step; it’s key for that perfect melt.
9. Preheat your air fryer to 400°F for 3 minutes.
10. Arrange the frozen mozzarella sticks in a single layer in the air fryer basket, leaving a little space between them for air circulation.
11. Lightly spray the sticks with cooking spray to promote browning.
12. Air fry at 400°F for 6–8 minutes, flipping halfway through, until golden brown and crispy. Tip: Watch closely near the end to avoid overcooking—they brown quickly!
13. Remove the sticks carefully with tongs and let them cool for 2 minutes on a wire rack (this keeps them crisp).
14. Serve immediately with the 1/2 cup warmed marinara sauce for dipping.
Unbelievably crispy on the outside with that signature stretchy, molten cheese inside, these sticks are a game-changer for quick appetizers or movie nights. I love pairing them with a cold drink and extra sauce for dipping—trust me, they disappear fast!
Savory Air Fryer Pork Chops

Craving a juicy, flavorful pork chop without the mess of pan-frying or the wait of baking? I recently discovered that my air fryer—which I mostly used for frozen fries—could produce the most tender, perfectly seasoned pork chops in under 20 minutes. It’s become my go-to weeknight dinner when I want something satisfying but don’t feel like spending hours in the kitchen.
Serving: 4 | Pre Time: 10 minutes | Cooking Time: 12 minutes
Ingredients
– 4 boneless pork chops, about 1-inch thick (I grab these from my local butcher—they’re always more tender than pre-packaged ones)
– 2 tablespoons extra virgin olive oil (my go-to for its mild flavor)
– 1 teaspoon garlic powder
– 1 teaspoon smoked paprika (this adds a lovely depth—don’t skip it!)
– 1 teaspoon dried thyme
– 1/2 teaspoon salt (I use fine sea salt for even seasoning)
– 1/4 teaspoon black pepper, freshly ground if possible
– Cooking spray (I keep an avocado oil spray handy for easy coating)
Instructions
1. Pat the pork chops completely dry with paper towels—this helps the seasoning stick and promotes a better sear.
2. In a small bowl, whisk together the olive oil, garlic powder, smoked paprika, dried thyme, salt, and black pepper until well combined.
3. Rub the spice mixture evenly over both sides of each pork chop, massaging it in gently. Let them sit at room temperature for 5 minutes to absorb the flavors.
4. Preheat your air fryer to 400°F for 3 minutes—this ensures even cooking from the start.
5. Lightly spray the air fryer basket with cooking spray to prevent sticking.
6. Place the pork chops in a single layer in the basket, leaving a little space between them for air circulation.
7. Air fry at 400°F for 6 minutes, then carefully flip each chop using tongs.
8. Continue air frying for another 6 minutes, or until the internal temperature reaches 145°F on an instant-read thermometer inserted into the thickest part.
9. Transfer the pork chops to a plate and let them rest for 5 minutes—this keeps them juicy.
Just out of the air fryer, these pork chops have a beautifully crisp exterior with a tender, moist interior that’s infused with smoky paprika and aromatic thyme. I love serving them over a bed of creamy mashed potatoes or alongside a bright apple slaw for a comforting meal that feels special without any fuss.
Easy Air Fryer Bagel Bites

Kitchen shortcuts are my love language, and these Easy Air Fryer Bagel Bites are my latest obsession—they’re the perfect solution for those busy weeknights when my kids are begging for a snack, or when I need a quick, shareable appetizer without heating up the whole oven. Honestly, I’ve made these so many times that my air fryer practically preheats itself at the mere sight of a bagel!
Serving: 4 | Pre Time: 10 minutes | Cooking Time: 8 minutes
Ingredients
– 4 plain bagels, sliced in half (I grab everything bagels when I want extra flavor, but plain works beautifully here)
– 1 cup marinara sauce (my secret is a jar of Rao’s—it’s rich and never watery)
– 1 cup shredded mozzarella cheese (I always use whole-milk for that perfect melt)
– 24 slices of pepperoni (about 3 ounces—I go for the thin-sliced kind for maximum crispiness)
– 1 tablespoon olive oil (extra virgin is my go-to for a light brush)
– 1 teaspoon dried oregano (a pinch from my little herb jar adds that classic pizza vibe)
Instructions
1. Preheat your air fryer to 375°F for 3 minutes—this ensures even cooking from the start.
2. Slice the 4 plain bagels in half horizontally to create 8 halves.
3. Lightly brush the cut sides of each bagel half with 1 tablespoon of olive oil using a pastry brush.
4. Place the bagel halves cut-side up in the air fryer basket in a single layer, working in batches if needed to avoid overcrowding.
5. Air fry the bagel halves at 375°F for 3 minutes until they are lightly toasted and crisp around the edges.
6. Remove the air fryer basket and spoon about 2 tablespoons of marinara sauce evenly onto each toasted bagel half.
7. Sprinkle 2 tablespoons of shredded mozzarella cheese over the marinara on each bagel half.
8. Top each bagel half with 3 slices of pepperoni, arranging them in a single layer.
9. Sprinkle a pinch of dried oregano evenly over the pepperoni on each bagel half.
10. Return the basket to the air fryer and cook at 375°F for 5 minutes, or until the cheese is fully melted and bubbly with golden spots.
11. Carefully remove the bagel bites from the air fryer using tongs and let them cool on a wire rack for 2 minutes to set.
12. Serve the bagel bites warm directly from the rack.
Unbelievably crispy on the bottom with a gooey, cheesy top, these bites have that nostalgic pizza-party flavor we all crave. I love dipping them in extra marinara for an added kick, or serving them alongside a fresh garden salad for a light meal—they disappear faster than I can say “snack time!”
Mouthwatering Air Fryer Buffalo Cauliflower

Diving into game day snacks or just craving something spicy and satisfying without the guilt? I’ve been on a mission to find healthier alternatives to classic bar food, and after countless experiments (and a few burnt batches), this Air Fryer Buffalo Cauliflower has become my absolute favorite. It’s the perfect blend of crispy, spicy, and tangy that even my most skeptical friends now request.
Serving: 4 | Pre Time: 15 minutes | Cooking Time: 20 minutes
Ingredients
– 1 large head of cauliflower, cut into bite-sized florets (I look for one that feels heavy for its size)
– 1 cup all-purpose flour (I sometimes swap half for whole wheat for extra fiber)
– 1 cup milk (I use unsweetened almond milk, but any kind works)
– 1 teaspoon garlic powder
– 1/2 teaspoon salt
– 1/2 teaspoon black pepper
– 1/2 cup hot sauce (Frank’s RedHot is my go-to for that authentic buffalo flavor)
– 2 tablespoons unsalted butter, melted (I always use unsalted to control the saltiness)
– 1 tablespoon honey (this touch of sweetness balances the heat perfectly)
– Cooking spray (an avocado oil spray gives a nice, light crisp)
Instructions
1. Preheat your air fryer to 400°F for 5 minutes—this ensures it’s hot and ready for crispy results.
2. In a large bowl, whisk together the all-purpose flour, milk, garlic powder, salt, and black pepper until you have a smooth, thick batter. Tip: Let the batter sit for 5 minutes; it thickens slightly for better coating.
3. Add the cauliflower florets to the batter and toss gently until each piece is fully coated.
4. Lightly spray the air fryer basket with cooking spray to prevent sticking.
5. Arrange the battered cauliflower in a single layer in the basket, leaving space between pieces for air circulation.
6. Air fry at 400°F for 15 minutes, shaking the basket halfway through to promote even browning. Tip: Check at 12 minutes—if the florets are golden and crisp, they’re done.
7. While the cauliflower cooks, whisk together the hot sauce, melted unsalted butter, and honey in a medium bowl until well combined.
8. Transfer the cooked cauliflower to the bowl with the buffalo sauce and toss gently to coat every piece evenly.
9. Return the sauced cauliflower to the air fryer basket in a single layer.
10. Air fry at 400°F for an additional 5 minutes, until the sauce is sticky and caramelized. Tip: Watch closely in the last minute to avoid burning—the honey can brown quickly.
11. Remove the cauliflower from the air fryer and let it cool for 2-3 minutes before serving. Just like that, you’ve got a batch of irresistible buffalo bites!
Juicy on the inside with a satisfying crunch on the outside, these florets pack a punch of flavor that’s addictive yet light. I love serving them with a side of cool ranch or blue cheese dressing for dipping, and they’re fantastic piled high on a salad for a hearty lunch twist.
Simple Air Fryer Grilled Cheese Sandwich
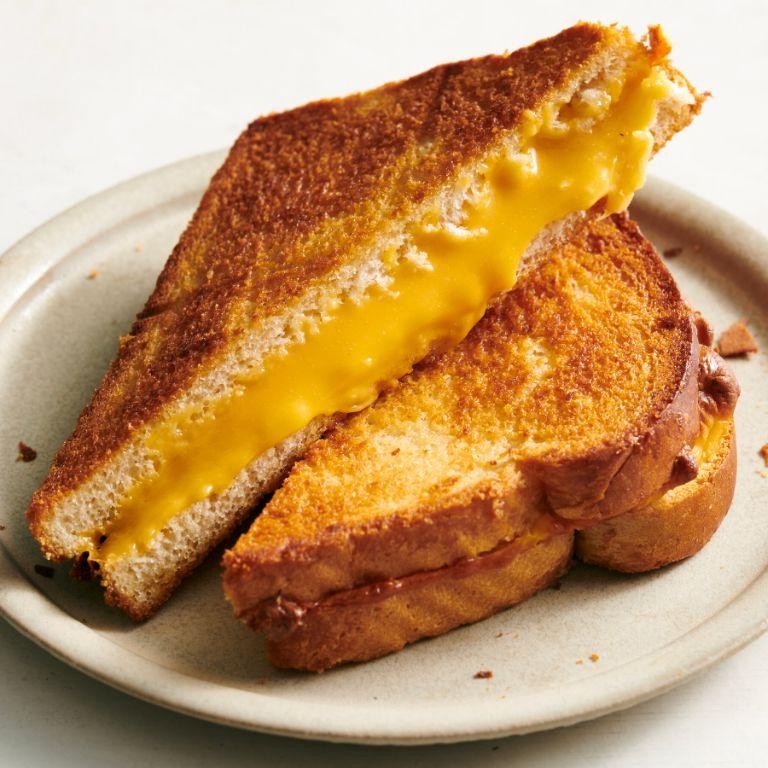
Kind of like a warm hug on a plate, this simple air fryer grilled cheese sandwich is my go-to comfort food when I need something quick, satisfying, and deliciously crispy without the mess of a stovetop. I discovered this method on a lazy Sunday when my skillet was dirty, and now it’s my favorite hack for a perfect, golden sandwich every single time.
Serving: 1 | Pre Time: 5 minutes | Cooking Time: 8 minutes
Ingredients
– 2 slices of sourdough bread (I love the tangy flavor and sturdy texture)
– 2 tbsp salted butter, softened (room temp spreads so much easier)
– 2 slices of sharp cheddar cheese (I always grab the extra sharp for that bold kick)
– 1 tbsp mayonnaise (trust me, it adds a subtle richness and helps with browning)
Instructions
1. Preheat your air fryer to 375°F for 3 minutes to ensure it’s hot and ready.
2. Spread 1 tbsp of softened salted butter evenly on one side of each slice of sourdough bread.
3. Flip the bread over and spread ½ tbsp of mayonnaise on the unbuttered side of each slice.
4. Place 2 slices of sharp cheddar cheese on the mayonnaise side of one bread slice.
5. Top with the second bread slice, mayonnaise-side down, to form a sandwich with butter on the outsides.
6. Carefully place the sandwich in the air fryer basket, ensuring it’s not touching the sides.
7. Cook at 375°F for 4 minutes, then flip the sandwich using tongs.
8. Cook for another 4 minutes at 375°F, or until the bread is golden brown and crispy.
9. Remove the sandwich from the air fryer and let it rest for 1 minute on a cutting board to set the cheese.
10. Slice the sandwich in half diagonally and serve immediately.
Perfectly crispy on the outside with a gooey, melted center, this sandwich delivers that classic comfort with a satisfying crunch. Pair it with a bowl of tomato soup for dipping, or get creative by adding a slice of ham or a sprinkle of garlic powder before cooking—it’s endlessly adaptable to whatever you’re craving!
Crispy Air Fryer Sweet Potato Chips

Venturing into my kitchen on a lazy Sunday afternoon, I found myself craving something crunchy yet wholesome—enter these crispy air fryer sweet potato chips. They’re my go-to snack when I want to satisfy that chip craving without the guilt, and honestly, they’re so simple that even my kids love helping me slice the potatoes. Trust me, once you try these, you’ll never go back to the store-bought bag again!
Serving: 4 | Pre Time: 10 minutes | Cooking Time: 15 minutes
Ingredients
– 2 medium sweet potatoes (I always pick ones that feel firm and heavy for their size—they tend to be less fibrous)
– 1 tablespoon extra virgin olive oil (my go-to for its mild flavor and health perks)
– ½ teaspoon kosher salt (I prefer this over table salt for its coarser texture, which sticks better to the chips)
– ¼ teaspoon smoked paprika (it adds a subtle smoky kick that pairs perfectly with the sweetness)
Instructions
1. Preheat your air fryer to 380°F for 5 minutes—this ensures even cooking from the start.
2. Scrub the sweet potatoes thoroughly under cold water to remove any dirt, then pat them completely dry with a clean kitchen towel (a tip: moisture is the enemy of crispiness, so don’t skip this!).
3. Using a sharp knife or mandoline, slice the sweet potatoes into thin, uniform rounds about ⅛-inch thick; I aim for consistency so they cook evenly without some burning.
4. In a large bowl, toss the sweet potato slices with the extra virgin olive oil until they’re lightly coated on all sides.
5. Sprinkle the kosher salt and smoked paprika over the slices, then toss again to distribute the seasonings evenly.
6. Arrange the slices in a single layer in the air fryer basket, making sure they don’t overlap (another tip: overcrowding leads to steaming, not crisping—cook in batches if needed).
7. Air fry at 380°F for 12–15 minutes, shaking the basket halfway through, until the chips are golden brown and crispy around the edges (a final tip: keep an eye on them after 10 minutes, as thickness can vary cooking time).
8. Transfer the chips to a wire rack to cool for 5 minutes; this helps them crisp up further without getting soggy.
Really, these chips are a game-changer with their satisfying crunch and sweet, smoky flavor that’s just addictive. I love serving them alongside a creamy avocado dip or sprinkling them over a fresh salad for extra texture—they’re versatile enough to elevate any snack or meal!
Quick Air Fryer Teriyaki Chicken

Busy weeknights call for simple solutions, and this quick air fryer teriyaki chicken has become my go-to lifesaver. I first tried it on a hectic Tuesday when my kids were begging for takeout, and now it’s a regular in our rotation—it’s that easy and delicious!
Serving: 4 | Pre Time: 10 minutes | Cooking Time: 15 minutes
Ingredients
– 1.5 lbs boneless, skinless chicken thighs, cut into 1-inch pieces (I prefer thighs for juiciness, but breasts work too)
– 1/3 cup low-sodium soy sauce (my pantry staple for balanced saltiness)
– 2 tbsp honey (local honey adds a lovely floral note)
– 1 tbsp rice vinegar
– 1 tsp minced garlic (freshly minced makes all the difference)
– 1 tsp grated ginger (I keep a knob in the freezer for easy grating)
– 1 tbsp cornstarch
– 1 tbsp water
– 1 tbsp sesame seeds, for garnish (toasted ones from my last Asian market trip)
– 2 green onions, thinly sliced, for garnish
Instructions
1. In a medium bowl, whisk together 1/3 cup low-sodium soy sauce, 2 tbsp honey, 1 tbsp rice vinegar, 1 tsp minced garlic, and 1 tsp grated ginger until well combined.
2. Add 1.5 lbs boneless, skinless chicken thighs, cut into 1-inch pieces, to the bowl, tossing to coat evenly. Let marinate at room temperature for 10 minutes—this short marinate infuses flavor without making the chicken mushy.
3. Preheat your air fryer to 375°F for 3 minutes, ensuring it’s hot for even cooking.
4. Place the marinated chicken pieces in a single layer in the air fryer basket, shaking off excess marinade into the bowl (reserve it for later).
5. Air fry the chicken at 375°F for 10 minutes, flipping the pieces halfway through with tongs for uniform browning.
6. While the chicken cooks, pour the reserved marinade into a small saucepan and bring it to a boil over medium heat.
7. In a separate small bowl, mix 1 tbsp cornstarch with 1 tbsp water to create a slurry, then whisk it into the boiling marinade. Cook for 1-2 minutes, stirring constantly, until the sauce thickens to a glossy consistency—this prevents a starchy taste.
8. After 10 minutes, check the chicken: it should reach an internal temperature of 165°F and have crispy edges. If needed, air fry for an additional 2-3 minutes.
9. Transfer the cooked chicken to a serving bowl and drizzle with the thickened teriyaki sauce, tossing gently to coat.
10. Garnish with 1 tbsp sesame seeds and 2 thinly sliced green onions for a fresh finish.
Glazed to perfection, this chicken boasts a sticky-sweet exterior with tender, juicy bites inside. I love serving it over steamed rice with a side of broccoli for a complete meal, or even tossing it into lettuce wraps for a lighter twist—it’s versatile enough to make any dinner feel special!
Conclusion
Gathering these 28 irresistible air fryer recipes is all about making your busy days easier and tastier! From quick dinners to simple snacks, there’s something here for every home cook. We’d love to hear which recipes become your favorites—drop a comment below and share this roundup on Pinterest to spread the air fryer love!