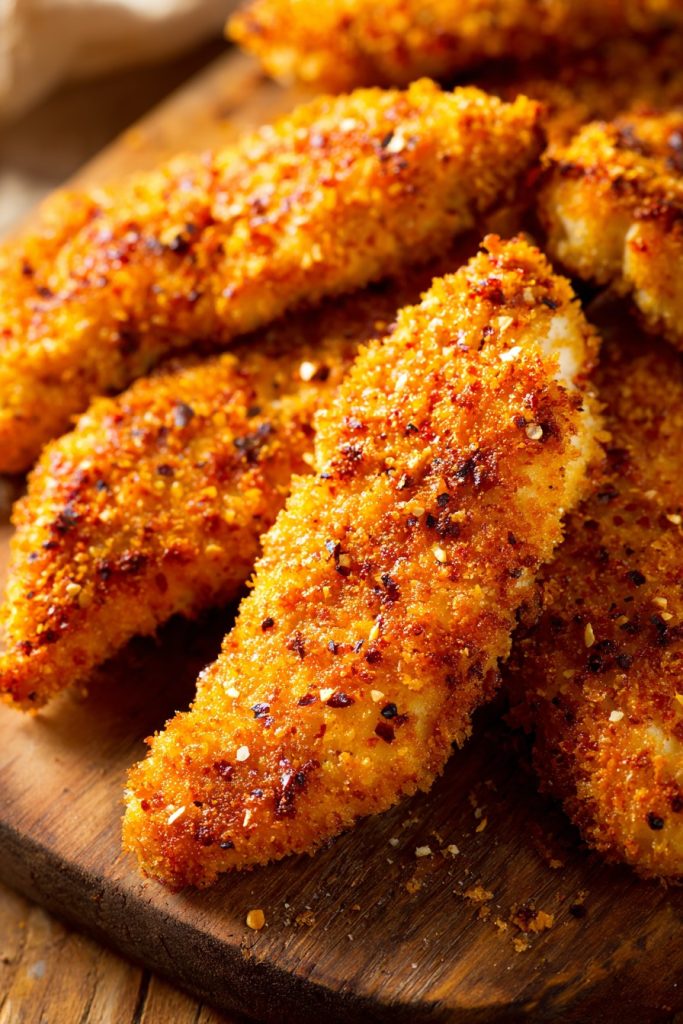
Buckle up, food friends, because we’re about to revolutionize your chicken tender game with this air fryer magic! Believe it or not, these tenders come out so crispy and juicy, you’ll swear they’re deep-fried but without all that greasy guilt. Best part? They’re ready faster than you can say “extra dipping sauce, please!”
Why This Recipe Works
- The air fryer’s rapid hot air circulation creates an incredibly crispy exterior while locking in moisture, giving you that perfect crunch without deep frying.
- Using panko breadcrumbs instead of traditional breadcrumbs provides a lighter, crispier coating that doesn’t get soggy during cooking.
- The buttermilk marinade tenderizes the chicken while adding subtle tanginess that complements the seasoned coating beautifully.
- Preheating the air fryer ensures immediate crisping action, preventing the coating from absorbing excess moisture before it sets.
- The high protein content makes these perfect for meal prep – they reheat beautifully without losing their texture or flavor.
Ingredients
- 1.5 pounds chicken tenders (or chicken breasts cut into 1-inch strips)
- 1 cup buttermilk
- 1 tablespoon hot sauce
- 1 cup all-purpose flour
- 2 large eggs, beaten
- 2 cups panko breadcrumbs
- 1 tablespoon garlic powder
- 1 tablespoon paprika
- 2 teaspoons onion powder
- 1 teaspoon cayenne pepper (optional for heat)
- 2 teaspoons salt
- 1 teaspoon black pepper
- Cooking spray or avocado oil spray
Equipment Needed
- Air fryer (any size, but basket-style works best)
- Three shallow bowls or plates for dredging station
- Whisk or fork for mixing
- Tongs for handling chicken
- Measuring cups and spoons
- Paper towels for draining
- Instant-read thermometer (highly recommended)
Instructions
Prepare the Chicken Marinade
Start by placing your chicken tenders in a large bowl or zip-top bag. Pour in the buttermilk and hot sauce, making sure every piece gets thoroughly coated. The buttermilk works its magic by tenderizing the chicken while the hot sauce adds a subtle kick that’ll have your taste buds dancing. Let this marinate for at least 30 minutes in the refrigerator – though if you’re planning ahead, overnight marinating will give you even more flavorful and tender results. The acid in the buttermilk breaks down proteins, resulting in chicken that stays incredibly juicy even after cooking at high heat. Pro tip: always pat your chicken dry with paper towels before marinating to help the buttermilk adhere better!
Set Up Your Dredging Station
While the chicken marinates, set up your three-station breading assembly line. In the first shallow bowl, combine the flour with half the seasonings (1.5 teaspoons salt, 1 teaspoon black pepper, 1.5 teaspoons garlic powder). The second bowl gets the beaten eggs – give them a good whisk until they’re uniform and frothy. The third bowl holds your panko breadcrumbs mixed with the remaining seasonings (paprika, onion powder, remaining garlic powder, cayenne if using, and remaining salt). This systematic approach ensures every tender gets perfectly coated without clumping or uneven seasoning distribution. Make sure your bowls are wide enough to comfortably dredge each piece without making a mess of your counter!
Bread the Chicken Tenders
Remove the chicken from the buttermilk marinade, letting excess liquid drip off. Working with one piece at a time, dredge it in the seasoned flour, shaking off any excess. Next, dip it into the egg mixture, making sure it’s fully coated but not dripping. Finally, press it firmly into the panko mixture, ensuring an even, generous coating on all sides. The key here is using one hand for dry ingredients and the other for wet to avoid ending up with breaded fingers! Place each breaded tender on a wire rack set over a baking sheet – this prevents the bottom from getting soggy while you finish breading the rest. Don’t rush this process; proper breading is what gives you that restaurant-quality crunch!
Preheat and Arrange in Air Fryer
Preheat your air fryer to 400°F for about 3 minutes – this crucial step ensures immediate crisping when the chicken hits the basket. Lightly spray the air fryer basket with cooking spray to prevent sticking. Arrange the breaded tenders in a single layer without overcrowding; they shouldn’t touch each other for proper air circulation. You’ll likely need to cook in batches depending on your air fryer size. Lightly spray the tops of the tenders with oil – this helps achieve that golden brown color and extra crunch. The spray should be even but not soaking; we want crispiness, not greasiness! Proper spacing is non-negotiable for even cooking and maximum crisp factor.
Cook to Golden Perfection
Air fry at 400°F for 8-10 minutes, then carefully flip each tender using tongs. Continue cooking for another 6-8 minutes until the coating is deep golden brown and crispy. The internal temperature should reach 165°F when measured with an instant-read thermometer inserted into the thickest part of a tender. If some pieces are browning faster than others, rotate their positions in the basket halfway through cooking. Keep in mind that cooking times may vary slightly between air fryer models, so let the visual cues and temperature guide you more than the timer. That beautiful golden color and audible crunch when you tap them are your best indicators of doneness!
Rest and Serve Immediately
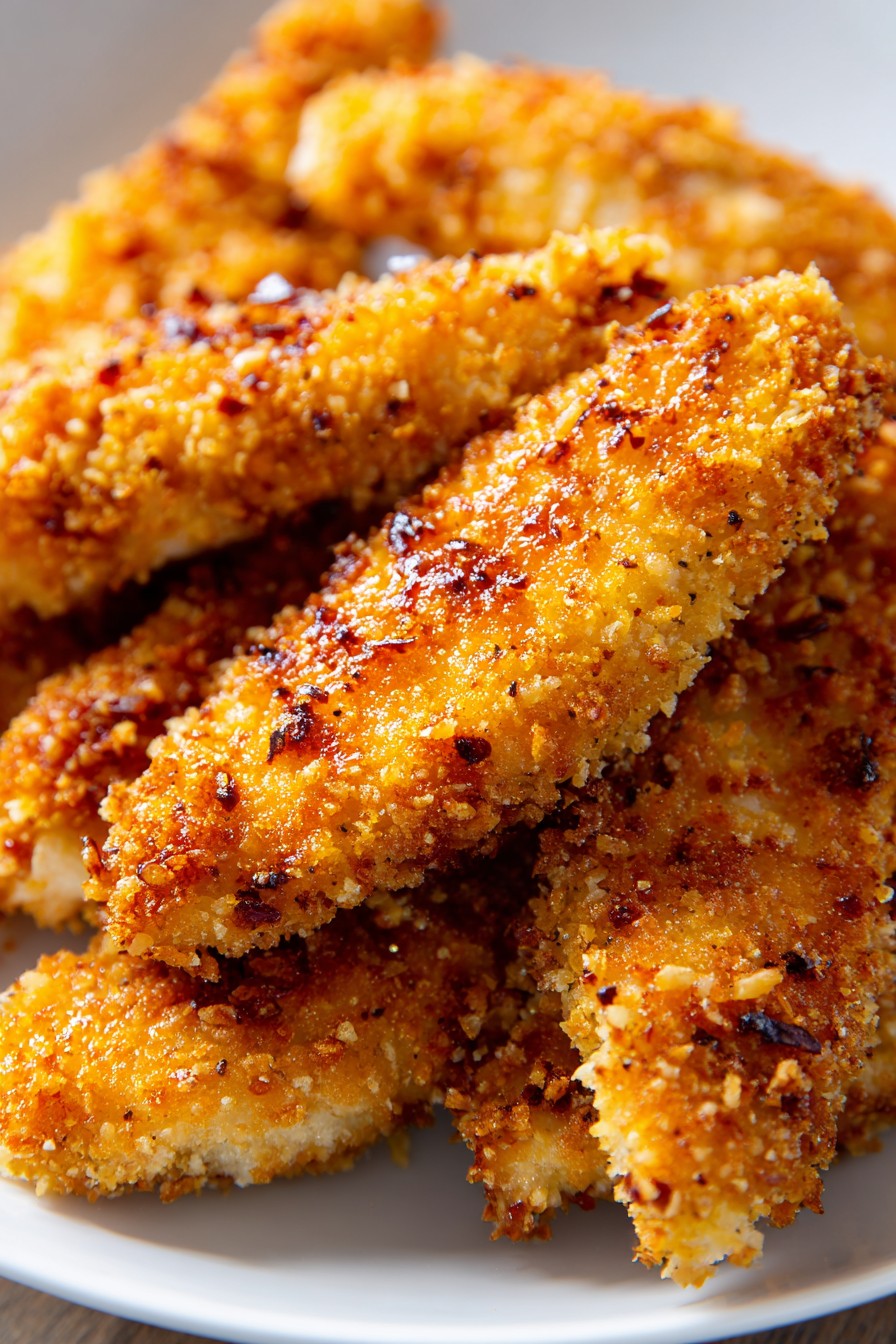
Transfer the cooked tenders to a clean wire rack rather than a plate – this prevents steam from making the bottom soggy. Let them rest for 2-3 minutes before serving; this allows the juices to redistribute throughout the meat while the coating sets to ultimate crispiness. Serve immediately with your favorite dipping sauces – classic ranch, honey mustard, or barbecue sauce all work wonderfully. If cooking multiple batches, keep finished tenders warm in a 200°F oven while you finish the rest. Remember: crispy chicken waits for no one, so dig in while they’re at their peak texture perfection!
Tips and Tricks
For the absolute crispiest results, try placing your breaded tenders on a wire rack in the refrigerator for 15-20 minutes before air frying. This chilling period helps the coating set and adhere better, resulting in less falling off during cooking. If you don’t have buttermilk, make your own by adding 1 tablespoon of lemon juice or vinegar to 1 cup of milk and letting it sit for 5 minutes until it curdles slightly. For extra crispy coating, you can double-dredge by going through the flour-egg-breadcrumb process twice, though this will add to your prep time. Always preheat your air fryer – it makes a significant difference in achieving that immediate crisp rather than steaming the coating first. If your air fryer has a tendency to blow lighter crumbs around, try pressing the panko onto the chicken firmly or even using a light spritz of oil on the crumbs before pressing. For even cooking, make sure your chicken tenders are relatively uniform in size – if some are much thicker, consider pounding them slightly or cutting them to match. Don’t skip the wire rack step after cooking; it’s the secret to maintaining crunch on all sides. If you’re meal prepping, these reheat beautifully in the air fryer at 375°F for 3-4 minutes rather than the microwave, which can make them soggy. For extra flavor, try adding grated Parmesan cheese to your breadcrumb mixture or using seasoned panko. Always check your air fryer’s manual for specific recommendations about breaded foods, as some models may have special settings or require foil liners. If you’re watching sodium, you can reduce the salt and use more herb-based seasonings like dried parsley, oregano, or thyme. For those who love extra crunch, try mixing crushed cornflakes or potato chips with your panko for added texture variation. Remember that altitude can affect air frying times – if you live at high elevation, you may need to add a minute or two to the cooking time. Always let your air fryer cool completely between batches if doing multiple rounds to maintain consistent temperature performance. If you encounter smoking from dripping fat, place a slice of bread in the bottom of the air fryer basket to absorb excess grease during cooking. For easiest cleanup, consider using air fryer parchment liners with holes, which contain crumbs while allowing air flow. Experiment with different oil sprays – avocado oil has a higher smoke point than olive oil, making it better for high-temperature air frying. If your coating isn’t browning evenly, try shaking the basket (gently!) halfway through cooking instead of flipping individually, though flipping does give more consistent results. For maximum efficiency, bread all your chicken first and keep it on racks in the refrigerator until ready to cook in batches. If you’re making these for kids, you can make a separate batch without cayenne or hot sauce for milder palates. Always pat your chicken completely dry before marinating to ensure the buttermilk mixture adheres properly and penetrates effectively. For food safety, never reuse leftover marinade that has touched raw chicken unless you bring it to a rolling boil for at least 1 minute first. If you find your coating is too thick, you can pulse the panko in a food processor briefly for a finer texture that adheres more evenly. For extra moisture, you can add a tablespoon of mayonnaise or Greek yogurt to your egg wash mixture. If you’re gluten-free, use gluten-free flour and panko-style breadcrumbs, though cooking times may need slight adjustment. Always check the internal temperature in the thickest part of multiple tenders to ensure they’ve all reached food-safe temperatures. For best results, bring your chicken to room temperature for 15-20 minutes before cooking if you have time, as this promotes more even cooking. If your air fryer has multiple functions, the “air crisp” or “roast” setting typically works best for breaded foods rather than the bake function. Remember that breaded foods naturally create more crumbs and residue, so plan for a more thorough cleaning of your air fryer basket afterward. For dramatic presentation, serve these on a wooden board with multiple dipping sauces in small bowls for a restaurant-style experience at home.
Recipe Variations
- **Spicy Nashville Hot Style**: After cooking, brush tenders with a mixture of 2 tablespoons melted butter, 1 tablespoon brown sugar, 1-2 tablespoons cayenne pepper (adjust to heat preference), 1 teaspoon paprika, and 1/2 teaspoon garlic powder. This gives you that signature Nashville heat with a touch of sweetness that balances perfectly against the crispy chicken.
- **Parmesan Herb Crust**: Replace 1/2 cup of panko with grated Parmesan cheese and add 2 teaspoons each of dried Italian seasoning and parsley to the breadcrumb mixture. The cheese creates an extra savory, slightly chewy crispness while the herbs provide fresh flavor that pairs wonderfully with marinara sauce for dipping.
- **Asian-Inspired**: Replace the buttermilk with 1/2 cup soy sauce and 1/2 cup rice vinegar for marinating, and add 1 tablespoon sesame oil to the egg wash. Mix 1 cup panko with 1/2 cup crushed crispy rice noodles, 1 tablespoon ginger powder, and 1 teaspoon white pepper for coating. Serve with sweet chili sauce or duck sauce for dipping.
- **Buffalo Style**: Skip the breading process entirely – marinate as directed, then air fry naked tenders at 400°F for 12-15 minutes until cooked through. Toss in a mixture of 1/2 cup hot sauce and 1/4 cup melted butter immediately after cooking. These give you all the buffalo flavor with less carbs and still plenty of crispy texture from the air frying.
- **Everything Bagel**: Replace the panko with crushed everything bagel chips or mix panko with 2 tablespoons everything bagel seasoning. The garlic, onion, poppy seeds, and sesame seeds create incredible flavor and texture that needs only a simple sour cream-based dip to complete the bagel experience without the bread.
Frequently Asked Questions
Can I use frozen chicken tenders for this recipe?
Absolutely, but proper thawing is crucial for food safety and even cooking. Always thaw frozen chicken completely in the refrigerator overnight before marinating and breading. If you try to bread partially frozen chicken, the coating won’t adhere properly and you’ll risk uneven cooking where the outside burns before the inside reaches safe temperature. Pat thawed chicken completely dry with paper towels before marinating to ensure the buttermilk mixture properly penetrates and the breading sticks effectively throughout the cooking process.
Why did my breading fall off during air frying?
Breading detachment usually happens for three main reasons: insufficient drying of the chicken before breading, not pressing the coating firmly enough, or overcrowding the air fryer basket. Make sure to pat your chicken very dry after marinating, press the breadcrumbs firmly onto all sides, and leave space between tenders for proper air circulation. Also ensure your air fryer is properly preheated so the coating sets immediately rather than sitting in moisture before crisping begins.
Can I make these gluten-free?
Yes, this recipe adapts beautifully to gluten-free needs! Substitute the all-purpose flour with your favorite gluten-free flour blend (look for one with xanthan gum for better binding). Use gluten-free panko-style breadcrumbs, which are now widely available in most grocery stores. The cooking times and temperatures remain exactly the same, though you might notice slightly different browning characteristics depending on your specific gluten-free products. Always check labels to ensure all ingredients meet your dietary requirements.
How do I store and reheat leftovers?
Store cooled leftovers in an airtight container in the refrigerator for up to 3 days. To reheat, never use the microwave as it makes the coating soggy. Instead, use your air fryer at 375°F for 3-4 minutes until hot and crispy again. You can also use a conventional oven at 400°F for 5-7 minutes on a wire rack. The texture won’t be quite as perfect as fresh, but it’s remarkably close compared to other reheating methods for breaded foods.
Can I prepare these ahead of time?
You can bread the chicken tenders up to 24 hours in advance! Arrange the breaded tenders in a single layer on a wire rack set over a baking sheet, cover loosely with plastic wrap, and refrigerate. The chilling actually helps the coating set and adhere better. When ready to cook, let them sit at room temperature for 15-20 minutes before air frying as directed. You can also freeze the breaded, uncooked tenders on a parchment-lined baking sheet until solid, then transfer to freezer bags for up to 3 months. Cook from frozen, adding 3-5 minutes to the cooking time.
Summary
These air fryer chicken tenders deliver incredible crunch and juicy flavor without deep frying. Perfect for quick dinners, game day snacks, or meal prep that actually reheats well. Once you try this method, you’ll never go back to soggy oven-baked or greasy fried versions again!
Air Fryer Chicken Tenders
4
servings15
minutes15
minutesIngredients
Instructions
- 1 Marinate chicken in buttermilk and hot sauce for 30 minutes minimum
- 2 Set up three stations: flour with half seasonings, beaten eggs, panko with remaining seasonings
- 3 Dredge each tender in flour, egg, then panko, pressing coating firmly
- 4 Preheat air fryer to 400°F for 3 minutes
- 5 Arrange tenders in single layer, spray lightly with oil
- 6 Air fry at 400°F for 8-10 minutes, flip, cook additional 6-8 minutes until 165°F internal temperature
- 7 Rest on wire rack for 2-3 minutes before serving


