Hey there, fellow food enthusiasts! How many times have you ended up with dry, rubbery chicken breast that could double as a hockey puck? How about we change that narrative forever with this foolproof air fryer method that delivers perfectly juicy, restaurant-quality chicken every single time. How amazing does that sound?
Why This Recipe Works
- The air fryer’s rapid hot air circulation creates a beautiful golden-brown crust while locking in moisture, preventing the dreaded dry chicken syndrome that plagues so many home cooks.
- Our simple but powerful seasoning blend of smoked paprika, garlic powder, and onion powder creates layers of flavor that penetrate deep into the chicken without overwhelming its natural deliciousness.
- The precise temperature control and cooking time ensure even cooking from edge to center, eliminating those frustrating raw spots or overcooked edges that can ruin an otherwise perfect meal.
- Light coating of olive oil helps the seasonings adhere perfectly while promoting that irresistible crispy exterior that makes you keep coming back for just one more bite.
- Resting time after cooking allows the juices to redistribute throughout the meat, resulting in incredibly tender and moist chicken that practically melts in your mouth.
Ingredients
- 4 boneless, skinless chicken breasts (about 6 ounces each), patted completely dry with paper towels
- 2 tablespoons extra virgin olive oil, measured precisely for even coating
- 1 teaspoon smoked paprika, for that deep, smoky flavor profile
- 1 teaspoon garlic powder, not garlic salt, for pure garlic goodness
- 1 teaspoon onion powder, providing sweet onion notes without texture
- 1/2 teaspoon dried oregano, crushed between fingers to release oils
- 1/2 teaspoon black pepper, freshly ground for maximum flavor impact
- 1 teaspoon kosher salt, or 3/4 teaspoon table salt if substituting
- Optional: 1/4 teaspoon cayenne pepper for those who like a little kick
Equipment Needed
- Air fryer (any brand or model will work beautifully)
- Digital kitchen scale for accurate chicken portioning
- Mixing bowls in various sizes for seasoning preparation
- Paper towels for thorough drying of chicken surfaces
- Instant-read meat thermometer for perfect doneness verification
- Cutting board and sharp knife for any final slicing needs
- Measuring spoons for precise seasoning measurements
- Tongs for safe and easy chicken handling
Instructions
Prepare Your Chicken and Seasoning Blend
Start by taking your boneless, skinless chicken breasts and placing them on a clean cutting board. Use paper towels to pat them completely dry on all surfaces – this is crucial because moisture is the enemy of crispy skin. While your chicken is drying, grab a small bowl and combine your smoked paprika, garlic powder, onion powder, dried oregano, black pepper, and kosher salt. If you’re feeling adventurous, add that optional cayenne pepper now. Whisk these dry ingredients together until they’re beautifully combined and uniform in color. The aroma at this point should already be making your stomach growl! Measure out your olive oil into a separate small bowl or ramekin, ready for the next step. This preparation ensures everything moves smoothly once we start cooking.
Coat and Season the Chicken Thoroughly
Now comes the fun part – transforming plain chicken into flavor-packed perfection! Take your thoroughly dried chicken breasts and brush them lightly but evenly with the olive oil on all sides. Make sure every nook and cranny gets a thin coating – this will help the seasonings stick and promote beautiful browning. Next, generously sprinkle your seasoning blend over all surfaces of the chicken, using your hands to gently press the spices into the meat to ensure they adhere properly. Don’t be shy here – really massage those flavors in! Pro tip: Let the seasoned chicken sit at room temperature for about 10-15 minutes before cooking. This allows the seasonings to penetrate deeper and helps the chicken cook more evenly throughout.
Preheat and Arrange in Air Fryer
Turn on your air fryer and set it to 380°F – this is the sweet spot temperature that gives us that perfect balance of crispy exterior and juicy interior. While it’s heating up (which usually takes about 3-5 minutes), lightly spray your air fryer basket with cooking spray to prevent any sticking. Once preheated, carefully arrange your seasoned chicken breasts in a single layer in the basket, making sure they aren’t touching each other. If your air fryer is on the smaller side, you might need to cook in batches – overcrowding is the quickest way to steamed rather than crispy chicken. The chicken should have about half an inch of space around each piece for optimal air circulation.
Cook to Perfect Doneness
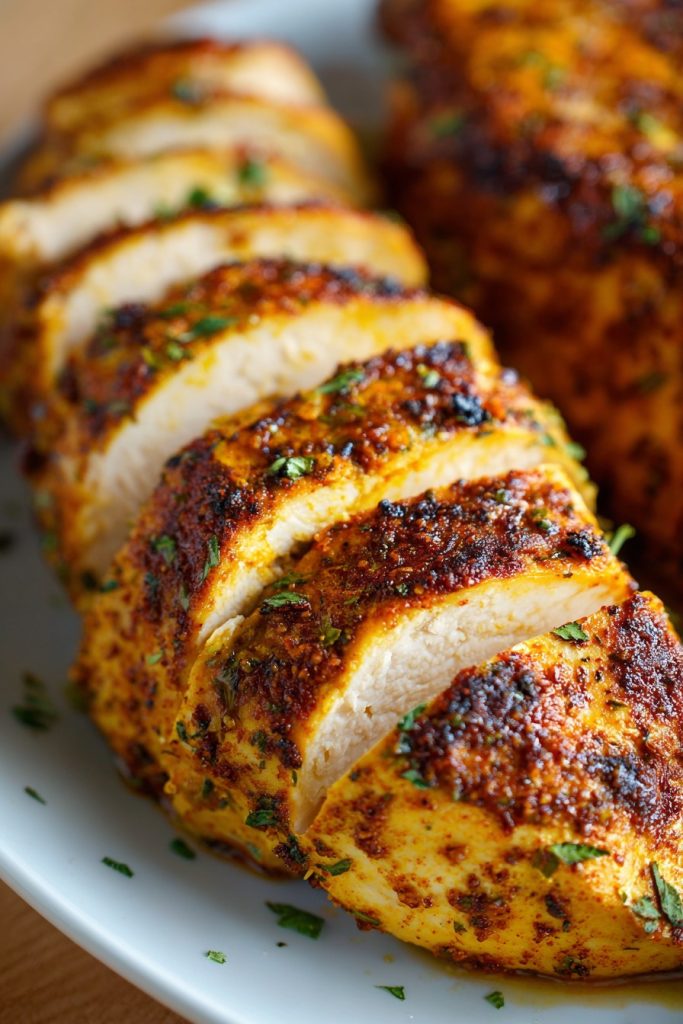
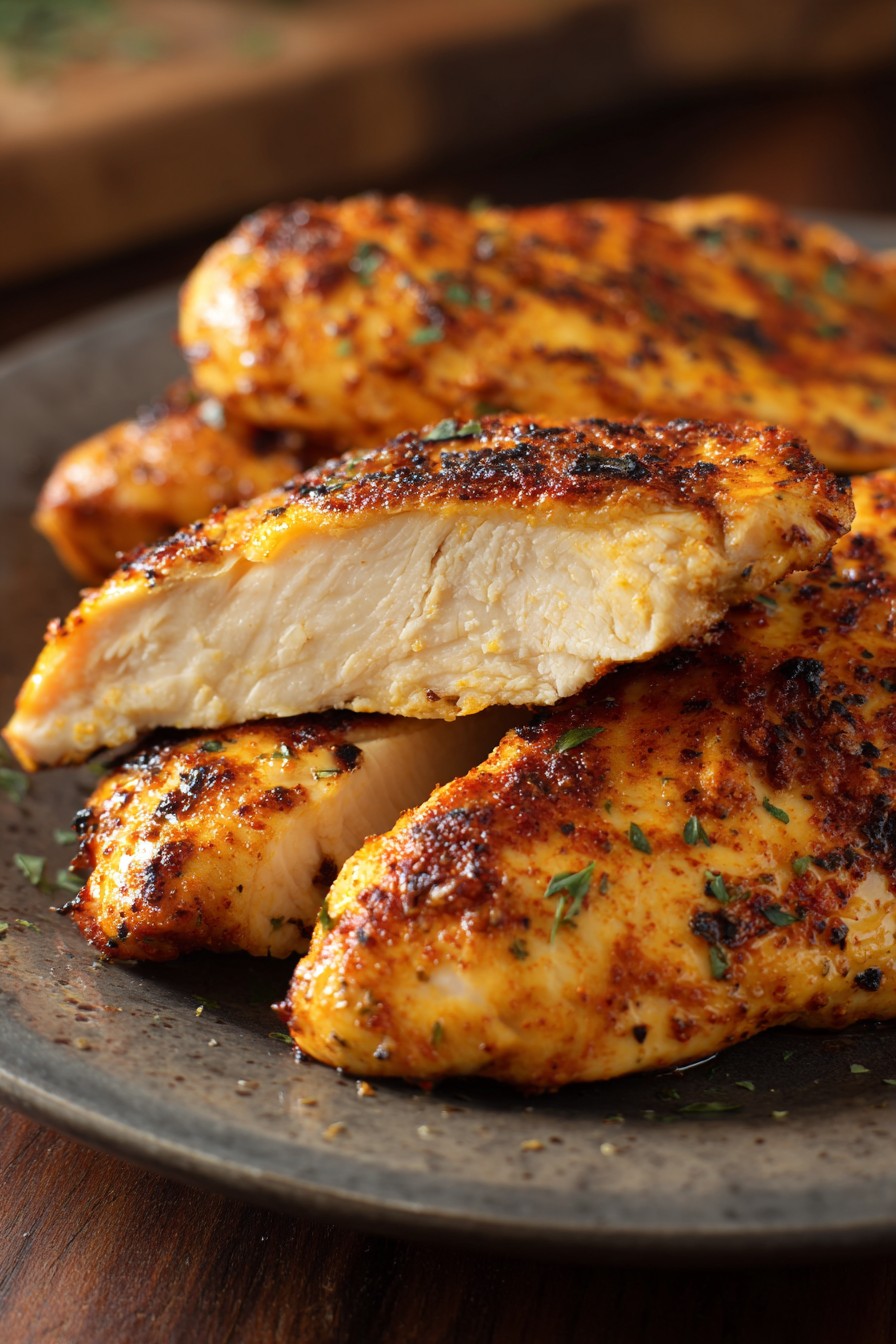
Close the air fryer and set your timer for 12 minutes. About halfway through, at the 6-minute mark, open the basket and use tongs to carefully flip each chicken breast. This ensures even cooking and browning on both sides. After flipping, continue cooking for the remaining 6 minutes. Now comes the most important part: checking for doneness. Insert an instant-read thermometer into the thickest part of the chicken – it should register exactly 165°F. If it’s not quite there yet, continue cooking in 2-minute increments until it reaches the safe temperature. The exterior should be golden brown with some darker, crispier spots – that’s where the magic happens!
Rest and Serve Immediately
Once your chicken reaches 165°F, immediately remove it from the air fryer using tongs and transfer it to a clean cutting board or plate. Here’s the step most people skip but absolutely shouldn’t: let the chicken rest for at least 5 minutes before slicing or serving. This resting period allows the juices to redistribute throughout the meat, resulting in incredibly moist and tender chicken. If you cut into it immediately, all those precious juices will run out and you’ll be left with dry chicken. After resting, you can slice it against the grain for maximum tenderness or serve whole. It’s now ready to enjoy immediately while it’s still perfectly warm and crispy!
Tips and Tricks
If you really want to take your air fryer chicken breast to the next level, consider brining your chicken before seasoning. Create a simple brine with 4 cups of cold water and 1/4 cup of kosher salt, stirring until the salt dissolves completely. Submerge your chicken breasts in this brine and refrigerate for 30 minutes to 2 hours. This process helps the chicken retain even more moisture during the cooking process. After brining, be sure to rinse the chicken thoroughly and pat it completely dry before proceeding with the recipe. The difference in juiciness is absolutely remarkable and well worth the extra step for special occasions or when you really want to impress dinner guests.
Another professional trick is to pound your chicken breasts to an even thickness before cooking. Place each breast between two pieces of plastic wrap or in a zip-top bag and use a meat mallet, rolling pin, or even a heavy skillet to gently pound them to about 3/4-inch uniform thickness. This ensures every part of the chicken cooks at exactly the same rate, eliminating those frustrating moments where the thinner edges are overcooked while the thicker center is still underdone. Even thickness is the secret weapon of restaurant chefs, and it’s just as applicable to home air frying. The result is perfectly cooked chicken from edge to edge with no dry spots whatsoever.
Consider investing in an air fryer rack or basket extender if you cook chicken frequently. These inexpensive accessories allow for even better air circulation around the food, resulting in crispier exteriors without any flipping required. They’re especially useful if you’re cooking multiple pieces at once or if your air fryer has limited vertical space. The rack elevates the food, allowing hot air to circulate underneath as well as around the sides and top. This creates what I like to call the “360-degree crisp” – maximum crunchiness on all surfaces. It’s a game-changer for air fryer enthusiasts and makes weeknight dinner preparation even more efficient and consistent.
Don’t forget about the power of finishing touches! After your chicken is cooked and rested, try brushing it with a little compound butter or herb oil. Mix softened butter with minced garlic, fresh herbs like parsley or thyme, and a squeeze of lemon juice, then brush it over the hot chicken right before serving. The residual heat will melt the butter and infuse the chicken with incredible fresh flavor. Alternatively, a drizzle of high-quality extra virgin olive oil and a sprinkle of flaky sea salt can elevate simple chicken breast into something truly special. These finishing touches add layers of flavor and sophistication with minimal effort.
Finally, remember that air fryers can vary significantly between brands and models. The first time you make this recipe, keep a close eye on the cooking process and adjust timing as needed for your specific appliance. Factors like wattage, basket size, and heating element placement can all affect cooking times. Take notes on what works best with your air fryer, and soon you’ll have it perfectly dialed in for consistently amazing results every time. Don’t be afraid to experiment with slight temperature adjustments either – some air fryers perform better at 375°F while others excel at 385°F. Knowing your appliance is key to air frying mastery!
Recipe Variations
- For a Mediterranean twist, replace the seasoning blend with 2 teaspoons of Italian seasoning, 1 teaspoon of lemon zest, and 1/2 teaspoon of red pepper flakes. After cooking, top with crumbled feta cheese, chopped kalamata olives, and a drizzle of tzatziki sauce. Serve with lemon wedges on the side for squeezing over the chicken. This variation transforms the chicken into a Greek-inspired masterpiece that pairs beautifully with couscous or a fresh Greek salad.
- Create a buffalo-style chicken by skipping the seasoning blend and instead tossing the cooked chicken in 1/2 cup of buffalo sauce mixed with 1 tablespoon of melted butter. Return to the air fryer for just 1-2 minutes to crisp up the sauce. Serve with celery sticks, carrot sticks, and blue cheese or ranch dressing for dipping. This is perfect for game day or when you’re craving that classic buffalo wing flavor without the mess of deep frying.
- Try an Asian-inspired version using 1 tablespoon of soy sauce, 1 teaspoon of sesame oil, 1 teaspoon of grated ginger, and 1 minced garlic clove as your marinade instead of the olive oil and seasoning blend. Marinate for 30 minutes before air frying. After cooking, garnish with sliced green onions and sesame seeds. Serve over rice with steamed broccoli for a complete meal that’s better than takeout and ready in minutes.
- For a creamy herb crust, mix 1/4 cup of mayonnaise with 1/4 cup of grated Parmesan cheese, 1 teaspoon of dried basil, and 1/2 teaspoon of garlic powder. Spread this mixture evenly over the chicken before air frying. The mayonnaise creates an incredibly moist and flavorful crust that browns beautifully in the air fryer. This method is foolproof for keeping chicken juicy and adds a rich, decadent flavor that feels indulgent but is actually quite simple to prepare.
Frequently Asked Questions
Can I use frozen chicken breasts in this recipe?
Absolutely, but you’ll need to adjust the cooking time significantly. Start with frozen chicken breasts (without thawing) and increase the cooking time to 18-20 minutes at 380°F, flipping halfway through. However, I highly recommend thawing first if possible, as frozen chicken tends to release more moisture during cooking, which can prevent that desirable crispy exterior. If using frozen, pat the chicken especially dry after thawing and consider increasing the temperature to 400°F for the last few minutes to really crisp up the surface. Always verify doneness with a meat thermometer reaching 165°F internally.
Why is my chicken coming out dry even when following the recipe?
Dry chicken usually results from overcooking or insufficient resting time. Remember that chicken continues to cook after removal from heat (carryover cooking), so remove it from the air fryer at 160-162°F rather than waiting for 165°F. The residual heat will bring it to the safe temperature during resting. Also, ensure you’re using similar-sized chicken breasts – if one is significantly thicker than others, it may require separate cooking times. Finally, the quality of chicken matters; look for air-chilled chicken rather than water-chilled, as it contains less added water and tends to cook up juicier.
Can I meal prep this chicken for the week?
This chicken is excellent for meal prep! Cook as directed, let it cool completely, then store in airtight containers in the refrigerator for up to 4 days. For best results, slice or shred the chicken before storing – it reheats more evenly this way. When ready to eat, reheat in the air fryer at 350°F for 3-4 minutes until warmed through. This method helps restore some of the crispiness. Avoid microwaving if possible, as it tends to make the chicken rubbery. You can also freeze cooked chicken for up to 3 months – thaw in the refrigerator before reheating.
What’s the best way to clean my air fryer after cooking chicken?
Cleaning is easiest immediately after use while the air fryer is still warm but not hot. Remove the basket and wash with warm soapy water – most baskets are dishwasher safe, but check your manufacturer’s instructions. For stuck-on bits, let the basket soak in warm soapy water for 10-15 minutes before scrubbing. Wipe down the interior of the air fryer with a damp cloth – never submerge the main unit in water. For stubborn grease, make a paste of baking soda and water, apply to the interior, let sit for 10 minutes, then wipe clean. Regular cleaning prevents smoke and maintains optimal performance.
Can I cook other cuts of chicken using this method?
Absolutely! This method works wonderfully for chicken thighs (bone-in or boneless), chicken tenders, and even chicken wings. Adjust cooking times accordingly: boneless thighs take about 15 minutes at 380°F, tenders take 8-10 minutes, and wings take 20-25 minutes, shaking the basket occasionally. For bone-in chicken, add 3-5 minutes to the cooking time and always verify doneness with a meat thermometer. The seasoning blend works equally well on all chicken cuts, though you might want to increase quantities for larger batches. The air fryer is incredibly versatile for all types of chicken preparations.
Summary
This air fryer chicken breast recipe delivers perfectly juicy, flavorful results every time with minimal effort. The combination of proper seasoning, precise cooking temperature, and essential resting time transforms ordinary chicken into an extraordinary meal. Perfect for busy weeknights or meal prep!
Air Fryer Chicken Breast
4
servings10
minutes12
minutesIngredients
Instructions
- 1 Pat chicken breasts completely dry with paper towels
- 2 Combine all dry seasonings in a small bowl
- 3 Brush chicken with olive oil, then coat with seasoning blend
- 4 Preheat air fryer to 380°F
- 5 Arrange chicken in single layer in air fryer basket
- 6 Cook for 12 minutes, flipping halfway through
- 7 Verify internal temperature reaches 165°F
- 8 Rest for 5 minutes before slicing and serving