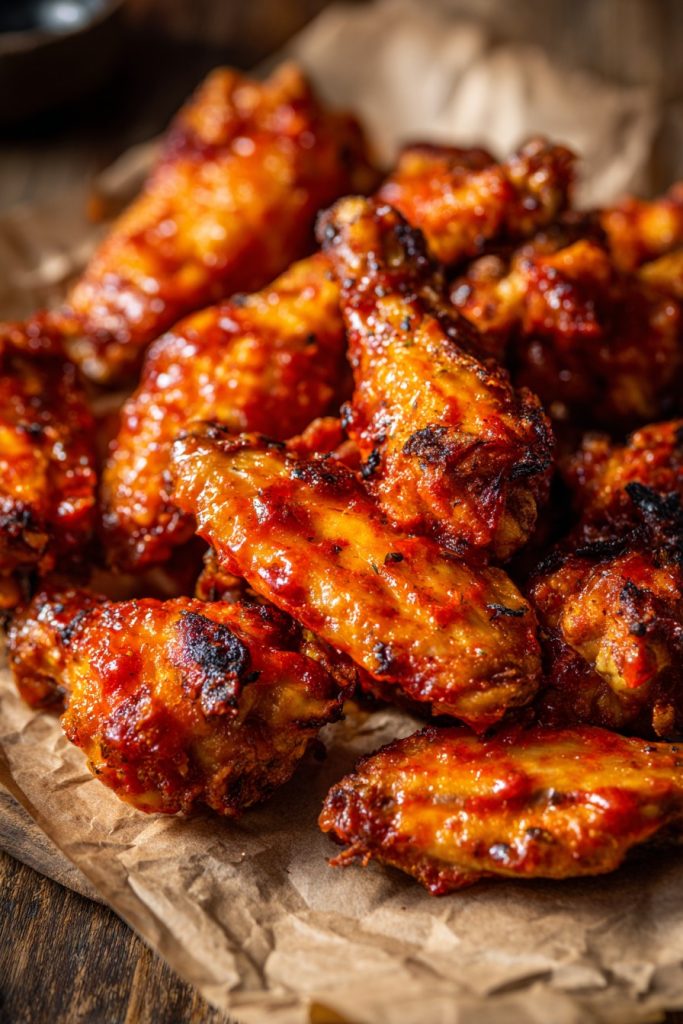
Zesty, finger-licking goodness awaits with these air fryer buffalo chicken wings that deliver all the crispy satisfaction without the deep-fry guilt. Zero excuses needed to indulge in this game-day favorite that comes together faster than your favorite team can score a touchdown. Get ready to wow your crowd with wings so good they’ll have you doing the chicken dance!
Why This Recipe Works
- The air fryer creates an incredibly crispy exterior without submerging the wings in oil, resulting in a lighter yet equally satisfying texture compared to traditional deep-frying methods.
- Patting the wings completely dry and using a light coating of baking powder helps draw moisture to the surface, creating that perfect crackly skin that shatters with every bite.
- Our two-step cooking process ensures the wings cook through evenly while achieving maximum crispiness, eliminating any rubbery or undercooked sections that can ruin wing night.
- The simple but powerful buffalo sauce combination of hot sauce, butter, and garlic powder creates that classic flavor profile that keeps you coming back for just one more wing.
- Finishing with a quick sauce toss rather than cooking the wings in sauce preserves the crispy texture while ensuring every nook and cranny gets coated in spicy, tangy goodness.
Ingredients
- 2 pounds chicken wings, separated into drumettes and flats, patted completely dry with paper towels
- 1 tablespoon baking powder (aluminum-free preferred)
- 1 teaspoon kosher salt
- 1/2 teaspoon freshly ground black pepper
- 1/2 teaspoon garlic powder
- 1/2 cup Frank’s RedHot Original Cayenne Pepper Sauce
- 1/4 cup unsalted butter, melted
- 1 tablespoon white vinegar
- 1/2 teaspoon Worcestershire sauce
- 1/4 teaspoon cayenne pepper (optional, for extra heat)
- Blue cheese or ranch dressing for serving
- Celery sticks and carrot sticks for serving
Equipment Needed
- Air fryer (basket or oven style)
- Large mixing bowl
- Paper towels
- Small saucepan or microwave-safe bowl
- Tongs
- Measuring spoons and cups
- Wire rack (optional but helpful)
Instructions

Prepare and Season the Wings
Start by ensuring your chicken wings are completely dry—this is the secret to crispy success! Pat each wing piece vigorously with paper towels until no moisture remains on the surface. In a large mixing bowl, combine the baking powder, kosher salt, black pepper, and garlic powder, whisking them together to create an even seasoning blend. Add the dried wings to the bowl and toss them thoroughly, making sure every single piece gets coated with the seasoning mixture. The baking powder works magic by raising the pH of the skin, helping it crisp up beautifully in the air fryer. Arrange the wings in a single layer on a plate or wire rack while you prepare your air fryer, ensuring they’re not crowded or touching each other. This initial preparation sets the stage for wings that will have your guests questioning if you secretly deep-fried them!
Preheat and Arrange in Air Fryer
Preheat your air fryer to 380°F for about 3 minutes—this ensures immediate crisping action when the wings hit the basket. While it’s heating, lightly spray the air fryer basket with cooking spray to prevent any sticking. Arrange the seasoned wings in a single layer in the basket, making sure they’re not overlapping or touching each other; overcrowding is the enemy of crispy wings! You’ll likely need to work in batches unless you have an extra-large air fryer. Leave about 1/2 inch of space between each wing piece to allow hot air to circulate properly around every surface. If your air fryer has multiple racks, use them to maximize capacity while maintaining proper airflow. The sizzle you hear when they first go in is the sound of crispy perfection beginning its journey!
First Cooking Phase
Cook the wings at 380°F for 12 minutes, then carefully flip each piece using tongs. You should see the skin starting to tighten and become lightly golden brown on the first side. Continue cooking for another 12 minutes at the same temperature, watching as the wings transform into beautifully bronzed specimens. The internal temperature should reach at least 165°F when checked with an instant-read thermometer inserted into the thickest part of the meat without touching bone. You’ll notice the skin becoming increasingly crispy and rendered, with little bubbles forming across the surface—this is exactly what we want! The aroma filling your kitchen will have everyone gathering around like moths to a flame, wondering when they can taste-test your creation.
Prepare the Buffalo Sauce
While the wings are cooking, combine the Frank’s RedHot sauce, melted butter, white vinegar, Worcestershire sauce, and optional cayenne pepper in a medium bowl. Whisk vigorously until the mixture becomes smooth, emulsified, and beautifully orange-red—this should take about 1-2 minutes of steady whisking. Taste the sauce and adjust seasoning if needed; some folks like extra vinegar tang while others prefer more butter richness. Keep the sauce warm by placing the bowl near (but not on) the warm air fryer or covering it with a towel. The ideal sauce consistency should coat the back of a spoon but still be pourable enough to evenly dress every wing. This classic buffalo sauce combination has stood the test of time for good reason—it’s the perfect balance of heat, tang, and richness!
Final Crisping Phase
Increase the air fryer temperature to 400°F and cook the wings for an additional 5-7 minutes, watching closely as they achieve their final crispy perfection. The skin should become deep golden brown and incredibly crackly—you might even hear it snapping and popping in the air fryer! Check several wings to ensure they’ve reached that ideal texture where the skin shatters when bitten but the meat inside remains juicy and tender. Remove the wings from the air fryer and immediately transfer them to a large clean bowl while they’re piping hot. The residual heat will help the sauce adhere better when you toss them. Let them rest for exactly 1 minute—this allows the exterior to set while keeping the interior steaming hot and ready for saucing.
Toss with Sauce and Serve
Pour about two-thirds of your prepared buffalo sauce over the hot wings in the bowl, using tongs to toss and coat every surface thoroughly. Add the remaining sauce gradually until you achieve your desired sauciness level—some like them dripping while others prefer a lighter coating. Serve immediately on a platter with celery sticks, carrot sticks, and plenty of blue cheese or ranch dressing for dipping. The contrast between the crispy spicy wings and cool creamy dressing is what makes this combination legendary. For extra restaurant-style presentation, garnish with chopped fresh parsley or chives and serve with extra napkins—things are about to get deliciously messy! These wings are best enjoyed immediately while that crispy texture is at its peak.
Tips and Tricks
For the ultimate crispy wings, consider letting them sit uncovered on a wire rack in the refrigerator for 1-4 hours after seasoning—this drying time helps evaporate even more surface moisture. If you’re feeding a crowd, you can cook all your wings through the first two phases, then do the final crisping and saucing in batches right before serving to maintain perfect texture. Don’t skip the baking powder—it’s not the same as baking soda and creates a chemical reaction that dramatically improves crispiness without any metallic taste. For extra flavor, add 1/2 teaspoon of smoked paprika or onion powder to your dry seasoning blend, or include a pinch of cayenne if you like them spicier from the inside out. If your wings are particularly fatty, you might notice some smoke—this is normal, but keep your kitchen well-ventilated and consider placing a little water in the bottom of your air fryer drawer if it has one. For easier cleanup, line your air fryer basket with parchment paper designed for air fryers, but make sure to cut slits or holes for proper airflow. If you prefer darker, crispier wings, extend the final 400°F cooking phase by 2-3 minutes, but watch carefully to prevent burning—all air fryers have slightly different heating patterns. To make ahead, you can complete the first two cooking phases, then refrigerate the wings for up to 2 days before doing the final crisping and saucing when ready to serve. For saucing perfection, toss the wings in a bowl that’s slightly too big—this gives you room to really mix them without losing any precious sauce over the edges. If you’re sensitive to heat, reduce the Frank’s to 1/3 cup and increase the butter to 1/3 cup for a milder version that still delivers fantastic flavor. Always use an instant-read thermometer to ensure food safety—165°F is the magic number for chicken, but going to 175°F won’t hurt and can yield even crispier skin. For extra saucy wings, reserve some additional sauce for dipping rather than tossing it all on—this keeps the wings crisper longer while still delivering that buffalo kick. If your air fryer tends to cook unevenly, rotate the basket or shuffle the wings halfway through each cooking phase for more consistent results. Don’t pour excess sauce back over the plated wings—it will make them soggy; instead, serve extra on the side for dipping. For the best eating experience, serve wings on a warmed platter to keep them hot and crispy throughout your gathering.
Recipe Variations
- Honey BBQ Twist: Replace the buffalo sauce with a mixture of 1/2 cup barbecue sauce, 2 tablespoons honey, 1 tablespoon melted butter, and 1 teaspoon smoked paprika for a sweet and smoky alternative that still delivers that finger-licking goodness. The honey creates a beautiful glaze that caramelizes slightly in the air fryer, while the smoked paprika adds depth that complements the chicken perfectly.
- Lemon Pepper Dry Rub: Skip the wet sauce altogether and toss the cooked wings with a mixture of 2 tablespoons lemon pepper seasoning, 1 teaspoon garlic powder, 1/2 teaspoon onion powder, and the zest of one lemon. The citrus notes cut through the richness of the chicken while the dry coating maintains maximum crispiness from first bite to last.
- Asian-Inspired Sticky Garlic: Create a sauce with 1/3 cup soy sauce, 1/4 cup honey, 3 minced garlic cloves, 1 tablespoon sesame oil, 1 teaspoon grated ginger, and 1 tablespoon rice vinegar. Simmer until slightly thickened, then toss with the wings and garnish with sesame seeds and sliced green onions for an East-meets-West flavor explosion.
- Nashville Hot Style: Mix 1/4 cup melted butter with 2 tablespoons cayenne pepper, 1 tablespoon brown sugar, 1 teaspoon paprika, 1/2 teaspoon garlic powder, and 1/4 teaspoon cayenne pepper for an extra-spicy version that pays homage to the famous Tennessee heat. Serve with pickles and white bread for the authentic experience.
- Herbaceous Parmesan: Toss cooked wings with 3 tablespoons melted butter, 1/4 cup grated Parmesan cheese, 2 tablespoons chopped fresh parsley, 1 teaspoon dried oregano, and 1/2 teaspoon garlic powder for a Italian-inspired twist that’s surprisingly addictive. The Parmesan creates a slightly cheesy crust that complements the crispy skin beautifully.
Frequently Asked Questions
Can I use frozen wings instead of fresh?
Absolutely, but you’ll need to adjust your approach! Thaw frozen wings completely in the refrigerator overnight, then pat them extra dry—frozen wings tend to release more moisture during thawing. You may need to increase the initial cooking time by 3-5 minutes per side to account for the additional water content. Never put frozen wings directly in the air fryer as they’ll steam rather than crisp up, resulting in rubbery skin. For best results, place thawed wings on a wire rack in the refrigerator for an hour after patting dry to ensure maximum surface dryness before seasoning and cooking.
Why did my wings turn out soggy instead of crispy?
Soggy wings usually result from three common mistakes: not drying the wings thoroughly before seasoning, overcrowding the air fryer basket, or saucing them too early. The baking powder needs dry skin to work its magic, and overcrowding prevents proper air circulation that creates crispiness. Always work in batches if needed, and never sauce the wings before the final toss—the moisture will immediately ruin that beautiful crust. Also ensure your air fryer is properly preheated and that you’re using the correct temperature sequence outlined in the recipe.
Can I make these wings ahead of time for a party?
You can partially prepare them ahead! Complete the first two cooking phases (through the 380°F cooking), then let the wings cool completely and refrigerate for up to 2 days. When ready to serve, re-crisp at 400°F for 5-7 minutes until hot and crispy, then toss with sauce. This method actually helps develop even more flavor as the seasonings penetrate deeper. Avoid fully saucing them ahead of time—the sauce will make the skin soggy upon reheating. For large parties, keep batches warm in a 200°F oven on a wire rack until all are ready to sauce and serve.
What’s the purpose of baking powder in this recipe?
Baking powder is the secret weapon for ultra-crispy skin! It raises the pH of the chicken skin, which helps break down proteins and allows moisture to evaporate more efficiently during cooking. This chemical reaction creates tiny bubbles and pockets on the surface that become incredibly crispy when exposed to the air fryer’s heat. Unlike baking soda, baking powder won’t leave a metallic taste because it contains both acid and base components that neutralize during cooking. Always use aluminum-free baking powder for the cleanest flavor profile.
How do I prevent the sauce from making the wings soggy?
The key is timing and technique! Always toss the wings with sauce immediately after the final crisping phase while they’re still piping hot—the residual heat helps the sauce adhere without seeping into the crispy layers. Use a large bowl and toss quickly but thoroughly, serving within minutes of saucing. If serving buffet-style, keep the sauce on the side for dipping rather than tossing all the wings at once. Also, ensure your sauce isn’t too thin—if it seems watery, simmer it for 2-3 minutes to reduce slightly before tossing.
Summary
These air fryer buffalo wings deliver incredible crispiness with significantly less oil than traditional frying. The baking powder technique creates crackly skin while the two-temperature cooking ensures perfect doneness. Tossed in classic buffalo sauce and served with cool dressings, they’re game-day perfection!
Air Fryer Buffalo Chicken Wings
4
servings15
minutes30
minutesIngredients
Instructions
- 1 Pat wings completely dry with paper towels
- 2 Toss with baking powder, salt, pepper, and garlic powder
- 3 Air fry at 380°F for 12 minutes per side
- 4 Increase to 400°F for 5-7 minutes until crispy
- 5 Whisk together sauce ingredients
- 6 Toss hot wings with sauce and serve immediately