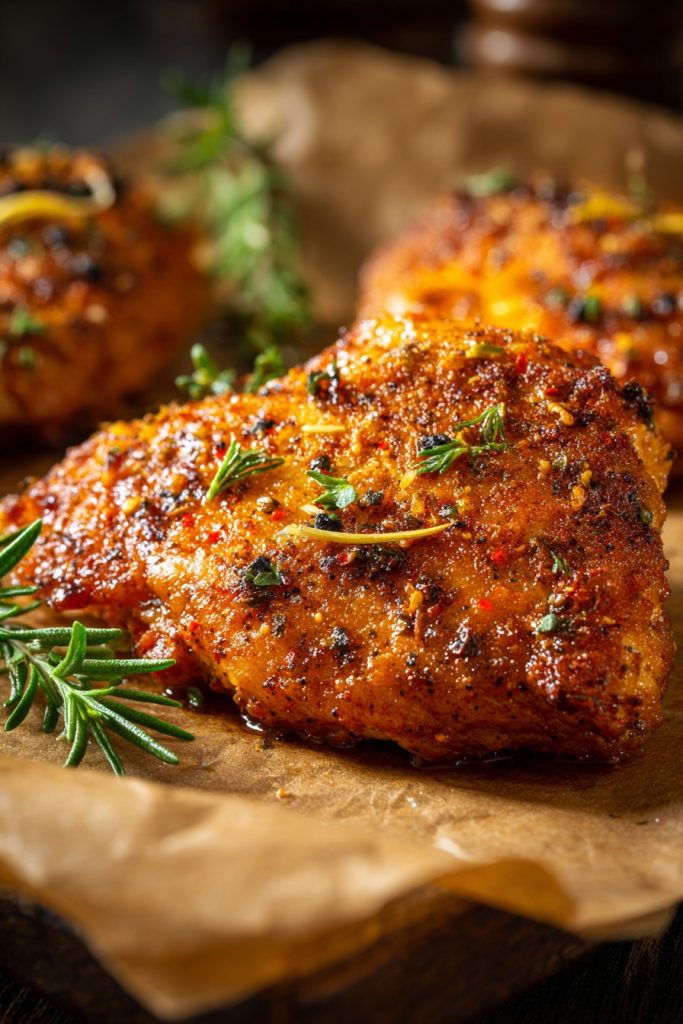
Zesty, zippy, and absolutely zero-fuss—this air fryer bone-in chicken breast recipe is about to become your weeknight hero! Forget dry, boring chicken; we’re locking in moisture and cranking up the flavor with a crispy, golden exterior that’ll have everyone begging for seconds. Let’s get that air fryer humming and transform simple ingredients into a show-stopping meal.
Why This Recipe Works
- Bone-in chicken breasts stay incredibly juicy because the bone acts as a natural insulator, preventing the meat from drying out during the high-heat air frying process.
- The air fryer’s rapid circulation creates a perfectly crispy skin without the need for excessive oil, making it a healthier alternative to deep frying while delivering that satisfying crunch.
- A simple dry rub with paprika, garlic powder, and onion powder enhances the natural flavor of the chicken without overpowering it, and the high heat caramelizes the spices for a depth of taste.
- Preheating the air fryer ensures that the chicken starts cooking immediately, which helps seal in juices and achieve an even, crispy exterior from the very first minute.
- Resting the chicken after cooking allows the juices to redistribute throughout the meat, resulting in a tender, succulent bite every single time—no more guesswork!
Ingredients
- 2 bone-in, skin-on chicken breasts (about 1.5 pounds total)
- 1 tablespoon olive oil
- 1 teaspoon paprika
- 1 teaspoon garlic powder
- 1 teaspoon onion powder
- 1/2 teaspoon dried thyme
- 1/2 teaspoon salt
- 1/4 teaspoon black pepper
- 1/4 teaspoon cayenne pepper (optional, for heat)
Equipment Needed
- Air fryer
- Mixing bowl
- Measuring spoons
- Kitchen tongs
- Meat thermometer (highly recommended)
Instructions
Step 1: Prep the Chicken and Spice Rub
Start by patting the chicken breasts completely dry with paper towels—this is crucial for achieving crispy skin since moisture is the enemy of crunch! In a small bowl, combine the paprika, garlic powder, onion powder, dried thyme, salt, black pepper, and cayenne pepper if using. Mix them well to create an even blend. Drizzle the olive oil over the chicken breasts, rubbing it all over the skin and underside to create a sticky surface that the spices will cling to. Generously sprinkle the spice rub onto both sides of the chicken, pressing gently to ensure it adheres. Let the chicken sit at room temperature for 10 minutes while you preheat the air fryer; this helps it cook more evenly and allows the flavors to penetrate. Tip: For extra flavor, you can gently loosen the skin and rub some of the spice mixture directly onto the meat underneath, but be careful not to tear the skin.
Step 2: Preheat the Air Fryer
Preheat your air fryer to 380°F for about 3 minutes. Preheating might seem like a small step, but it makes a huge difference—it ensures that the chicken starts cooking immediately upon contact, which helps seal in those precious juices and promotes a crispy exterior from the get-go. If your air fryer doesn’t have a preheat function, simply set it to 380°F and let it run empty for 3 minutes before adding the chicken. Avoid overcrowding the basket; if you’re doubling the recipe, cook in batches to maintain proper air circulation. While it’s heating, take a moment to lightly spray the air fryer basket with cooking spray to prevent any sticking, though the chicken’s natural fats usually do the trick. Tip: Always preheat your air fryer for meat recipes to avoid uneven cooking and soggy skin—trust me, it’s a game-changer!
Step 3: Arrange and Cook the Chicken
Place the seasoned chicken breasts in the air fryer basket skin-side up, making sure they aren’t touching each other to allow hot air to circulate freely around them. Cook at 380°F for 18-22 minutes, depending on the size of your chicken breasts. The high heat will render the fat under the skin, creating that irresistible crispiness while keeping the interior moist. Avoid opening the air fryer frequently during cooking—every time you peek, you let out heat and disrupt the cooking process, which can lead to uneven results. Halfway through the cooking time, around the 9-11 minute mark, use kitchen tongs to flip the chicken breasts carefully. This ensures both sides get exposed to the direct heat flow for an all-over golden brown finish. Tip: If you notice the skin browning too quickly, you can tent the chicken loosely with foil for the remaining cook time to prevent burning without sacrificing crispiness.
Step 4: Check for Doneness and Rest
After the initial cook time, use a meat thermometer to check the internal temperature of the chicken—insert it into the thickest part of the meat without touching the bone, and it should read 165°F. If it’s not quite there, continue cooking in 2-minute increments until it reaches the safe temperature. Remember, color isn’t always a reliable indicator; the skin might be beautifully golden brown while the interior is still undercooked, so that thermometer is your best friend here. Once done, carefully remove the chicken from the air fryer using tongs and transfer it to a cutting board. Let it rest for at least 5-7 minutes before slicing or serving—this allows the juices to redistribute throughout the meat, ensuring every bite is succulent and not dry. Tip: Resting is non-negotiable for juicy chicken; skip it, and you’ll lose those flavorful juices the moment you cut into it.
Step 5: Serve and Enjoy
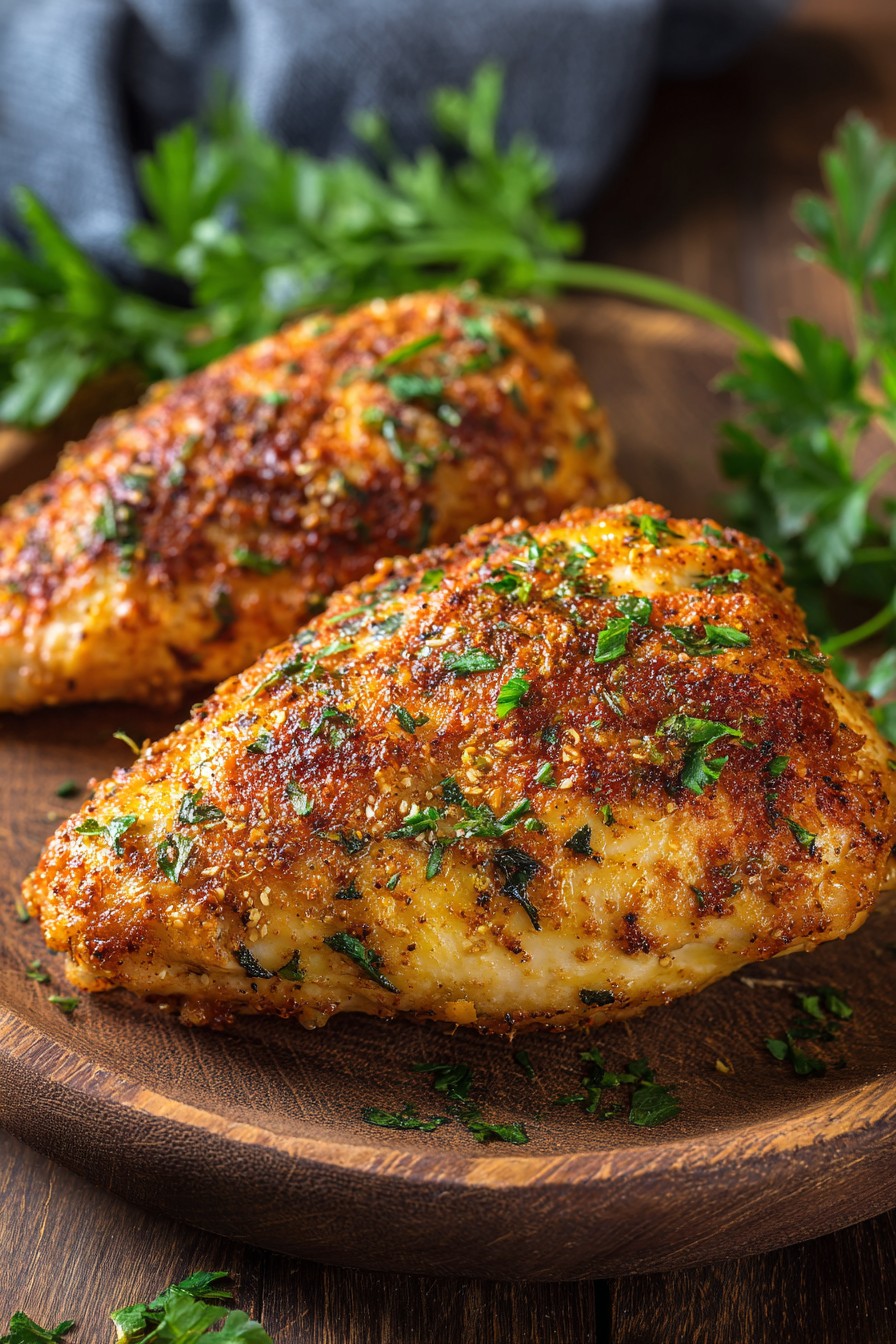
After resting, slice the chicken against the grain if desired, or serve it whole for a dramatic presentation. The skin should be crackling crisp, and the meat should be tender and moist, pulling easily away from the bone. Pair it with your favorite sides—maybe some air-fried veggies, a fresh salad, or creamy mashed potatoes—and drizzle any accumulated juices from the cutting board over the top for extra flavor. This dish is versatile enough for a casual family dinner or impressive enough for guests, and the best part? cleanup is a breeze since the air fryer basket is likely the only thing that needs washing. Store any leftovers in an airtight container in the refrigerator for up to 3 days, and reheat in the air fryer at 350°F for 4-5 minutes to restore the crispiness. Tip: For a finishing touch, sprinkle with fresh chopped parsley or a squeeze of lemon juice right before serving to brighten up the dish.
Tips and Tricks
If you’re aiming for restaurant-quality air fryer chicken every time, here are some pro tips to elevate your game. First, consider brining the chicken breasts before seasoning—soak them in a solution of 4 cups water and 1/4 cup salt for 1-2 hours in the refrigerator. This step enhances moisture retention dramatically, resulting in even juicier meat, especially if you’re using larger breasts. After brining, rinse and pat dry thoroughly before applying the rub. Second, play with the fat content: if your chicken skin isn’t as crispy as you’d like, lightly spray it with avocado oil spray before air frying—it has a high smoke point and adds an extra layer of crunch without making it greasy. Third, don’t shy away from layering flavors; after applying the dry rub, let the chicken marinate in the refrigerator for up to 4 hours. This allows the spices to penetrate deeper into the meat, creating a more robust flavor profile. Fourth, if you’re cooking multiple batches, keep the finished chicken warm in a 200°F oven while you finish the rest—this prevents it from cooling down and losing its crisp texture. Fifth, for easy cleanup, line your air fryer basket with parchment paper designed for air fryers (with holes for air flow), but ensure it doesn’t cover the entire basket to avoid blocking circulation. Sixth, if you’re using frozen bone-in chicken breasts, thaw them completely in the refrigerator overnight first; cooking from frozen will yield uneven results with overcooked exteriors and undercooked interiors. Lastly, experiment with different air fryer models—some run hotter than others, so adjust cooking times accordingly and always rely on that meat thermometer for precision.
Recipe Variations
- Lemon Herb Delight: Swap the paprika-based rub for a zestier blend—mix 1 tablespoon lemon zest, 2 teaspoons dried oregano, 1 teaspoon garlic powder, 1/2 teaspoon salt, and 1/4 teaspoon black pepper. Add thin lemon slices under the skin before air frying for a bright, aromatic twist that pairs beautifully with roasted vegetables or a light pasta salad. The citrus infuses the meat with tangy notes while the herbs create a Mediterranean vibe that’s perfect for summer dinners.
- Spicy Buffalo Style: For those who love heat, omit the dry rub and after cooking, toss the chicken in a mixture of 1/4 cup hot sauce (like Frank’s RedHot), 2 tablespoons melted butter, and 1/2 teaspoon garlic powder. Return it to the air fryer for 2-3 minutes at 370°F to caramelize the sauce, serving with celery sticks and blue cheese dressing for a game-day favorite that’s healthier than traditional fried wings.
- Smoky BBQ Glaze: Cook the chicken as directed with the original rub, but during the last 5 minutes of cooking, brush with your favorite BBQ sauce (about 1/4 cup total) and continue air frying until sticky and caramelized. The sugar in the sauce will create a glossy, finger-licking glaze that’s sweet and smoky—ideal for backyard barbecues or paired with corn on the cob and coleslaw.
- Creamy Parmesan Crust: After applying the olive oil, press a mixture of 1/4 cup grated Parmesan cheese, 1/2 cup panko breadcrumbs, 1 teaspoon Italian seasoning, and 1/4 teaspoon garlic powder onto the chicken skin. Air fry as usual; the cheese and breadcrumbs form a golden, crunchy crust that adds a decadent touch, perfect for serving over pasta or with a side of marinara sauce for dipping.
Frequently Asked Questions
Can I use boneless chicken breasts instead?
Absolutely, but adjustments are needed! Boneless, skinless chicken breasts cook faster and can dry out more easily due to the lack of bone and skin insulation. Reduce the cooking time to 12-16 minutes at 380°F, flipping halfway through, and always check for an internal temperature of 165°F with a meat thermometer. To keep them juicy, consider pounding them to an even thickness before seasoning, and maybe add a light coating of oil to mimic the crispiness. However, for the best results, stick with bone-in for superior moisture and flavor.
Why is my chicken skin not crispy?
Several factors could be at play: first, ensure you pat the chicken completely dry before seasoning—any moisture on the skin will steam instead of crisp. Second, preheating the air fryer is crucial; if you skip it, the chicken starts cooking slowly, leading to soggy skin. Third, avoid overcrowding the basket; if the pieces are too close, air circulation is hampered. Lastly, if your air fryer model has weaker airflow, try spraying the skin with a bit more oil or increasing the temperature to 400°F for the last 2-3 minutes to boost crispiness.
How do I prevent the chicken from sticking to the basket?
Sticking usually occurs if the basket isn’t preheated or if there’s insufficient fat on the chicken. Always preheat the air fryer to create a non-stick surface through heat. Lightly spraying the basket with cooking spray before adding the chicken can help, but the natural fats from the skin often release during cooking, so using tongs to gently lift the chicken after a few minutes of cooking can prevent sticking. If it does stick, don’t force it—let it cook a bit longer, and it should release easily once the skin crisps up.
Can I make this recipe with frozen chicken?
It’s not recommended for best results. Frozen bone-in chicken breasts will cook unevenly—the exterior might overcook and dry out while the interior remains frozen or undercooked. Always thaw completely in the refrigerator overnight first. If you’re in a pinch, you can use the defrost function on your air fryer (if available) for 10-15 minutes, but then pat it dry thoroughly and proceed with the recipe. However, for food safety and texture, thawing is the way to go.
What sides pair well with this chicken?
This versatile chicken pairs with almost anything! For a healthy option, try air-fried vegetables like broccoli or asparagus cooked at 400°F for 8-10 minutes—toss them in olive oil and salt before adding to the air fryer during the last few minutes of chicken cooking. Classic sides like mashed potatoes, rice pilaf, or a fresh garden salad also work beautifully. If you’re feeling adventurous, serve it with quinoa salad or roasted sweet potatoes for a nutrient-packed meal that balances the crispy, savory chicken perfectly.
Summary
This air fryer bone-in chicken breast recipe delivers juicy, crispy perfection with minimal effort. Preheating, proper seasoning, and resting ensure foolproof results every time. Perfect for busy weeknights or impressive dinners!
Air Fryer Bone-In Chicken Breast Recipe
4
servings10
minutes20
minutesIngredients
Instructions
- 1 Pat chicken dry, mix spices, rub with oil and seasoning, let sit 10 minutes.
- 2 Preheat air fryer to 380°F for 3 minutes.
- 3 Cook chicken skin-side up for 18-22 minutes, flipping halfway.
- 4 Check internal temperature reaches 165°F, rest for 5-7 minutes.
- 5 Serve with sides and enjoy.


