Welcome to your new favorite kitchen adventure! Active dry yeast is the magical ingredient that transforms simple pantry staples into warm, fragrant homemade delights. From crusty artisan breads to fluffy cinnamon rolls, we’ve gathered 32 irresistible recipes that will fill your home with the comforting aroma of fresh baking. Get ready to roll up your sleeves—your next baking triumph is waiting in this delicious collection!
Classic French Baguette
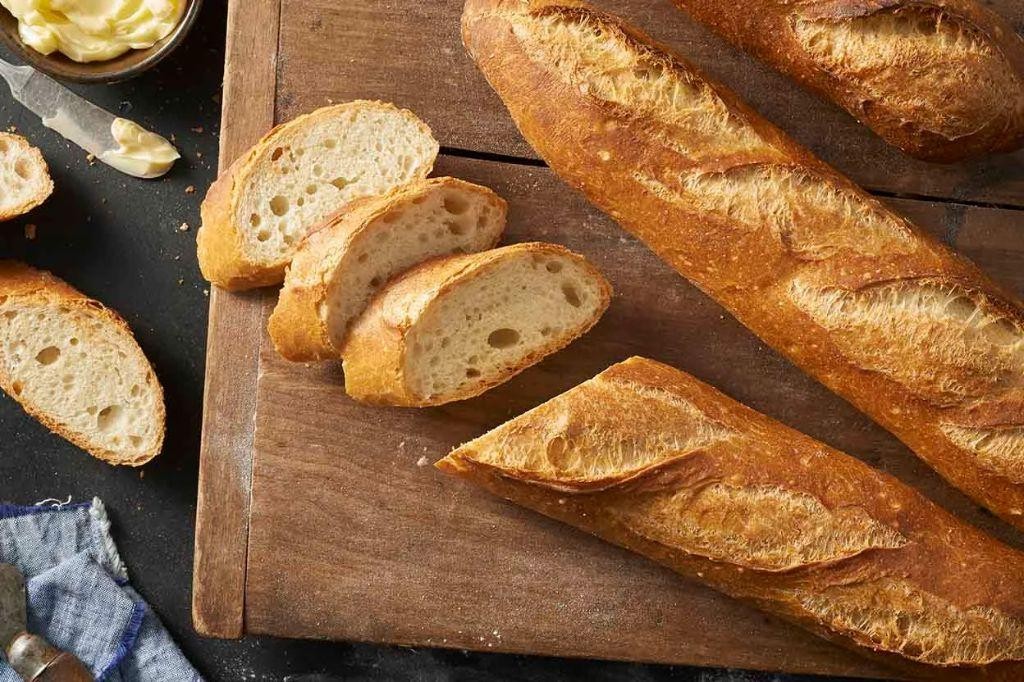
Earning that perfect crust and airy crumb of a Classic French Baguette is simpler than you might think, requiring just a few quality ingredients and some patience. Follow these methodical steps to create bakery-worthy bread right in your own kitchen. Let’s begin with gathering your ingredients and preparing your workspace.
2
baguettes135
minutes25
minutesIngredients
- 4 cups bread flour, sifted
- 1 ½ cups warm water (110°F)
- 2 ¼ teaspoons active dry yeast
- 2 teaspoons fine sea salt
- 1 tablespoon extra virgin olive oil
- 1 large egg white, lightly beaten
Instructions
- Combine warm water and active dry yeast in a large mixing bowl, then let it stand for 5 minutes until foamy.
- Add sifted bread flour to the yeast mixture in three additions, mixing with a wooden spoon after each addition.
- Incorporate fine sea salt into the dough, then knead on a lightly floured surface for 8-10 minutes until smooth and elastic. Tip: The dough should pass the windowpane test—stretch a small piece thin enough to see light through without tearing.
- Coat the dough ball with extra virgin olive oil, place it in a clean bowl, cover with a damp kitchen towel, and let it rise in a warm place for 1.5 hours until doubled in size.
- Punch down the risen dough to release air bubbles, then divide it into two equal portions on a floured surface.
- Shape each portion into a 16-inch long baguette by rolling and tapering the ends, then place them seam-side down on a parchment-lined baking sheet.
- Score the top of each baguette with a sharp lame or knife at a 45-degree angle, making 4-5 diagonal cuts about ¼-inch deep.
- Brush the surface of each baguette with lightly beaten egg white using a pastry brush for a glossy crust.
- Let the shaped baguettes proof for 45 minutes until they look puffy and spring back slowly when gently pressed. Tip: Create steam by placing a pan of boiling water on the oven’s bottom rack during baking for optimal crust development.
- Preheat your oven to 475°F with a baking stone or inverted baking sheet inside for 30 minutes.
- Transfer the baguettes to the preheated baking surface and bake for 20-25 minutes until deeply golden brown with an internal temperature of 210°F. Tip: For the crispiest crust, turn off the oven and prop the door open slightly during the last 5 minutes of baking.
- Transfer the baked baguettes to a wire rack and let them cool completely for at least 1 hour before slicing.
Zesty crust gives way to a tender, hole-riddled interior with that distinctive chewiness that defines authentic French bread. The subtle tang from the slow fermentation pairs beautifully with cultured butter or makes exceptional crostini when thinly sliced and toasted. For a creative twist, split a cooled baguette lengthwise, brush with garlic-infused olive oil, and grill until lightly charred for an elevated sandwich base.
Soft and Fluffy Dinner Rolls
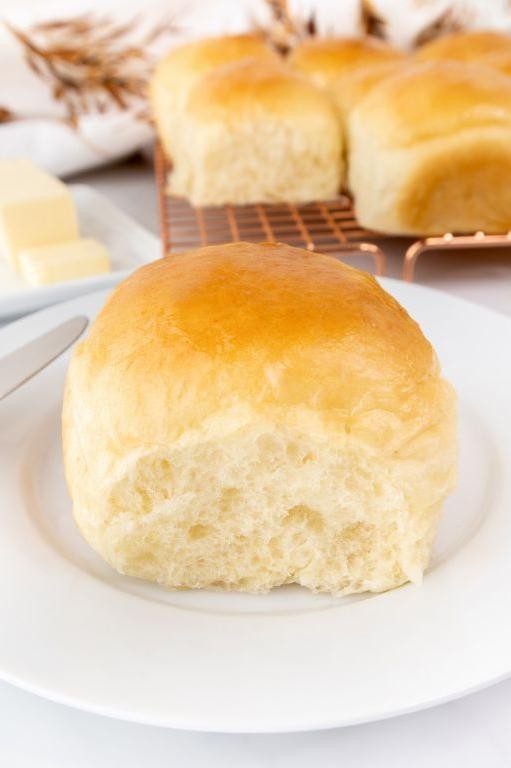
Haven’t you always wanted to master those pillowy-soft dinner rolls that seem to melt in your mouth? Here’s your foolproof guide to creating bakery-quality rolls right in your own kitchen, using simple techniques that guarantee perfect results every single time. Let’s walk through this methodical process together, one careful step at a time.
16
rolls30
minutes20
minutesIngredients
- 4 cups bread flour, sifted
- 2 ¼ teaspoons active dry yeast
- 1 ½ cups whole milk, warmed to 110°F
- ¼ cup granulated sugar
- 6 tablespoons unsalted European-style butter, softened
- 2 large pasture-raised eggs, lightly beaten
- 1 ½ teaspoons fine sea salt
- 2 tablespoons clarified butter, for brushing
Instructions
- Combine warmed whole milk, granulated sugar, and active dry yeast in the bowl of a stand mixer, then let the mixture rest undisturbed for exactly 8 minutes until foamy.
- Add sifted bread flour, softened European-style butter, lightly beaten pasture-raised eggs, and fine sea salt to the yeast mixture.
- Fit the stand mixer with a dough hook attachment and mix on medium speed for precisely 7 minutes until the dough becomes smooth, elastic, and pulls completely away from the bowl’s sides.
- Transfer the dough to a lightly oiled large bowl, turning once to coat all surfaces evenly with oil.
- Cover the bowl tightly with plastic wrap and place in a warm, draft-free area to rise for 1 hour 15 minutes until doubled in volume.
- Punch down the risen dough firmly with your fist to release all air bubbles.
- Divide the dough into 16 equal portions using a bench scraper for accuracy.
- Shape each portion into smooth, tight balls by pulling the dough edges downward and pinching firmly at the bottom.
- Arrange the shaped rolls in a buttered 9×13-inch baking pan, spacing them about ½ inch apart.
- Cover the pan with a clean kitchen towel and let the rolls rise in a warm place for 45 minutes until puffy and nearly doubled.
- Preheat your oven to 375°F during the final 15 minutes of the second rise.
- Bake the rolls on the center oven rack for 18-20 minutes until golden brown and the internal temperature reaches 190°F when tested with an instant-read thermometer.
- Remove the rolls from the oven and immediately brush the hot surfaces generously with clarified butter using a pastry brush.
- Transfer the rolls to a wire cooling rack and let them rest for 10 minutes before serving.
Soft, feather-light interiors contrast beautifully with the delicate, buttery crust that forms from the clarified butter wash. Serve these warm rolls alongside roasted meats or use them as the foundation for miniature sliders at your next gathering. Their subtle sweetness makes them equally delightful when split and toasted with jam for breakfast the next morning.
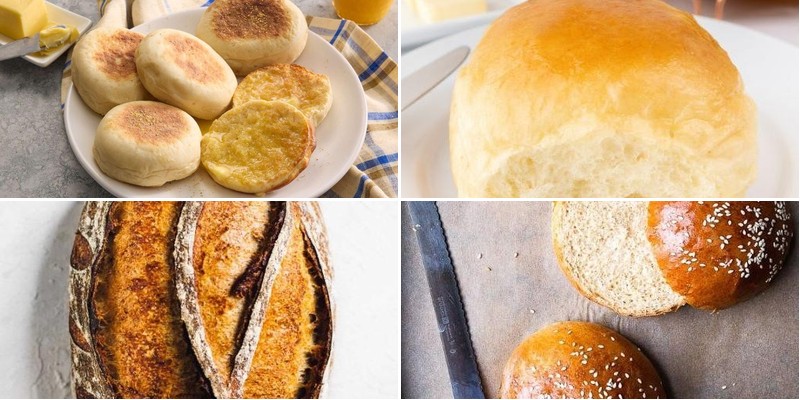
Homemade English Muffins
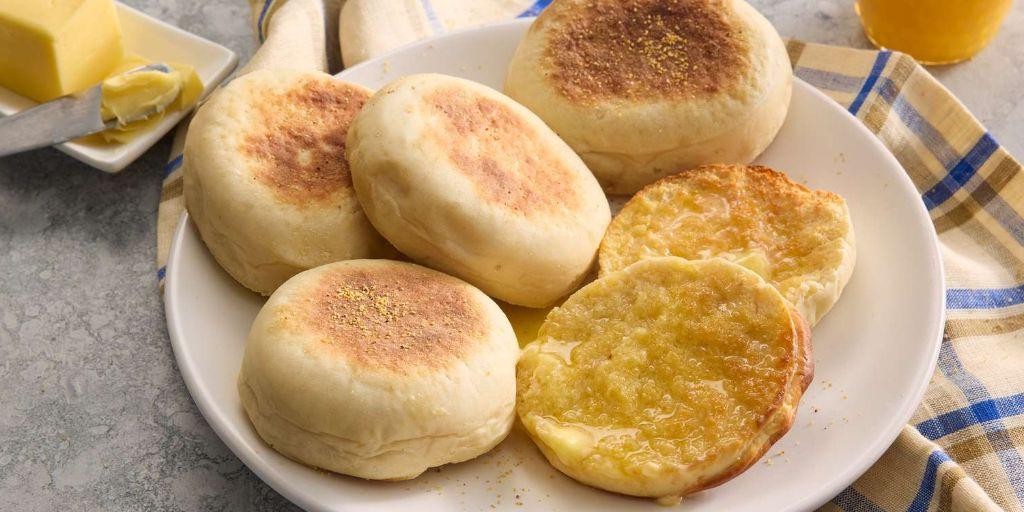
Ultimately, homemade English muffins offer that distinctive nooks-and-crannies texture store-bought versions can’t match, and with this methodical approach, even novice bakers can achieve bakery-quality results right in their own kitchens. Understanding the precise temperatures and timing transforms simple ingredients into breakfast perfection.
8
muffins75
minutes48
minutesIngredients
– 2 cups bread flour, sifted
– 1 cup whole milk, warmed to 110°F
– 2 tablespoons unsalted European-style butter, melted
– 1 tablespoon granulated sugar
– 1 teaspoon fine sea salt
– 2 ¼ teaspoons active dry yeast
– ½ cup fine-ground cornmeal for dusting
– 2 tablespoons clarified butter for cooking
Instructions
1. Combine warmed whole milk (110°F), granulated sugar, and active dry yeast in a large mixing bowl, then let stand for 8 minutes until foamy.
2. Whisk sifted bread flour and fine sea salt in a separate bowl to ensure even distribution.
3. Pour yeast mixture and melted unsalted European-style butter into dry ingredients, then mix with a dough hook on medium speed for 6 minutes until elastic.
4. Transfer dough to a lightly oiled bowl, cover with damp cheesecloth, and proof in a warm place (75°F) for 1 hour until doubled.
5. Punch down dough firmly with your knuckles to release air pockets.
6. Roll dough to ¾-inch thickness on a cornmeal-dusted surface, then cut into 3-inch rounds with a biscuit cutter.
7. Dust both sides of each round generously with fine-ground cornmeal to prevent sticking.
8. Arrange rounds on a cornmeal-dusted baking sheet, cover loosely, and proof for 45 minutes until puffy.
9. Heat a cast-iron skillet over medium-low heat (325°F surface temperature) and brush with clarified butter.
10. Cook muffins in batches for 6 minutes per side until golden brown with firm edges.
11. Transfer cooked muffins to a wire rack and cool completely for 30 minutes before splitting.
12. Use a fork to pierce and split muffins around the edges to preserve the craggy texture.
Heavenly when toasted, these muffins reveal their signature honeycomb interior that perfectly captures melted butter and jam. The cornmeal crust provides subtle crunch against the tender, slightly tangy crumb, making them ideal for eggs Benedict or simply slathered with artisanal honey.
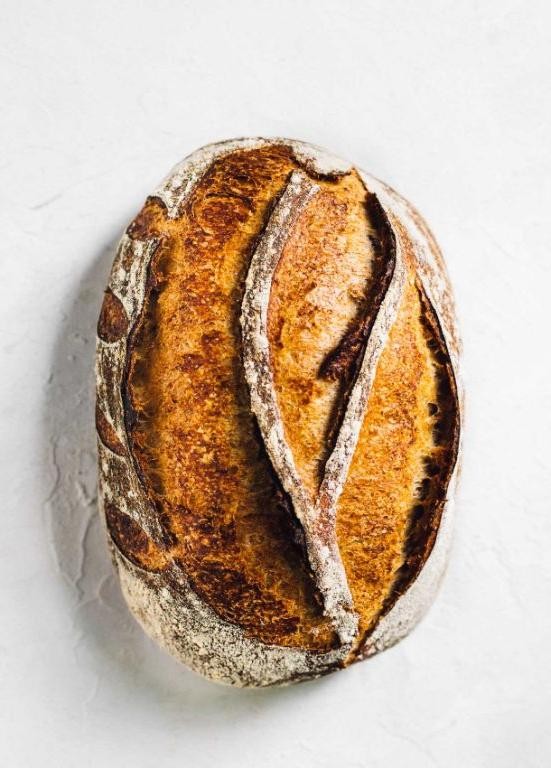
Artisan Sourdough Bread
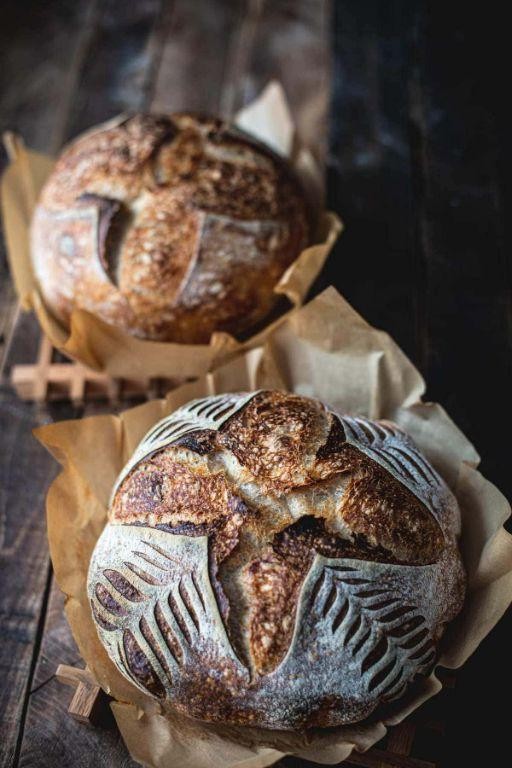
Only recently has sourdough baking become accessible to home cooks, yet many still find the process intimidating. Our methodical approach will guide you through creating a perfect artisan loaf with that coveted crisp crust and airy crumb.
1
loaf90
minutes50
minutesIngredients
- 150g active sourdough starter at peak fermentation
- 500g high-protein bread flour
- 350g filtered water at 80°F
- 10g fine sea salt
- Rice flour for dusting
Instructions
- Combine 150g active sourdough starter and 350g filtered water at 80°F in a large mixing bowl, whisking until the starter is fully dissolved.
- Add 500g high-protein bread flour to the liquid mixture, mixing with a dough whisk until no dry patches remain.
- Cover the bowl with a damp kitchen towel and let the shaggy dough rest for 30 minutes at room temperature to autolyse.
- Sprinkle 10g fine sea salt over the dough surface and incorporate using wet hands to prevent sticking.
- Perform the first set of stretch and folds: grab one edge of the dough, pull upward gently, and fold toward the center, repeating for all four sides.
- Cover the bowl and let the dough rest for 30 minutes at 75°F before repeating the stretch and fold process three more times at 30-minute intervals.
- Transfer the dough to a lightly floured surface and pre-shape into a tight round, creating surface tension by pulling the dough toward yourself.
- Let the pre-shaped dough bench rest for 20 minutes uncovered to relax the gluten structure.
- Dust a proofing basket generously with rice flour to prevent sticking during the final rise.
- Final shape the dough into a tight boule or batard, then place seam-side up in the prepared proofing basket.
- Cover the proofing basket with a plastic bag and refrigerate for 12-16 hours at 38°F for cold fermentation.
- Place a Dutch oven with lid in your oven and preheat to 475°F for 45 minutes before baking.
- Carefully transfer the cold dough from the proofing basket onto parchment paper, then score the top with a sharp lame at a 45-degree angle.
- Lift the parchment paper with dough into the preheated Dutch oven, cover with the lid, and bake for 20 minutes at 475°F.
- Remove the lid and continue baking for 25-30 minutes until the crust develops a deep mahogany color and sounds hollow when tapped.
- Transfer the baked loaf to a wire cooling rack and let cool completely for at least 4 hours before slicing.
Knowing when your sourdough is properly fermented makes all the difference—look for a 30-50% volume increase and small bubbles on the surface. This patient process yields a bread with remarkable complexity: a crisp, blistered crust gives way to an open, irregular crumb with tangy notes that develop beautifully when toasted. Consider serving thick slices alongside cultured butter and flaky sea salt, or use day-old bread for an exceptional panzanella salad that highlights the bread’s sturdy structure.
Italian Focaccia Bread
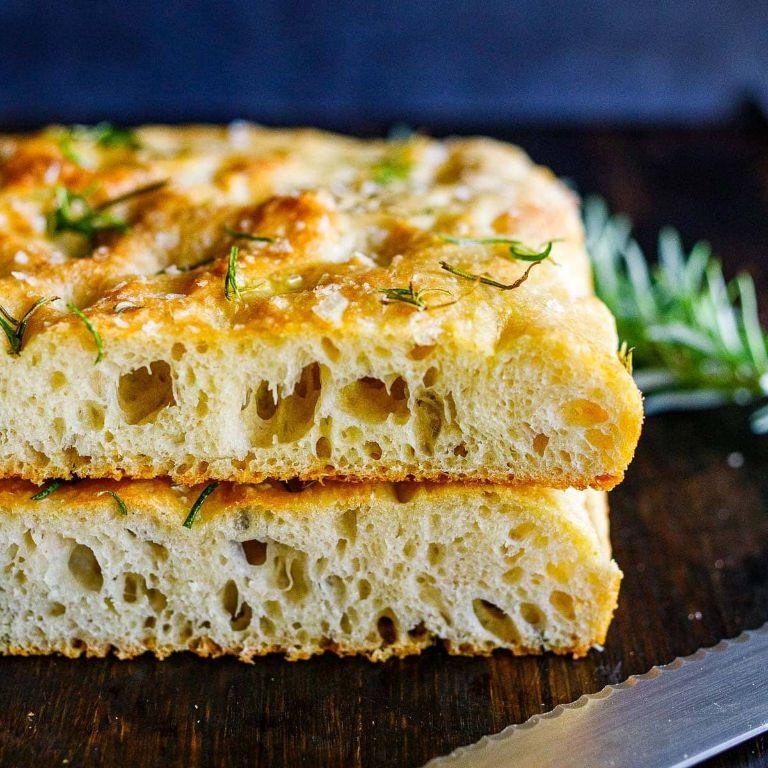
Focaccia bread, with its signature dimpled surface and golden crust, transforms simple pantry staples into an aromatic masterpiece that fills your kitchen with the comforting scent of fresh-baked herbs and olive oil. Following these methodical steps will guide even novice bakers through creating this classic Italian flatbread with professional results.
8
servings120
minutes25
minutesIngredients
- 4 cups high-protein bread flour
- 2 teaspoons fine sea salt
- 1 packet active dry yeast
- 1½ cups warm filtered water (110°F)
- ¼ cup extra-virgin olive oil, divided
- 2 tablespoons fresh rosemary leaves, finely chopped
- 1 teaspoon flaky sea salt for finishing
Instructions
- Combine warm filtered water (110°F precisely) with active dry yeast in a large mixing bowl and let stand for 5 minutes until foamy.
- Whisk in 2 tablespoons extra-virgin olive oil until fully emulsified with the yeast mixture.
- Gradually incorporate high-protein bread flour and fine sea salt using a wooden spoon until a shaggy dough forms.
- Turn dough onto a lightly floured surface and knead for 8-10 minutes until smooth and elastic. Tip: The dough should pass the windowpane test—stretch a small piece thin enough to see light through without tearing.
- Place kneaded dough in a lightly oiled bowl, cover with a damp kitchen towel, and proof in a warm area for 1-1.5 hours until doubled in volume.
- Pour remaining 2 tablespoons extra-virgin olive oil into a 9×13-inch baking pan, coating the bottom completely.
- Transfer proofed dough to the prepared pan and gently stretch to fill the corners without tearing.
- Create characteristic dimples by pressing fingertips deeply into the dough surface at 1-inch intervals.
- Evenly distribute finely chopped fresh rosemary leaves across the dimpled surface.
- Sprinkle flaky sea salt generously over the entire surface. Tip: For enhanced flavor development, refrigerate the shaped dough overnight—this slow fermentation creates deeper complexity.
- Cover pan with plastic wrap and proof at room temperature for 45 minutes until slightly puffed.
- Preheat oven to 425°F and bake focaccia for 20-25 minutes until golden brown with crisp edges. Tip: For maximum oven spring, place an empty baking sheet on the bottom rack during preheating and pour ½ cup water onto it when loading the focaccia.
- Transfer baked focaccia to a wire rack and cool for 15 minutes before slicing.
Your finished focaccia should feature a crisp, olive oil-infused crust giving way to a tender, airy crumb with distinct herbaceous notes from the rosemary. You’ll notice the characteristic irregular holes throughout the interior, evidence of proper fermentation. Yielded slices make exceptional sandwiches when stuffed with prosciutto and fresh mozzarella, or simply tear warm pieces to dip into high-quality olive oil sprinkled with balsamic vinegar.
Sweet Honey Wheat Bread
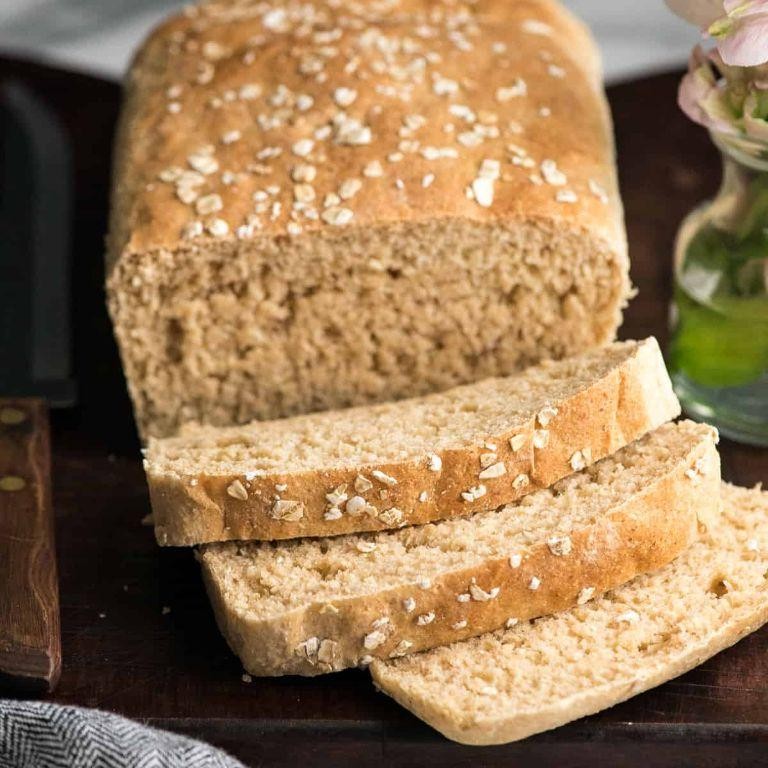
Creating the perfect loaf of sweet honey wheat bread requires patience and precision, but the reward is well worth the effort. Carefully measuring ingredients and following each step methodically will yield a beautifully textured, golden-brown loaf with subtle sweetness and wholesome flavor that fills your kitchen with the most comforting aroma.
1
loaf30
minutes35
minutesIngredients
- 2 ¼ cups bread flour
- 1 ½ cups whole wheat flour
- 1 packet active dry yeast
- 1 ¼ cups warm water (110°F)
- ¼ cup raw honey
- 2 tablespoons unsalted butter, melted
- 1 ½ teaspoons fine sea salt
- 1 large pasture-raised egg, lightly beaten
Instructions
- Combine 1 ¼ cups warm water (110°F) and ¼ cup raw honey in the bowl of a stand mixer, then sprinkle 1 packet active dry yeast over the surface.
- Allow the yeast mixture to rest undisturbed for 8-10 minutes until foamy and aromatic.
- Add 2 ¼ cups bread flour, 1 ½ cups whole wheat flour, 1 ½ teaspoons fine sea salt, and 2 tablespoons melted unsalted butter to the yeast mixture.
- Attach the dough hook and mix on medium-low speed for 8 minutes until the dough becomes smooth and elastic.
- Transfer the dough to a lightly oiled bowl, turning once to coat all surfaces.
- Cover the bowl with a damp kitchen towel and let rise in a warm place for 1 hour 15 minutes until doubled in volume.
- Punch down the risen dough firmly to release air bubbles.
- Shape the dough into a tight loaf and place in a greased 9×5-inch loaf pan.
- Cover the loaf pan with the damp towel and let rise for 45 minutes until the dough crests just above the pan rim.
- Preheat your oven to 375°F during the final 15 minutes of the second rise.
- Brush the loaf surface evenly with 1 lightly beaten pasture-raised egg using a pastry brush.
- Bake at 375°F for 30-35 minutes until the crust develops a deep golden-brown color and sounds hollow when tapped.
- Transfer the baked loaf to a wire rack and cool completely for 2 hours before slicing.
Every slice reveals a tender, moist crumb with delicate honey notes that complement the nutty whole wheat flavor. Excellent for morning toast with cultured butter or as the foundation for sophisticated tea sandwiches, this bread maintains its soft texture for days when stored properly in an airtight container.
Cinnamon Raisin Bread
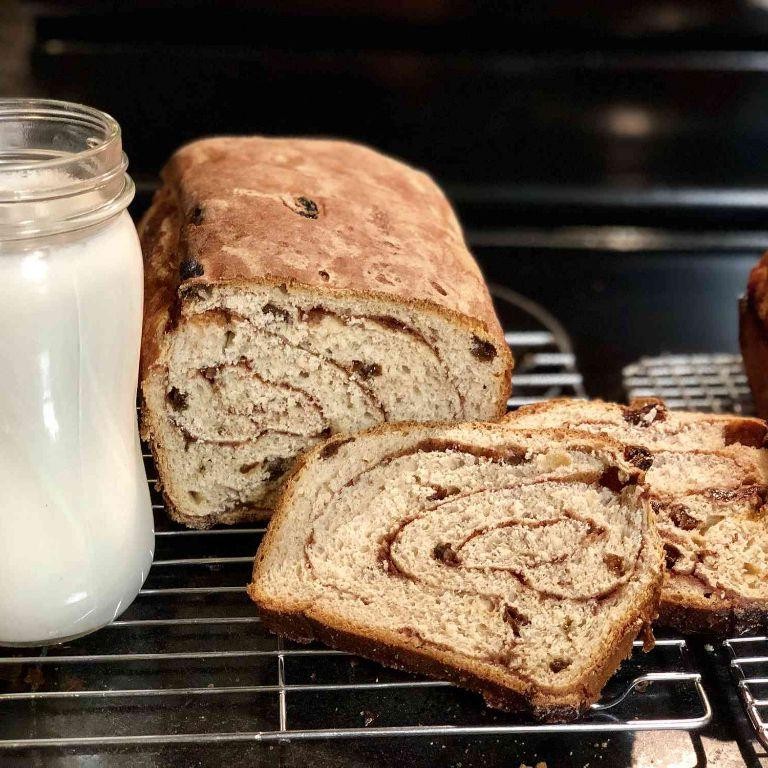
A comforting classic that fills your kitchen with the most inviting aroma, cinnamon raisin bread combines tender crumb with sweet swirls of spice and fruit. This methodical approach ensures even beginners achieve bakery-quality results through precise measurements and patient technique.
1
loaf45
minutes40
minutesIngredients
– 4 cups bread flour
– 1/4 cup granulated sugar
– 2 1/4 teaspoons active dry yeast
– 1 1/4 cups whole milk, warmed to 110°F
– 1/4 cup unsalted European-style butter, melted
– 2 pasture-raised eggs, lightly beaten
– 1 1/2 teaspoons fine sea salt
– 1 cup Thompson raisins, plumped
– 1/4 cup light brown sugar, packed
– 2 tablespoons ground Ceylon cinnamon
– 1 large egg yolk mixed with 1 tablespoon heavy cream (egg wash)
Instructions
1. Combine bread flour, granulated sugar, and active dry yeast in the bowl of a stand mixer fitted with a dough hook attachment.
2. Pour in whole milk warmed to precisely 110°F and mix on low speed for 1 minute until a shaggy dough forms.
3. Add melted unsalted European-style butter and lightly beaten pasture-raised eggs, mixing for 2 minutes until incorporated.
4. Sprinkle in fine sea salt and knead on medium speed for 8 minutes until the dough becomes smooth, elastic, and pulls away from the bowl sides.
5. Transfer the dough to a lightly oiled bowl, cover with plastic wrap, and let rise in a warm place for 1 1/2 hours until doubled in size.
6. While dough rises, combine plumped Thompson raisins, packed light brown sugar, and ground Ceylon cinnamon in a small bowl.
7. Punch down the risen dough and roll it out on a floured surface to a 9×18-inch rectangle.
8. Evenly sprinkle the raisin-cinnamon mixture over the entire surface, leaving a 1/2-inch border on all edges.
9. Tightly roll the dough lengthwise into a log, pinching the seam firmly to seal.
10. Place the sealed log into a greased 9×5-inch loaf pan, seam side down.
11. Cover the pan with a clean kitchen towel and let rise for 45 minutes until the dough crests just above the pan rim.
12. Preheat your oven to 350°F and brush the loaf surface with the prepared egg wash.
13. Bake for 35-40 minutes until the internal temperature reaches 190°F and the crust is deep golden brown.
14. Immediately remove the bread from the pan and transfer to a wire rack to cool completely for 2 hours before slicing.
Nothing compares to the tender, pillowy texture of freshly baked cinnamon raisin bread, where sweet raisins and warm cinnamon create pockets of flavor throughout each slice. Toasted with cultured butter, it makes an exceptional breakfast, or try it as French toast with maple syrup and crème fraîche for a decadent weekend treat.
Garlic Knots
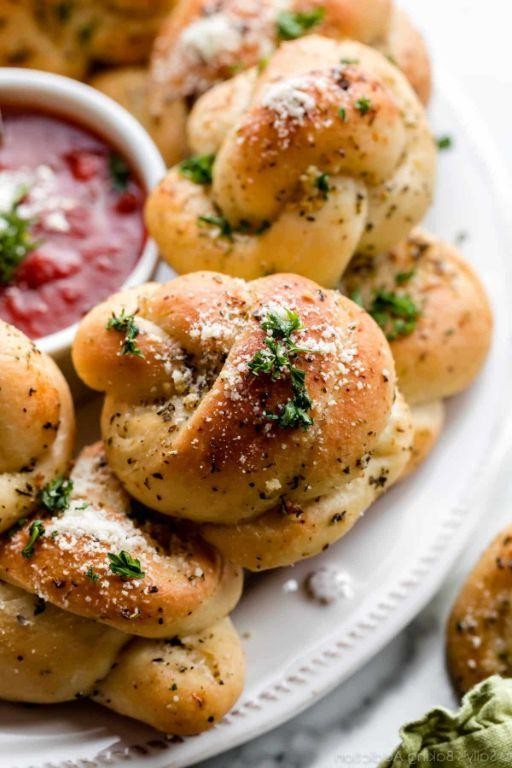
Eager to elevate your bread-making skills? These garlic knots transform simple pizza dough into golden, aromatic delights that fill your kitchen with the comforting scent of freshly baked bread and roasted garlic. Follow these precise steps to create restaurant-quality knots at home.
12
knots30
minutes14
minutesIngredients
– 1 pound high-protein bread flour
– 1 ½ teaspoons fine sea salt
– 2 ¼ teaspoons active dry yeast
– 1 tablespoon granulated sugar
– ¾ cup warm water (110°F)
– ¼ cup extra virgin olive oil
– 6 cloves fresh garlic, finely minced
– 3 tablespoons unsalted European-style butter
– 2 tablespoons freshly chopped Italian parsley
– 1 teaspoon flaky sea salt
Instructions
1. Combine 1 pound high-protein bread flour, 1 ½ teaspoons fine sea salt, 2 ¼ teaspoons active dry yeast, and 1 tablespoon granulated sugar in the bowl of a stand mixer fitted with a dough hook.
2. Pour ¾ cup warm water (110°F) and ¼ cup extra virgin olive oil into the dry ingredients.
3. Mix on low speed for 2 minutes until a shaggy dough forms, then increase to medium speed and knead for 8 minutes until the dough becomes smooth and elastic.
4. Transfer the dough to a lightly oiled bowl, cover with a damp kitchen towel, and let rise in a warm place for 1 hour or until doubled in size.
5. Punch down the risen dough and divide it into 12 equal portions using a bench scraper.
6. Roll each portion into a 6-inch rope on a lightly floured surface.
7. Tie each rope into a simple knot, tucking the ends underneath to secure the shape.
8. Arrange the knots on a parchment-lined baking sheet, spacing them 2 inches apart.
9. Cover loosely with plastic wrap and proof for 30 minutes until puffy.
10. Preheat your oven to 400°F during the last 15 minutes of proofing.
11. Bake the knots for 12-14 minutes until golden brown with an internal temperature of 190°F.
12. While the knots bake, melt 3 tablespoons unsalted European-style butter in a small saucepan over medium heat.
13. Add 6 cloves finely minced fresh garlic and cook for 1 minute until fragrant but not browned.
14. Remove the baked knots from the oven and immediately brush with the garlic butter mixture using a pastry brush.
15. Sprinkle with 2 tablespoons freshly chopped Italian parsley and 1 teaspoon flaky sea salt while still warm.
Warm from the oven, these knots boast a crisp exterior that gives way to a soft, airy crumb infused with savory garlic butter. The flaky sea salt provides delightful bursts of salinity that contrast beautifully with the rich, herbal notes of parsley. For an elegant presentation, serve them nestled in a linen-lined basket alongside marinara sauce for dipping, or tear them apart to soak up the last bits of olive oil from your antipasto platter.
Chewy Bagels
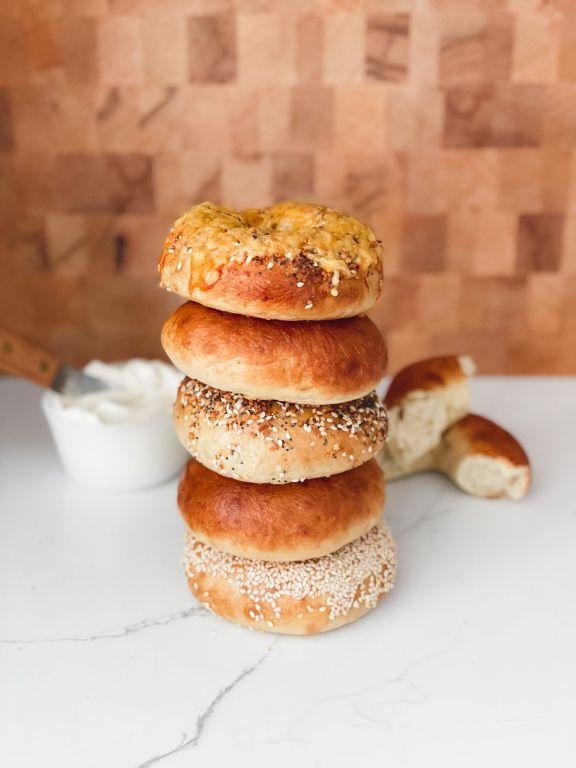
Perfecting homemade bagels requires patience and precision, but the reward is worth every minute. Preparing chewy bagels from scratch allows you to control the texture and flavor, resulting in a superior bakery-style treat. Follow these methodical steps to create bagels with that signature dense, chewy crumb and glossy crust.
8
portions105
minutes21
minutesIngredients
- 4 cups high-gluten bread flour
- 1 ½ cups warm water (110°F)
- 2 tbsp barley malt syrup
- 1 tbsp active dry yeast
- 2 tsp fine sea salt
- 1 tbsp granulated sugar
- 1 large egg white, lightly beaten
- 2 tbsp sesame seeds
- 2 tbsp poppy seeds
- 1 gallon water for boiling
- ¼ cup baking soda
Instructions
- Combine warm water, barley malt syrup, and active dry yeast in a large mixing bowl, then let stand for 5 minutes until foamy.
- Add high-gluten bread flour and fine sea salt to the yeast mixture, then mix on low speed with a dough hook for 2 minutes until a shaggy dough forms.
- Knead the dough on a lightly floured surface for 8–10 minutes until smooth and elastic, testing for proper gluten development by gently stretching a small piece until it becomes translucent without tearing.
- Place the dough in a lightly oiled bowl, cover with a damp kitchen towel, and let rise in a warm place for 1 hour or until doubled in size.
- Punch down the dough and divide it into 8 equal portions, then roll each piece into a 10-inch rope.
- Shape each rope into a circle, overlapping the ends by 1 inch and pinching firmly to seal, then place on a parchment-lined baking sheet.
- Cover the shaped bagels with the damp towel and let proof for 30 minutes until slightly puffed.
- Preheat your oven to 425°F and bring 1 gallon of water and ¼ cup baking soda to a rolling boil in a large pot.
- Boil 2–3 bagels at a time for 45 seconds per side, using a slotted spoon to flip them carefully to avoid deflating the delicate structure.
- Transfer the boiled bagels to a wire rack to drain for 1 minute, then brush each with lightly beaten egg white.
- Sprinkle the tops with sesame seeds and poppy seeds, pressing gently to adhere.
- Bake for 18–20 minutes until deeply golden brown and the crust sounds hollow when tapped.
Zesty and satisfying, these bagels achieve an ideal chewiness with a crisp, blistered crust from the baking soda boil. Their malty sweetness pairs wonderfully with smoked salmon or simply toasted with cultured butter. For a creative twist, slice and freeze extras to make exceptional bagel chips seasoned with garlic powder and nutritional yeast.
Savory Challah Bread
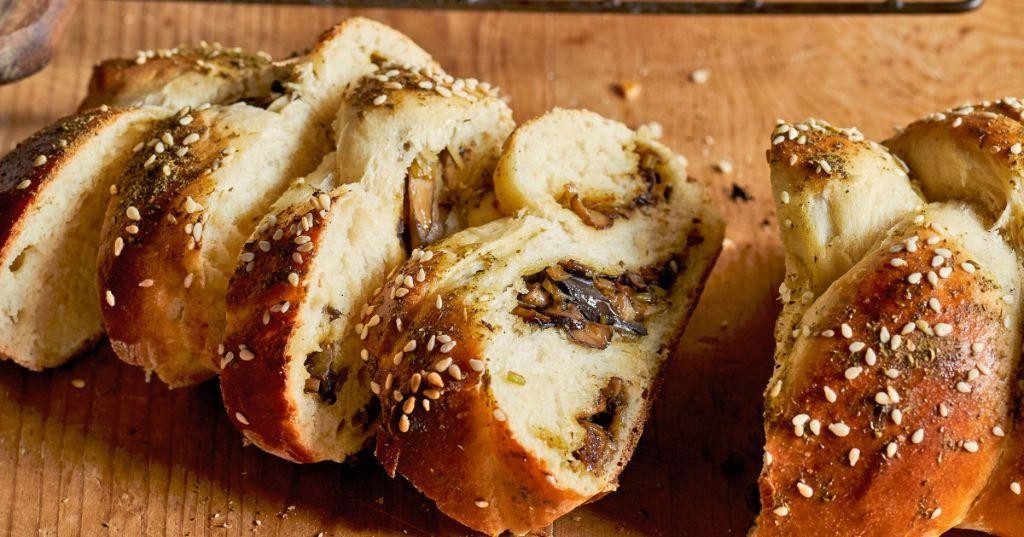
Perfecting homemade challah requires patience and precision, but the reward is a beautifully braided, golden loaf with a tender crumb and rich flavor that far surpasses store-bought versions. This methodical approach ensures even beginners can achieve bakery-quality results.
1
loaf30
minutes30
minutesIngredients
– 4 cups bread flour, sifted
– ¼ cup granulated sugar
– 2 tsp fine sea salt
– 2¼ tsp active dry yeast
– ½ cup warm water (110°F)
– 3 pasture-raised eggs, lightly beaten
– ¼ cup extra virgin olive oil
– 1 tbsp clarified butter, melted
– 1 tbsp raw honey
– 1 egg yolk mixed with 1 tsp water (egg wash)
– 2 tbsp sesame seeds
Instructions
1. Combine warm water, yeast, and honey in a small bowl; let stand until foamy, about 5–7 minutes. 2. In a large mixing bowl, whisk together sifted bread flour, sugar, and sea salt. 3. Create a well in the center of the dry ingredients; pour in yeast mixture, beaten eggs, and olive oil. 4. Mix with a wooden spoon until a shaggy dough forms, scraping the bowl thoroughly. 5. Turn dough onto a lightly floured surface; knead for 8–10 minutes until smooth and elastic. 6. Place dough in a lightly oiled bowl, cover with a damp cloth, and let rise in a warm spot until doubled, about 1–1.5 hours. 7. Punch down the dough gently to release air bubbles. 8. Divide dough into 3 equal portions; roll each into an 18-inch rope with tapered ends. 9. Braid the 3 ropes tightly, pinching ends to seal and tucking them under. 10. Transfer the braid to a parchment-lined baking sheet; cover and let rise until puffy, about 45 minutes. 11. Preheat the oven to 375°F. 12. Brush the loaf evenly with egg wash, ensuring it doesn’t pool in the crevices. 13. Sprinkle sesame seeds generously over the top. 14. Bake for 25–30 minutes until the crust is deep golden brown and the loaf sounds hollow when tapped. 15. Transfer to a wire rack; brush with melted clarified butter while warm. Velvety and aromatic, this challah boasts a soft, pillowy interior with a subtly sweet, egg-rich flavor and a glossy, sesame-flecked crust. Serve thick slices toasted with cultured butter or use day-old chunks for a decadent bread pudding layered with cinnamon and roasted apples.
Buttery Croissants

Whether you’re a novice baker or seasoned pastry enthusiast, mastering buttery croissants requires patience and precision. We’ll walk through each laminated layer methodically to achieve that perfect flaky texture. With careful temperature control and measured technique, you’ll create bakery-quality results at home.
12
croissants180
minutes20
minutesIngredients
- 4 cups high-protein bread flour
- 1/4 cup granulated sugar
- 1 tablespoon active dry yeast
- 1 1/2 teaspoons fine sea salt
- 1 1/4 cups whole milk, warmed to 110°F
- 1 cup European-style unsalted butter, chilled
- 1 large pasture-raised egg, lightly beaten
- 1 tablespoon heavy cream
Instructions
- Combine bread flour, granulated sugar, active dry yeast, and fine sea salt in the bowl of a stand mixer fitted with a dough hook.
- Pour warmed whole milk into the dry ingredients and mix on medium speed for 8 minutes until the dough becomes smooth and elastic.
- Transfer the dough to a lightly oiled bowl, cover with plastic wrap, and refrigerate for 1 hour to relax the gluten.
- Place chilled European-style unsalted butter between two sheets of parchment paper and pound with a rolling pin into an 8-inch square measuring 1/2-inch thick.
- Roll the chilled dough on a floured surface into a 10-inch square, then place the butter square diagonally in the center.
- Fold the dough corners over the butter envelope-style, ensuring no butter is exposed, and seal the edges completely.
- Roll the dough package into a 20×8-inch rectangle, maintaining even pressure to distribute the butter layers uniformly.
- Perform a single fold by bringing the bottom third up and the top third down, like folding a business letter, then rotate the dough 90 degrees.
- Wrap the folded dough in plastic wrap and refrigerate for 30 minutes to prevent butter from melting into the dough.
- Repeat the rolling and folding process two more times, chilling for 30 minutes between each turn to create distinct laminated layers.
- After the final fold, refrigerate the dough for 4 hours or overnight to develop flavor and ensure proper butter firmness.
- Roll the chilled dough into a 24×8-inch rectangle measuring exactly 1/4-inch thick, using a ruler for precision.
- Cut the dough into long triangles measuring 8 inches at the base and 10 inches in height using a pizza cutter or sharp knife.
- Make a 1-inch slit at the center of each triangle’s base, then gently stretch the dough while rolling from base to tip.
- Arrange the shaped croissants on parchment-lined baking sheets, curving them into crescent shapes with the tip tucked underneath.
- Combine lightly beaten pasture-raised egg and heavy cream to create an egg wash, then brush each croissant evenly.
- Proof the croissants in a turned-off oven with a pan of hot water for 2 hours until doubled in size and visibly puffy.
- Preheat your oven to 400°F and bake the croissants for 18-20 minutes until deeply golden brown and crisp.
- Transfer the baked croissants to a wire rack and cool for at least 30 minutes to set the interior structure.
Just-baked croissants reveal hundreds of paper-thin layers that shatter delicately with each bite. The interior boasts a honeycomb structure with buttery notes that linger on the palate. Consider serving them warm with artisanal jam or splitting them for decadent breakfast sandwiches with cured ham and Gruyère cheese.
New York-Style Pizza Dough

Whether you’re craving that iconic foldable slice or dreaming of homemade pizza nights, mastering New York-style dough requires precision and patience. With just a few quality ingredients and careful technique, you can achieve that perfect chewy-yet-crisp crust that defines this classic pie.
2
portions40
minutesIngredients
- 4 cups high-protein bread flour (approximately 500g)
- 1½ cups lukewarm filtered water (110°F)
- 2¼ teaspoons active dry yeast
- 2 teaspoons fine sea salt
- 1 tablespoon extra virgin olive oil
- 1 teaspoon granulated sugar
- Semolina flour for dusting
Instructions
- Combine lukewarm filtered water, active dry yeast, and granulated sugar in a large mixing bowl.
- Allow the yeast mixture to proof for exactly 5 minutes until foamy and aromatic.
- Add high-protein bread flour and fine sea salt to the yeast mixture.
- Mix with a dough hook on medium speed for 3 minutes until shaggy.
- Drizzle in extra virgin olive oil while continuing to mix.
- Knead the dough for 8-10 minutes until smooth and elastic. Tip: The dough should pass the windowpane test when stretched thinly without tearing.
- Form the dough into a tight ball by folding edges toward the center.
- Place the dough ball in a lightly oiled bowl and cover with plastic wrap.
- Proof the dough in a warm area (75-80°F) for 1½ hours until doubled in size.
- Punch down the dough to release air bubbles.
- Divide the dough into two equal portions using a bench scraper.
- Shape each portion into tight balls and place on a semolina-dusted baking sheet. Tip: Use semolina flour to prevent sticking while creating that authentic pizzeria texture.
- Cover the dough balls with a damp kitchen towel and rest for 30 minutes.
- Stretch each dough ball from the center outward, maintaining a thicker edge. Tip: Avoid using a rolling pin to preserve those essential air pockets in the crust.
- Transfer the stretched dough to a pizza peel dusted with semolina flour.
Zesty and perfectly chewy, this dough develops beautiful blistered bubbles when baked at high heat. The crisp underside provides that satisfying crunch while the airy cornicione offers the classic New York fold. For an elevated twist, try topping with fresh burrata and basil after baking, or use as a base for white pizza with roasted garlic and fontina.
Rustic Rye Bread
Humble yet sophisticated, this rustic rye bread combines earthy flavors with a satisfyingly dense crumb that makes it perfect for both everyday sandwiches and elegant charcuterie boards. Mastering this loaf requires patience and attention to detail, but the reward is a deeply flavorful bread with that signature chewy crust artisan bakers cherish. Follow these methodical steps to create your own bakery-quality rye bread at home.
1
loaf150
minutes40
minutesIngredients
- 3 cups stone-ground rye flour
- 1 cup high-protein bread flour
- 1 ½ cups filtered water at 110°F
- 2 tablespoons raw wildflower honey
- 2 teaspoons fine sea salt
- 1 packet active dry yeast
- 2 tablespoons extra virgin olive oil
- 1 tablespoon caraway seeds, lightly toasted
Instructions
- Combine the filtered water at 110°F, raw wildflower honey, and active dry yeast in a large mixing bowl, then let it stand undisturbed for exactly 8 minutes until foamy.
- Whisk in the extra virgin olive oil and fine sea salt until fully incorporated into the yeast mixture.
- Gradually add the stone-ground rye flour and high-protein bread flour to the wet ingredients, mixing with a wooden spoon until a shaggy dough forms.
- Turn the dough onto a lightly floured surface and knead vigorously for 12-15 minutes until smooth and elastic. Tip: The windowpane test—stretching a small piece of dough thin enough to see light through it—indicates proper gluten development.
- Incorporate the lightly toasted caraway seeds during the final minute of kneading, distributing them evenly throughout the dough.
- Place the dough in a lightly oiled bowl, cover with a damp kitchen towel, and let it rise in a warm place for 1.5-2 hours until doubled in size.
- Punch down the risen dough firmly to release air bubbles, then shape it into a tight round loaf.
- Transfer the shaped loaf to a parchment-lined baking sheet, cover again, and let it proof for 45-60 minutes until puffy. Tip: The finger dent test—gently pressing your finger into the dough and watching it slowly spring back—confirms proper proofing.
- Using a sharp lame or razor blade, score the top of the loaf with three parallel diagonal cuts about ¼-inch deep.
- Bake in a preheated 425°F oven for 35-40 minutes until the crust is deeply browned and sounds hollow when tapped on the bottom. Tip: Placing a pan of boiling water on the oven floor during the first 15 minutes of baking creates essential steam for optimal crust development.
- Transfer the baked loaf to a wire rack and let it cool completely for at least 2 hours before slicing.
Meticulously crafted rye bread reveals a dense, moist crumb with subtle sweetness from the honey balancing the earthy rye notes. The toasted caraway seeds provide aromatic complexity that pairs beautifully with smoked salmon or sharp cheddar. Consider slicing it thick for a robust Reuben sandwich or serving thin slices alongside a rich pâté for an elegant appetizer presentation.
Brioche Hamburger Buns
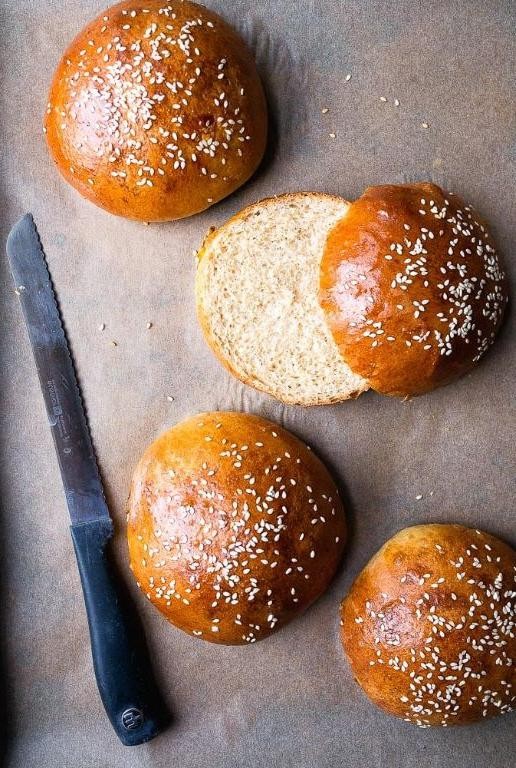
When you want to elevate your burger game beyond store-bought buns, homemade brioche hamburger buns offer that bakery-fresh quality with a touch of buttery sophistication. We’ll walk through each stage methodically, ensuring even beginners achieve that perfect soft, golden crumb. Following these precise steps will give you professional results worthy of your finest burger creations.
8
rolls40
minutes20
minutesIngredients
– 4 cups bread flour
– ¼ cup granulated sugar
– 2¼ teaspoons instant yeast
– 1½ teaspoons fine sea salt
– 3 pasture-raised eggs, lightly beaten
– ½ cup whole milk, warmed to 110°F
– ½ cup unsalted European-style butter, softened
– 1 egg yolk mixed with 1 tablespoon heavy cream (for egg wash)
– 2 tablespoons sesame seeds
Instructions
1. Combine 4 cups bread flour, ¼ cup granulated sugar, 2¼ teaspoons instant yeast, and 1½ teaspoons fine sea salt in the bowl of a stand mixer fitted with a dough hook.
2. Add 3 lightly beaten pasture-raised eggs and ½ cup whole milk warmed to 110°F to the dry ingredients.
3. Mix on low speed for 2 minutes until a shaggy dough forms, then increase to medium speed and knead for 5 minutes.
4. Add ½ cup softened unsalted European-style butter in three additions, mixing for 2 minutes between each addition until fully incorporated.
5. Continue kneading on medium speed for 8-10 minutes until the dough becomes smooth, elastic, and pulls away from the bowl sides cleanly.
6. Transfer the dough to a lightly oiled bowl, cover with plastic wrap, and let rise in a warm place for 1½-2 hours until doubled in size.
7. Punch down the risen dough gently to release air bubbles, then divide into 8 equal portions using a digital scale for accuracy.
8. Shape each portion into smooth, tight balls by pulling the dough edges underneath and pinching to seal.
9. Place the shaped buns on a parchment-lined baking sheet, spacing them 2 inches apart, and flatten slightly with your palm.
10. Cover loosely with a clean kitchen towel and let rise for 45-60 minutes until puffy and nearly doubled.
11. Preheat your oven to 375°F during the last 15 minutes of the second rise.
12. Brush each bun gently with the egg yolk and heavy cream mixture, being careful not to deflate the risen dough.
13. Sprinkle 2 tablespoons sesame seeds evenly over the brushed buns.
14. Bake for 18-20 minutes until the buns are deeply golden brown and sound hollow when tapped on the bottom.
15. Transfer the baked buns immediately to a wire rack to cool completely before slicing.
Each bun emerges with a delicate, golden crust that gives way to an exceptionally soft, buttery interior with just enough structure to hold even the juiciest burgers. These brioche buns transform ordinary burgers into gourmet experiences, their subtle sweetness complementing both beef and vegetarian fillings beautifully. Experiment with different seed toppings or use them for exceptional breakfast sandwiches the next day.
Conclusion
These 32 delicious active dry yeast recipes prove that homemade baking is within everyone’s reach! From crusty breads to sweet pastries, there’s something here to delight every home baker. We’d love to hear which recipes become your family favorites—leave a comment below and don’t forget to share this collection on Pinterest so other baking enthusiasts can discover these wonderful treats too!


